

Reversing.kr 刷题笔记 - 1
source link: https://kiprey.github.io/2021/12/reversing_kr-1/
Go to the source link to view the article. You can view the picture content, updated content and better typesetting reading experience. If the link is broken, please click the button below to view the snapshot at that time.

这里将记录一些笔者学习 reversing.kr 中的逆向题所留下的笔记。
这篇笔记所记录的题目分值为 100-120。
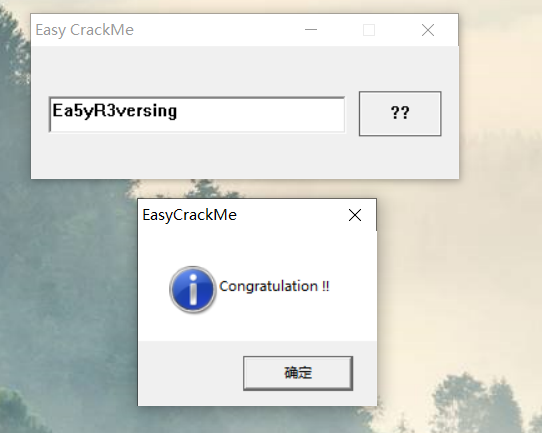
1. Easy Crack
IDA 32 位打开,通过交叉引用:

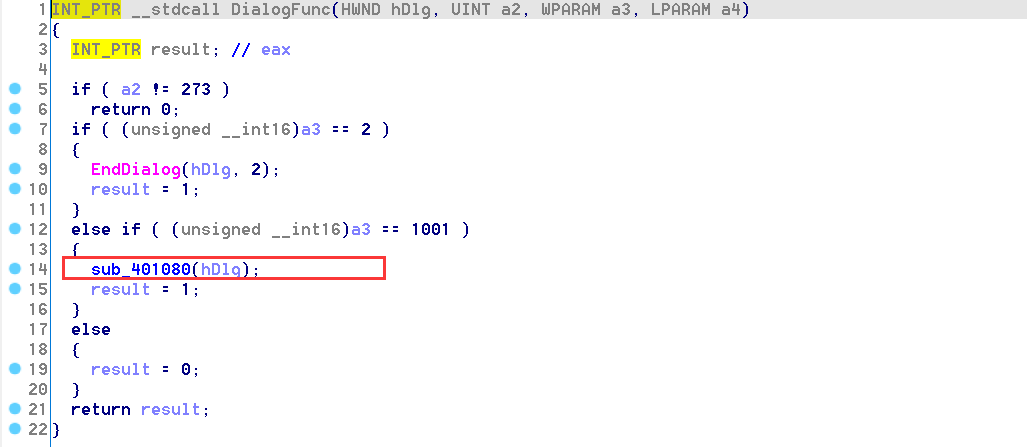
很容易找到目标函数,并定位关键判断语句:
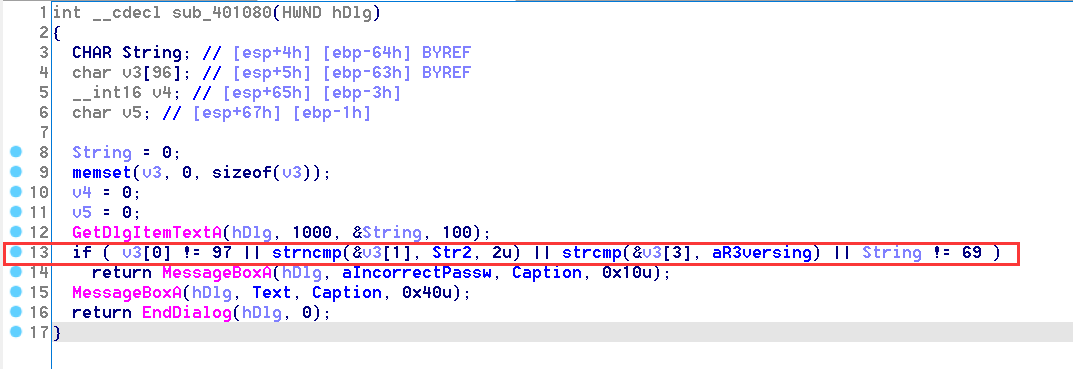
因此可以很容易得出 flag 为: Ea5yR3versing
2. Easy Keygen
下下来一个压缩包,ReadMe.txt 中写道:
Find the Name when the Serial is 5B134977135E7D13 |
同时打开程序,窗口提示输入 name:

看来这题应该是要我们根据 Serial 来反推输入的 Name。
IDA 打开,发现一个简易的映射算法:
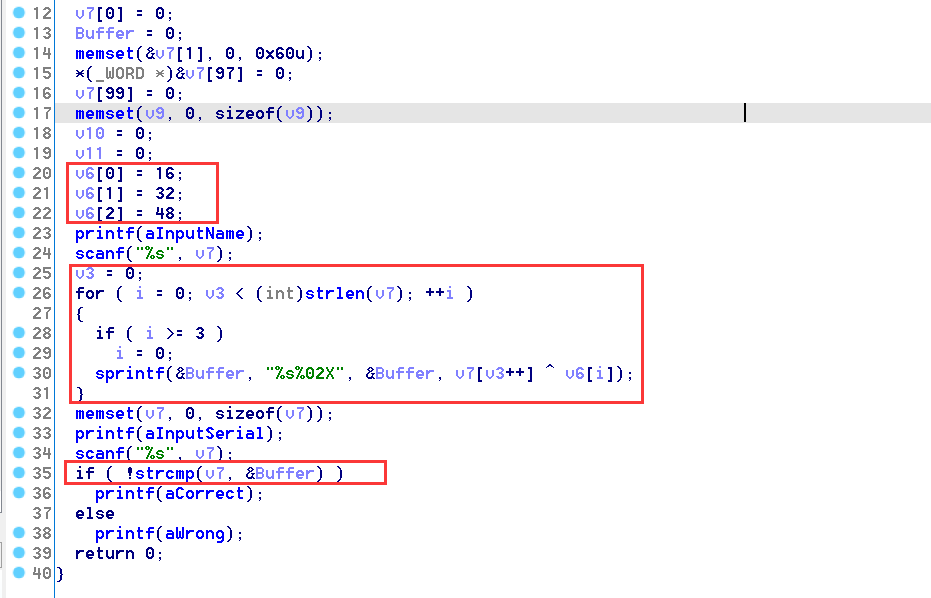
于是我们可以根据该算法来编写一个简易的解密算法:
#define _CRT_SECURE_NO_WARNINGS |
解出 flag:K3yg3nm3

3. Easy_ELF
确实很 Easy。程序首先会读取一个字符串,之后对字符串进行以下判断:
将该判断逆向一下,就可得到 flag:L1NUX
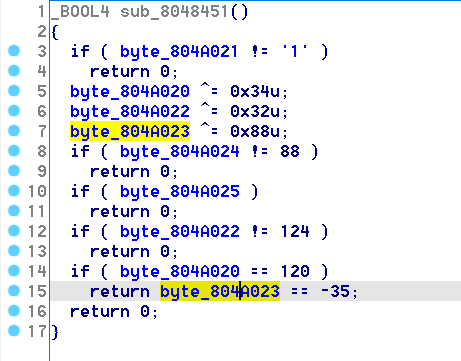
4. Easy Unpack
看上去这是一个需要脱壳的程序,但根据 IDA 反编译结果来看,应该是一个压缩壳。直接从 main 函数的反汇编列表往下拉到最底下,最后的那个 jmp 指令跳转的位置就是 OEP。
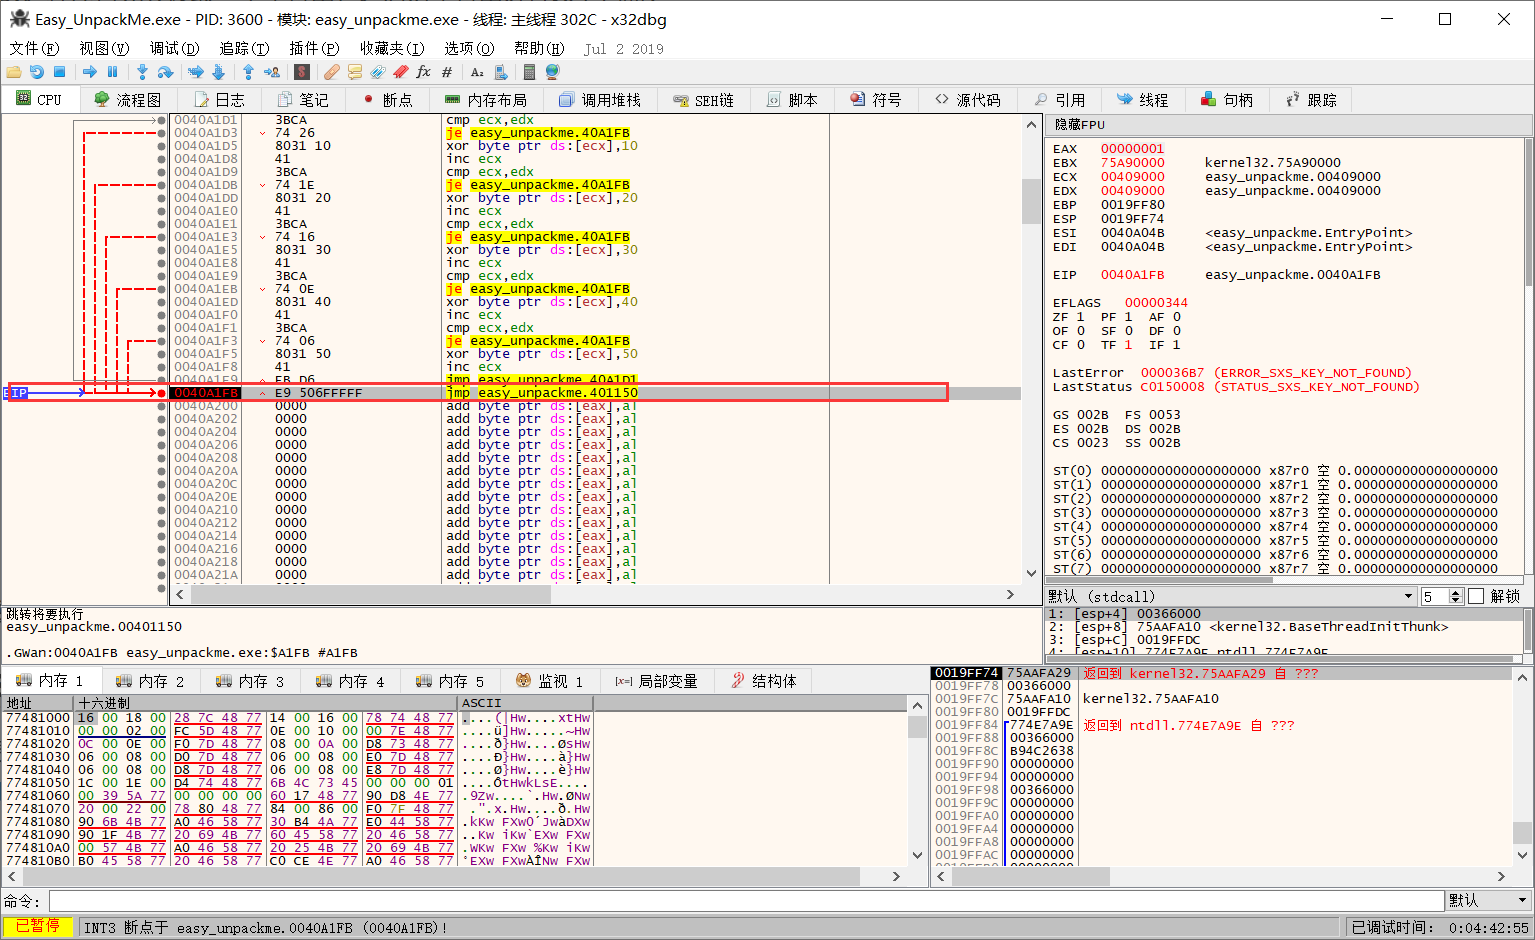
跳转后(该部分代码是 _start 函数的反汇编代码):
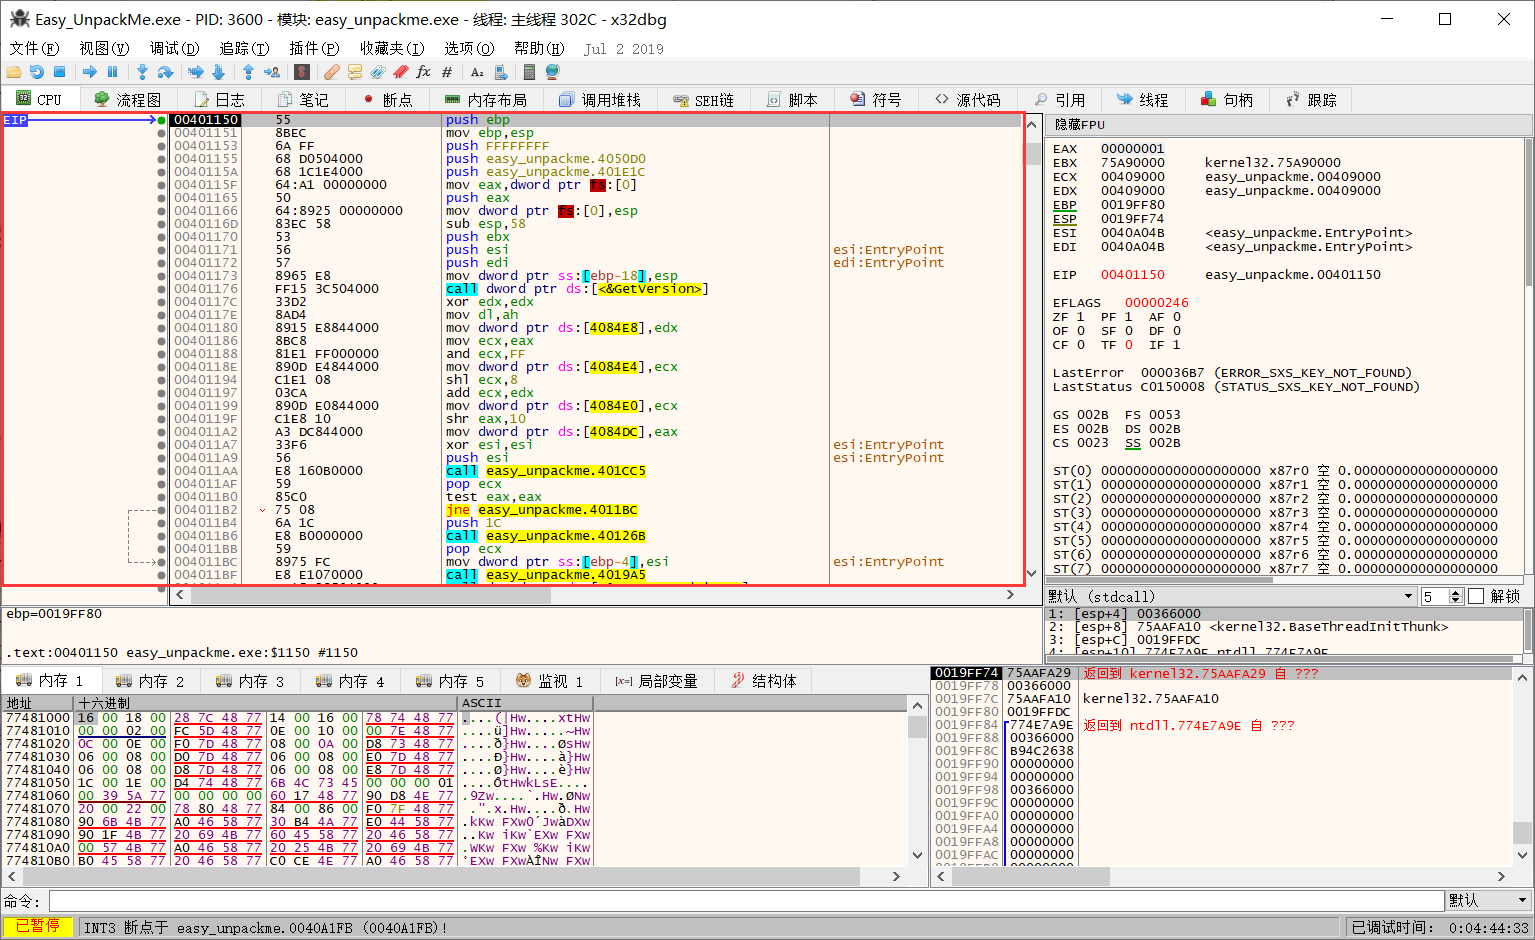
因此 OEP 为 00401150,而这也正是要提交的 flag。
5. ImagePrc
首先查看 WinMain 逻辑:
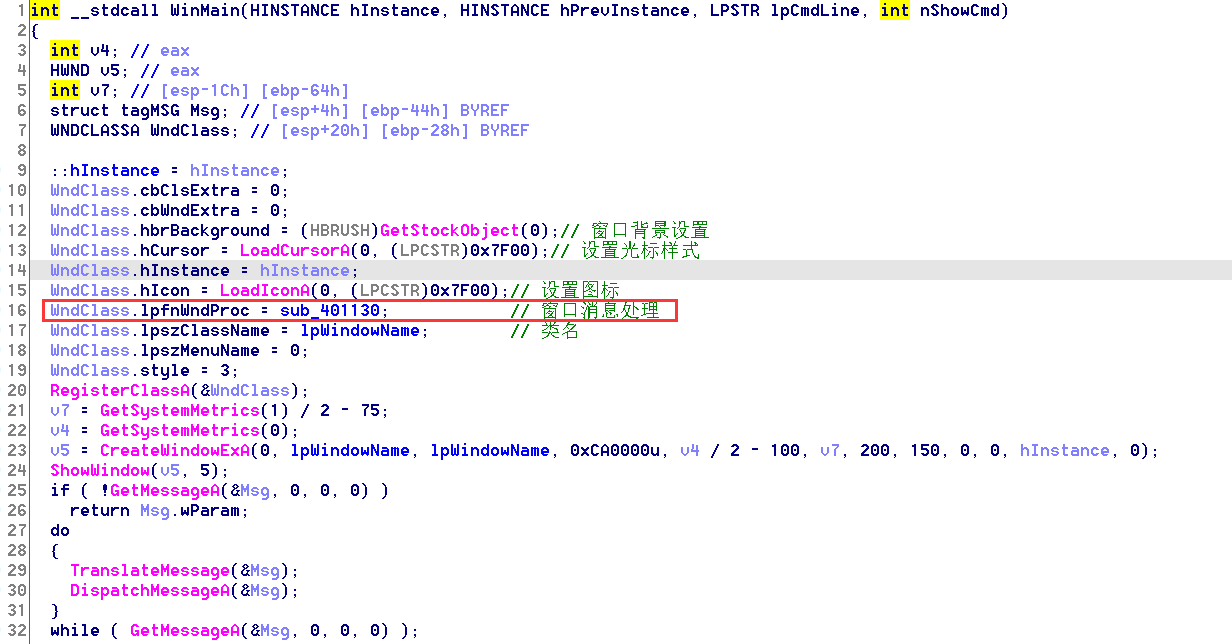
我们可以很容易的找到事件处理例程,并通过字符串交叉对比,找到真正的校验位置:
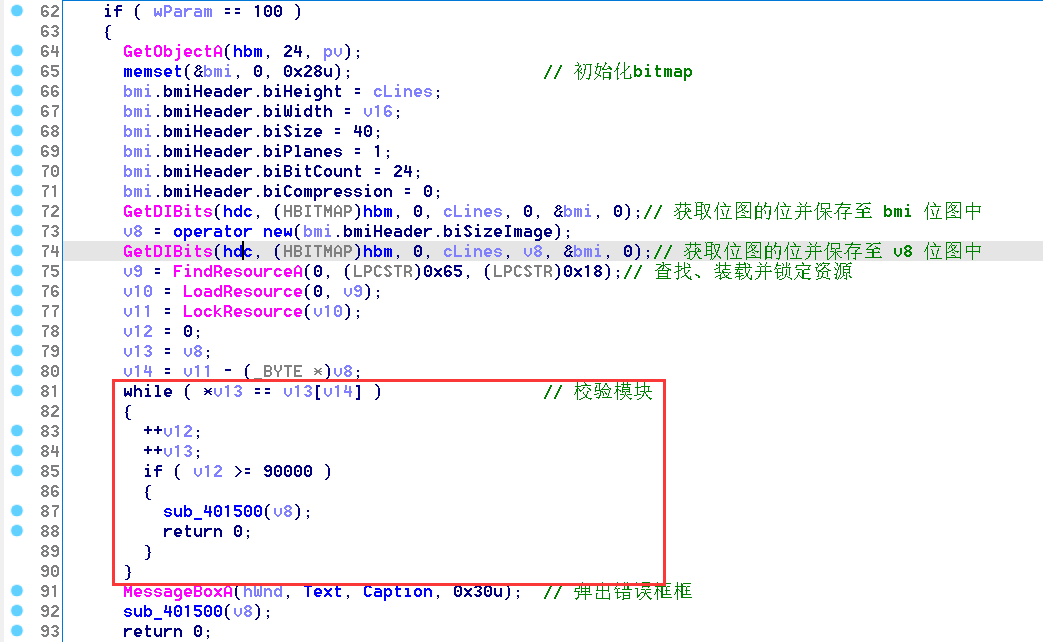
位图大小为 200 x 150,若有 90000 个像素相同则正确。而 *v13 和 v13[v14] 应该指向的是两块不同的位图,要是能dump下来看看,估计就能看出结果。
位图大小总像素点个数:200x150x3 = 90000,RGB 格式。
别的也看不出什么了,在调试时先随手画个 A 留个标记,之后尝试用 ida dump 内存出来看看。
dump 脚本:
import idaapi |
用 Python 处理一下 dump 出来的内存:
#! python3 |
v13 对应的图像如下:
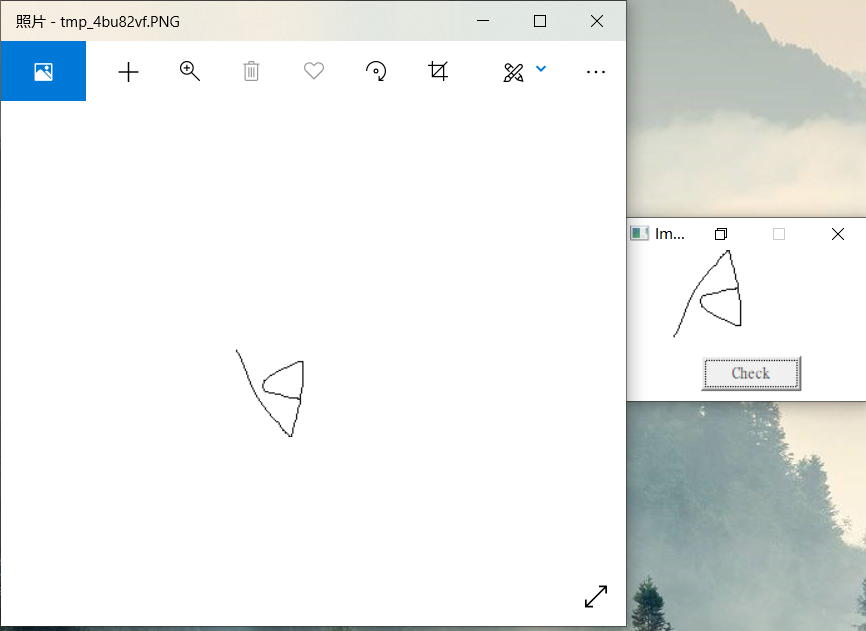
可以看到刚好 dump 出来的图片是上下倒置的。
接着我们就如法炮制,将 v13[v14] 的图片也 dump 出来:
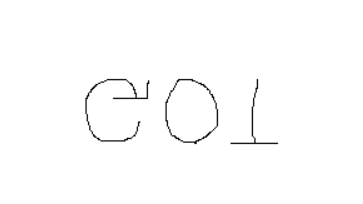
即 flag 为 GOT。
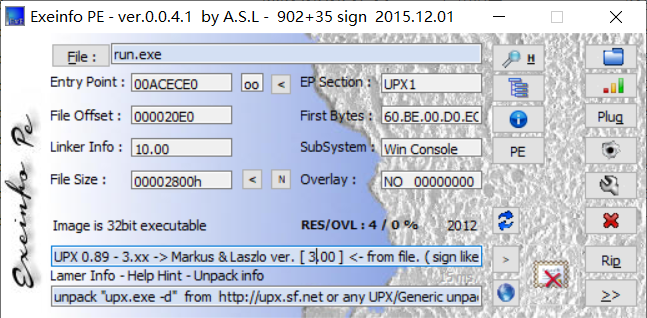
6. Ransomware
压缩包解压,根据 readme 的描述,可以看到要求我们解密 file 文件。
把目标文件拖到 Exeinfo 里一看,加了个 UPX压缩壳:
 s
s
因此直接用脱壳机脱壳:
之后用 IDA 打开看看:
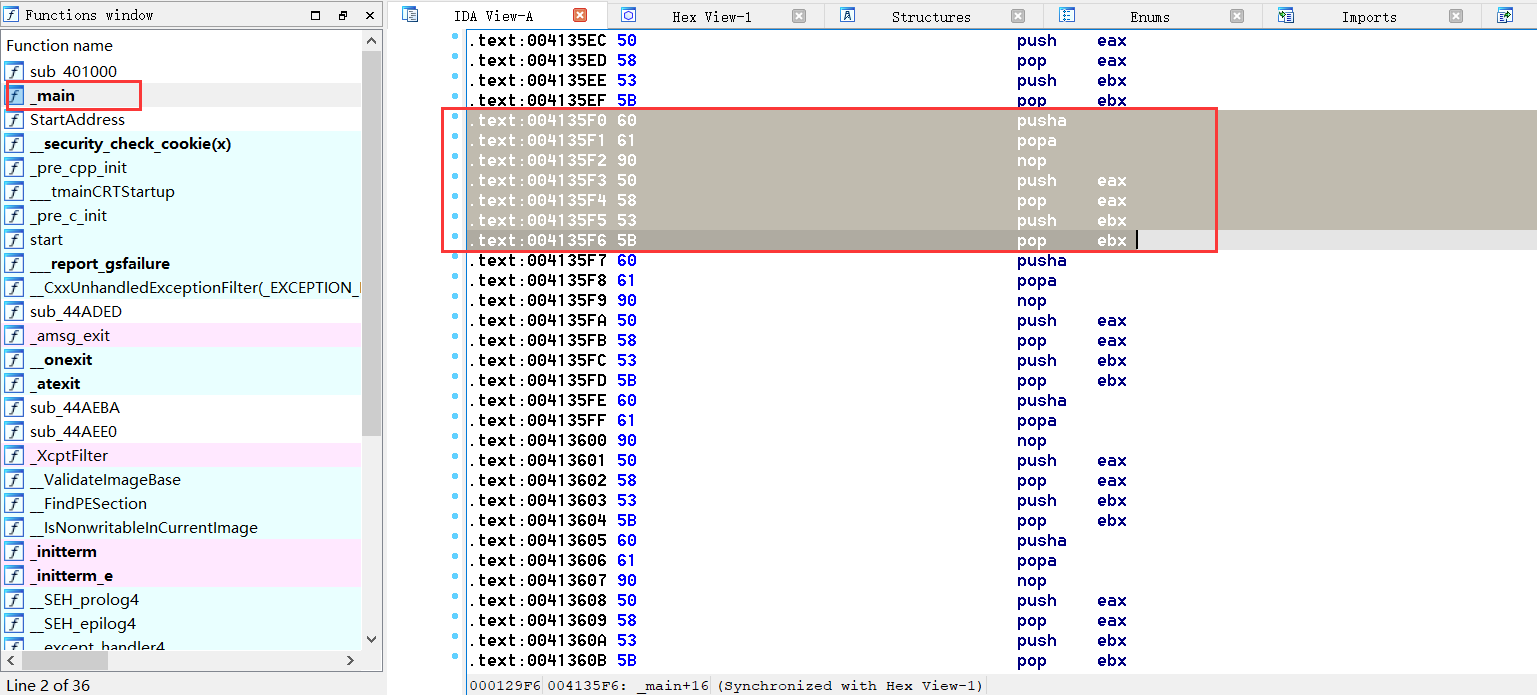
可以发现在 main 函数中存在超大量无用指令,使得 IDA 无法进行反汇编,提高分析难度,因此我们需要尝试去掉这些指令:
data = None |
而且在 sub_401000 函数中,整个函数体全部充斥着这类指令,即该函数是一个空函数体。为了防止混淆,我们将 sub_401000 函数名称修改为 nop_func。
接着非常悲剧的发现,main 函数还是因为函数太大无法被反汇编…
莫得办法了,只能将函数头的
UPX0:004135E0 55 push ebp |
移动到末尾:

然后修改一下函数的起始位置:
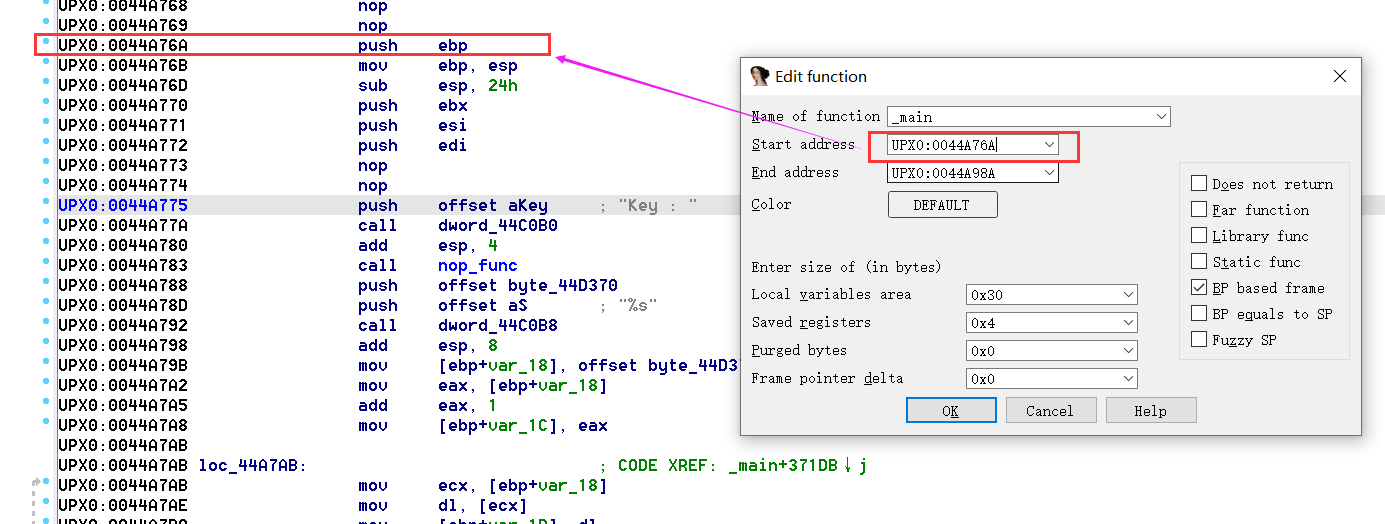
之后就可以照常反编译了,以下是经过简化的反汇编代码。
不过需要注意的是,这里修改函数的起始地址,指的是IDA 静态分析的起始地址。实际上函数调用 main 时仍然会跳转回原先的地址。
int __cdecl main(int argc, const char **argv, const char **envp) |
最核心的就是这部分加密算法:
// v6 为文件数据长度 |
而 readme.txt 的描述是这样的:Decrypt File (EXE)。也就是说那个 file 文件实际上就是加密后的 exe 文件。
在已有明文、密文并了解加密算法的情况下,我们便可以很容易的将密钥解出来。需要注意的是这里选取的是两个 exe 文件(一个加密前一个加密后)的前30 字节,因为应该所有 exe 文件的前30个字节都相同。
以下是暴力枚举密钥的算法:
#include <iostream> |
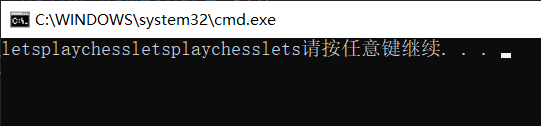
输出密钥为 letsplaychess:
因此再解密一下 file 文件:
#define _CRT_SECURE_NO_WARNINGS |
解出一个 flag.exe,运行下看看:
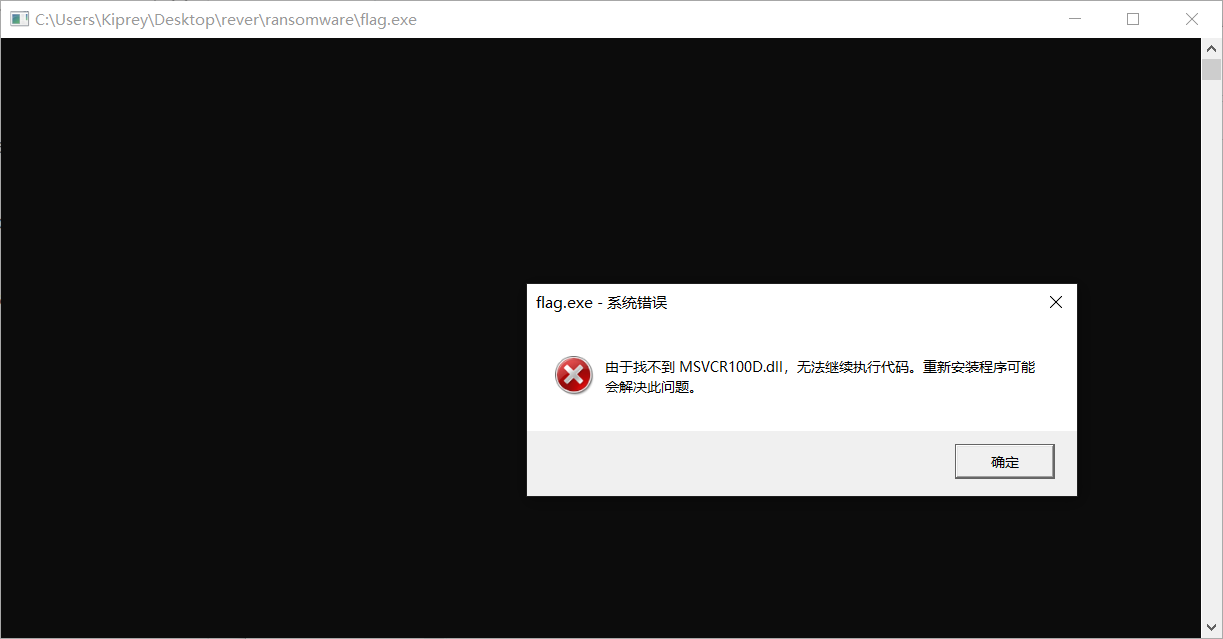
晕,从别处拷了一些 DLL 过来,终于解出来了…
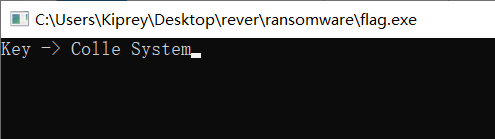
flag为 Colle System。
7. CSHOP
程序打开后没有任何可交互部分。拖进 IDA 发现是个 .NET 程序,直接用 dnSpy x86 打开(不得不说 dnSpy 的界面是真的好看):
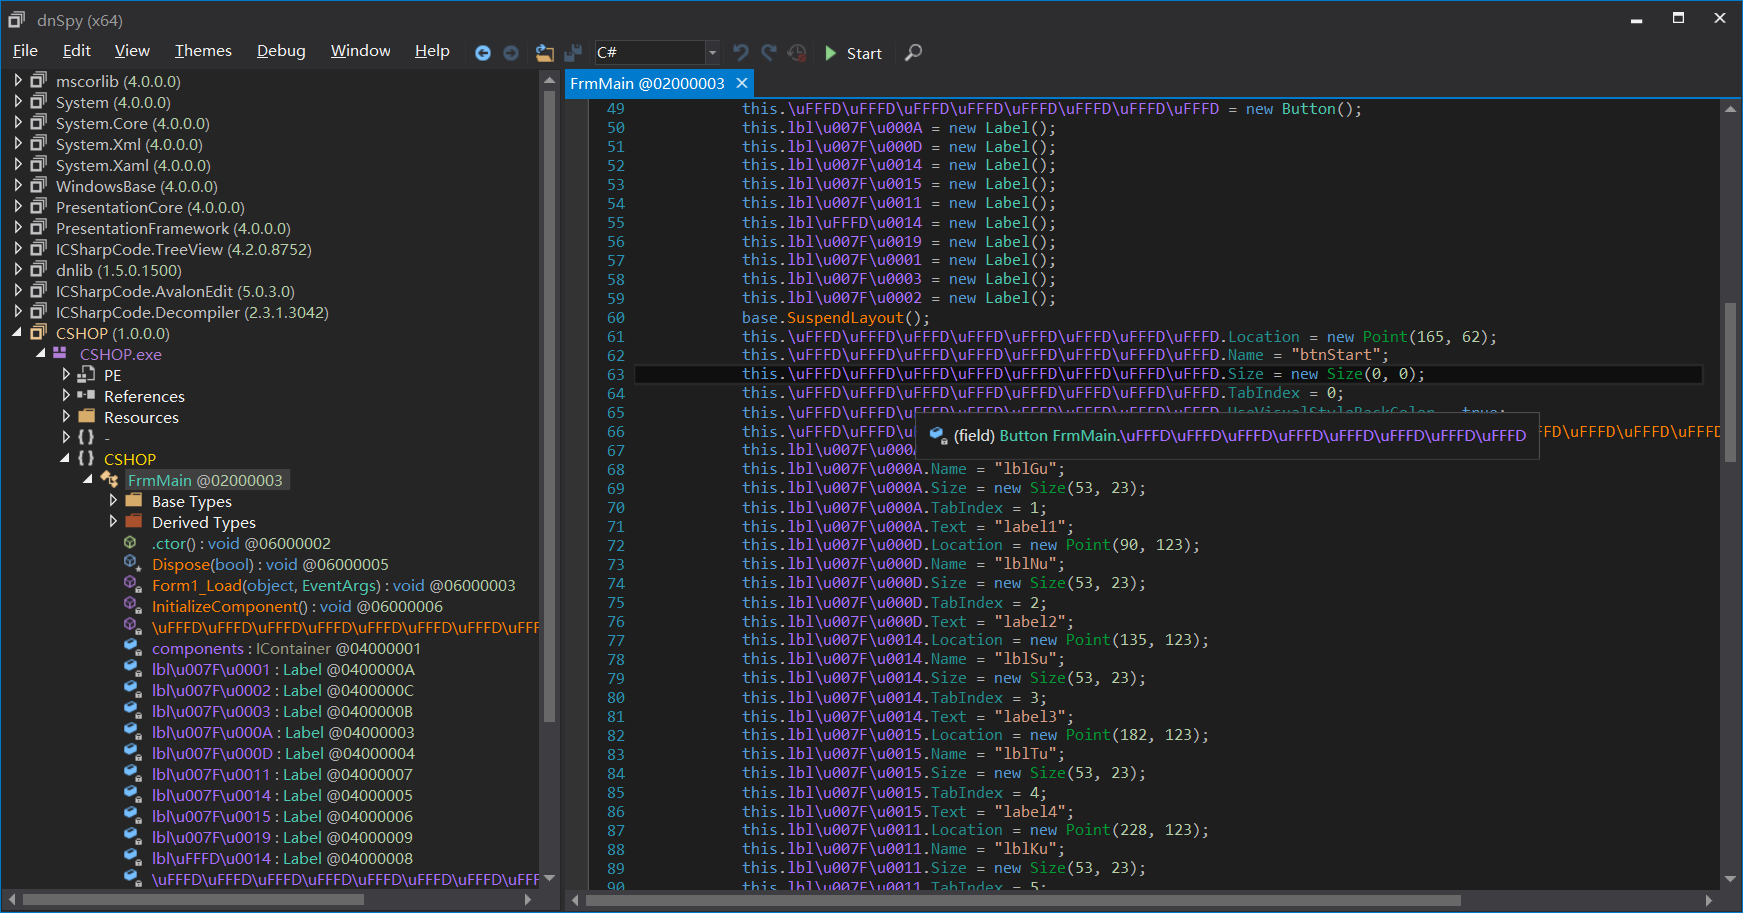
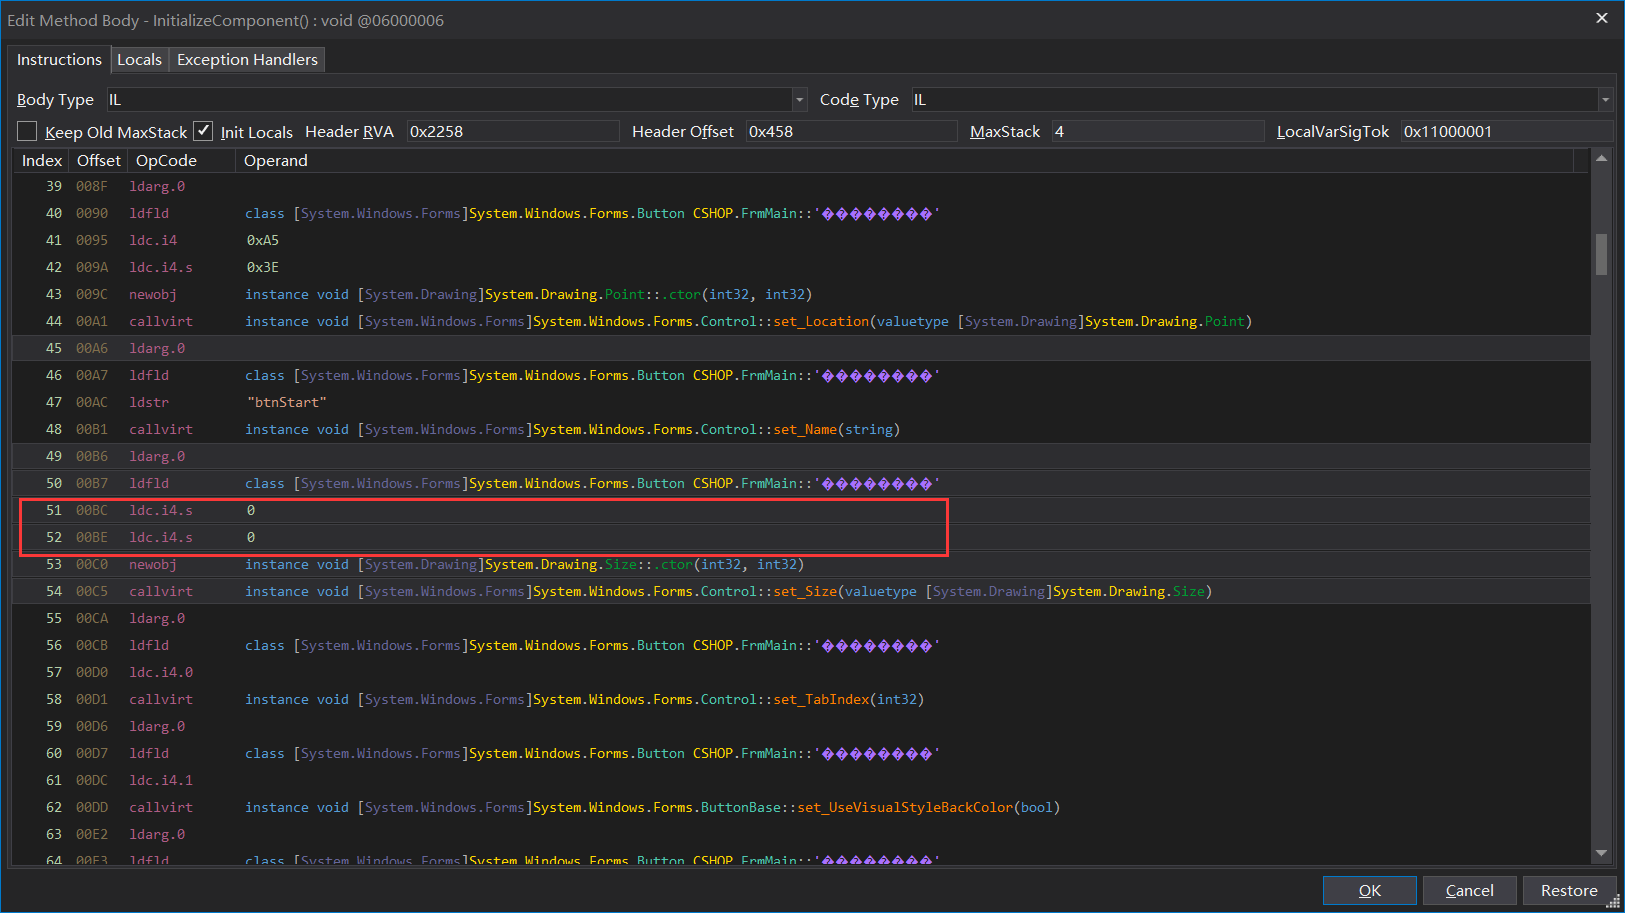
简单通读了一下代码,该窗口有 10 个 Label 和 1 个 Button,当 Button 被按下后,这10个 label 将显示出对应的文字(应该是 flag)。但问题是, Button 的 size 为 (0,0),因此正常情况下我们无法点击该 Button。
不过我们可以尝试修改这个 IL:
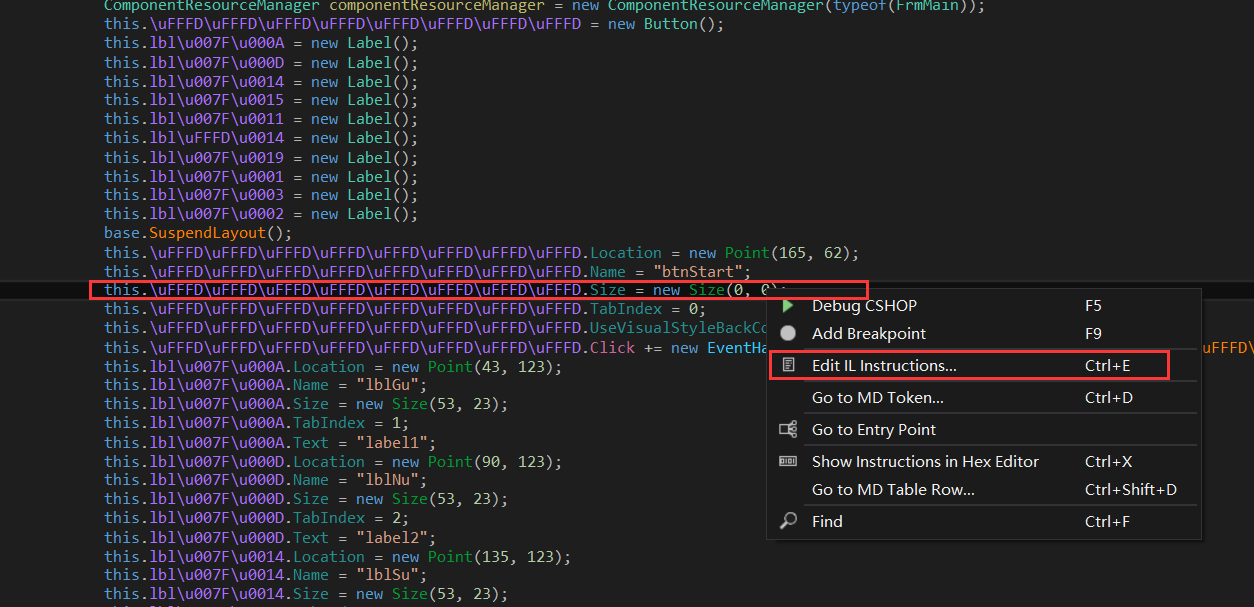
这两个值改大一点,然后 File -> Save Module:
重新打开被 patch 后的程序,并点击按钮,即可出现 flag:
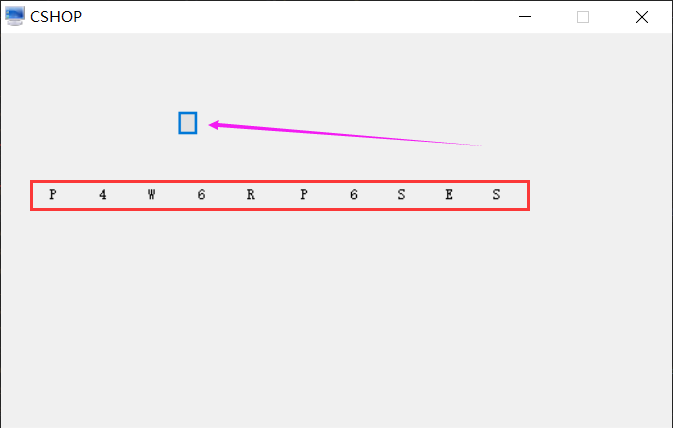
flag 为 P4W6RP6SES。
Recommend
About Joyk
Aggregate valuable and interesting links.
Joyk means Joy of geeK