

AWS IoT – Basics
source link: https://dzone.com/articles/aws-iot-basics
Go to the source link to view the article. You can view the picture content, updated content and better typesetting reading experience. If the link is broken, please click the button below to view the snapshot at that time.

Introduction
Internet of things (IoT) is pretty ambiguous. Any phrase with the word “things” in it is inevitably somewhat ambiguous, right? IoT is a popular and rich topic and depending on the view there is a lot that falls under this term. However, in this post, we will keep it to its core, just a simple use case where we have one or more devices and we want to manage, communicate and use them for our purposes.
From the implementation point of view, we have a few options, build our own infrastructure, without or without libraries, use cloud providers and/or mix of different technologies. In this post, we will be using the AWS IoT service.
AWS IoT is a managed cloud platform that lets connected devices – cars, light bulbs, sensor grids, and more – easily and securely interact with cloud applications and other devices.
In this getting started course, we will not be touching the actual physical device but instead see the mechanism using a NodeJs process. Later in posts, we will see how to read values from actual sensors but the principles will be the same. This will keep the complexity in the check-in scope of this basic setup.
The following are a few of the areas where you can consider using AWS IoT:
- Connect and Managed Devices: Secure and consistent way to connect to the device. You can use a variety of communication protocols to connect devices to the cloud such as – HTTP, MQTT, or WebSocket.
- Process and act upon device data: Filter, transform and act upon data from devices on the fly, based on business rules. Easy integration with other AWS services e.g. Amazon DynamoDB, AWS Lambda, etc.
- Read and set device state at any time.
- Provides scalability to a larger number of devices.
There are many use cases and areas where AWS IoT can be used.
AWS IoT Security
Security is a very important concern for IoT and AWS provides different levels of security mechanisms for various application needs:
- TLS for protecting data on the wire.
- X.509 certificates for device identity.
These two technologies provide safety from man-in-middle attacks and device impersonation.
Furtherer more on AWS we also have IAM accounts for access to AWS resources and Policies to configure action permissions.
AWS IoT Connectivity
MQTT is the protocol to support intermittent connectivity with the devices.
Shadow Devices: Small database of the last state of your device along with the message broker, allows the control of your device in almost any environment.
Setting up an IoT Device
We can use AWS CLI or AWS Web Console to create a Thing for our device. An IoT thing is the representation of our physical assets.
As part of the Things creation process, we will also need to get the certificates to be used to identify our device to AWS.
Following screenshot shows AWS IoT Web Console to manage things and other AWS IoT resources:
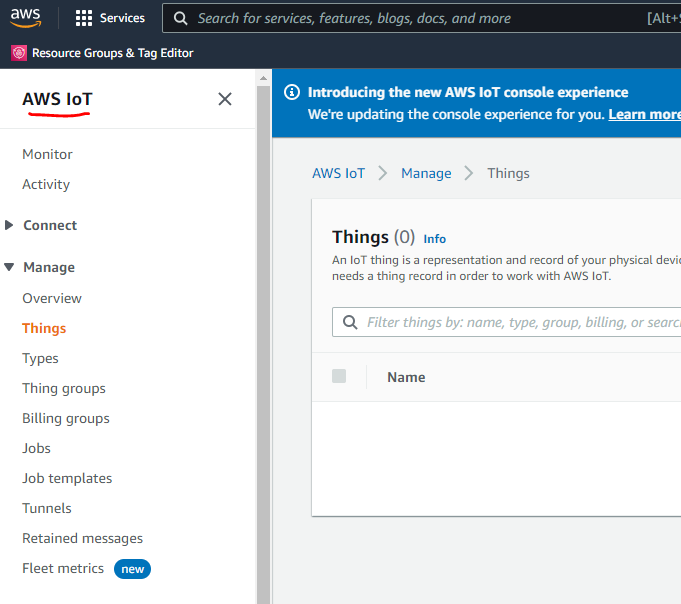
Furthermore, to speed up development, AWS provides SDK for various development environments. SDK supports many popular programming languages including JavaScript, Java, Node.js, and Python.
Creating a Thing
Creating a Thing is a very simple process, that typically involves the following steps:
- Specify Device Properties
- Create/Attach Certificates
- Create/Attach a Policy
Create Certificates (For Secure Connection and Data Exchange)
Before we create a thing, we need to create a set of certificates unique to our application. We will also need to download the AWS Certificate.
Create a Policy
We will need to create a policy, which tells AWS what capabilities to allow the device.
Demo – Create a Thing
From the AWS IoT Web console, you can start creating a thing wizard as shown below:
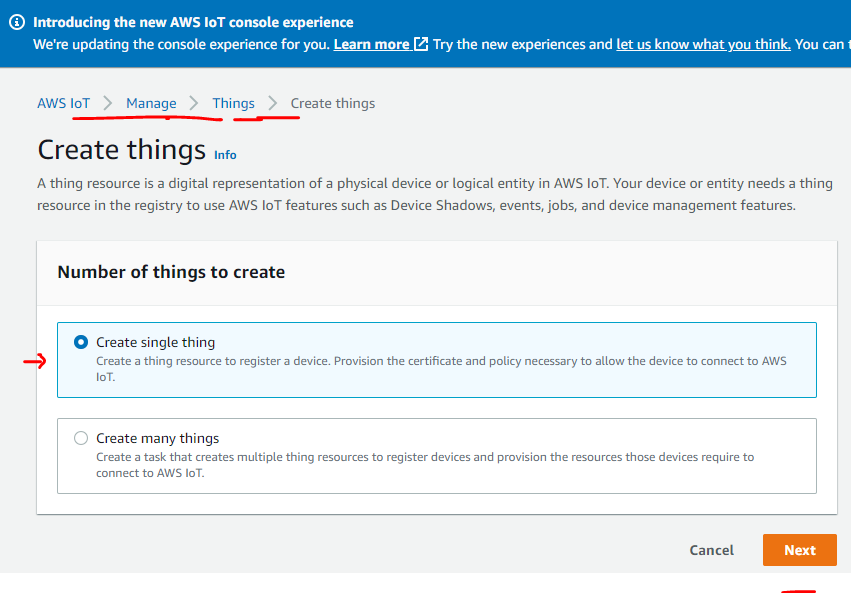
Click Next:
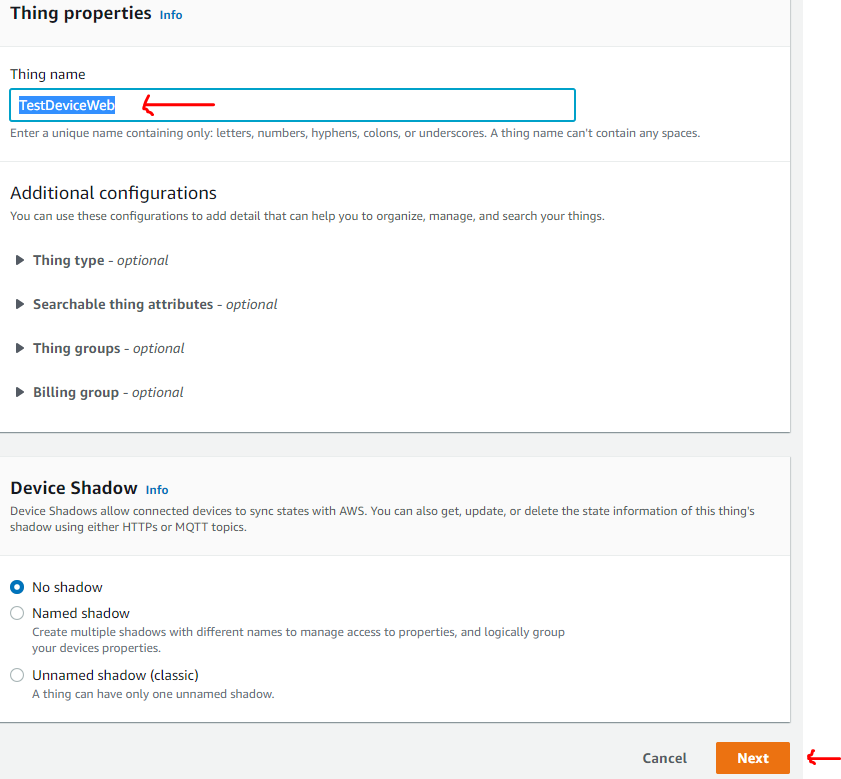
Here, give it a name and accept all other defaults. Click Next: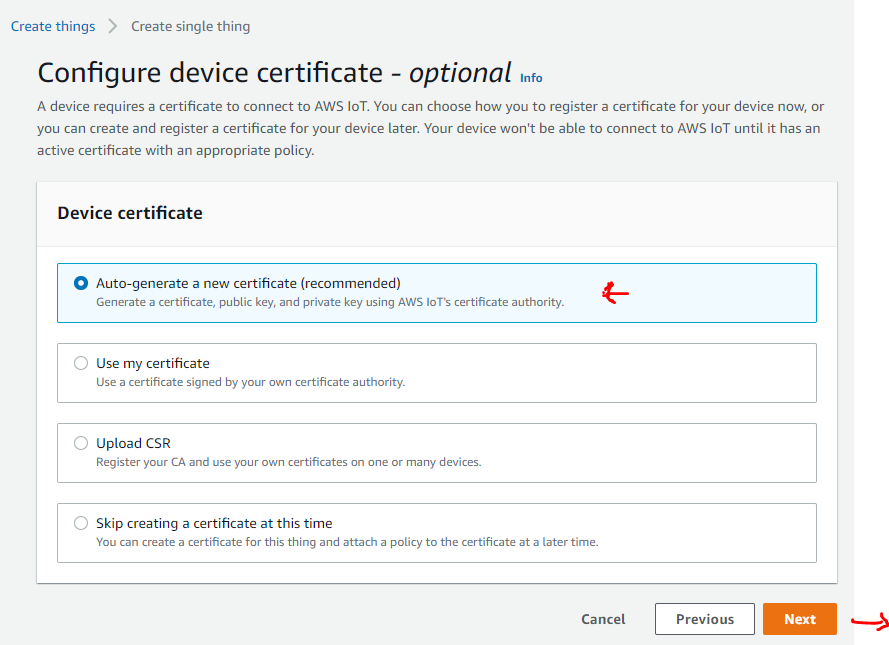
Select the recommended option for certificates and click Next:
If you want you can click Create policy button (we will do this step later) and for now directly click, Create thing.
You will be asked to download certificates as shown below:
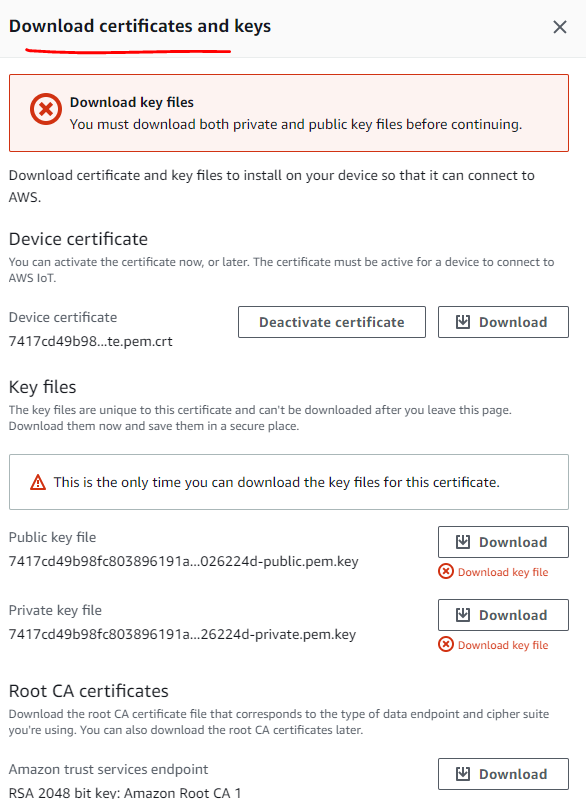
And once downloaded, we can finish the wizard and notice that thing is created:

Create AWS IoT Policy
We can start creating policy using the following option on the AWS Web Console:
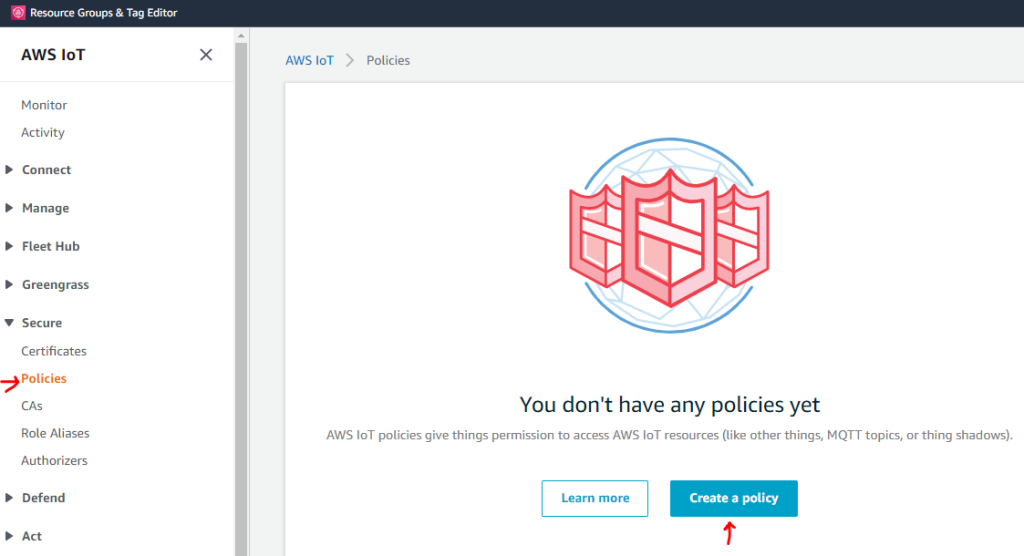
The policy can be applied to any number of certificates. Here I will create a very basic default policy:

This policy will allow any device to access any IoT resource. Once done, click the Create button:
With DefaultPolicy created, we can now return to the list of things, select the thing and in details -> certificates, click the certificate as shown below:

This will open up a new page, where we can go to the policy section: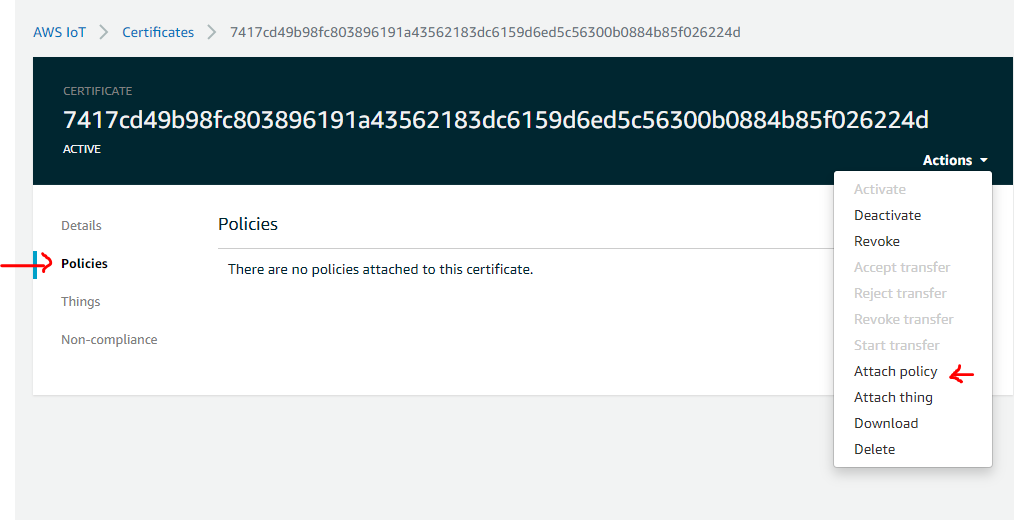
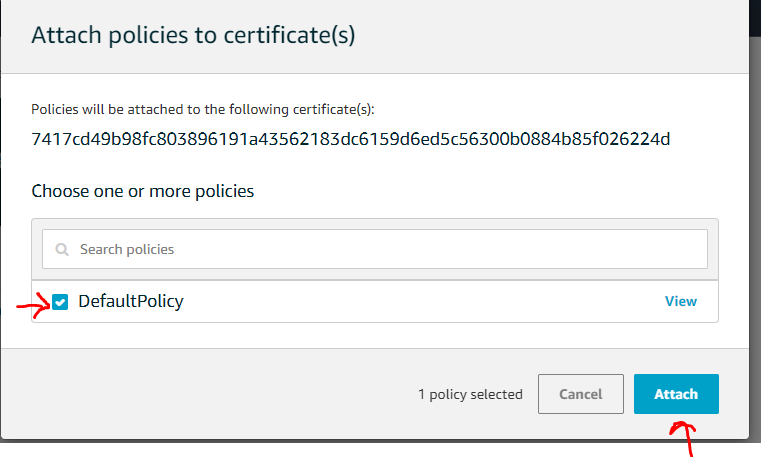
From the Action drop-down, select Attach policy. It will open up a new dialog, where we can select DefaultPolicy we created earlier:
With that, we have created our thing and we are ready to write code for our device.
AWS IoT Using AWS CLI
Now, in this section, we will see how to use AWS CLI to create a thing. The use of CLI is great for automation purposes as well. Check this post for details about how to set up AWS CLI and some basics.
List Things
We can list IoT things, using the following command:
aws iot list-thingsHere is the output showing earlier created thing:

Create a Thing
aws iot create-thing --thing-name "TestDeviceCli"
As we can see that a new thing is created.
Provision Certificates
aws iot create-keys-and-certificate --set-as-active --certificate-pem-outfile certificate.pem --public-key-outfile publicKey.pem --private-key-outfile privateKey.pem
It will generate the files:

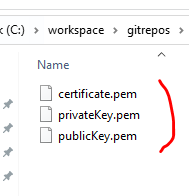
The certificate is created and we will now set up that our thing uses this client certificate.
Attach a Thing to a Client Certificate
aws iot attach-thing-principal \
--principal certificateArn \
--thing-name thingName
Please replace the certificateArn and thing name in the command as shown below:

If you want, you can use the web console to verify that thing and certificates are attached:

Create a Policy
aws iot create-policy --policy-name "test-policy" --policy-document file://default-policy.json
Attach a Policy to Client Certificate
aws iot attach-principal-policy --principal "certificate-arn" --policy-name "test-policy“Notice the certificate-arn, you need to replace it:

You can use Web Console to verify that policy and certificates are attached: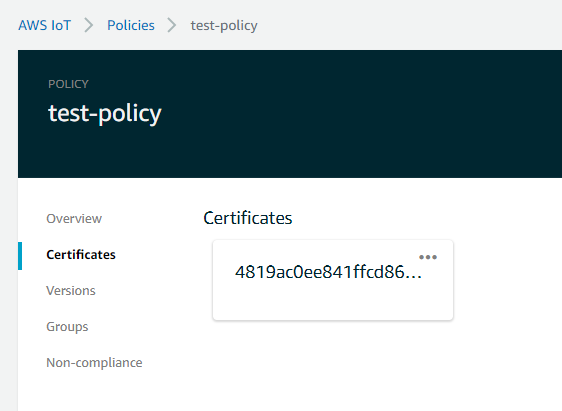
So far, we have created a thing, certificates for the thing, policy, and attached these bits together. We saw how to do it using a web console as well as using aws cli.
Connectivity Test
Now, we have already covered a few topics in this getting started article and I don’t wanna overload you with more information. We will cover device connection and communication in detail in later posts. However, just to give you an idea and show you a basic workflow implementation i.e. sending data from our application to AWS IoT platform and back, we will see a simple Node.JS application demo.
AWS offers SDK for IoT integration for different programming languages such as Java, C++, JavaScript, Python. You can check more details on this link.
There are a great many resources and examples online. For example, the javascript SDK github page has a very simple example on this link. I will use this basic example for our demo today.
I created a folder for source code and set up a GitHub repository, initialized it, and install the aws-iot-device-sdk package using npm:
npm install aws-iot-device-sdkHere is what the initial project structure and JavaScript code look like. device.js file contains the code and it's very simple and self-explanatory:
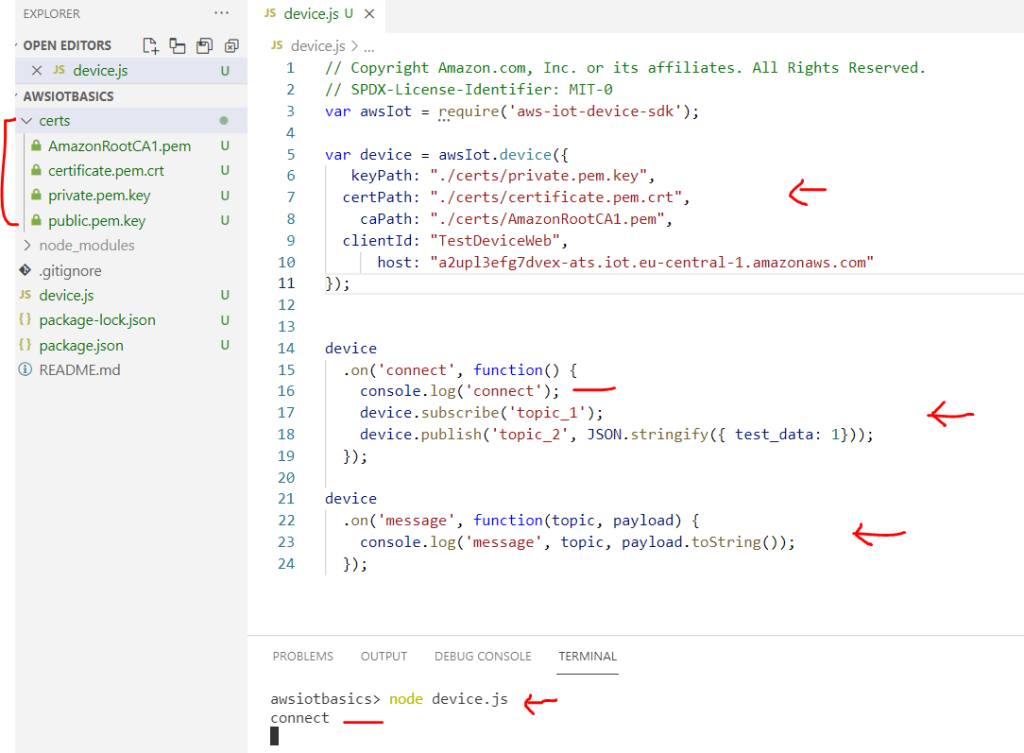
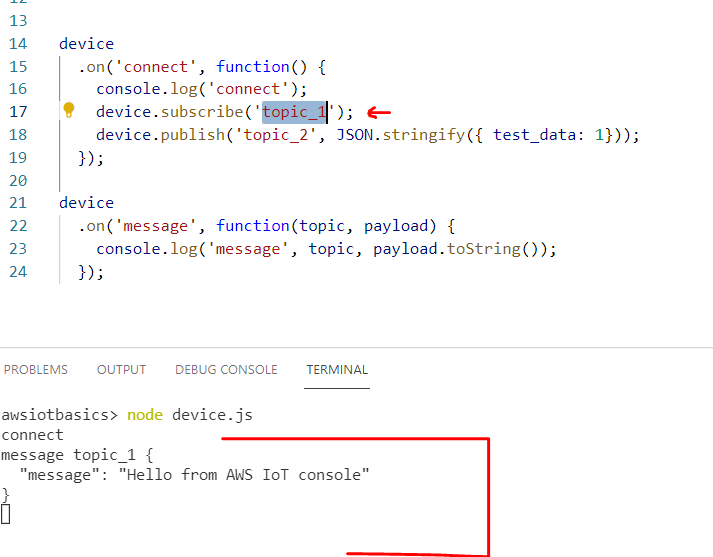
As you can see, I created new folder certs and copied the certificate which we created earlier for the thing. In device.js file, we require the SDK, we provide certificate paths and then wired two events - connect and message.
We can then simply execute this code using node and we see that we are able to connect to AWS IoT successfully from console msg “connect”.
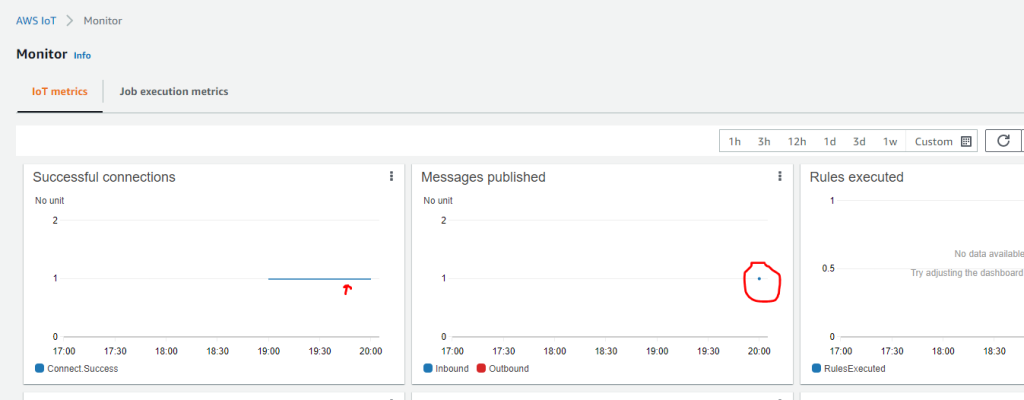
If we now go to AWS IoT Web Console (Monitor), we can see the same connection information there:
We can use Web Console for sending messages to our application as well using the Test option:
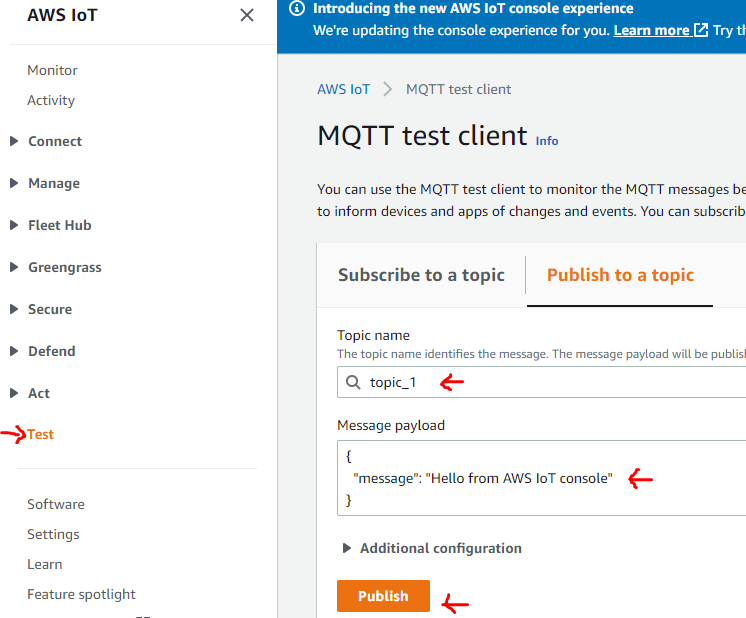
From the web console, I am publishing to a Topic (topic_1) and this is the same topic, our Node.js code is listening on:
This is of course a very basic example, but you can see, how easy it is to integrate AWS IoT Core in our application. You can download the source code from this git repository (however, you need to place your own certificates in the certs folder).
Summary
In this post, we covered the basics of the AWS IoT platform. We saw a simple workflow of creating a thing, getting certificates, creating and attaching policies using AWS Web Console and AWS CLI.
We then saw a simple example of how to use AWS JavaScript SDK for creating a NodeJS application to connect to our IoT thing and send and receive messages.
IoT is a big and interesting topic and we just took a very first step in this direction. In the coming days, we will cover more advanced use cases and solutions involving IoT.
Let me know if you have some comments or questions. Till next time, Happy Coding.
Recommend
About Joyk
Aggregate valuable and interesting links.
Joyk means Joy of geeK