

Home Assistant Yellow - Pi-powered local automation
source link: https://www.jeffgeerling.com/blog/2022/home-assistant-yellow-pi-powered-local-automation
Go to the source link to view the article. You can view the picture content, updated content and better typesetting reading experience. If the link is broken, please click the button below to view the snapshot at that time.

Pi-powered local automation
January 19, 2022
I've dipped my toes in 'smart home' automation in the past.
Typically I approach 'smart' and 'IoT' devices as a solution to one simple problem, instead of trying to do 'all the things'.
For example, I wanted to make it easy for my kids to control a home theater with four different devices and complex audio/visual routing, so I bought a Harmony remote and programmed it to control TV, a game console, an Apple TV, and radio. I don't want Logitech to start controlling other aspects of my house, or to give intruders an avenue by which they could invade my home's network.
However, many smart devices require a persistent Internet connection to use them, and that I cannot abide.
Luckily, on my long journey towards finally choosing 'one hub to rule them all', I found out about Home Assistant. When I was setting up CO2 indoor air quality monitoring last year, I got an offer from Nabu Casa—the company behind the open source Home Assistant and ESPHome projects. They wanted to send me a Home Assistant Yellow to try out, after seeing my many adventures with the Raspberry Pi Compute Module 4.
I posted a video on YouTube about how I control my office lighting with Yellow and some Zigbee accessories.
But in this blog post, I'll give a few more details on the hardware itself, along with more impressions and test results than would fit in a YouTube video.
Full disclosure: Nabu Casa sent me the PoE version of the Home Assistant Yellow, but did not offer any additional compensation, nor have input into the contents of this blog post or the linked YouTube video.
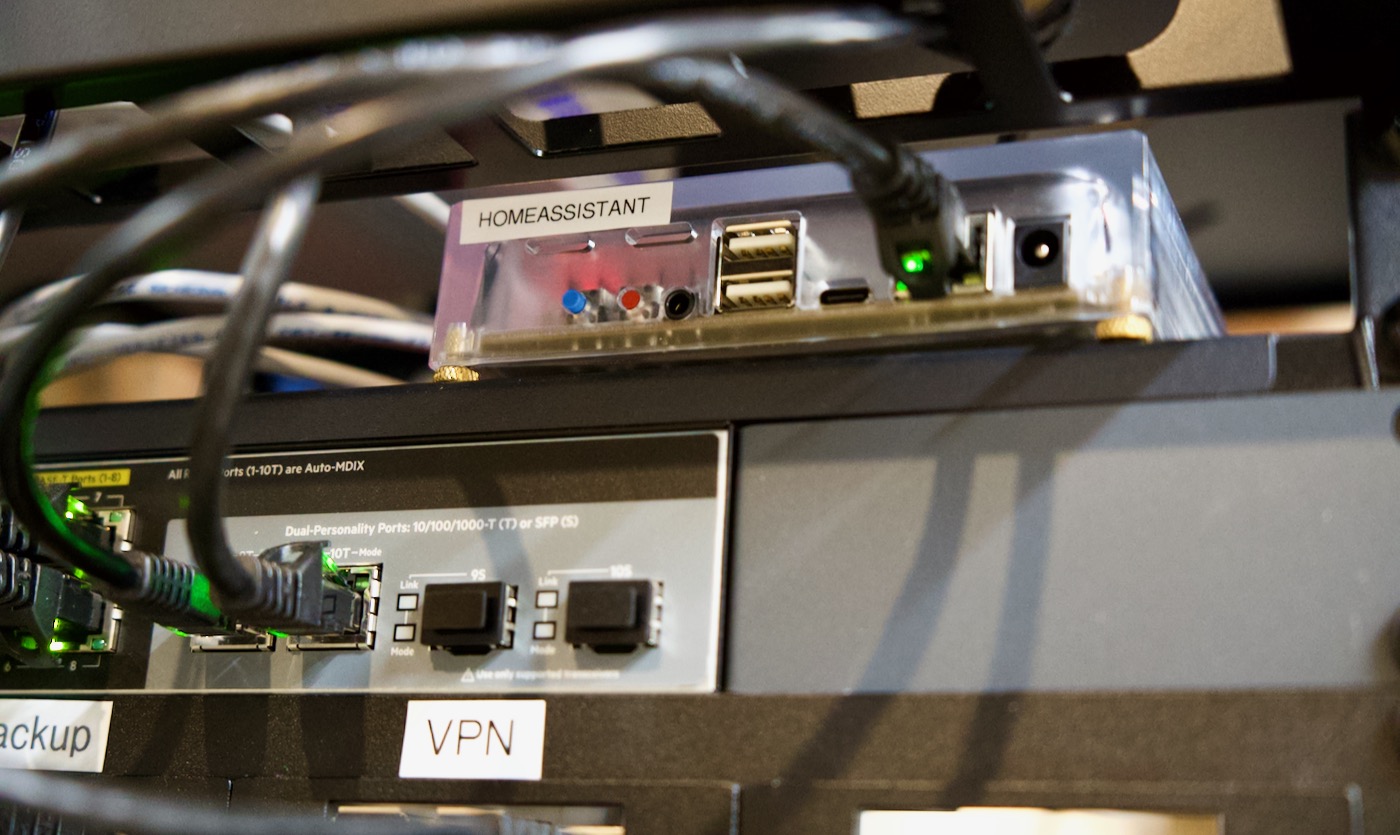
Hardware
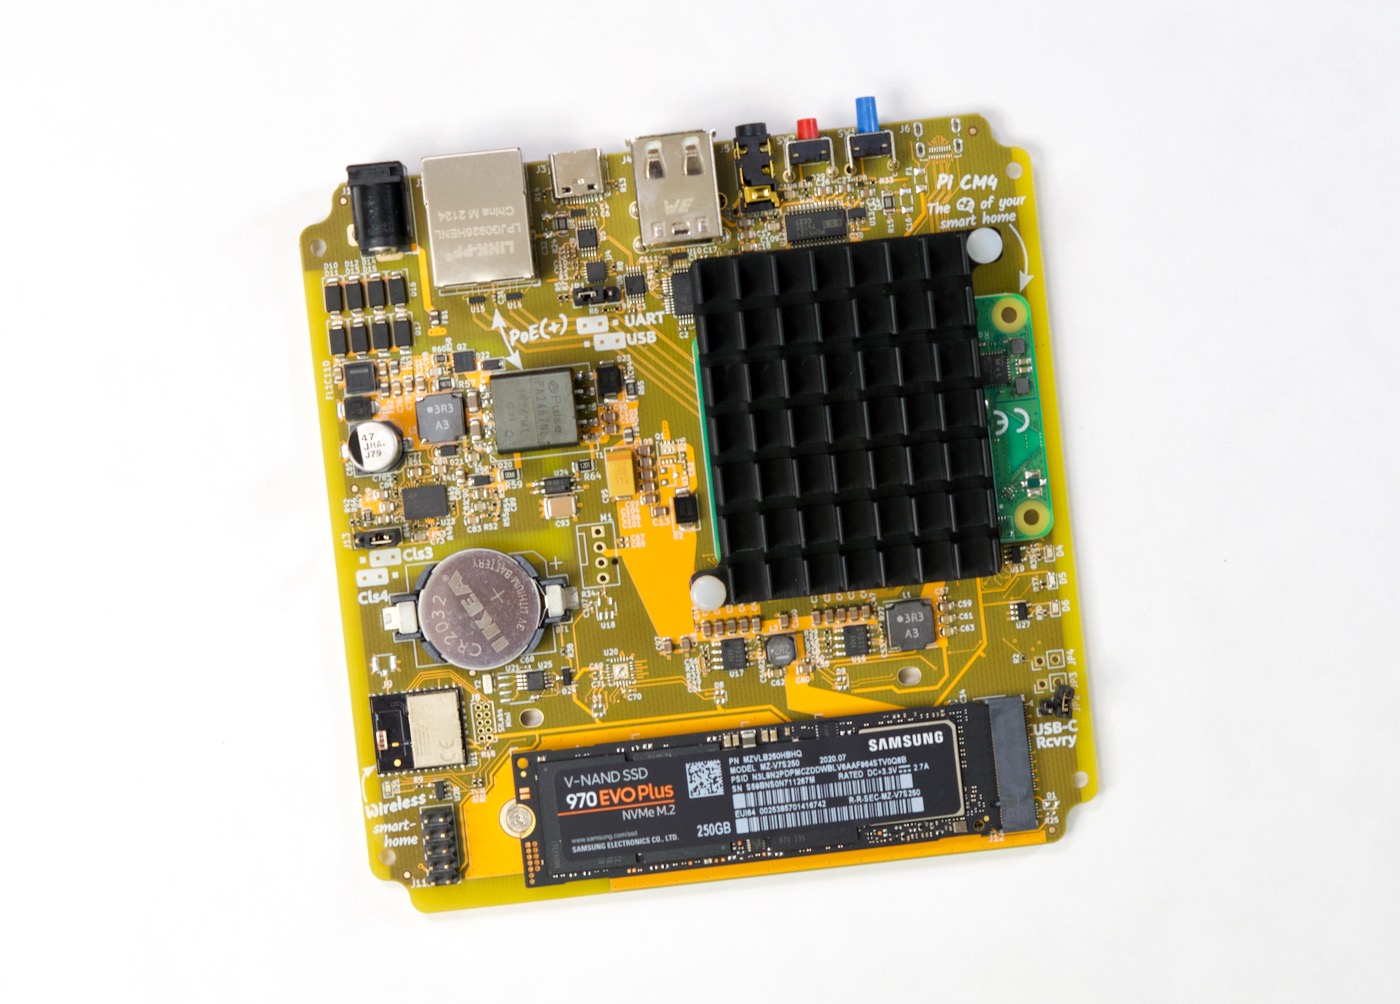
(Note: in the above picture, I've also added on a Samsung 970 NVMe SSD for faster and more reliable data storage.)
There are actually three major versions of the Home Assistant Yellow:
- Basic Kit with Power Supply: A Yellow board with no included Pi nor PoE, for $115
- PoE Kit without Power Supply: A Yellow board with no included Pi but PoE support, for $125
- Flagship Kit: A Yellow board kit with a Pi and power supply included, but no PoE, for $175
All three kits include a custom heat sink, enclosure, and Ethernet cable.
But one major difference—pertinent at the time of writing this blog post—is availability; while you can currently buy some Raspberry Pi Compute Module 4 versions on Seeed Studios (as of January 2022), it has been a struggle to find them in stock—especially in quantities greater than 1!
The basic kit should be available at the end of May, the PoE kit at the end of July, and the full kit including a CM4 in November. Those who backed the yellow on Crowdsupply should get their boards soonest, though.
Availability aside, let's look at the hardware features of the board:
- Raspberry Pi CM4 as the 'brain' — supports all variants (up to 8 GB of RAM and 32 GB onboard eMMC)
- Zigbee support via Silicon Labs MGM210P Mighty Gecko Module (also supports OpenThread/Matter)
- M.2 M-key expansion slot (intended for NVMe SSD expansion storage, can also boot Lite CM4 modules with no onboard eMMC)
- RTC with battery backup
Typical I/O including:
- 1 Gbps Ethernet (with PoE support on the PoE version)
- 2x USB 2.0 Type-A
- 2x push buttons (for factory reset and future use)
- 1x USB-C 2.0 port (for flashing device or using with special USB-C to A serial port adapter)
There are also three status LEDs (red for power, green for activity, and yellow for Home Assistant status), and a 12v barrel plug for power (can be used instead of or in addition to PoE).
The board also has a subset of GPIO pin headers in the bottom left that allow the addition of an internal Z-Wave radio, like the Z-Pi 7 or the RaZberry2—though you could just as easily add an external USB radio, too.
Finally, the board includes a stereo 1/8" audio jack, which is a little strange when combined with the exclusion of any HDMI port—I guess you could have the Home Assistant play music as a streaming device, but it would also be nice (and add a bit of flexibility, in case you want to repurpose Yellow later) to have display output as well!
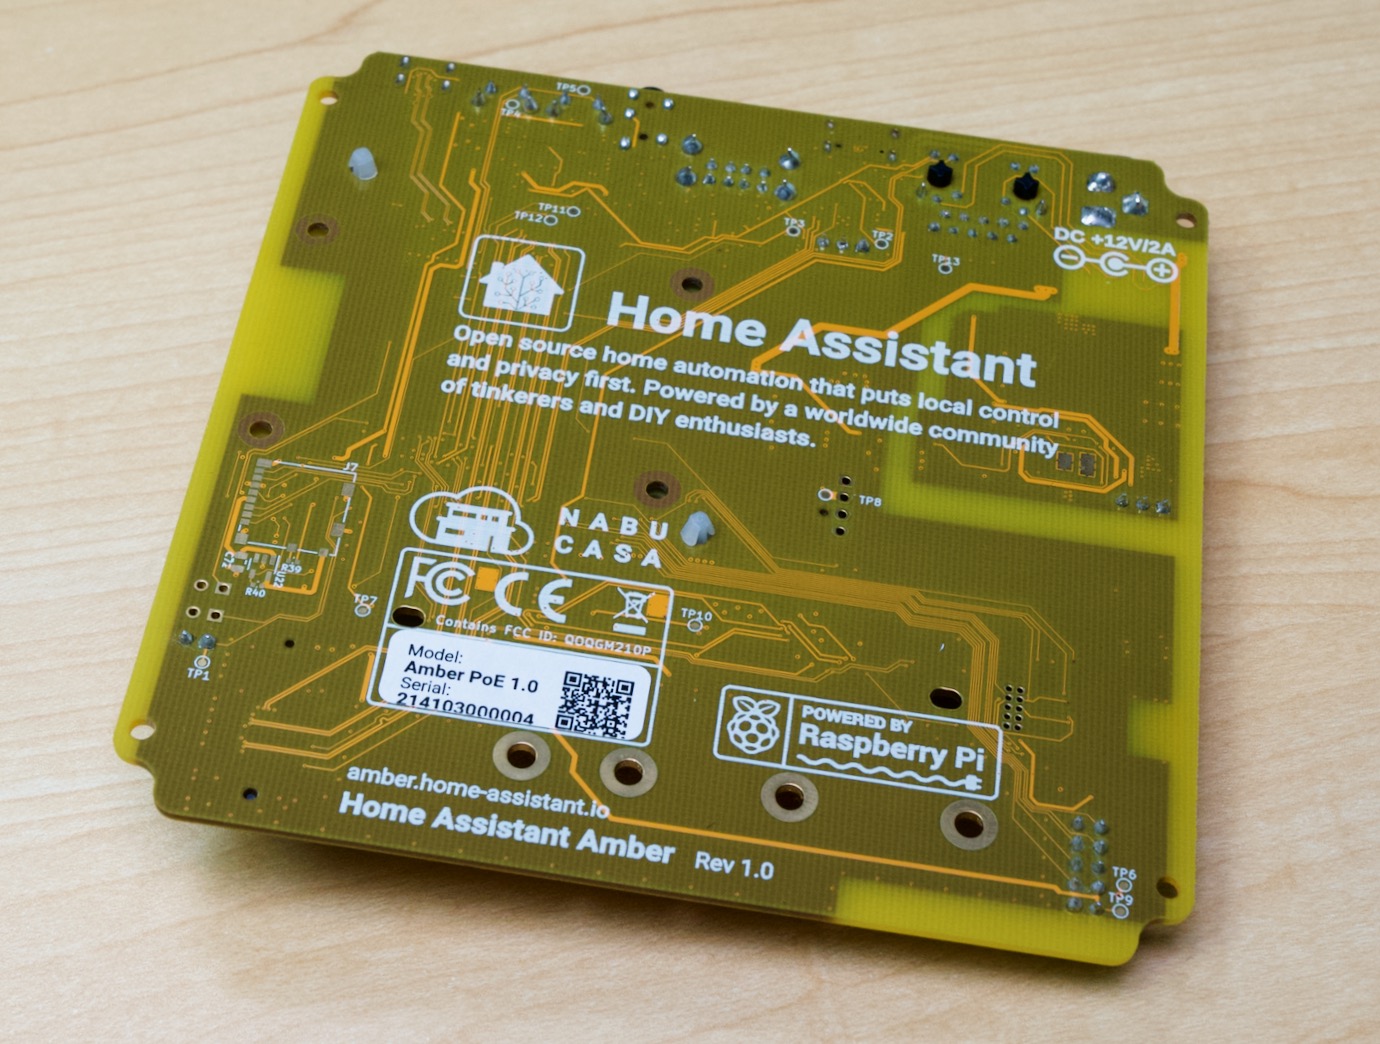
The other thing missing from this board is a microSD card slot; there are pads for something on the back of the board (pictured above), though it doesn't look like they'd fit a card reader. It would be nice to offer the flexibility of booting a Lite model CM4 from microSD, though I half-wonder if Nabu Casa decided the horrible experience afforded by bad microSD cards (which many people would probably try using) was enough to warrant that slot's exclusion.
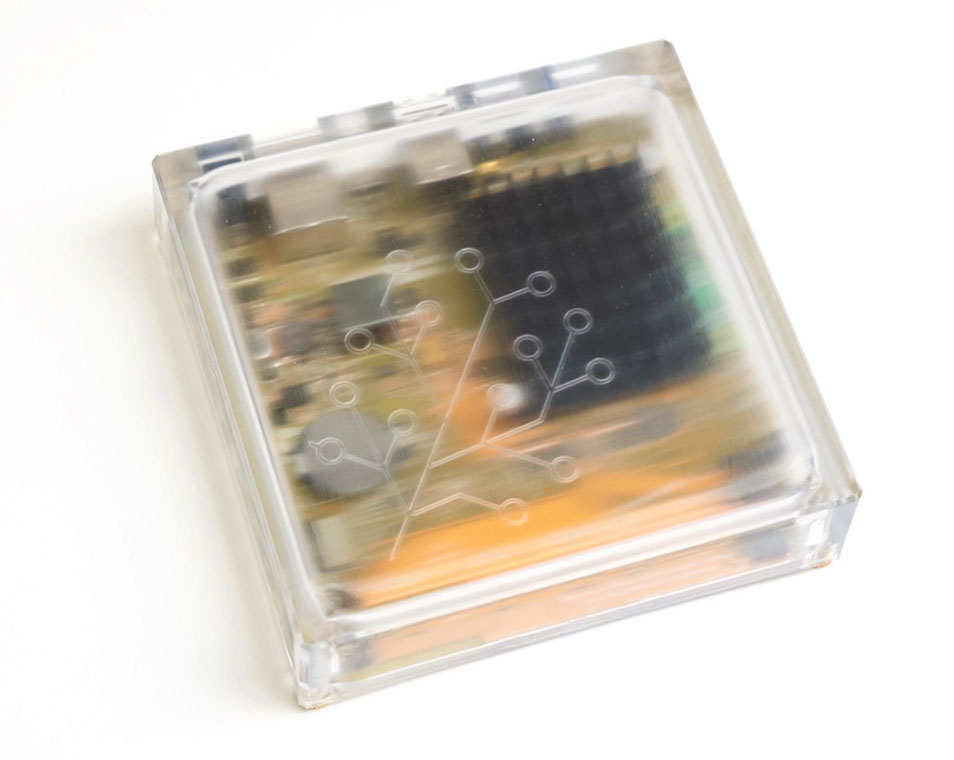
The last thing to mention is the case: it looks nice, and has an internal embossed Home Assistant logo on the top side. The picture at the top of the post shows the version I got—still a little rough on the finish. The final version should have a nicer interior finish and will probably fit together slightly better.

But one concern I had was—besides a couple slots on the IO side (pictured above), there's no ventilation. The Pi has a hefty heatsink, but all that heat is just dumped into the interior of the case, with nowhere to go.
The case does warm up a bit, and the Pi generally doesn't overheat if idle, but if you were planning on buying Yellow to run Home Assistant and a ton of other things, that might not be the best idea. It will throttle the CPU if stressed for more than a few minutes.
Luckily, after using it a few days in my basement rack, I didn't encounter any issues with responsiveness. I would like the case to possibly include an option for a Pi-fan or some other tiny fan to exchange air so that heat sink can keep the Pi nice and cool no matter what.
Heck, even a few holes in the top over the Pi should be enough to keep it from overheating.
Home Assistant - first impressions
This isn't a post reviewing Home Assistant, per-se, but it was my first exposure to the project, and it being a very popular open source project for home automation, I thought I'd offer a few initial thoughts.
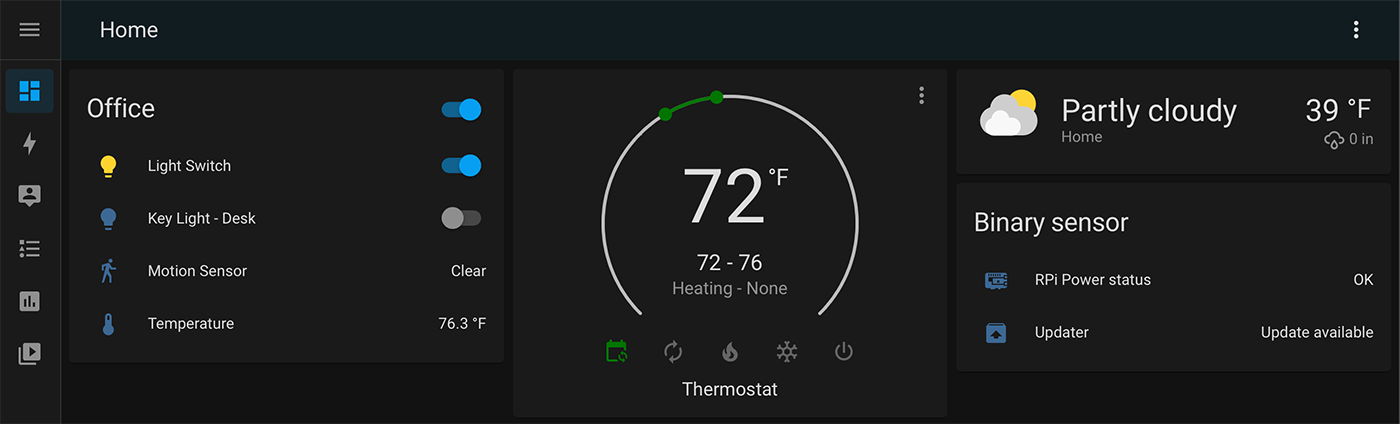
You can see my pretty barebones dashboard right now—the first three things I integrated were in my Office:
I added an Automation to control the office lights with the motion sensor, and that turned out to be very easy to do—once I figured out there was a blueprint for it. I initially tried the hard way after I failed to input the right incantation into the 'chatbot' style query field and it misinterpreted it (see 9:57 onwards in the video.
I also found Home Assistant's integration discovery mechanism to work very well—I was able to add on my Elgato Key Light Air pretty quickly, and in combination with a Shelly Plug, I'm now considering tying my smart button into my Mac so I can quickly switch on my camera and lights for video recording (right now I have the oh-so-laborious task of walking around my desk to turn on the camera, then pressing two or three buttons to turn on all the rest of my lights and recording gear—what a bother!).
I plan on re-flashing my ESP8266-based air quality sensors with ESPHome and getting their data into Home Assistant soon, and probably tying in more home monitoring as I go.
Resetting and upgrading Yellow
I haven't tested this yet, but Yellow has it's own specialized method for resetting the system (by pressing the Red button), and if connected to the Internet, the board can re-flash a Raspberry Pi's eMMC or even an NVMe SSD directly, if the Pi's firmware is up to date. It also has a jumper to control the mode of the USB-C port on the back, so you can use Raspberry Pi's own usbboot tool to manage onboard eMMC.
Some issues with Yellow
The Yellow's not perfect—I already mentioned I was puzzled by the lack of a built-in HDMI port, and while I can understand the reasons why the microSD card slot was neglected, it would've been nice to include for those who can choose a good microSD card.
The bigger issue is the case, and it's lack of ventilation. While it's not an issue in casual/normal Home Assistant use (the CPU stays under 50°C in my testing since it's almost always idle), it would be an issue if you want to run, more intense software on the Pi, or repurpose it to run as a server if you eventually outgrow it as a Home Assistant box.
It's not a huge gripe, and you could always 3D print a custom case with better ventilation (or even a little 5V fan connected to the 10 exposed GPIO pins), but it would be nice to have a few more slats where air can flow through the case.
In terms of power consumption—one of the best arguments for using something like Yellow instead of a full X86 PC to run Home Assistant is that it consumes only 2-4W while idle—mine averages about 3.5W through my PoE switch.
A normal PC's ability to go to sleep (consuming < 1 W of power during sleep) is negated by the fact that a system like Home Assistant requires the PC doesn't go to sleep. If you're not running much else on the PC, you'll waste a lot of power for an application that doesn't need it.
Conclusion
Do I think everyone who wants to get into home automation should get a Yellow? No—there are many people who already have a Raspberry Pi or another computer running that could run Home Assistant (maybe via Docker) quite well, and all you'd need to do is add on a USB Zigbee gateway.
But if you don't have any other hardware to put to the task, and want to start down a dangerous path towards automating every last thing in your home, Home Assistant's Yellow is a great product for it.
It's not the cheapest dedicated Home Assistant hardware, but the upgradeable core (the Raspberry Pi inside), the open source, local-first approach, and the overall simplicity of the board mean it's going to remain in my homelab for the foreseeable future.
Recommend
About Joyk
Aggregate valuable and interesting links.
Joyk means Joy of geeK