

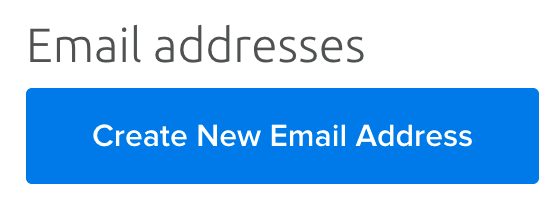
How do I add an email address?
source link: https://help.dreamhost.com/hc/en-us/articles/215029918-How-do-I-add-an-email-address-
Go to the source link to view the article. You can view the picture content, updated content and better typesetting reading experience. If the link is broken, please click the button below to view the snapshot at that time.

Overview
This article describes how to add an email address to your account using the DreamHost web panel.
Prerequisites
You must have an active hosting plan, or a paid email add-on plan to use email.
All hosting plans except Shared Starter offer email at no cost.
While Shared Starter hosting plans and domain registration-only accounts do not include email, you can add a paid email plan onto your account that includes up to 5 email addresses. View the following article for more information:
Adding a new email address
Fully hosted email
In the past, it was possible to create a fully hosted email that also forwarded to another inbox. This feature is no longer supported and any new email addresses created will not have this option. Existing email addresses using this feature will remain unaffected until they are edited, at which time you will need to select between forward only or fully hosted.
A fully hosted email address is an address that has an active mailbox that you can log into in order to send and receive messages. Fully-hosted email users can access their own mailbox as well as use the Webmail and the Mailboxes interface. You can also set up email users on third-party mail programs if you do not wish to access your mailbox through the Webmail interface.
Description of fields in the fully hosted email page
Email settings
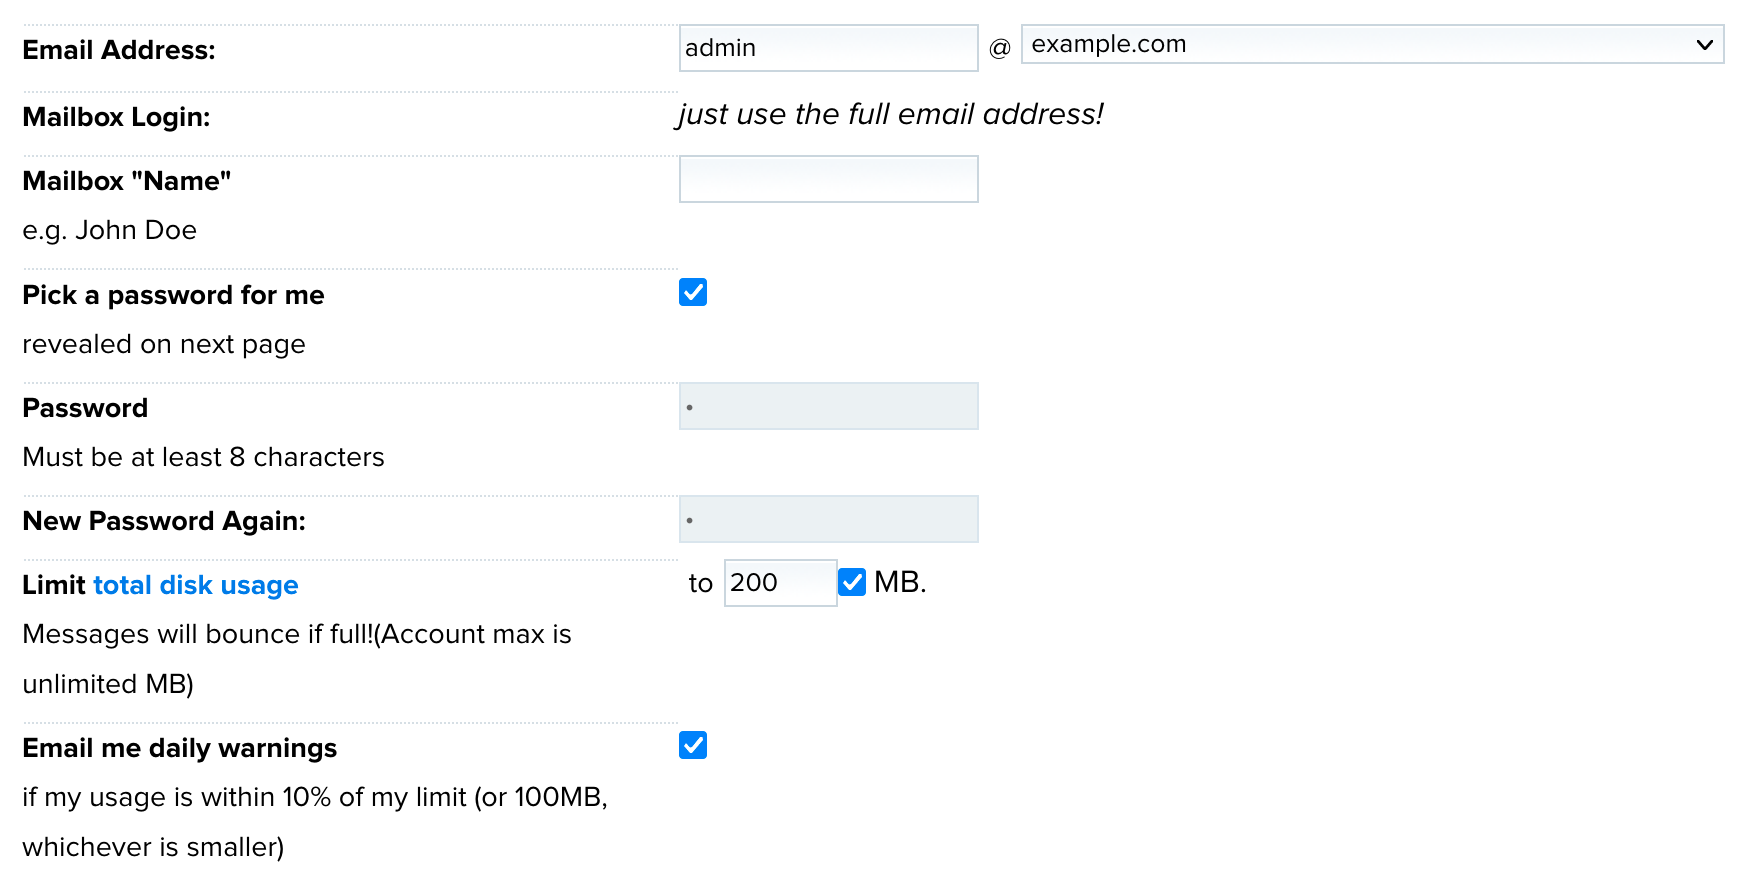
Email Address To the left of the “@” symbol, enter your desired alias. To the right of the “@” symbol, select the domain or subdomain the user will be created under. Malibox Login
Like it says, "just use the full email address!" Mailbox "Name" The name that will appear on the panel's Manage Email page for this mailbox. Pick a new password for me / Password Check the box if you want the system to generate a password for you. If you do not want the system to pick the password, you can set your own personalized password here.
The custom password must be 8 characters long and cannot contain the username of the user it’s being set for. For example, the [email protected] email user cannot have ‘user’ in the password as it will post the following error when attempting to set the password:
“Bad Password: password contains username”
If you uncheck the box for 'MB', it will set the user’s mailbox size to unlimited. Unlimited mailboxes will show on the Manage Email page for the user as '10 MB / N/A MB (N/A%)' under the Mailbox column.
Inbox archiver settings
DreamHost purges all spam and trash email messages after 15 days. Please make sure you check your spam and trash messages within this time frame.
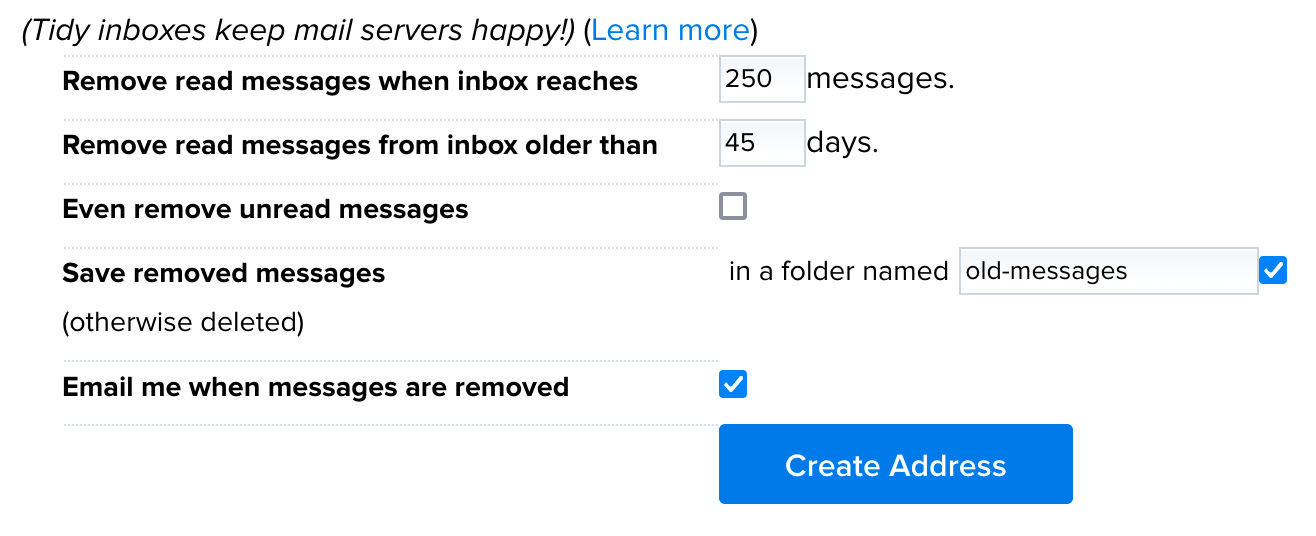
The Tidy inboxes keep mail servers happy! in the Fully Hosted Email section contains the Inbox Archiver settings for your user. The Inbox Archiver archives old messages from your Inbox into another folder so that your Inbox doesn’t become too full, which can result in login issues with your user.
Remove read messages when inbox reaches The messages you have read will be removed from the inbox when the total number of emails in the inbox reaches this number. Older emails are moved first.The number you set must be between 1 and 2000.
The value entered must be between 1 and 9999.
Even remove unread messages If you check this box, messages that were not yet read are removed from the Inbox as well. Save removed messages
You can set the folder name you want the messages to be archived to. By default, this field is populated with ‘old-messages’, so all messages that the Inbox Archiver archives will move the messages to this folder as long as you have the checkbox marked.
It is vital that you have the checkbox marked for this setting if you wish to keep the old messages stored. If you do not have the checkbox marked, the messages caught by the Inbox Archiver will be deleted instead.
Saving your changes
Once you’ve finished entering all of the details for a fully-hosted email user, you can simply click the Create Address button at the bottom of the page to save the new information.
If the user was set up properly, you should see the following message at the top of the Manage Email page. If you chose to have the panel create a password for you, it displays in the message:

If this is the first email user created for the domain, the MX record and the other mail records are set for the domain once the user has been created. This requires up to 6 hours for the DNS to resolve for each mail record. Because of this, the user will not be accessible until the DNS has updated.
Deleting an email address
To delete an email address in the panel:
- Navigate to the Manage Email page.
- Click the Delete button to the right of your email address.
- When prompted, select 'Ok' to confirm the deletion request.
How long does it take a new email address to function?
By default, your domain is not set up with MX (mail hosting) records with DreamHost when the domain is set to be hosted. The MX records and all other mail hosting records are applied to the domain once the first email address is created.
After you’ve created your email address (and if this is the first email address created under the domain) the domain will need some time for the mail record DNS to propagate, which can take up to 6 hours for each record.
If your domain is already configured with the records for mail hosting, the newly created user should be fully active within 15 minutes of it being created.
Sending and receiving email using your new email address
The following records are configured when the first user is created:
- _domainkey (dkim)
- _autodiscover (srv)
- mail. (A)
- mail. (MX)
- mail. (MX)
- mailboxes. (A)
- www.mailboxes. (A)
- webmail. (A)
- www.webmail. (A)
There are two MX records for the domain’s mail hosting along with the records for the subdomains for Mailboxes and Webmail. Each record can resolve at different times, so one service may be active while another has yet to update.
During this time, messages sent to your user will be rejected with a bounce notification containing the following error:
Until the DNS resolves, the messages sent to your user will continue to be rejected. However, your user should be able to send messages even when the DNS has yet to resolve. This often causes confusion as to why a user can send, but cannot receive emails. Give it a bit more time for the DNS to resolve before the new user can receive incoming mail.
To send and receive emails, DreamHost offers the Webmail interface by default. This can be accessed once the DNS resolves for the webmail record. You can access the Webmail interface with the following URL: https://webmail.dreamhost.com.
Internet standards email addresses
Internet standards specify that you create the following specific email addresses, which every domain should have and use for the following purposes:
Address Purpose postmaster@example.com contact for any email issues, should exist for any domain that has email service webmaster@example.com contact for any website issues, should exist for any domain that has a website or http service hostmaster@example.com contact for any DNS issues, should exist for all domains since they all use DNS for everything abuse@example.com contact for any "inappropriate public behavior"See also
Recommend
About Joyk
Aggregate valuable and interesting links.
Joyk means Joy of geeK