
3

ELKStack实战二——Elasticsearch配置及管理
source link: https://chegva.com/1790.html
Go to the source link to view the article. You can view the picture content, updated content and better typesetting reading experience. If the link is broken, please click the button below to view the snapshot at that time.

ELKStack实战二——Elasticsearch配置及管理
1. Elasticsearch配置
1.1 编辑ES配置文件
    [root@linux-node1 ~]# grep -v "#" /etc/elasticsearch/elasticsearch.yml
    cluster.name: myes              #集群名称
    node.name: linux-node1          #节点名称
    path.data: /data/es-data        #数据目录
    path.logs: /var/log/elasticsearch   #日志目录
    bootstrap.mlockall: true    #允许es进程锁定内存不进交换分区,提高效率
    network.host: 192.168.56.11 #网络配置
    http.port: 9200             #端口设置

    如果要配置优化更多参数,请编译安装,yum安装只有基本配置信息
1.2 启动ES
    [root@linux-node1 ~]# mkdir -p /data/es-data     #创建数据目录
    [root@linux-node1 ~]# chown -R elasticsearch.elasticsearch /data/es-data/   #设置目录用户权限,否则启动会报错
    [root@linux-node1 ~]# systemctl start elasticsearch

    #若启动报这个错误,是license的原因
    java.lang.IllegalStateException: marvel plugin requires the license plugin to be installed
    [2017-03-22 19:21:11,382][ERROR][license.plugin.core      ] [linux-node1]
    # License will expire on [Friday, April 21, 2017]. If you have a new license, please update it.

    #安装license,即可解决
    [root@linux-node1 ~]# /usr/share/elasticsearch/bin/plugin install license
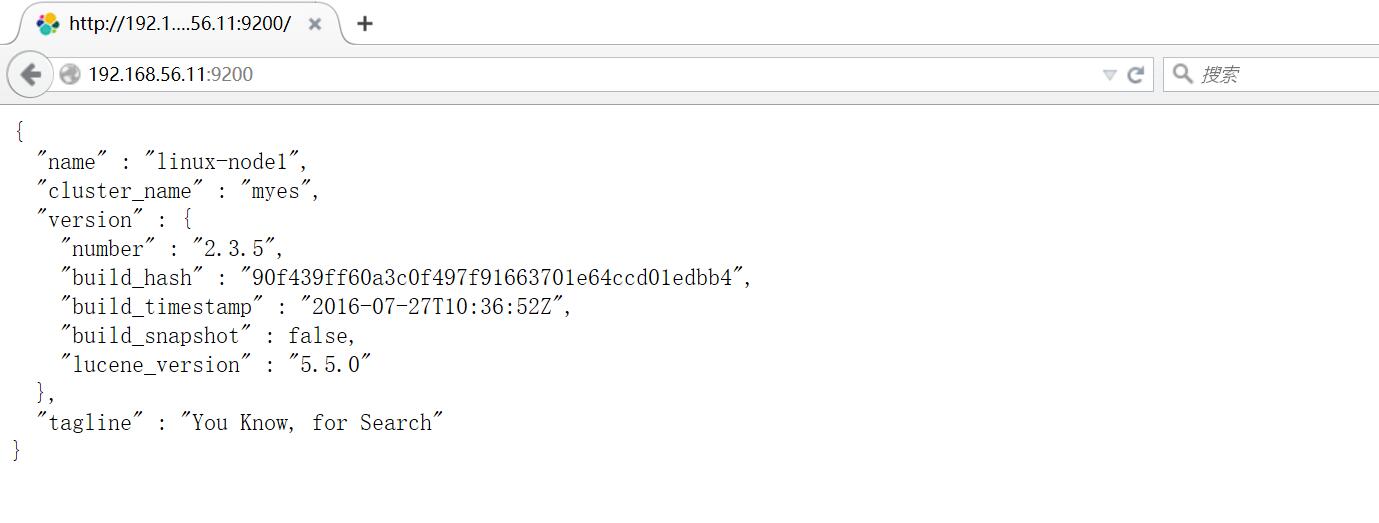
1.3 访问ES
打开网页访问es,显示如下,部署成功!
{
  "name" : "linux-node1",   #集群、节点信息
  "cluster_name" : "myes",
  "version" : {             #版本信息,基于lucene的搜索引擎
    "number" : "2.3.5",
    "build_hash" : "90f439ff60a3c0f497f91663701e64ccd01edbb4",
    "build_timestamp" : "2016-07-27T10:36:52Z",
    "build_snapshot" : false,
    "lucene_version" : "5.5.0"
  },
  "tagline" : "You Know, for Search"
2. Elasticsearch管理
2.1 通过curl联系es
[root@linux-node1 ~]# curl -i -XGET 'http://192.168.56.11:9200/_count?'
HTTP/1.1 200 OK
Content-Type: application/json; charset=UTF-8
Content-Length: 59
#返回结果
{"count":0,"_shards":{"total":0,"successful":0,"failed":0}}
2.2 通过插件访问
#监控ES插件,收费,不给钱可以使用一些功能
[root@linux-node1 ~]# /usr/share/elasticsearch/bin/plugin install marvel-agent
#head插件主要用于ES管理
[root@linux-node1 ~]# /usr/share/elasticsearch/bin/plugin install mobz/elasticsearch-head
#bigdesk主要用于ES性能监控
[root@linux-node1 ~]# /usr/share/elasticsearch/bin/plugin install lukas-vlcek/bigdesk
#内容功能很强大的一个插件,生产常用
[root@linux-node1 ~]# /usr/share/elasticsearch/bin/plugin install lmenezes/elasticsearch-kopf
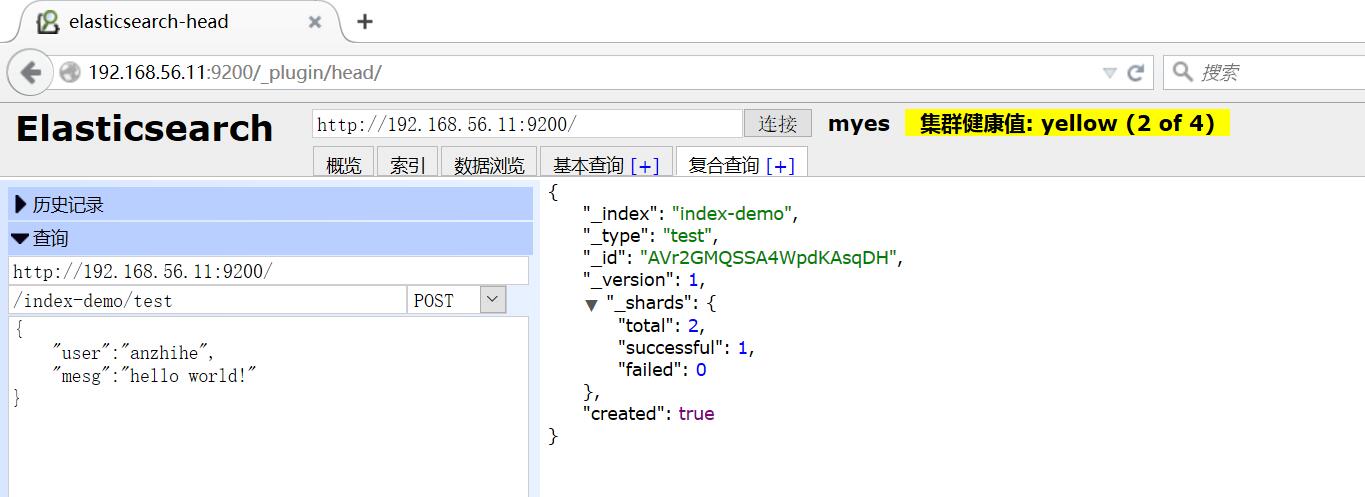
打开浏览器,使用head插件管理ES
#新建查询,基于json模式,默认会分成5片
/index-demo/test
{"user":"anzhihe","
mesg":"hello world"}
使用kopf插件管理ES

插件管理命令:/usr/share/elasticsearch/bin/plugin install/list/remove
安志合个人博客,版权所有 丨 如未注明,均为原创 丨 转载请注明转自:https://chegva.com/1790.html | ☆★★每天进步一点点,加油!★★☆ |
Recommend
About Joyk
Aggregate valuable and interesting links.
Joyk means Joy of geeK