
2

用openssh的tunnel建立vpn
source link: https://bajie.dev/posts/20240115-ssh_tun_vpn/
Go to the source link to view the article. You can view the picture content, updated content and better typesetting reading experience. If the link is broken, please click the button below to view the snapshot at that time.

用openssh的tunnel建立vpn
2024-01-15
2 分钟阅读
openssh是支持隧道的,所以很简单就可以在ssh中再套个管道,直接用来vpn,场景如下:
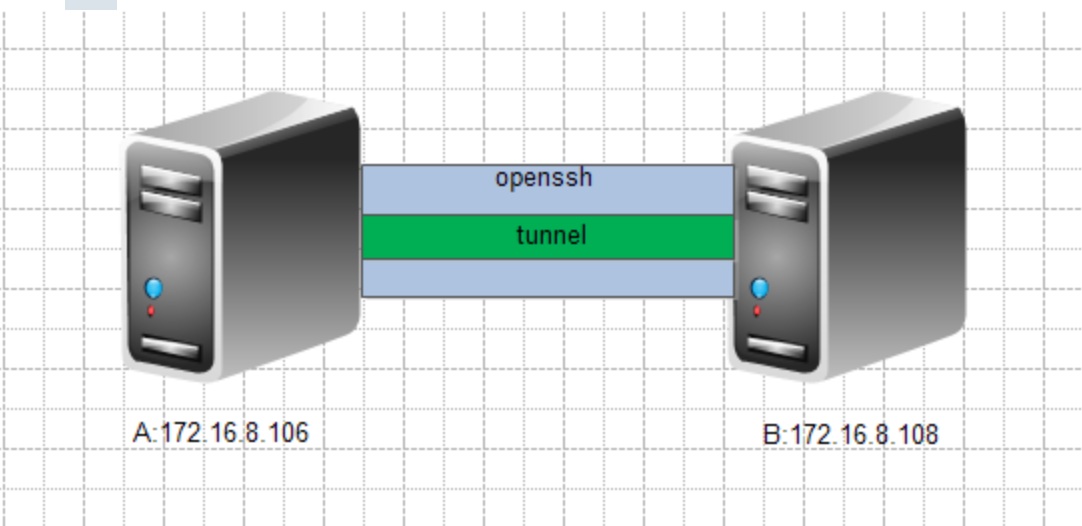
如上图,A机能ssh无密码登录B机
A机的IP:172.16.8.106
B机的IP:172.16.8.108
A机拨通vpn tunnel后tun的ip:192.168.244.2
B机拨通vpn tunnel后tun的ip:192.168.244.1
- 首先编辑A和B的/etc/ssh/sshd_config,允许tunnel,缺省是不允许的,然后service sshd restart ,重启sshd
...
PermitTunnel yes
...
- A和B安装linux下的tunctl软件,并启动一个tunnel设备
yum install tunctl
tunctl -t tun5 -u root
- 在A(172.16.8.106)机器上生成key,并设置能无密码证书直接登录B(172.16.8.108)
ssh-keygen
ssh-copy-id [email protected]
- 在A上执行命令,建立ssh tunnel:
ssh -w 5:5 [email protected]
- 在A上执行
ifconfig tun5 192.168.244.2 pointopoint 192.168.244.1 netmask 255.255.255.0
- 在B上执行
ifconfig tun5 192.168.244.1 pointopoint 192.168.244.2 netmask 255.255.255.0
- 这样分别在A和B上ping 192.168.244.1和192.168.244.2,都能通就表示已经ok了。
优化一下,A和B两边都先把tun5起来以后,直接在A上一句话搞定,这个不会自动退出,所以得ctrl+z,然后bg放后台去:
ssh \
  -o PermitLocalCommand=yes \
  -o LocalCommand="ifconfig tun5 192.168.244.2 pointopoint 192.168.244.1 netmask 255.255.255.0" \
  -o ServerAliveInterval=60 \
  -w 5:5 [email protected] \
  'ifconfig tun5 192.168.244.1 pointopoint 192.168.244.2 netmask 255.255.255.0; echo tun5 ready'
如果要用在翻墙的环境,那就得保持长链接了。假设A机器是在一个防火墙后,且被NAT了,那么就得先这样打通隧道:
ssh -f -w5:5 [email protected] \
        -o ServerAliveInterval=30 \
        -o ServerAliveCountMax=5 \
        -o TCPKeepAlive=yes \
        -i ~/.ssh/id_rsa "sleep 1000000000"
然后在A和B上分别单独配置ip即可。
再进阶:假设A要建立独立的netns空间,加ip及网关如下:
ip net add ns-vpn
ip net exec ip addr add  100.64.42.2/24 dev tun42
ip net exec ip link set up dev tun42
ip net exec ip route add default via 100.64.42.1
再在B的/etc/sysctl.conf打开转发
net.ipv4.ip_forward = 1
sysctl -p
iptables -t nat -A POSTROUTING -s 192.168.244.0/24 -j SNAT --to 172.16.8.108
A就可以通过B代理出去了。
Recommend
About Joyk
Aggregate valuable and interesting links.
Joyk means Joy of geeK