

How to Install Netdata Monitoring Software on AlmaLinux 9
source link: https://www.howtoforge.com/how-to-install-netdata-on-almalinux-9/
Go to the source link to view the article. You can view the picture content, updated content and better typesetting reading experience. If the link is broken, please click the button below to view the snapshot at that time.

How to Install Netdata Monitoring Software on AlmaLinux 9
Collect system metrics and monitor your applications with Netdata. Netdata is an open-source, extensible, and real-time monitoring system for servers, containers, and applications.
Netdata can collect metrics from various operating systems, such as Linux, Unix, Windows, and macOS. Also, it supports containerized technology such as Docker and Kubernetes.
Follow our guide to install Netdata with Nginx as a reverse proxy on the AlmaLinux 9 server.
Prerequisites
To get started, ensure you have the following:
- An AlmaLinux 9 server.
- A non-root user with administrator privileges.
- A SELinux with mode permissive.
Setting up Repositories
Before starting the installation, you will add and enable some repositories for Netdata. You will add the EPEL and Netdata repositories, then enable the RHEL crb (Code Ready Build) repository on your AlmaLinux server.
To start, run the following command to install the dnf-plugins-core package.
sudo dnf install dnf-plugins-core -y
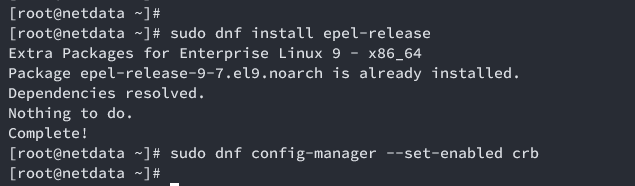
Now, run the below command to add the EPEL repository and enable the CRB repository on your system. Input y when prompted to proceed.
sudo dnf install epel-release
sudo dnf config-manager --set-enabled crb
Next, run the below command to add the Netdata repository to your system. In this case, you will be using the Netdata 2.2 repository.
sudo rpm -ivh https://repo.netdata.cloud/repos/stable/el/9/x86_64/netdata-repo-2-2.noarch.rpm
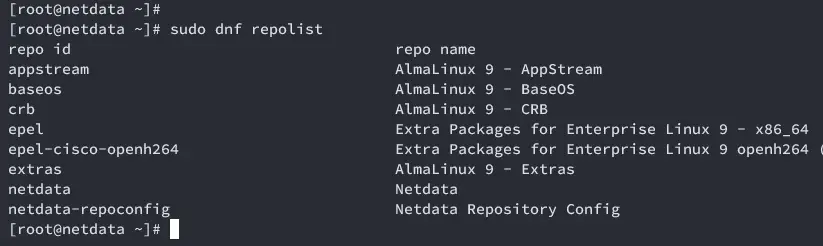
Once you've finished, check available repositories on your AlmaLinux machine using the below command.
sudo dnf repolist
The output you should receive is like this:
Downloading and Installing Netdata
Now that you've configured repositories, let's start installing Netdata.
In this example, you will install Netdata with additional plugins for monitoring your system and applications.
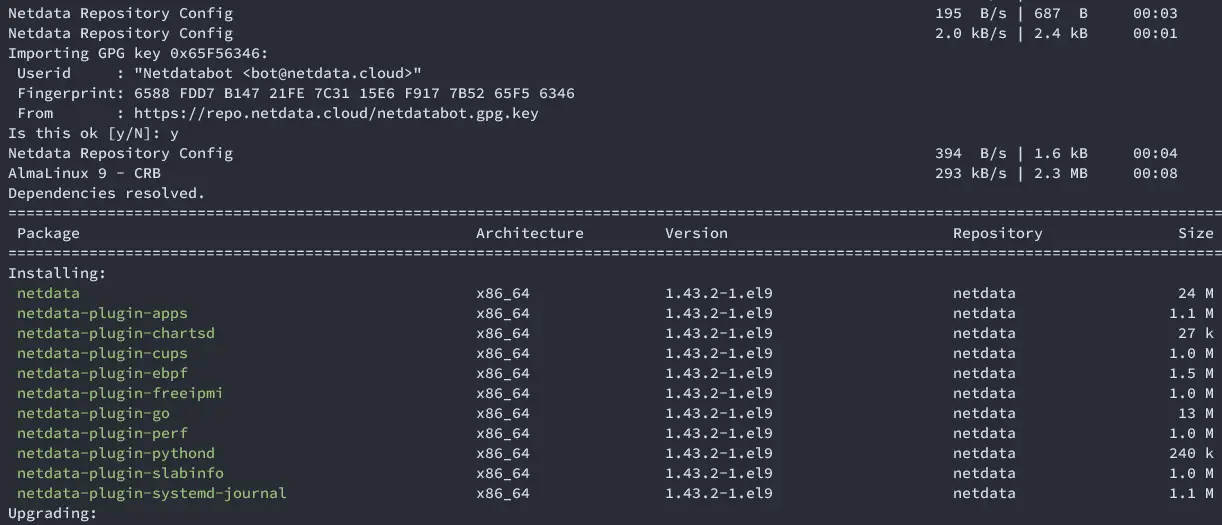
Execute the following dnf command to install Netdata. Input y to accept the GPG key and proceed with the installation, then wait until it is finished.
You may not need all of those Netdata plugins, be sure to adjust your package installation.
sudo dnf install netdata netdata-plugin-{apps,chartsd,cups,ebpf,go,pythond,perf,freeipmi,slabinfo,systemd-journal}
Now after you've installed Netdata, run the following command to start and enable the netdata service.
sudo systemctl start netdata
sudo systemctl enable netdata
Then, verify the netdata service by executing the command below.
sudo systemctl status netdata
If your installation is successful, the netdata service should be active (running) like the following:
Lastly, open the default Netdata port 19999 via the following command.
In this example, you will add port 19999 temporarily because you will set up Nginx as a reverse proxy. We'll do it in the next section.
sudo firewall-cmd --add-port=19999/tcp
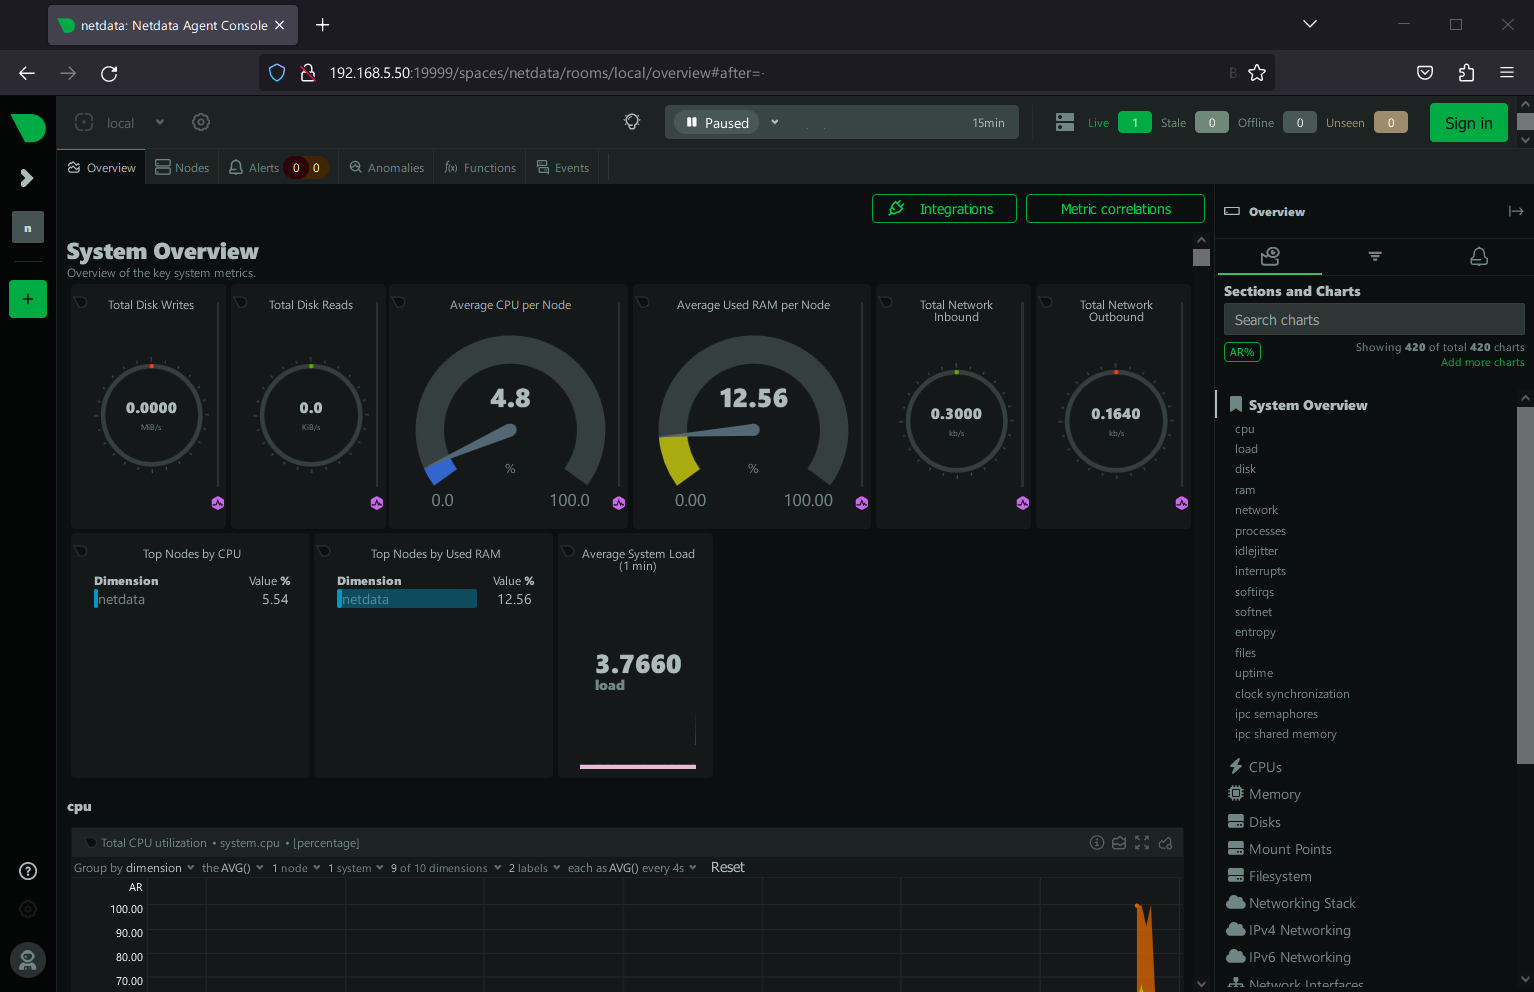
Visit your server IP address followed by port 19999 (i.e: http://192.168.5.50:19999) using your preferred web browser.
If everything goes well, you should see the Netdata dashboard like the following.
Configuring Netdata
After installing Netdata, you will configure Netdata to run in the UNIX sock file. This enables you to set up Nginx as a reverse proxy for Netdata, which you will do in the next step.
To start Netdata configuration, run the following command to download Netdata configuration to /etc/netdata/netdata.conf.
wget -O /etc/netdata/netdata.conf http://localhost:19999/netdata.conf
Move to the /etc/netdata directory and open the default configuration netdata.conf using the command below.
cd /etc/netdata
sudo ./edit-config netdata.conf
Find the [web] section and uncomment bind to option. Then, change the default bind option to UNIX socket unix:/var/run/netdata/netdata.sock.
[web]
    bind to = unix:/var/run/netdata/netdata.sock
Save and close the file when you're done.
Next, restart Netdata to apply your changes by executing the command below.
sudo systemctl restart netdata
At this point, Netdata should be running as a UNIX socket at unix:/var/run/netdata/netdata.sock.
Verify the Netdata UNIX socket using the ss command below.
ss -pl | grep netdata.sock
If your configuration is successful, you should get the following:
Installing Nginx as a Reverse Proxy
At this point, you've installed Netdata on AlmaLinux 9 server. In the next step, you will install and configure Nginx as a reverse proxy for Netdata.
Also, you may need a domain name for this, you can use a sub-domain or local domain name.
Installing Nginx
To start, install Nginx using the following dnf command. Type y to proceed with the installation.
sudo dnf install nginx
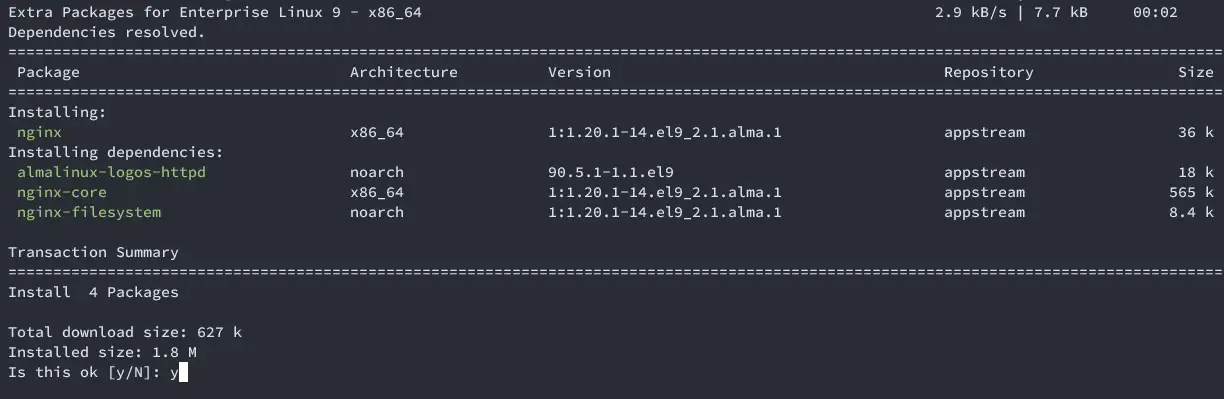
After you've installed Nginx, execute the following command to create a server block directory /etc/nginx/server-blocks and open the Nginx configuration /etc/nginx/nginx.conf.
mkdir -p /etc/nginx/server-blocks
sudo nano /etc/nginx/nginx.conf
Within the http {...} section, add the include... option below.
http {

...
    include /etc/nginx/server-blocks/*.conf;
}
Save and close the file when you're finished.
Adding Server Block Configuration
Next, create a new Nginx server block for Netdata reverse proxy /etc/nginx/server-blocks/netdata.conf using the following nano editor command.
sudo nano /etc/nginx/server-blocks/netdata.conf
Insert the following configuration and be sure to input your domain name within the server_name parameter. In this case, we'll be using the domain netdata.hwdomain.io.
Also, you will secure Netdata via the auth_basic module with the file /etc/nginx/.passwords.
upstream backend {
    # the Netdata server
    server unix:/var/run/netdata/netdata.sock;
    keepalive 1024;
}

server {
    # nginx listens to this
    listen 80;

# the virtual host name of this
    server_name netdata.hwdomain.io;

auth_basic "Protected";
    auth_basic_user_file /etc/nginx/.passwords;

location / {
        proxy_set_header X-Forwarded-Host $host;
        proxy_set_header X-Forwarded-Server $host;
        proxy_set_header X-Forwarded-For $proxy_add_x_forwarded_for;
        proxy_pass http://backend;
        proxy_http_version 1.1;
        proxy_pass_request_headers on;
        proxy_set_header Connection "keep-alive";
        proxy_store off;
    }
}
When finished, save the file and exit the editor.
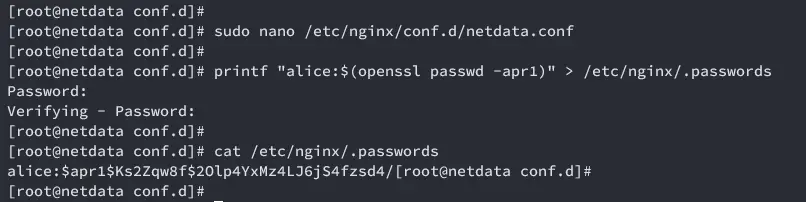
Now run the command below to generate the password file /etc/nginx/.passwords.
Be sure to change the user alice with your username. Then, input your password and repeat.
printf "alice:$(openssl passwd -apr1)" > /etc/nginx/.passwords
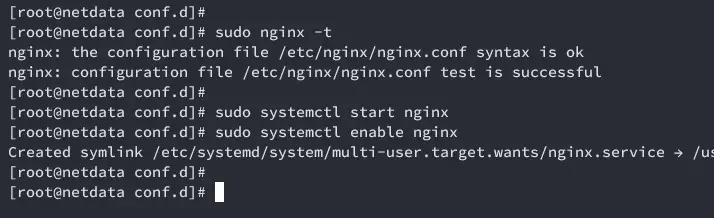
Now run the below command to verify your Nginx syntax. If no error, you should get the output 'syntax is ok - test is successful'.
sudo nginx -t
Then, start and enable Nginx using the following command.
sudo systemctl start nginx
sudo systemctl enable nginx
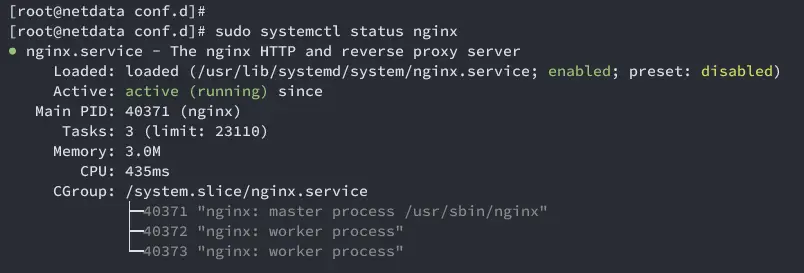
Once Nginx is started, verify it by executing the command below.
sudo systemctl status nginx
If everything goes well, you should receive the output active (running), which confirms that Nginx is running.
Open HTTP and HTTPS Ports
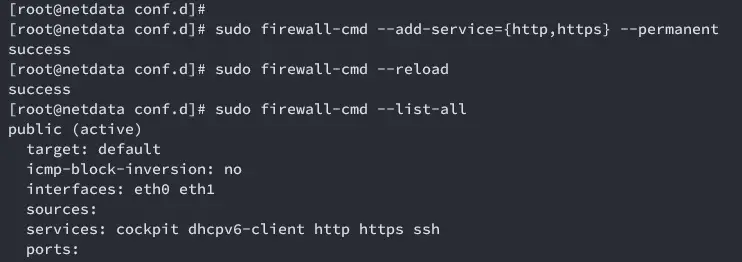
Open the HTTP and HTTPS ports on your AlmaLinux server to allow access to your Netdata installation. Execute the following command to do it.
sudo firewall-cmd --add-service={http,https} --permanent
sudo firewall-cmd --reload
Now verify firewalld rules using the following command.
sudo firewall-cmd --list-all
Be sure that you have both HTTP and HTTPS services available on the firewalld list services. If not, repeat the command before.
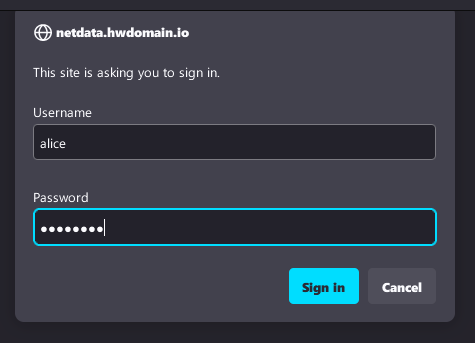
Lastly, visit your Netdata domain name such as http://netdata.hwdomain.io using your preferred web browser.
Input your user and password when prompted for Nginx basic authentication.
If your Nginx installation is successful, you should see the Netdata monitoring dashboard like the following:
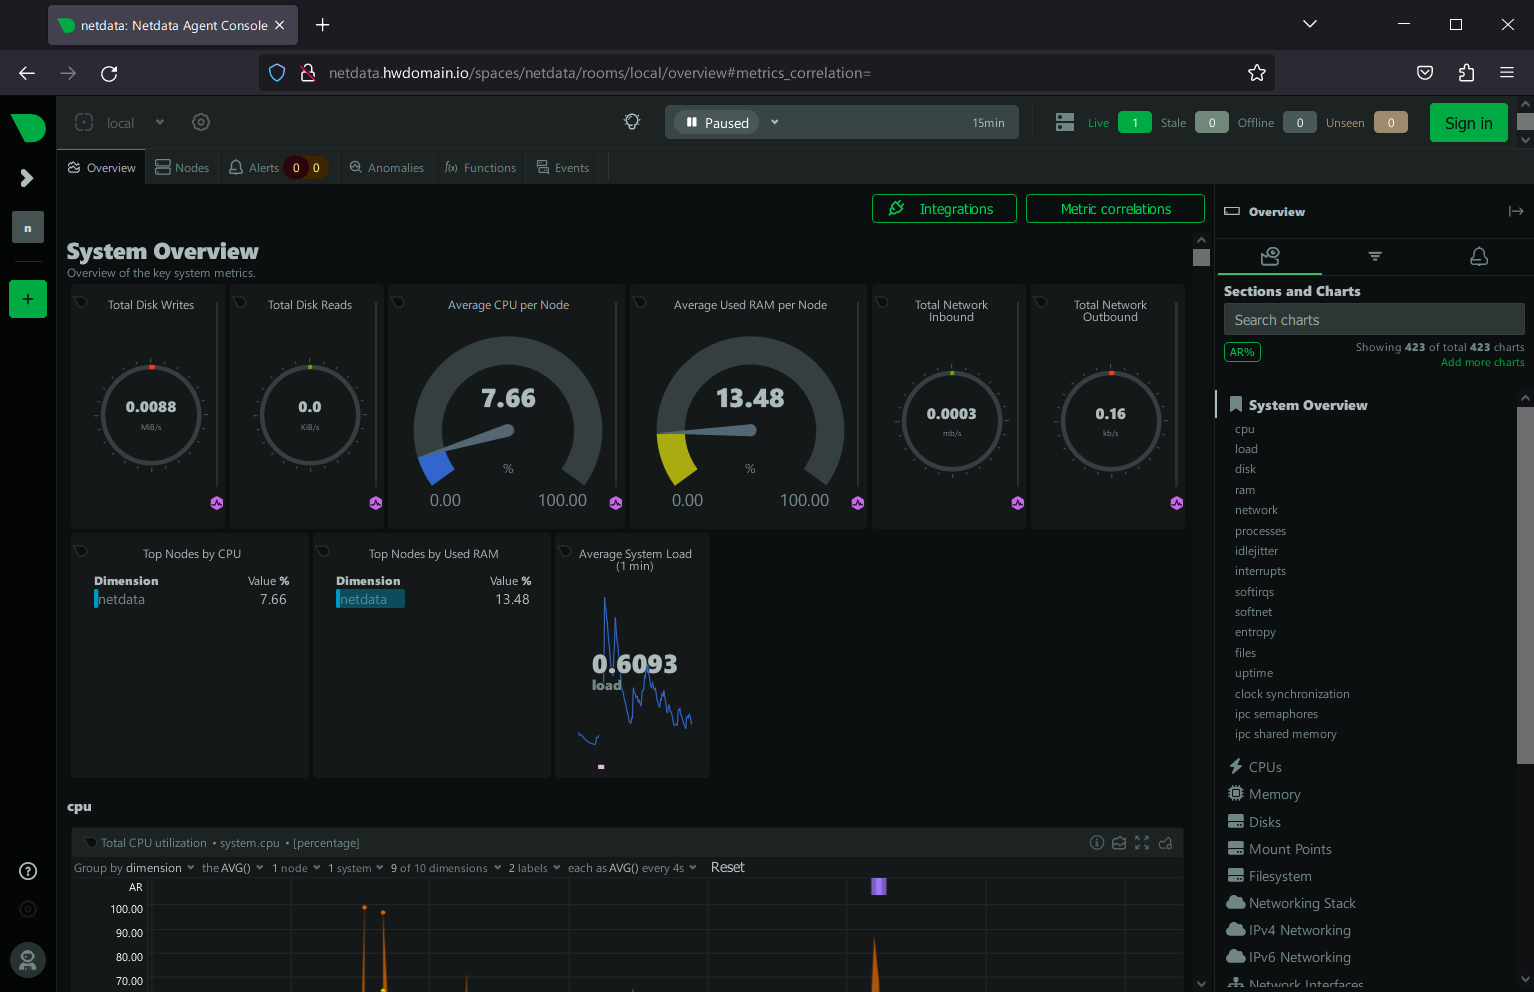
Securing Netdata with SSL/TLS Certificates
After configuring Nginx, you will generate SSL/TLS certificates to secure your installation.
If you're using a local domain name, you can generate Self-Signed certificates. But if using the real domain name, generate SSL/TLS certificates using the following steps:
Run the following command to install the Certbot and Certbot Nginx plugin to your system. Input y to proceed with the installation.
sudo dnf install certbot python3-certbot-nginx -y
Now run the certbot command below to generate SSL/TLS certificates from Letsencrypt. Be sure to modify the domain name and email address before running this command.
sudo certbot --nginx --agree-tos --redirect --hsts --staple-ocsp --email [email protected] -d netdata.hwdomain.io
Once the process is finished, your Netdata should be secured with HTTPS. You've generated SSl/TLS certificates from Letsencrypt and implemented HTTPS on your Nginx server block via the Certbot Nginx plugin.
Example: Monitoring Nginx with Netdata
If you've followed so far, you've finished your Netdata installation with Nginx as a reverse proxy and configured HTTPS. Now you will learn the basic monitoring with Netdata.
In this case, you will set up monitoring the Nginx web server via Netdata, so you can have the bigger picture of how to monitor other services and applications.
Enable Nginx stub_status
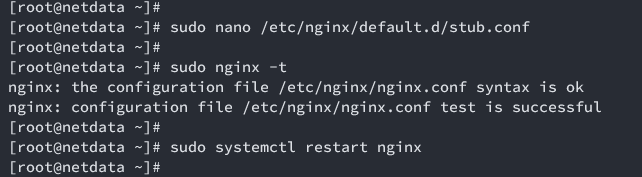
Create a new configuration /etc/nginx/default.d/stub.conf using the following nano editor command.
sudo nano /etc/nginx/default.d/stub.conf
Insert the following configuration to enable the Nginx stub_status module. This will expose the Nginx stub_status under the URL /basic_status.
location /basic_status {
    stub_status;
    server_tokens on;
}
Save and close the file when you're done.
Next, run the following command to verify the Nginx syntax. Then, restart Nginx to take effect of your changes.
sudo nginx -t
sudo systemctl restart nginx
Now run the curl command below to verify the Nginx stub_status module.
curl http://localhost/basic_status
If your configuration is successful, you should see status from your Nginx web server.
Enable Netdata Plugin for Monitoring Nginx
Go to the /etc/netdata directory and open the plugin configuration for monitoring Nginx. The Netdata plugin for monitoring Nginx is part of Go plugins, visit Netdata list plugins to get more info.
cd /etc/netdata
sudo ./edit-config go.d/nginx.conf
Ensure the configuration url: http://127.0.0.1/stub_status is available, or you can create it manually. This will tell Netdata to monitor Nginx via URL: http://127.0.0.1/stub_status.
jobs:
  - name: local
    url: http://127.0.0.1/stub_status
Save and close the file when you're finished.
Next, run the following command to restart Netdata and apply your changes.
sudo systemctl restart netdata
Now you can test or stress test your Nginx web server using the following command. The ab or Apache Benchmark is part of httpd-tools, be sure to install it on your machine.
ab -n 50000 -c 500 http://localhost/
Back to the Netdata data dashboard and click on the Nginx menu on the left. If your configuration is successful, you should see details of Nginx monitoring like the following.
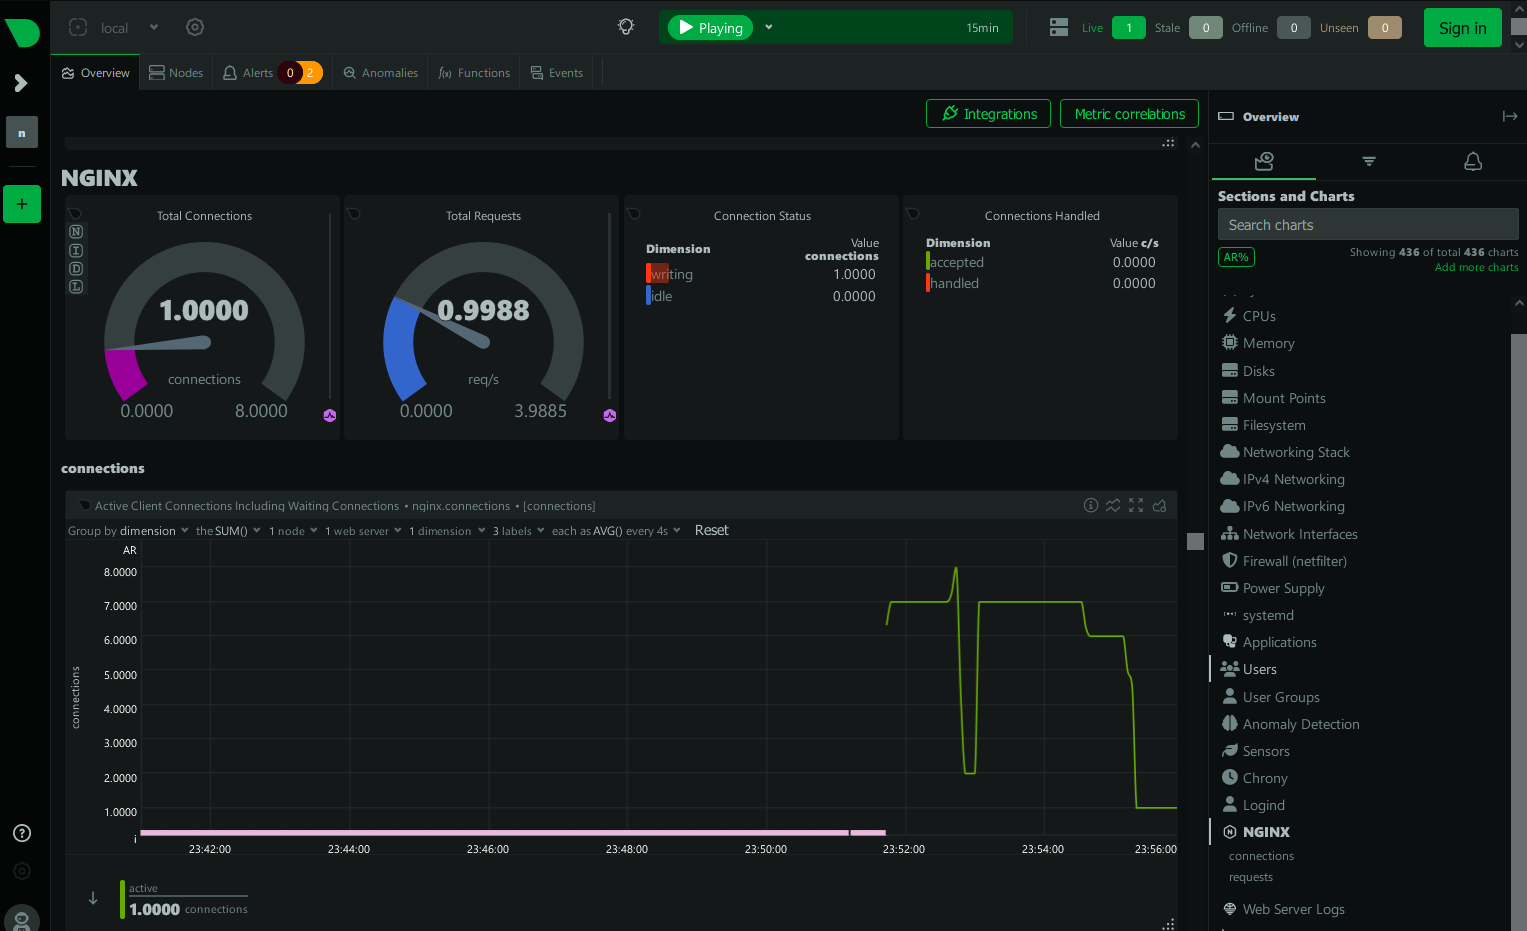
Conclusion
To wrap up, you've completed the installation of the Netdata monitoring solution on the AlmaLinux 9 server. You've installed Netdata with Nginx as a reverse proxy and secured Netdata with SSL/TLS certificates.
Furthermore, you've also learned the basic usage of the Netdata plugin for monitoring your applications.
From here, check the list available Netdata to monitor your applications.
Recommend
About Joyk
Aggregate valuable and interesting links.
Joyk means Joy of geeK