

Cloudflare设置回源端口
source link: https://itlanyan.com/cloudflare-set-origin-port/
Go to the source link to view the article. You can view the picture content, updated content and better typesetting reading experience. If the link is broken, please click the button below to view the snapshot at that time.

某个网站后端用的 NAT VPS,于是研究了一下Cloudflare设置回源端口。本文介绍不能使用标准80和443端口的情况下,通过设置Cloudflare实现任意回源端口访问。文章主要参考Cloudflare的官方博客:回源规则简介。
Cloudflare支持的端口
首先,除了常用的 80 和 443 两个标准端口,Cloudflare还支持11个其它端口。Cloudflare总共支持HTTP端口7个,HTTPS端口6个, 分别是:
HTTP协议
- 80
- 8080
HTTPS协议
- 443
- 8443
标红都是比较常见的HTTP(S)端口,其它的用的少,但是CF也支持。如果后端不方便用80或443,可以用其它支持的端口,但是访问时要加上端口号,例如: https://example.com:8443。
Cloudflare非标准端口自动重定向
非标准端口的情况下,不仅网址看起来丑,用户输入也麻烦。要想通过 https://example.com 这样的方式访问,有两种做法。
使用页面规则重定向
使用页面规则(Page Rules)可以实现网址自动重定向,在Cloudflare控制台上的操作如下图所示:
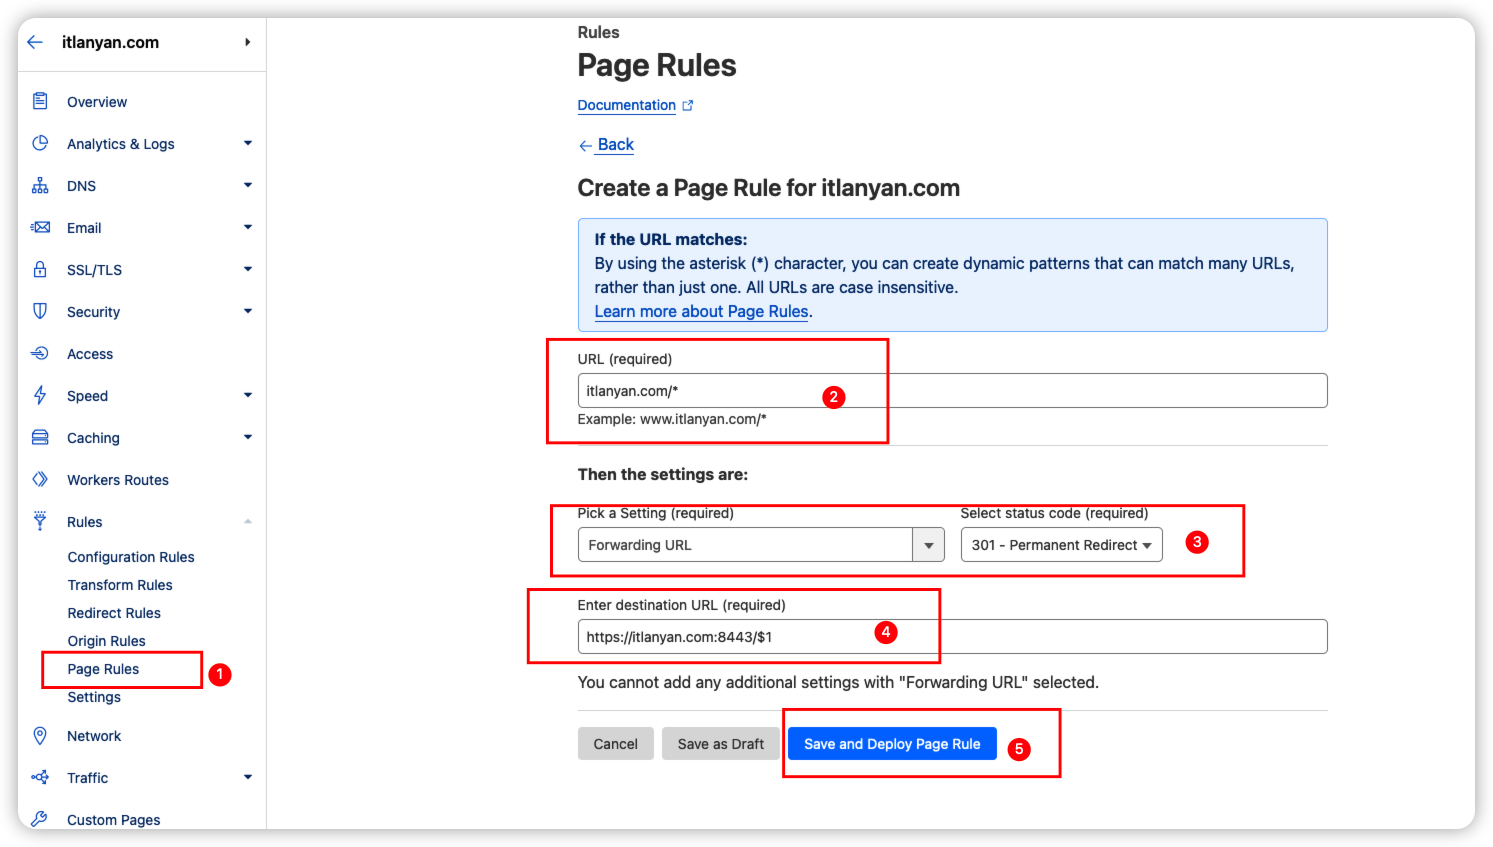
Cloudflare创建页面转发规则
免费站点可以创建三条页面规则,除了一股脑转发,也可以根据路径分别转发。
使用Cloudflare workers
第二种方法是利用功能强大的Cloudflare workers,但是需要写代码。一个简单的转发所有请求到新网址的worker代码示例:
export default {
  async fetch(request) {
    const base = "https://example.com:8443";
    const statusCode = 301;

    const url = new URL(request.url);
    const { pathname, search } = url;

    const destinationURL = `${base}${pathname}${search}`;
    return Response.redirect(destinationURL, statusCode);
  },
};
通过Cloudflare worker,实际上已经能实现我们所有的需求了,但是部署和调试更麻烦,适合高级玩家。Cloudflare worker另外一个缺点是免费账户每天请求限制10万次,当然对于个人用途也足够了。
Cloudflare设置任意回源端口
对于CDN来说,回源域名和端口与访问的不同,这是非常正常的需求。功能强大的Cloudflare当然也支持任意回源端口,这是回源源规则(Origin Rules)的工作,设置如下:
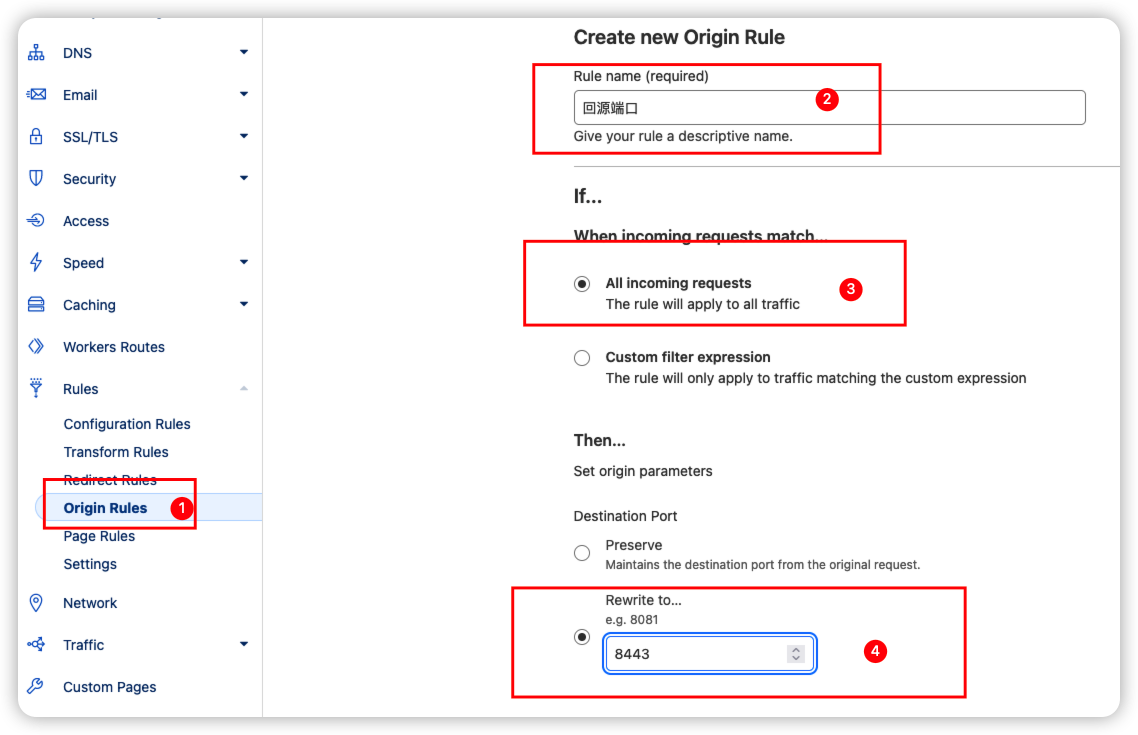
Cloudflare设置任意回源端口
通过回源规则,我们轻松的实现了不用写代码也能使用上后端服务器上的任意一个可用端口,这对于运行在NAT VPS上的服务非常有用。
Recommend
About Joyk
Aggregate valuable and interesting links.
Joyk means Joy of geeK