
Running NixOS on Proxmox
source link: https://mtlynch.io/notes/nixos-proxmox/
Go to the source link to view the article. You can view the picture content, updated content and better typesetting reading experience. If the link is broken, please click the button below to view the snapshot at that time.

Running NixOS on Proxmox
September 24, 2023
3-minute read
One of the stumbling blocks I ran into when trying out NixOS was that I couldn’t run it under Proxmox, my preferred virtual machine server.
Through some trial and error, I figured out how to install NixOS as a Proxmox container.
Download the NixOS container image 🔗︎
First, download the latest NixOS x86_x64 container image. For other hardware architectures, see this Github comment.
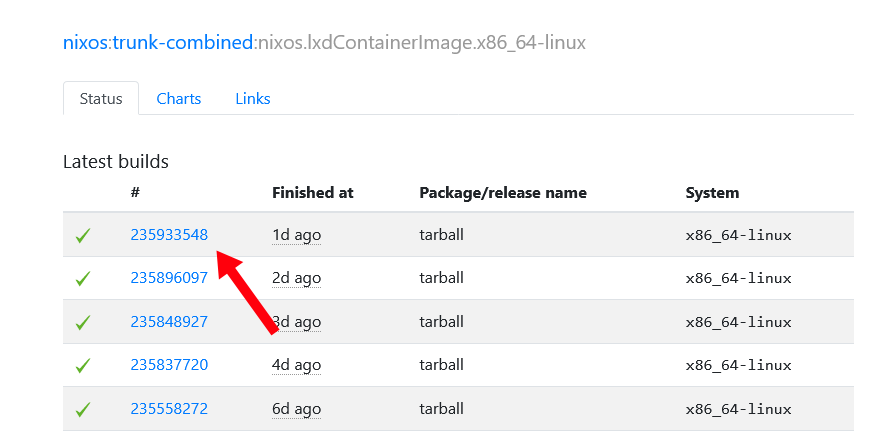
At the time of this writing, the latest NixOS container build is 235933548, but you can just click whatever is the latest build as you read this.
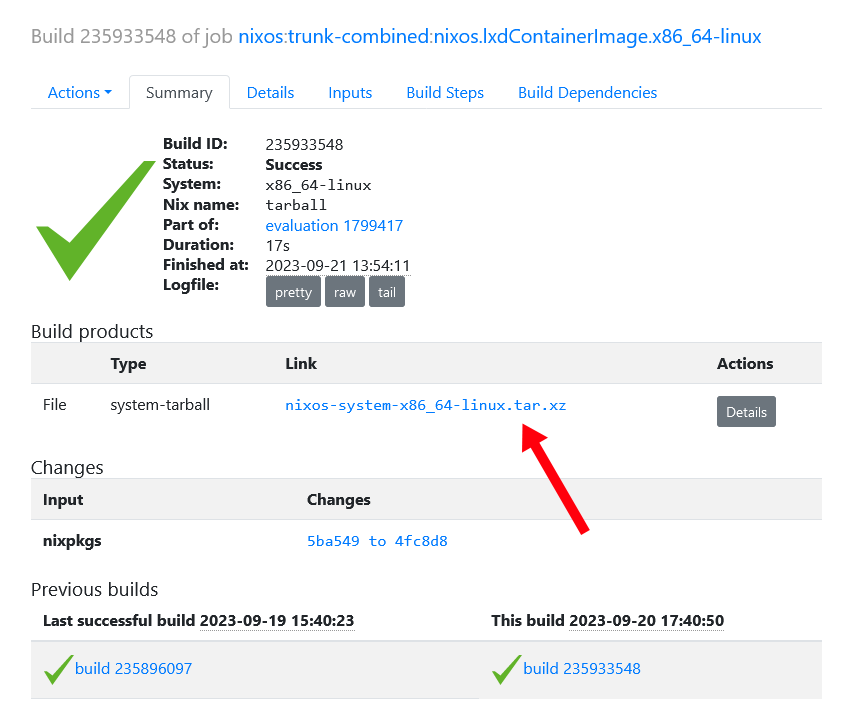
From the build result page, click the link labeled nixos-system-x86_64-linux.tar.xz to download the image:
Rename the NixOS container image (optional) 🔗︎
The NixOS container image download doesn’t include any version or date information. For organization, I renamed my image file to:
nixos-2023-09-21-lxdContainerImage.x86_64-linux.tar.xz
Renaming will help you identify which version of NixOS this is when you see it later in Proxmox, though this step is optional.
Upload the image to Proxmox 🔗︎
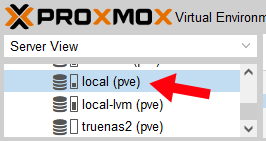
Now, it’s time to upload the image to Proxmox. Scroll down to one of your Proxmox storage nodes.
Click the storage node you’d like to use. The default is called local, but you may have others.
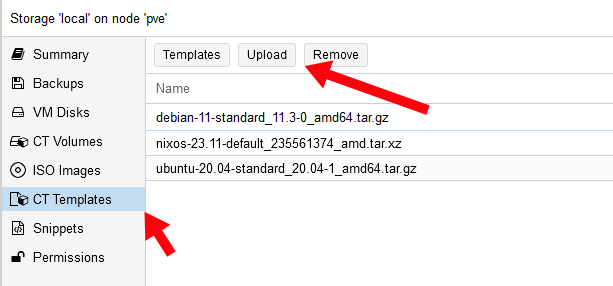
From the storage node, click “CT Templates,” and then click “Upload.”
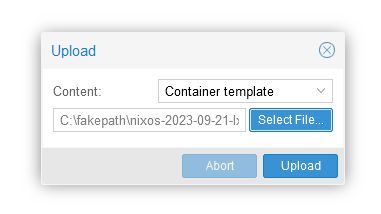
In the upload dialog, click “Select File…” and select the NixOS container image you downloaded above, and click “Upload.”
Create a NixOS container 🔗︎
Now that your Proxmox server has the NixOS image available, you can create your first NixOS container.
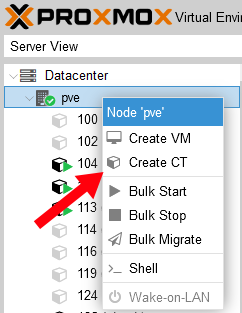
Scroll up to your Proxmox node, right click it, and select “Create CT”:
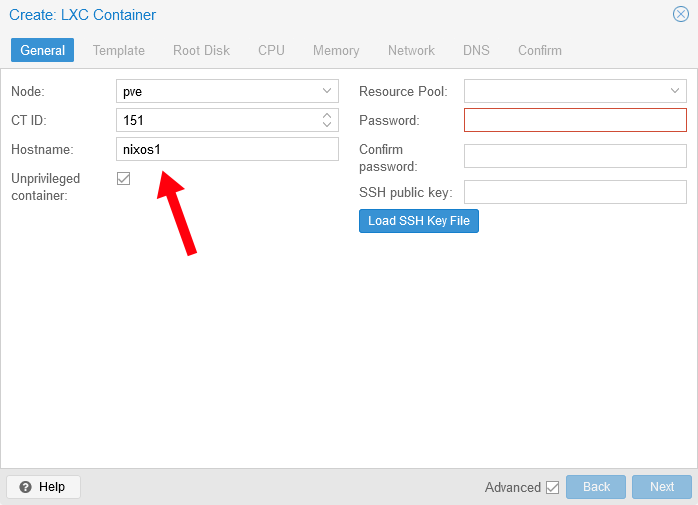
In the “Hostname” field, select any hostname you’d like, such as nixos1.
The Proxmox dialog requires you to fill out the password fields, but they have no effect in NixOS. Put in any value you want.
Ignore the SSH public key field, as it has no effect within NixOS.
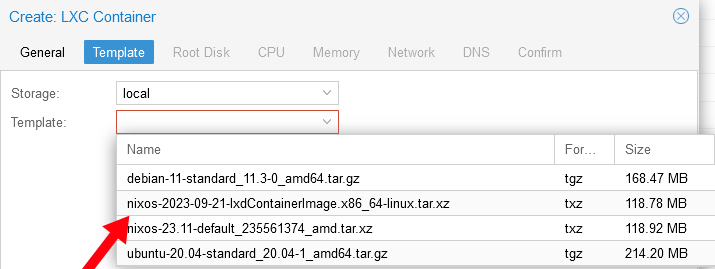
On the Template tab, choose the NixOS image you uploaded above:
Proceed through the container creation wizard normally, choosing your preferred values for disk, CPU, memory, and network.
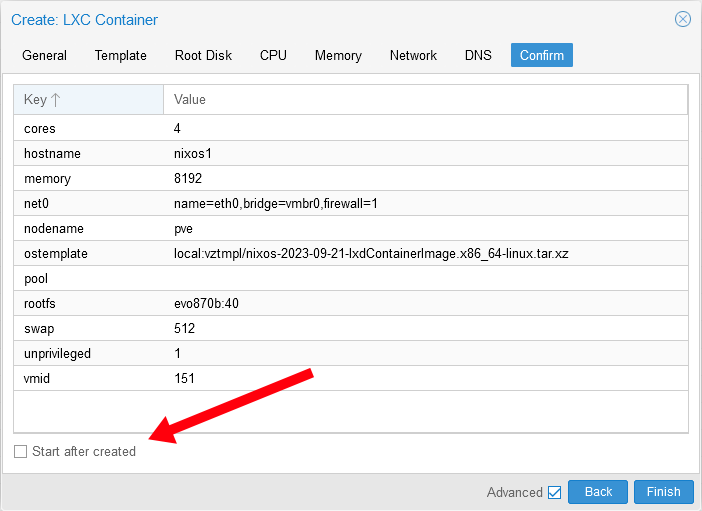
On the last page, leave “Start after created” unchecked and click “Finish.”
The output will contain these warnings, which are safe to ignore:
Architecture detection failed: open '/bin/sh' failed: No such file or directory

Falling back to amd64.
Use `pct set VMID --arch ARCH` to change.
unknown ID 'nixos' in /etc/os-release file, trying fallback detection
/etc/os-release file not found and autodetection failed, falling back to 'unmanaged'
Enable nesting 🔗︎
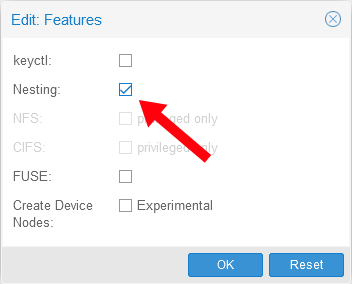
For NixOS to work properly under Proxmox, you need to enable the “Nesting” feature of the container.
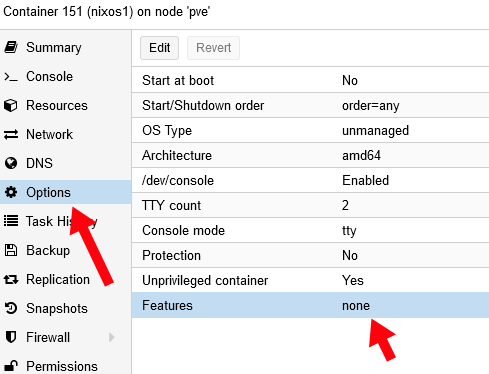
Navigate to the NixOS container you just created, then click the Options tab, and click “Features.”
Click the box next to “Nesting” and then hit “OK.”
Start NixOS 🔗︎
Your NixOS container is now configured!
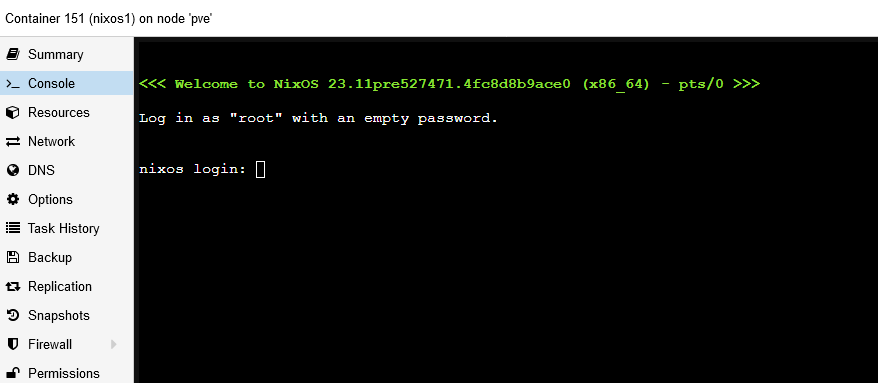
You can start your container normally. At the Console, you should see a standard NixOS prompt:
As the prompt says, you can log in with username root and no password.
Configure NixOS system 🔗︎
I’ve created a basic configuration for a NixOS server system as a Proxmox container. You can download this configuration by running the following command:
curl \
  --show-error \
  --fail \
  https://mtlynch.io/notes/nixos-proxmox/configuration.nix \
  | sudo tee /etc/nixos/configuration.nix
Apply the new configuration by running the following commands:
sudo nixos-rebuild boot && \
  echo "install complete, rebooting..." && \
  sudo poweroff --reboot
References 🔗︎
Recommend
About Joyk
Aggregate valuable and interesting links.
Joyk means Joy of geeK
