

How to Install Magento with Apache and Let's Encrypt SSL on Ubuntu 22.04
source link: https://www.howtoforge.com/how-to-install-magento-with-apache-and-lets-encrypt-sslon-ubuntu-22-04/
Go to the source link to view the article. You can view the picture content, updated content and better typesetting reading experience. If the link is broken, please click the button below to view the snapshot at that time.

How to Install Magento with Apache and Let's Encrypt SSL on Ubuntu 22.04
Magento is an open-source and one of the most popular eCommerce platforms that helps programmers create eCommerce websites. It is written in PHP, allowing you to create a flexible shopping cart system. It is fully customizable and will enable you to develop and launch a fully functional online store in minutes. Magento offers a free community and a commercial version, the community version is free and is designed for small businesses, while the commercial version is designed for medium to large companies.
This tutorial will show you how to install Magento on Ubuntu 22.04.
Prerequisites
- A server running Ubuntu 22.04.
- A valid domain name pointed with your server IP.
- A root password is configured on the server.
Install Apache, MySQL, and PHP
First, install the Apache webserver and MySQL database server using the following command:
apt install apache2 mysql-server -y
Magento supports only PHP versions 7.3 to 7.4. But, PHP version 7.4 is not included in the Ubuntu 22.04 default repository as it provides PHP 8.1 as the default version. So you will need to install PHP 7.4 from the PHP Ondrej repository.
First, install the required dependencies using the following command:
apt install software-properties-common -y
Next, add the PHP Ondrej repository using the following command:
add-apt-repository ppa:ondrej/php
Once the repository is added, update the repository and install PHP with other required dependencies using the following command:
apt update -y
apt install php7.4 libapache2-mod-php7.4 php7.4-common php7.4-gmp php7.4-curl php7.4-soap php7.4-bcmath php7.4-intl php7.4-mbstring php7.4-xmlrpc php7.4-mysql php7.4-gd php7.4-xml php7.4-cli php7.4-zip -y
Next, edit the PHP configuration file and change the default settings:
nano /etc/php/7.4/apache2/php.ini
Change the following values:
file_uploads = On
allow_url_fopen = On
short_open_tag = On
memory_limit = 512M
upload_max_filesize = 128M
max_execution_time = 3600
Save and close the file then restart the Apache service to apply the configuration changes:
systemctl restart apache2
Once you are finished, you can proceed to the next step.
Create a Database for Magento
Magento uses MySQL as a database backend so you will need to create a database and user for Magento.
First, log in to the MySQL shell with the following command:
mysql
Once you are connected to the MySQL, create a user and database for Magento using the following command:
mysql> CREATE DATABASE magento2;
mysql> CREATE USER 'magento2'@'localhost' IDENTIFIED BY 'password';
Next, grant all the privileges to the Magento2 database:
mysql> GRANT ALL PRIVILEGES ON magento2.* TO 'magento2'@'localhost';
Next, flush the privileges and exit from the MySQL with the following command:
mysql> FLUSH PRIVILEGES;
mysql> EXIT;
Install Composer
Composer is a dependency manager for PHP used to install the PHP dependencies required for your PHP project.
First, install the Curl command-line tool using the following command:
apt-get install curl -y
Next, install the Composer using the following command:
curl -sS https://getcomposer.org/installer -o composer-setup.php
php composer-setup.php --install-dir=/usr/local/bin --filename=composer
Once the Composer is installed, you will get the following output:
All settings correct for using Composer
Downloading...

Composer (version 2.3.5) successfully installed to: /usr/local/bin/composer
Use it: php /usr/local/bin/composer
You can check the Composer version using the following command:
composer --version
You will get the following output:
Composer version 2.3.5 2022-04-13 16:43:00
Download and Install Magento on Ubuntu 22.04
In this section, we will download the Magento version 2.4.3 using the Composer. To do so, you will need to create an access key after login in to the Magento website. https://marketplace.magento.com/customer/accessKeys/. Once the access key is created, run the following command to download Magento on your server:
cd /var/www/html
composer create-project --repository-url=https://repo.magento.com/ magento/project-community-edition=2.4.3 magento2
You will be asked to provide your access key as shown below to download the Magento:
Creating a "magento/project-community-edition=2.4.3" project at "./magento2"
Warning from repo.magento.com: You haven't provided your Magento authentication keys. For instructions, visit https://devdocs.magento.com/guides/v2.3/install-gde/prereq/connect-auth.html
    Authentication required (repo.magento.com):
      Username: a6b333ad41629bac913eaabb9b8e053c
      Password:
Do you want to store credentials for repo.magento.com in /root/.config/composer/auth.json ? [Yn] Y
Installing magento/project-community-edition (2.4.3)
  - Downloading magento/project-community-edition (2.4.3)
  - Installing magento/project-community-edition (2.4.3): Extracting archive
Created project in /var/www/html/magento2
Loading composer repositories with package information
Info from https://repo.packagist.org: #StandWithUkraine
Once the Magento is downloaded, set proper ownership and permission to the Magento directory:
chown -R www-data:www-data /var/www/html/magento2/
cd /var/www/html/magento2
find var generated vendor pub/static pub/media app/etc -type f -exec chmod g+w {} +
find var generated vendor pub/static pub/media app/etc -type d -exec chmod g+ws {} +
chown -R :www-data .
chmod u+x bin/magento
Next, run the following command to install Magento on your server:
bin/magento setup:install --base-url=http://magento.example.com --db-host=localhost --db-name=magento2 --db-user=magento2 --db-password=password --admin-firstname=Hitesh --admin-lastname=Jethva [email protected] --admin-user=admin --admin-password=Magento@Secure1Password --language=en_US --currency=USD --timezone=America/Chicago --use-rewrites=1
You will get the following error:
Could not validate a connection to Elasticsearch. No alive nodes found in your cluster
You can resolve this error using the following command:
php bin/magento module:disable {Magento_Elasticsearch,Magento_InventoryElasticsearch,Magento_Elasticsearch6,Magento_Elasticsearch7}
You should see the following output:
The following modules have been disabled:
- Magento_Elasticsearch
- Magento_Elasticsearch6
- Magento_InventoryElasticsearch
- Magento_Elasticsearch7

Cache cleared successfully.
Generated classes cleared successfully. Please run the 'setup:di:compile' command to generate classes.
Info: Some modules might require static view files to be cleared. To do this, run 'module:disable' with the --clear-static-content option to clear them.
You will also need to run the following command to disable the two-factor authentication:
sudo -u www-data bin/magento module:disable Magento_TwoFactorAuth
You will get the following output:
The following modules have been disabled:
- Magento_TwoFactorAuth

Cache cleared successfully.
Generated classes cleared successfully. Please run the 'setup:di:compile' command to generate classes.
Info: Some modules might require static view files to be cleared. To do this, run 'module:disable' with the --clear-static-content option to clear them.
Now, run the Magento installation command again to start the installation:
bin/magento setup:install --base-url=http://magento.example.com --db-host=localhost --db-name=magento2 --db-user=magento2 --db-password=password --admin-firstname=Hitesh --admin-lastname=Jethva [email protected] --admin-user=admin --admin-password=Magento@Secure1Password --language=en_US --currency=USD --timezone=America/Chicago --use-rewrites=1
Once the installation is complete, you will get the following output:
[Progress: 1359 / 1366]
Module 'Yotpo_Yotpo':
[Progress: 1360 / 1366]
Enabling caches:
Current status:
layout: 1
block_html: 1
full_page: 1
[Progress: 1361 / 1366]
Installing admin user...
[Progress: 1362 / 1366]
Caches clearing:
Cache cleared successfully
[Progress: 1363 / 1366]
Disabling Maintenance Mode:
[Progress: 1364 / 1366]
Post installation file permissions check...
For security, remove write permissions from these directories: '/var/www/html/magento2/app/etc'
[Progress: 1365 / 1366]
Write installation date...
[Progress: 1366 / 1366]
[SUCCESS]: Magento installation complete.
[SUCCESS]: Magento Admin URI: /admin_1u9o0y
Nothing to import.
Now, clear all cache and create a Magento cron job using the following commands:
sudo -u www-data bin/magento cache:flush
sudo -u www-data bin/magento cron:install
Once you are finished, you can proceed to the next step.
Configure Apache for Magento
Next, you will need to create an Apache virtual host configuration file to serve Magento over the web.
nano /etc/apache2/sites-available/magento2.conf
Add the following lines:
<VirtualHost *:80>
     ServerAdmin [email protected]
      DocumentRoot /var/www/html/magento2/
     ServerName magento.example.com

     <Directory /var/www/html/magento2/>
          Options FollowSymlinks
          AllowOverride All
          Require all granted
     </Directory>

     ErrorLog ${APACHE_LOG_DIR}/magento2_error.log
     CustomLog ${APACHE_LOG_DIR}/magento2_access.log combined

</VirtualHost>
Save and close the file then activate the Magento virtual host and Apache rewrite module using the following command:
a2ensite magento2.conf
a2enmod rewrite
Next, restart the Apache service to apply the changes:
systemctl restart apache2
You can also check the Apache status with the following command:
systemctl status apache2
You should see the following output:
? apache2.service - The Apache HTTP Server
     Loaded: loaded (/lib/systemd/system/apache2.service; enabled; vendor preset: enabled)
     Active: active (running) since Fri 2022-04-29 09:03:19 UTC; 2s ago
       Docs: https://httpd.apache.org/docs/2.4/
    Process: 39790 ExecStart=/usr/sbin/apachectl start (code=exited, status=0/SUCCESS)
   Main PID: 39794 (apache2)
      Tasks: 6 (limit: 4630)
     Memory: 14.1M
        CPU: 132ms
     CGroup: /system.slice/apache2.service
             ??39794 /usr/sbin/apache2 -k start
             ??39795 /usr/sbin/apache2 -k start
             ??39796 /usr/sbin/apache2 -k start
             ??39797 /usr/sbin/apache2 -k start
             ??39798 /usr/sbin/apache2 -k start
             ??39799 /usr/sbin/apache2 -k start

Apr 29 09:03:19 ubuntu systemd[1]: Starting The Apache HTTP Server...
Access Magento Web Interface
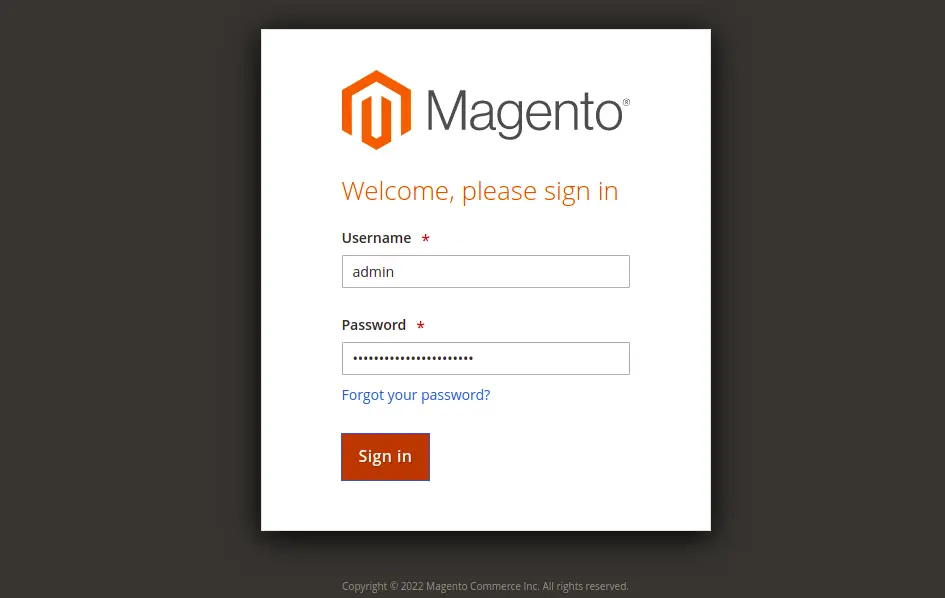
Now, open your web browser and access the Magento dashboard using the URL http://magento.example.com/admin_1u9o0y. You will be redirected to the Magento login page:
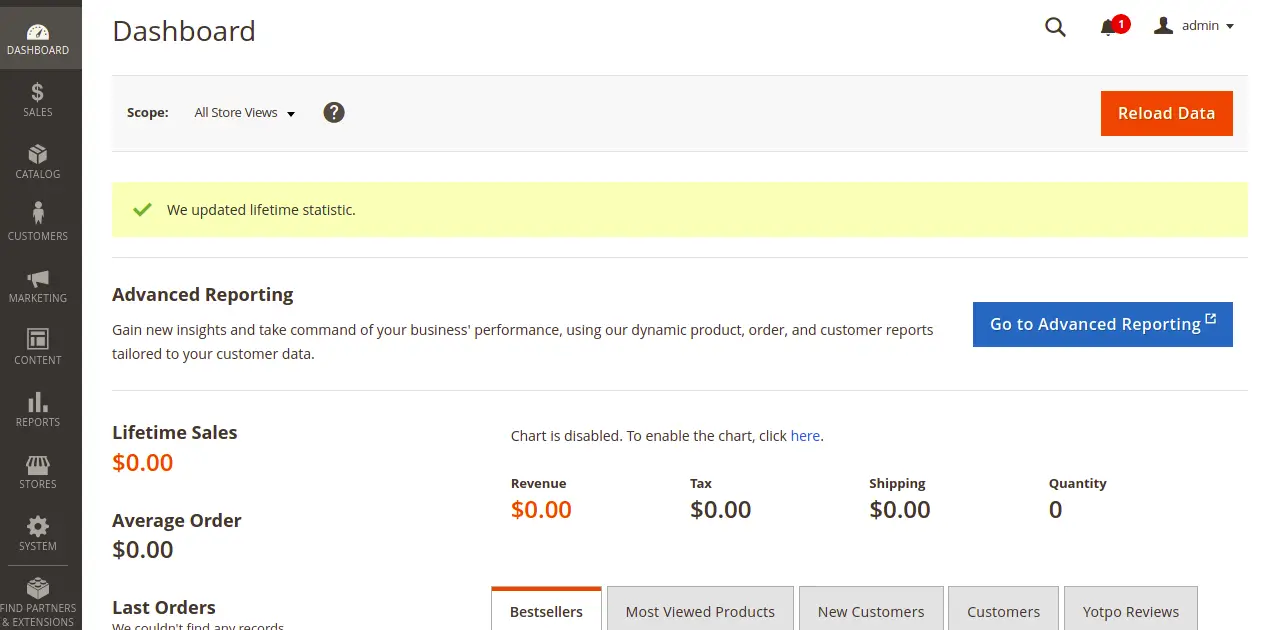
Provide your admin username, password, and click on the Login button. You should see the Magento dashboard on the following screen:
Secure Magento with Let's Encrypt SSL
It is always a good idea to secure your website with Let's Encrypt SSL. You will need to install the Certbot client to install and manage the SSL. You can install it with the following command:
apt-get install python3-certbot-apache -y
Once the Certbot is installed, run the following command to secure your website with Let's Encrypt SSL:
certbot --apache -d magento.example.com
You will be asked to provide your email and accept the term of service as shown below:
Saving debug log to /var/log/letsencrypt/letsencrypt.log
Plugins selected: Authenticator standalone, Installer None
Enter email address (used for urgent renewal and security notices) (Enter 'c' to
cancel): [email protected]

- - - - - - - - - - - - - - - - - - - - - - - - - - - - - - - - - - - - - - - -
Please read the Terms of Service at
https://letsencrypt.org/documents/LE-SA-v1.2-November-15-2017.pdf. You must
agree in order to register with the ACME server at
https://acme-v02.api.letsencrypt.org/directory
- - - - - - - - - - - - - - - - - - - - - - - - - - - - - - - - - - - - - - - -
(A)gree/(C)ancel: A

- - - - - - - - - - - - - - - - - - - - - - - - - - - - - - - - - - - - - - - -
Would you be willing to share your email address with the Electronic Frontier
Foundation, a founding partner of the Let's Encrypt project and the non-profit
organization that develops Certbot? We'd like to send you email about our work
encrypting the web, EFF news, campaigns, and ways to support digital freedom.
- - - - - - - - - - - - - - - - - - - - - - - - - - - - - - - - - - - - - - - -
(Y)es/(N)o: Y
Plugins selected: Authenticator apache, Installer apache
Obtaining a new certificate
Performing the following challenges:
http-01 challenge for magento.example.com
Enabled Apache rewrite module
Waiting for verification...
Cleaning up challenges
Created an SSL vhost at /etc/apache2/sites-available/magento-le-ssl.conf
Enabled Apache socache_shmcb module
Enabled Apache ssl module
Deploying Certificate to VirtualHost /etc/apache2/sites-available/magento-le-ssl.conf
Enabling available site: /etc/apache2/sites-available/magento-le-ssl.conf
Next, select whether or not to redirect HTTP traffic to HTTPS as shown below:
Please choose whether or not to redirect HTTP traffic to HTTPS, removing HTTP access.
- - - - - - - - - - - - - - - - - - - - - - - - - - - - - - - - - - - - - - - -
1: No redirect - Make no further changes to the webserver configuration.
2: Redirect - Make all requests redirect to secure HTTPS access. Choose this for
new sites, or if you're confident your site works on HTTPS. You can undo this
change by editing your web server's configuration.
- - - - - - - - - - - - - - - - - - - - - - - - - - - - - - - - - - - - - - - -
Select the appropriate number [1-2] then [enter] (press 'c' to cancel): 2
Type 2 and hit Enter to install the Let's Encrypt SSL for your website:
Enabled Apache rewrite module
Redirecting vhost in /etc/apache2/sites-enabled/magento.conf to ssl vhost in /etc/apache2/sites-available/magento-le-ssl.conf

- - - - - - - - - - - - - - - - - - - - - - - - - - - - - - - - - - - - - - - -
Congratulations! You have successfully enabled https://magento.example.com

You should test your configuration at:
https://www.ssllabs.com/ssltest/analyze.html?d=magento.example.com
- - - - - - - - - - - - - - - - - - - - - - - - - - - - - - - - - - - - - - - -

IMPORTANT NOTES:
 - Congratulations! Your certificate and chain have been saved at:
   /etc/letsencrypt/live/magento.example.com/fullchain.pem
   Your key file has been saved at:
   /etc/letsencrypt/live/magento.example.com/privkey.pem
   Your cert will expire on 2023-01-23. To obtain a new or tweaked
   version of this certificate in the future, simply run certbot again
   with the "certonly" option. To non-interactively renew *all* of
   your certificates, run "certbot renew"
 - If you like Certbot, please consider supporting our work by:

   Donating to ISRG / Let's Encrypt:   https://letsencrypt.org/donate
   Donating to EFF:                    https://eff.org/donate-le
Now, you can access your website securely using the URL https://magento.example.com.
Conclusion
Congratulations! you have successfully installed Magento with Apache on Ubuntu 22.04. I hope this post will help you to start your own online shopping cart system. Feel free to ask me if you have any questions.
About Hitesh Jethva
Over 8 years of experience as a Linux system administrator. My skills include a depth knowledge of Redhat/Centos, Ubuntu Nginx and Apache, Mysql, Subversion, Linux, Ubuntu, web hosting, web server, Squid proxy, NFS, FTP, DNS, Samba, LDAP, OpenVPN, Haproxy, Amazon web services, WHMCS, OpenStack Cloud, Postfix Mail Server, Security etc.
Recommend
About Joyk
Aggregate valuable and interesting links.
Joyk means Joy of geeK