

Electron App 安装包定制 -- Inno Setup 脚本 Pascal Scripting 初探 - 池中物王二狗
source link: https://www.cnblogs.com/willian/p/17512647.html
Go to the source link to view the article. You can view the picture content, updated content and better typesetting reading experience. If the link is broken, please click the button below to view the snapshot at that time.
在做 Electron 项目时,有个需求是安装包安装时要给客户机上装上某个软件
在查看 Inno Setup 官网后发现是通过 .iss 脚本编写实现自定义安装过程
可在 .iss 内可以添加脚本为安装过程添加逻辑
为了测试方便我用 vite 新建一个全新的 electron 项目
用的是这个脚手架 https://github.com/electron-vite/electron-vite-vue
用其它脚手架也行,反正我们对 app 内容本身并不关注,只关心制作安装包
新建 electron 项目
安装注意事项(都是我踩过的坑..)
yarn config get registry
我用的是这个 https://registry.npm.taobao.org/
yarn create electron-vite
项目名 first-electron
模板我选了 vue ,其实无所谓我们只是跑个electron demo 目的是打包而不是开发
Project name: first-electron
Project template: Vue
 cd first-electron
 yarn
 yarn dev
项目应该跑起来了可以看到 electron 窗口
关掉项目, 下一步测一下打包功能
编译打包 app
项目已经帮你整合了 electron-builder
直接运行打包命令
yarn build
大概率会失败
从 github 拉 electron 失败
需要从镜像服务器,设置 electron_mirror 到专门镜像 后再打包

yarn config set electron_mirror https://npm.taobao.org/mirrors/electron/
yarn build
成功后在项目 first-electron\release 目录下就是编译完成的 electron app 了
我的是在 first-electron\release\0.0.0 目录下,0.0.0 一看就是软件版本号了
项目根目录的 electron-builder.json5 就是 electron-builder 配置文件
配置文件内的 "output": "release/${version}" 就是定义编译后的文件目录,一般不会去改
first-electron_0.0.0.exe 这个文件就是单独文件的安装版,双击安装时会有安装过程
win-unpacked 就是绿色版, 安装包的制作就是把这个文件夹内的文件进行打包
安装包自定义安装过程
如果想对安装包安装过程进行自定义
那么首先电脑上先安装 Inno Setup Compiler, 再创建 setup.iss 文件
通过 ide 新建 .iss 文件
过程如下:
-
打开 Inno Setup Compiler
-
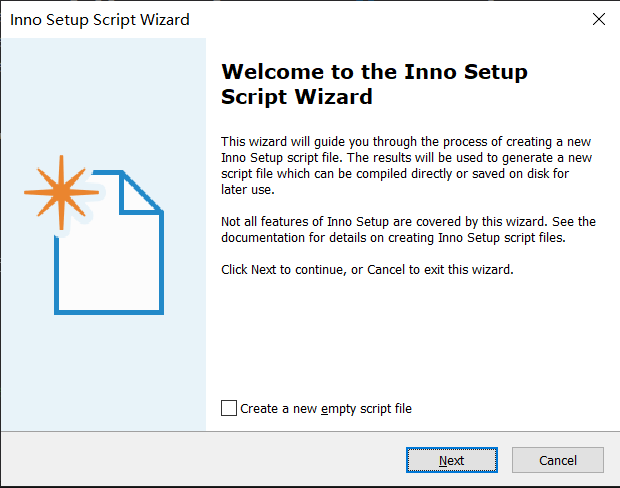
新建一个 Inno Setup Script Wizard 开始创建 .iss 脚本文件
-
按提示一步步往下走,可以选择填写 app 名字,版本,公司之类的信息这些都不重要
-
直到
Application FilesApplication main executable file 原默认的 Myprog.exe 主执行文件变更到我们自己 first-electron 的主执行文件,如下:
first-electron\release\0.0.0\win-unpacked\first-electron.exe另外 Other application files: 这一项点击 Add folder... 按钮
把 win-unpacked 整个文件夹也添加进来
继续按提示往下走,直到 Compiler Settings 这一页
-
Custom compiler output folder: 选择打包文件输出目录
我选择输出到 first-electron\dist-setup 目录
-
继续按提示往下走,最后会让你保存成 .iss 文件,这个 .iss 文件就是打包脚本了
我在这个例子中输出文件保存为了 setup.iss
先不动这个脚本。直接编译,完成后可以在 first-electron\dist-setup 看到 windows 安装包了
安装程序完成后调用其它程序
比如主程序安装完后想自动执行安装东方财富的的安装文件 “dfcft8.exe”
(别问为什么是 “东方财富” 这个安装包,我的电脑的下载文件夹内刚好看到有这个.exe 执行文件就用这个来测试吧)
为什么要做这么流氓的事? 这只是举个例子而已!
其实,真实项目中有可能是客户机器上缺少某种环境或文件之类的东西,那么你可以利用此方法帮用户安装上
让我们开始吧。 非常的简单!
修改之前保存的 setup.iss 文件
在 setup.iss 文件中找到 [Run] 节点添加如下代码:
[Run]
Filename: "{app}\resources\bin\dfcft8.exe"; Description: ""; Flags: nowait postinstall skipifsilent
使用 Inno setup compiler 编译该文件
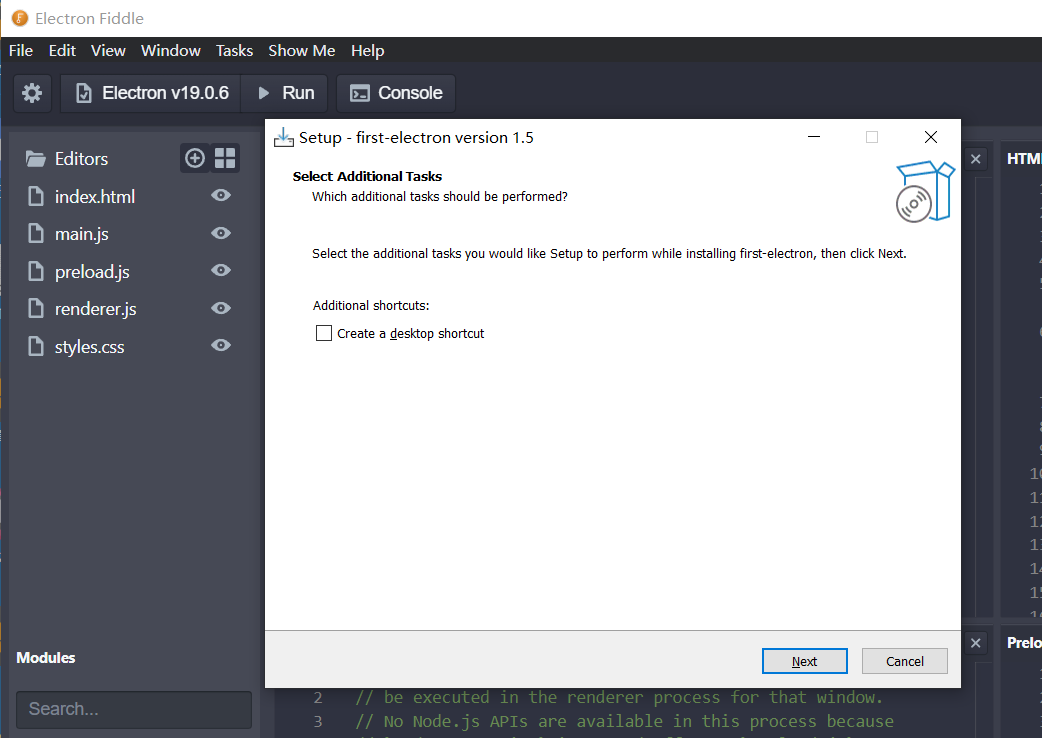
安装程序最后会显示这样的画面:
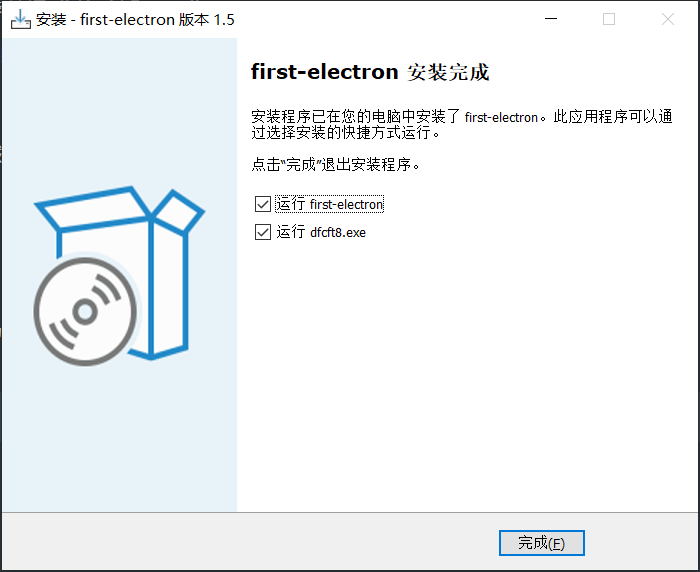
点击 “完成” 按钮就会出现以下画面:
非常简单!
能不能在安装开始前就调用某个程序?
上面说的是安装程序安装完成后执行另外的一个程序,那么如果想在安装程序安装前执行呢?
[code]节点脚本控制安装过程
需要 Pascal 脚本了, 开始吧!
说实话作为长期使用 Javascript 的我来说第一次接触 Pascal Scripting 我心里一万头xx马奔腾而过
而且我看 Inno Setup Compiler 官网 <jrsoftware.org> 的大概意思是 Pascal Scripting 不太好弄
官方建议用户从
Inno Setup 6\Examples安装目录下的 Examples 目录下参考官方提供的脚本例子
在 setup.iss 文件内添加 [code] 节点
这个节点允许你为安装过程添加逻辑,可细化到安装的每一步
它通过在 [code] 节点下暴露 Event Functions 实现,比如:
- function InitializeSetup(): Boolean;
- procedure DeinitializeSetup();
- function InitializeUninstall(): Boolean;
我姑且把它理解为生命周期吧!
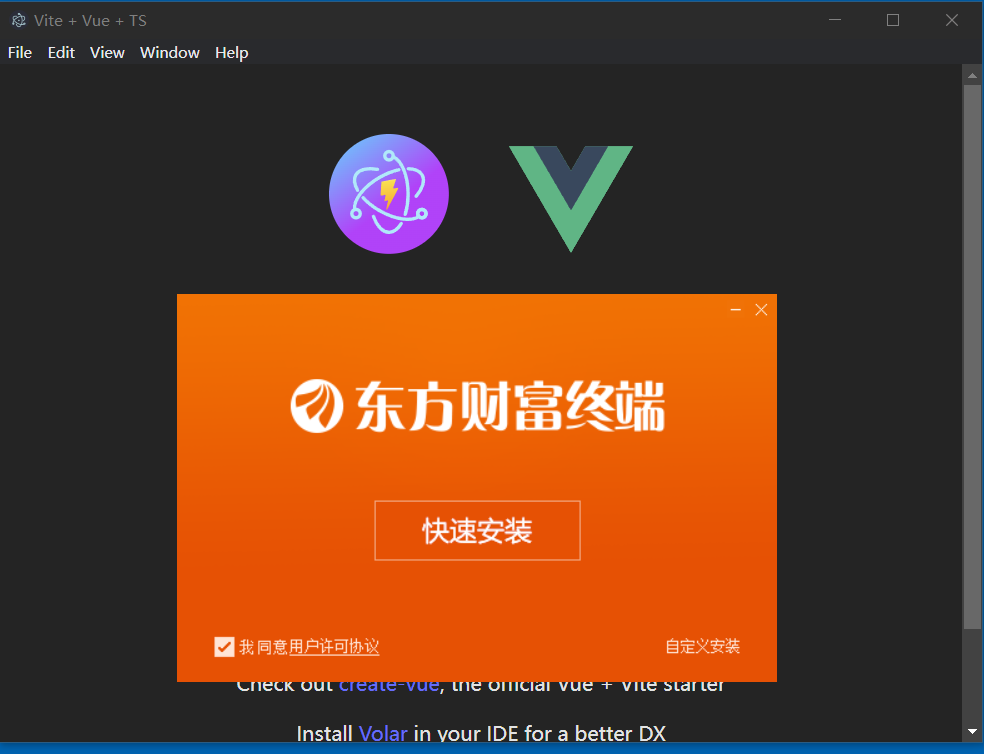
那么如果想在安装开始时就调用
使用 InitializeSetup 并在其内用 Exec 方法调用 'dfcft8.exe'
下面实现安装过程开始之前前调用
[code]
function InitializeSetup(): Boolean;
var
  ResultCode: Integer;
begin
  ExtractTemporaryFile('dfcft8.exe');
  Exec(ExpandConstant('{tmp}\dfcft8.exe'), '', '', SW_SHOW, ewWaitUntilTerminated, ResultCode)
  Log('InitializeSetup called');
  Result := true
end;
为 setup.iss 添加上面代码后用 Inno Setup Compiler Ide 按 F9 或 Run 菜单 Run选项 "编译并启动"
安装包启动后点击"确定"按钮,Ide 会输出日志,也可以看到东方财富的安装程序也启动了

注意日志输出画面中的 这两句:
[15:19:26.074]   Created temporary directory: C:\Users\ADMINI~1\AppData\Local\Temp\is-8P52P.tmp
[15:19:26.082]   Extracting temporary file: C:\Users\ADMINI~1\AppData\Local\Temp\is-8P52P.tmp\dfcft8.exe
意思是先建个临时文件夹,再从安装包中先解压出 "dfctt8.exe" 这个文件放到临时文件夹内
此时安装目录内是取不到文件的, 因为我们的 first-electron 程序还没有安装成功,也不会在客户电脑上有安装目录
只能从安装包这个压缩文件内解压获取临时文件
这是 setup.iss 现在的代码
; Script generated by the Inno Setup Script Wizard.
; SEE THE DOCUMENTATION FOR DETAILS ON CREATING INNO SETUP SCRIPT FILES!

#define MyAppName "first-electron"
#define MyAppVersion "1.5"
#define MyAppPublisher "My Company, Inc."
#define MyAppURL "https://www.example.com/"
#define MyAppExeName "first-electron.exe"
#define MyAppAssocName MyAppName + " File"
#define MyAppAssocExt ".myp"
#define MyAppAssocKey StringChange(MyAppAssocName, " ", "") + MyAppAssocExt

[Setup]
; NOTE: The value of AppId uniquely identifies this application. Do not use the same AppId value in installers for other applications.
; (To generate a new GUID, click Tools | Generate GUID inside the IDE.)
AppId={{72C0FB3C-108B-4530-8D27-5D31B5349C3C}
AppName={#MyAppName}
AppVersion={#MyAppVersion}
;AppVerName={#MyAppName} {#MyAppVersion}
AppPublisher={#MyAppPublisher}
AppPublisherURL={#MyAppURL}
AppSupportURL={#MyAppURL}
AppUpdatesURL={#MyAppURL}
DefaultDirName={autopf}\{#MyAppName}
ChangesAssociations=yes
DisableProgramGroupPage=yes
; Uncomment the following line to run in non administrative install mode (install for current user only.)
;PrivilegesRequired=lowest
OutputDir=C:\Users\Administrator\Desktop\first-electron\dist-setup
OutputBaseFilename=first-electron-setup
Compression=lzma
SolidCompression=yes
WizardStyle=modern

[Languages]
Name: "english"; MessagesFile: "compiler:Default.isl"

[Tasks]
Name: "desktopicon"; Description: "{cm:CreateDesktopIcon}"; GroupDescription: "{cm:AdditionalIcons}"; Flags: unchecked

[Files]
Source: "C:\Users\Administrator\Desktop\first-electron\release\0.0.0\win-unpacked\{#MyAppExeName}"; DestDir: "{app}"; Flags: ignoreversion
Source: "C:\Users\Administrator\Desktop\first-electron\release\0.0.0\win-unpacked\*"; DestDir: "{app}"; Flags: ignoreversion recursesubdirs createallsubdirs
; NOTE: Don't use "Flags: ignoreversion" on any shared system files

[Registry]
Root: HKA; Subkey: "Software\Classes\{#MyAppAssocExt}\OpenWithProgids"; ValueType: string; ValueName: "{#MyAppAssocKey}"; ValueData: ""; Flags: uninsdeletevalue
Root: HKA; Subkey: "Software\Classes\{#MyAppAssocKey}"; ValueType: string; ValueName: ""; ValueData: "{#MyAppAssocName}"; Flags: uninsdeletekey
Root: HKA; Subkey: "Software\Classes\{#MyAppAssocKey}\DefaultIcon"; ValueType: string; ValueName: ""; ValueData: "{app}\{#MyAppExeName},0"
Root: HKA; Subkey: "Software\Classes\{#MyAppAssocKey}\shell\open\command"; ValueType: string; ValueName: ""; ValueData: """{app}\{#MyAppExeName}"" ""%1"""
Root: HKA; Subkey: "Software\Classes\Applications\{#MyAppExeName}\SupportedTypes"; ValueType: string; ValueName: ".myp"; ValueData: ""

[Icons]
Name: "{autoprograms}\{#MyAppName}"; Filename: "{app}\{#MyAppExeName}"
Name: "{autodesktop}\{#MyAppName}"; Filename: "{app}\{#MyAppExeName}"; Tasks: desktopicon

[Run]
Filename: "{app}\{#MyAppExeName}"; Description: "{cm:LaunchProgram,{#StringChange(MyAppName, '&', '&&')}}"; Flags: nowait postinstall skipifsilent
; Filename: "{app}\resources\bin\dfcft8.exe"; Description: ""; Flags: nowait postinstall skipifsilent


[code]
function InitializeSetup(): Boolean;
var
  ResultCode: Integer;
begin
  ExtractTemporaryFile('dfcft8.exe');
  Exec(ExpandConstant('{tmp}\dfcft8.exe'), '', '', SW_SHOW, ewWaitUntilTerminated, ResultCode);
  Log('InitializeSetup called');
  Result := true
end;
这里有个疑问,ExtractTemporaryFile('dfcft8.exe') 路径
这里可没指定过 'dfcft8.exe' 文件位置,而且我明明是把它放在了 resources\bin\dfcft8.exe 下,难道会自动搜索?
测试一下猜想
为了测试我把用另一个 "electron-fiddle.exe" 安装包放在 resources 文件夹并且名称改为同样的 'dfcft8.exe' ,这样就有两个同名文件在不同文件夹下
resources\bin\'dfcft8.exe'
resources\'dfcft8.exe'
编译测试结果:
果然被改名为 'dfcft8.exe' 的 'electron-fiddle.exe' 被启动代替了东方财富的安装程序
官网我找不到资料,但测试后得到的结论是 ExtractTemporaryFile 会返回搜索到的第一个匹配文件
如果非要解压指定文件夹下的指定文件呢?
那么需要换种方法,像下面这样改:
[Files]
Source: "C:\Users\Administrator\Desktop\first-electron\release\0.0.0\win-unpacked\resources\bin\dfcft8.exe"; DestDir: "{tmp}\resources\bin"

[code]
function InitializeSetup(): Boolean;
var
  ResultCode: Integer;
begin
  ExtractTemporaryFiles('{tmp}\resources\bin\dfcft8.exe')
  Exec(ExpandConstant('{tmp}\resources\bin\dfcft8.exe'), '', '', SW_SHOW, ewWaitUntilTerminated, ResultCode);
  Log('InitializeSetup called');
  Result := true
end;
[Files] 节点指定 DestDir: "{tmp}\resources\bin"
[code] 节点内使用 ExtractTemporaryFiles('{tmp}\resources\bin\dfcft8.exe') 解压
并且 Exec 方法调用时也要传路径 ExpandConstant('{tmp}\resources\bin\dfcft8.exe')
编译测试一下
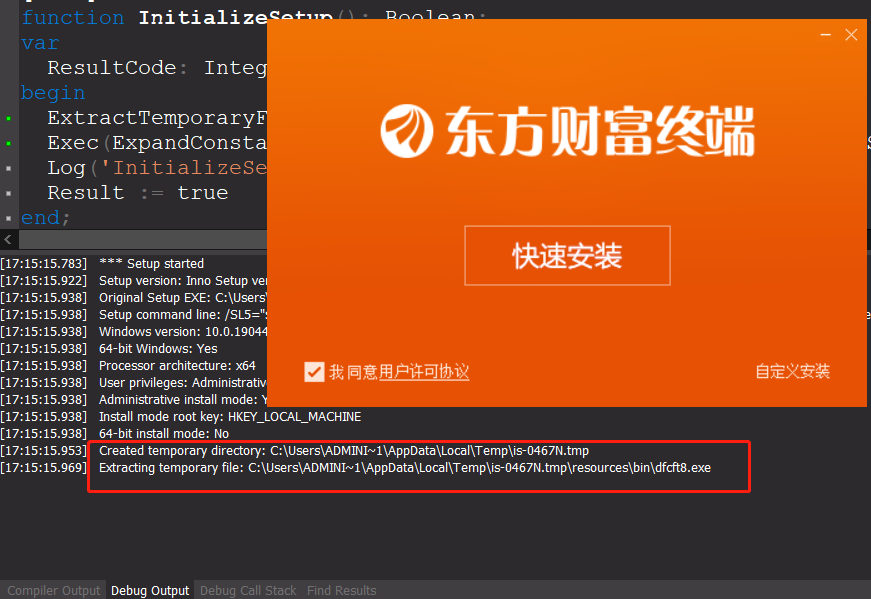
可以看到已经执行调用东方财富的安装程序
先别急着关掉,我们可以通过 log 输出的临时路径信息,找到对应的文件夹打开查看 C:\Users\ADMINI~1\AppData\Local\Temp\is-0467N.tmp
[17:15:15.953] Created temporary directory: C:\Users\ADMINI~1\AppData\Local\Temp\is-0467N.tmp

果然临时文件夹内文件夹结构如我们所指定的那样
该路径会在安装程序结束时自动删除
用 [code] 实现安装完成后执行 "dfcft8.exe" 可执行文件
之前是在 [Run] 节点下实现,其实也可以用 procedure DeinitializeSetup() 实现类似的功能
改动如下:
[code]
function InstallDfcf: Boolean;
var
  ResultCode: Integer;
begin
  if not Exec(ExpandConstant('{app}\resources\bin\dfcft8.exe'), '', '', SW_SHOW, ewWaitUntilTerminated, ResultCode) then
  begin
    Log('安装东方财富失败. Error code: ' + IntToStr(ResultCode));
  end;
end;

procedure DeinitializeSetup();
begin
  InstallDfcf;
end;
函数 DeinitializeSetup 就是安装结束时调用自定义函数 InstallDfcf
InstallDfcf 函数内部的 Exec 调用了 'dfcft8.exe'
还有更多..
Inno Setup 其实可定制化的功能还有很多,官网文档就仁者见仁智者见智了
全面详细学习 Inno Setup 没啥意义,用哪个功能直接了解这一块儿就行,就是学习各种配置
现在有 chatgpt,还记啥配置呢,不明白可以直接问它,chatgpt 真是事半功倍啊,反正我就是这么做的
我们该把时间用于更有意义的地方,比如摸鱼!
博客园: http://cnblogs.com/willian/
github: https://github.com/willian12345/
Recommend
About Joyk
Aggregate valuable and interesting links.
Joyk means Joy of geeK