
5

webpack 入门级 傻瓜式教学
source link: https://blog.p2hp.com/archives/11046
Go to the source link to view the article. You can view the picture content, updated content and better typesetting reading experience. If the link is broken, please click the button below to view the snapshot at that time.

webpack 入门级 傻瓜式教学
注意点:webpack 4 以上的,都需要安装webpack-cli
安装 webpack-cli 后面我们需要使用webpack打包我们需要打包的文件
npm i webpack-cli -S 当前项目安装
npm i webpack-cli -g  全局安装


在项目中新建一个
webpack.config.js
用来存放配置代码
// 初始化版本
module.exports = {
  mode: 'development', // 当前的开发模式
  entry: __dirname   "/js/test.js",// 入口文件 需要打包的js文件
  output: {
    path: __dirname   "/dist",// 打包后的文件存放的地方 总的所有的打包文件的根文件
    filename: "bundle.js" // 打包后输出文件的文件名,js文件打包后的路径
  }
}
提前写好运行的js文件,在当前的控制台,直接使用命令 webpack 打包
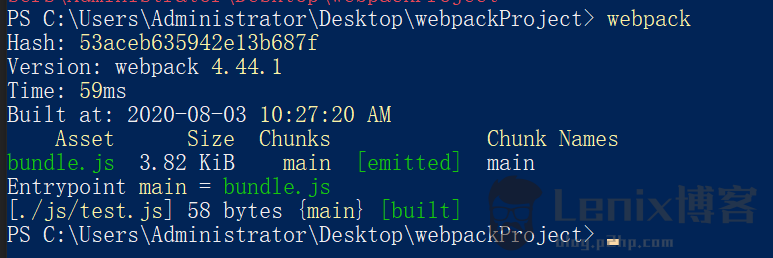
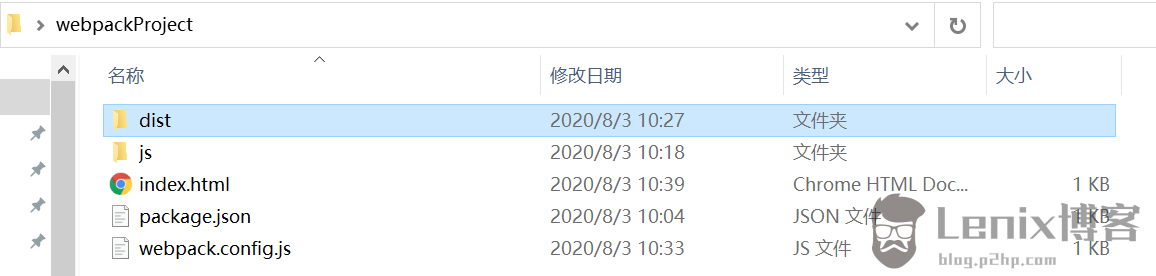
打包之后会新增加一个dist的文件夹
在html中引用当前打包之后的js
<!DOCTYPE html>
<html lang="en">

<head>
  <meta charset="UTF-8">
  <meta name="viewport" content="width=device-width, initial-scale=1.0">
  <title>Document</title>
</head>

<body>

</body>
<!-- 引入打包之后的文件 -->
<script src="./dist/bundle.js"></script>
<!-- <script src="./js/test.js"></script> -->

</html>
<!DOCTYPE html> <html lang="en"> <head> <meta charset="UTF-8"> <meta name="viewport" content="width=device-width, initial-scale=1.0"> <title>Document</title> </head> <body> </body> <!-- 引入打包之后的文件 --> <script src="./dist/bundle.js"></script> <!-- <script src="./js/test.js"></script> --> </html>
运行当前的html文件js内容就会被加载了
ps 文件目录
Recommend
About Joyk
Aggregate valuable and interesting links.
Joyk means Joy of geeK