

网站部署上线一条龙文档 - huxiaofeng
source link: https://www.cnblogs.com/huxiaofeng1029/p/17386202.html
Go to the source link to view the article. You can view the picture content, updated content and better typesetting reading experience. If the link is broken, please click the button below to view the snapshot at that time.

项目部署上线

想要将django项目部署在服务器上,本质上需要三大部分:
- 将代码上传到服务器
- 在服务器上 获取代码、安装服务、配置环境
1.代码同步
上传代码的方式有很多种,例如:FTP工具、scp命令、rsync服务、svn等,不过目前公司主流的都是使用git+代码托管平台。

- 本地电脑,安装git并使用git命令上传代码。
- 代码仓库,创建仓库。
- 服务器,安装git并使用git命令获取最新代码。
1.1 本地上传
在本地电脑上本质上需要执行如下步骤:
-
全局配置(只需要配置一次)
git config --global user.name "ifeng" git config --global user.email "[email protected]" -
进入项目目录
-
git init -
配置远程地址
git remote add origin https://gitee.com/i__feng/order-trading-platform.git -
本地版本提交
git add . git commit -m '提交说明...' -
提交到远程仓库
git push origin master
-
1.1.1 gitignore和local_settings
在项目中创建一个 .gitignore的文件,在里面写上文件名或文件夹,可以git忽略一些文件,不要进行版本控制。
https://github.com/github/gitignore/blob/main/Python.gitignore
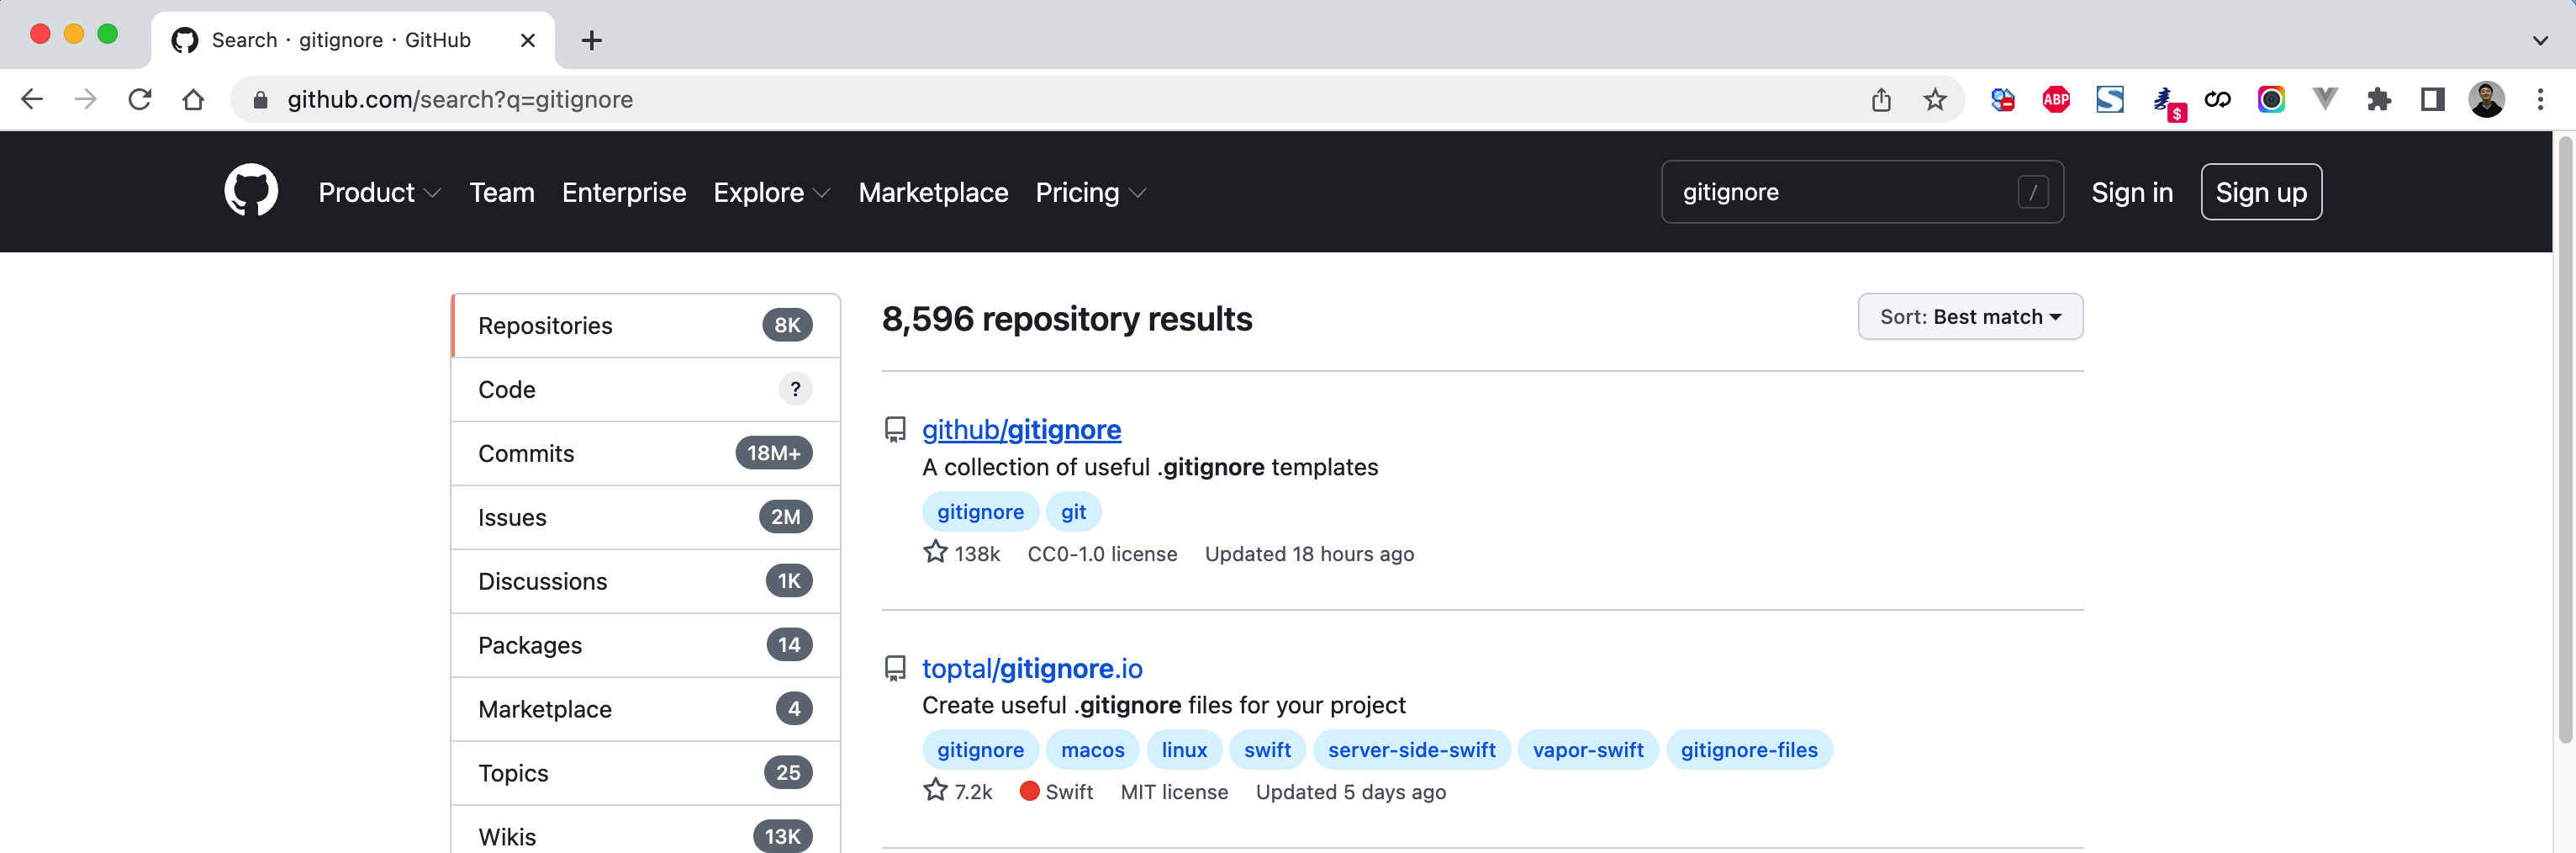
将Python的ignore文件内存拷贝并保存至项目目录下。

这样,就可以控制git忽略某些文件。
注意: 在使用.gitignore的时候 如果不起作用 -> 我们可以强行删除gitee中代码仓库 然后删掉pycharm文件中的.git(相当于没有做过之前的git操作了) 最后重新上传代码(git init...)
学会这个知识点之后,接下来再来讲一个关于配置文件的常见操作,.即:local_settings.py
项目中所有数据都提交了,如果仓库是公开的,有些敏感数据会泄露。
# 在settings.py中加入代码块 -> 在.gitignore中会将local_settings忽略
try:
    from .local.settings import *
except Exception as e:
    pass

如果本次开发和线上开发一些配置不同(eg: mysql中配置密码的不同),就可以放在这个文件。
- 本地:local_settings.py 编写本地特有配置。
- 线上:local_settings.py 编写线上特有配置。
而在settings.py中编写所有环境都有的配置。
1.1.2 每次提交(push)都需要输入密码,太烦了。
-
https://gitee.com/i__feng/order-trading-platform.git
git remote remove origin git remote add origin `https://用户名:@gitee.com/i__feng/order-trading-platform.git` -> 缺点是直接将密码暴露在自己电脑上了 git push origin master -
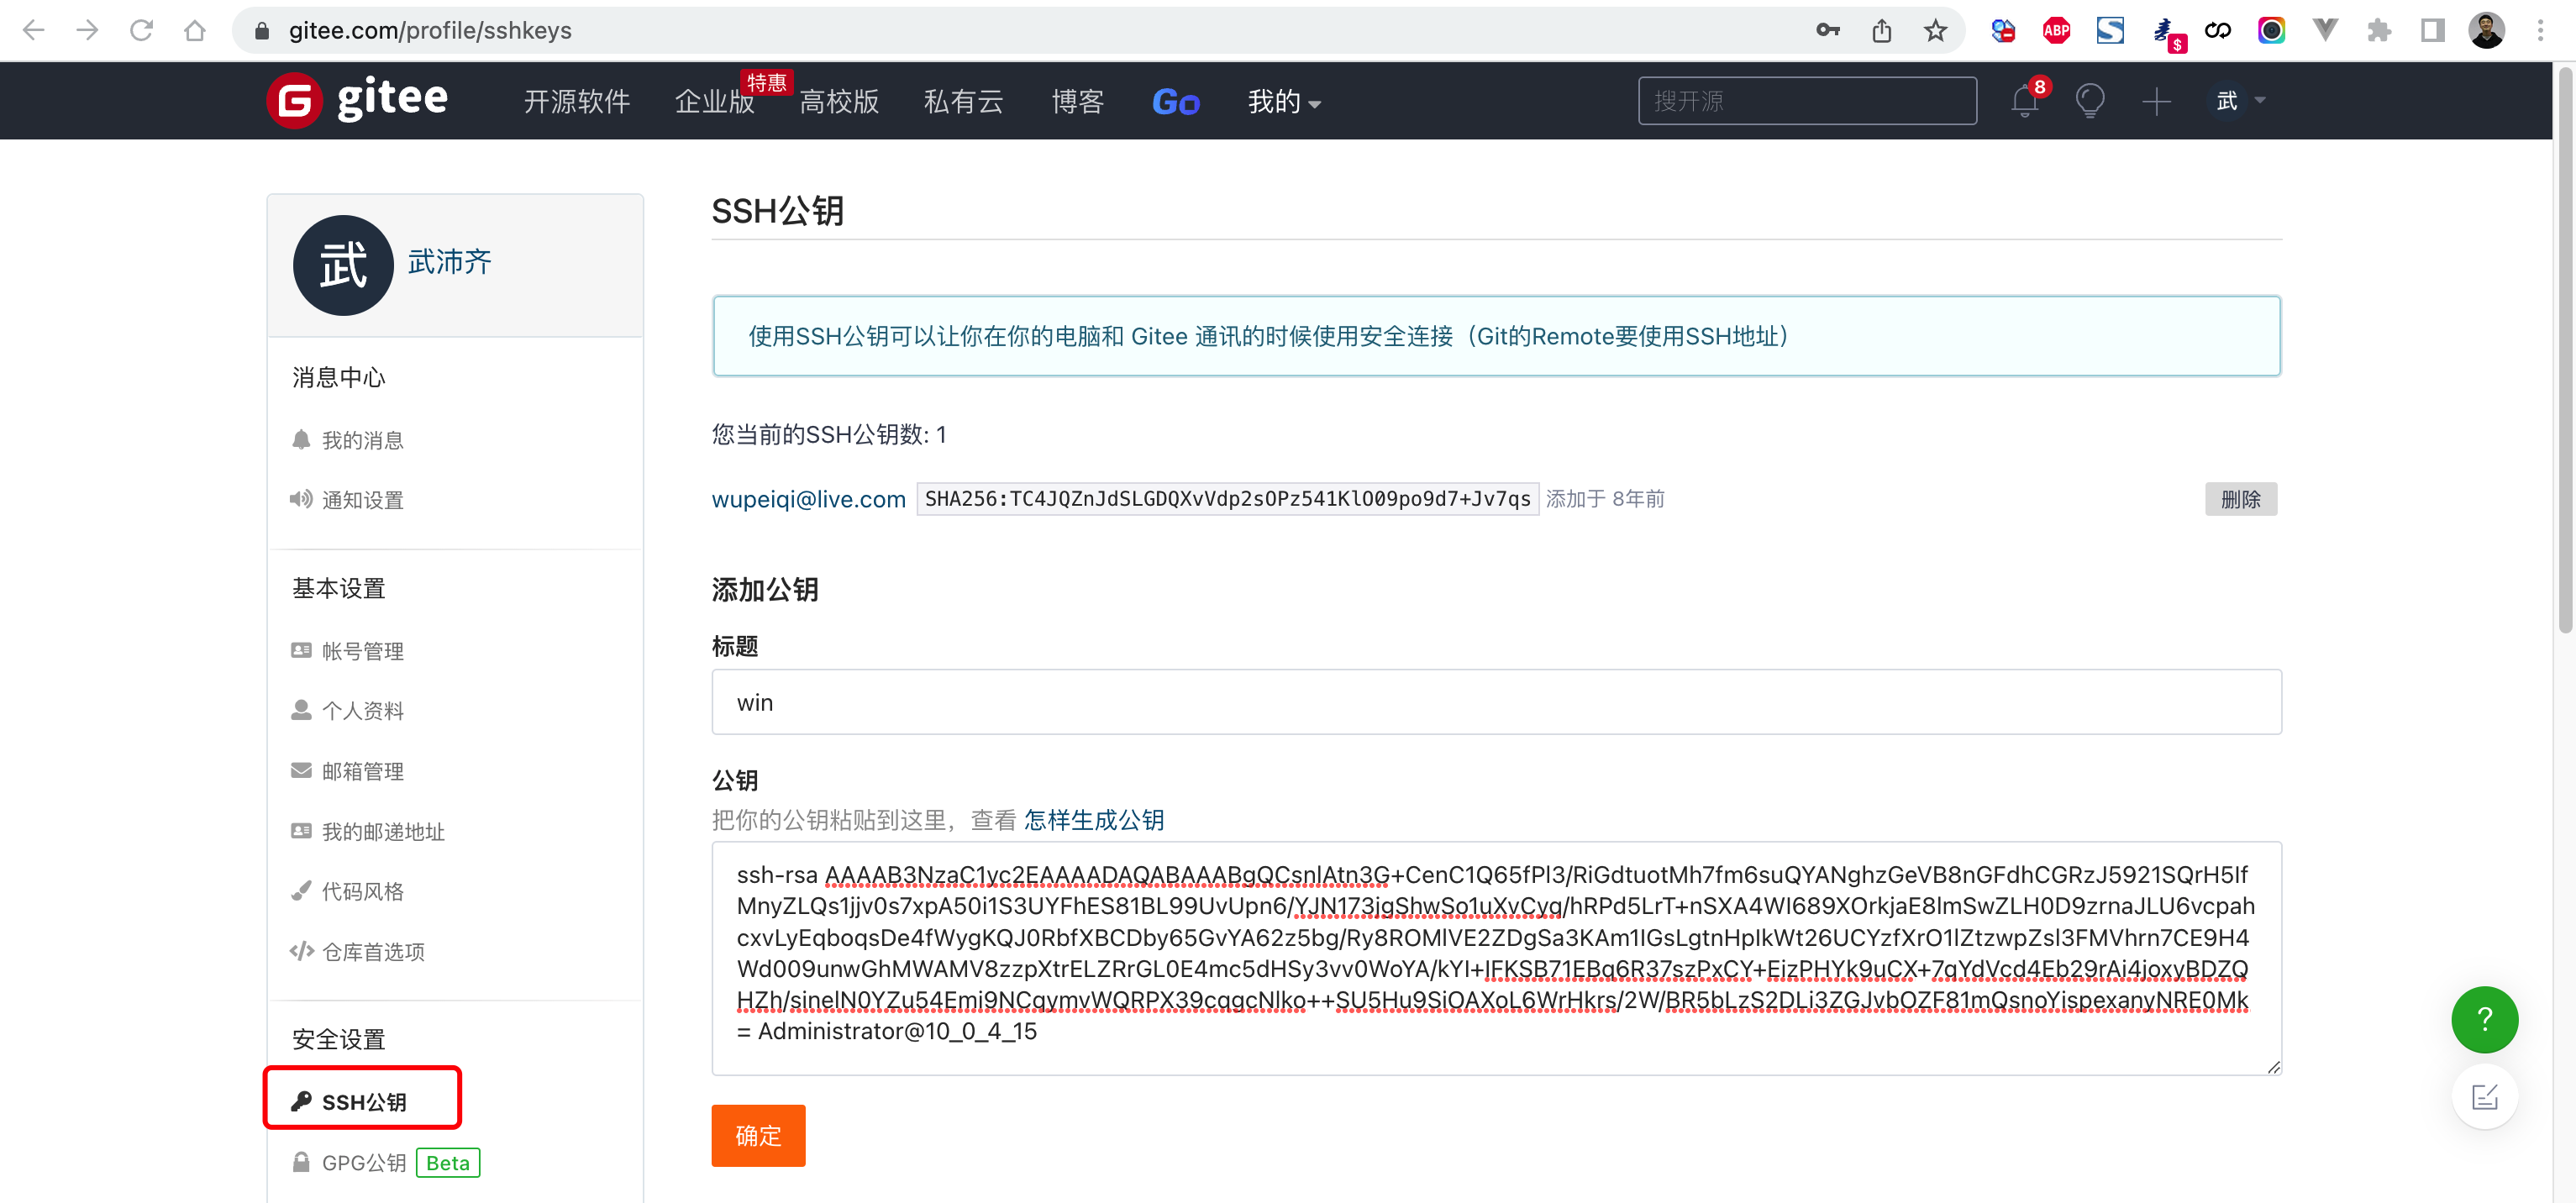
1.使用ssh生成秘钥(在git中)
ssh-keygen -t rsa2.读取公钥
cat ~/.ssh/id_rsa.pub内容并上传到代码托管仓库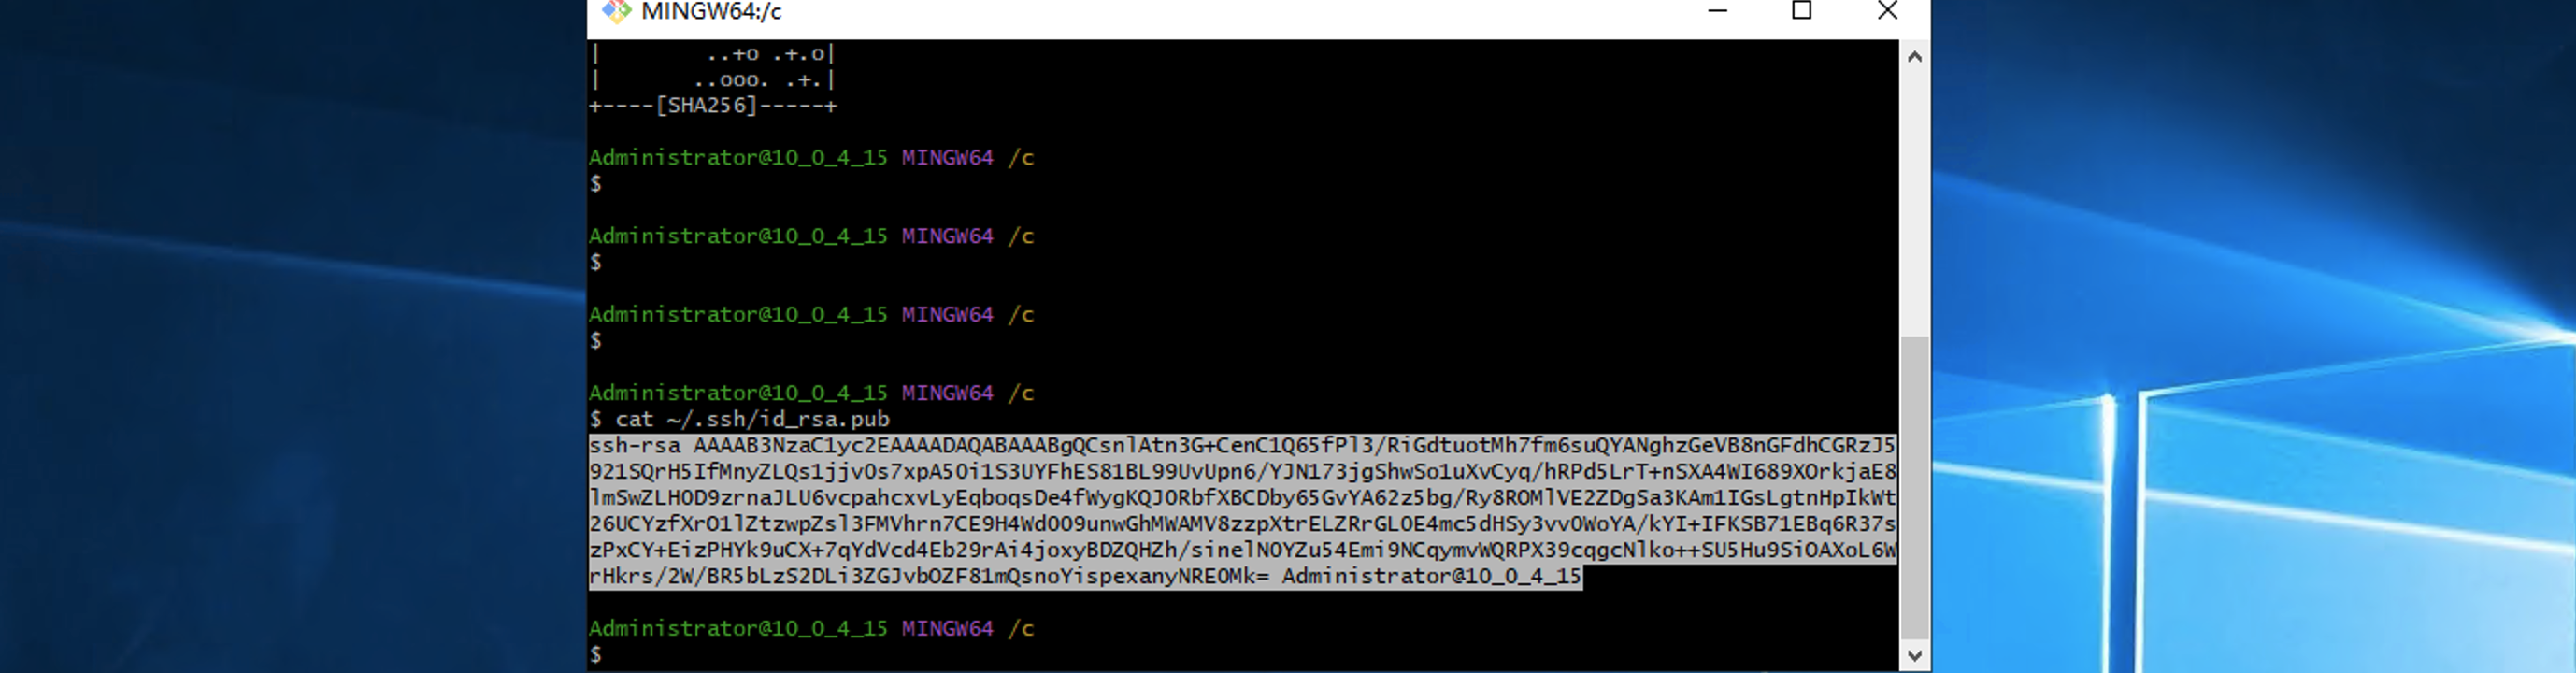
3.基于ssh链接. 推拉数据
git remote remove origin -> 删除掉原始的记录
git remote add origin [email protected]:i__feng/order-trading-platform.git
git push origin master
git clone [email protected]:i__feng/order-trading-platform.git
1.1.3 来回切换各种版本
git log -> 可以看到所有修改代码的日志

git reset --hard 版本号 -> 回滚到指定版本

git reflog ->  查看提交记录
2.服务器下载代码
- 先登录到远程服务器
ssh root@ip地址
输入密码
- 下载git的代码
yum install git
git clone [email protected]:i__feng/order-trading-platform.git  -> 克隆代码(这是项目第一次下载代码)
# 如果后期项目有改动. 我们可以先cd到项目目录
source /envs/day06/bin/activate  # 进入虚拟环境
git pull origin master  # 拉代码
重启服务器...
- 生成公钥. 私钥 -> 公钥拷贝到和上面一样的代码仓库 -> 克隆代码可以免密执行
ssh-keygen -t rsa
cat ~/.ssh/id_rsa.pub
3.服务器运行起来
centos系统
3.1 Mysql
3.1.1 安装
yum install mariadb-server -y
yum install mariadb -y
3.1.2启动
systemctl enable mariadb -> 开机自启动

systemctl start mariadb
systemctl stop mariadb
3.1.3 项目配置
insert into mysql.user (user, host, password) values ('ifeng', '%', password('xxxx'));
- 创建数据库
create database order_system default charset utf8 collate utf8_general_ci;
- 用户 + 数据库授权
grant all privileges on order_system.* to ifeng@'%';  -- %表示所有ip都可以访问
flush privileges;
show grant for ifeng; -- 查看用户权限
3.1.4 后续连接项目数据库
DATABASES = {
    'default': {
        'ENGINE': 'django.db.backends.mysql',
        'NAME': 'order_system',
        'USER': '',
        'PASSWORD': '',
        'HOST': '',
        'PORT': 3306
    }
}
3.1.5 Mysql问题补充
- 账户无法登录, Mysql-server安装成功之后, 服务器直接登录, 所以我们需要主动把服务器的账户删除
delete from mysql.user where host='localhost' and user='';
delete from mysql.user where host='vm-16-9-centos' and user='';

MariaDB [(none)]> select user, password, host from mysql.user;
+-------+-------------------------------------------+----------------+
| user  | password                                  | host           |
+-------+-------------------------------------------+----------------+
| root  |                                           | localhost      |
| root  |                                           | vm-16-9-centos |
| root  |                                           | 127.0.0.1      |
| root  |                                           | ::1            |
| ifeng | *2CEB53858B8FDD17DA02602D2BBB334BEB6CDED4 | %              |
+-------+-------------------------------------------+----------------+
5 rows in set (0.00 sec)
登录: Mysql -u ifeng -p
- 目前%没有任何意义 -> 3306没有开放
到安全组(vpc)中开放端口
22 SSH
80 浏览器输入IP
443 https方式访问
3306
3.2 redis
3.2.1 安装
yum install redis -y
3.2.2 配置 -> /etc/redis.conf
打开文件
	vim /etc/redis.conf
寻找requirepass
	?requirepass
进入编辑状态
	i
退出并保存
	点击esc -> :wq
3.2.3 启动
systemctl enable redis

systemctl start redis
systemctl stop redis
注意:
只支持本机链接 -> bind 127.0.0.1 requirepass qwe123456
想要任何地方都能链接:
bind 0.0.0.0
requirepass qwe123456
安全组配置6379端口
3.3 安装python3.9.5
-
安装gcc,用于后续安装Python时编译源码。
yum install gcc -y -
安装Python3相关依赖
yum install zlib zlib-devel -y yum install bzip2 bzip2-devel -y yum install ncurses ncurses-devel -y yum install readline readline-devel -y yum install openssl openssl-devel -y yum install xz lzma xz-devel -y yum install sqlite sqlite-devel -y yum install gdbm gdbm-devel -y yum install tk tk-devel -y yum install mysql-devel -y yum install python-devel -y yum install libffi-devel -y -
下载Python源码,https://www.python.org/ftp/python/
cd /data/ wget https://www.python.org/ftp/python/3.9.5/Python-3.9.5.tgz注意:如果没有wget,则先安装yum install wget -
-
tar -xvf Python-3.9.5.tgz -
进入目录并编译安装
cd Python-3.9.5 ./configure make all make install -
python3 --version /usr/local/bin/python3 /usr/local/bin/pip3 /usr/local/bin/pip3.9 -
配置豆瓣源(腾讯云服务器,默认腾讯源)
pip3.9 config set global.index-url https://pypi.douban.com/simple/
-
3.4 创建虚拟环境
pip3 install virtualenv

mkdir /envs
virtualenv /envs/day06 --python=python3.9
3.5 上传代码&下载代码&安装环境
- 上传代码时:
# 在项目终端
pip freeze > requirements.txt
# 后续将代码上传到gitee仓库
可创建文件夹将文件分类
git clone [email protected]:i__feng/order-trading-platform.git
- 安装第三方包
- 激活虚拟环境(如果是虚拟环境的话)
source /envs/day06/bin/activate
- 下载(先进入到有requirement.txt的目录)
pip3 install -r requirement.txt
# importlib-metadata==4.11.3  demjson -> demjson 包的设置命令中使用了无效的 use_2to3 参数导致报错
3.6 配置local_settings.py
- 创建空文件local_settings.py
>>> touch local_settings.py
>>> vim local_settings.py  # 编辑配置
DEBUG = False
ALLOWED_HOSTS = ['*']
# 配置mysql
DATABASES = {
'default': {
'ENGINE': 'django.db.backends.mysql',
'NAME': 'order_system',
'USER': 'ifeng',
'PASSWORD': 'th20190410',
'HOST': '127.0.0.1',
'PORT': 3306
}
}
# cache缓存
CACHES = {
"default": {
"BACKEND": "django_redis.cache.RedisCache",
"LOCATION": "redis://127.0.0.1:6379",
"OPTIONS": {
"CLIENT_CLASS": "django_redis.client.DefaultClient",
"CONNECTION_POOL_KWARGS": {"max_connections": 100},
"PASSWORD": "123456",
}
}
}
# 关于静态资源. 后续希望将django中每个app中所有的静态资源收集至此 -> nginx控制寻找静态目录
# STATIC_ROOT = ''
import os
from pathlib import Path
BASE_DIR = Path(__file__).resolve().parent.parent.parent # 找到根目录外面一级
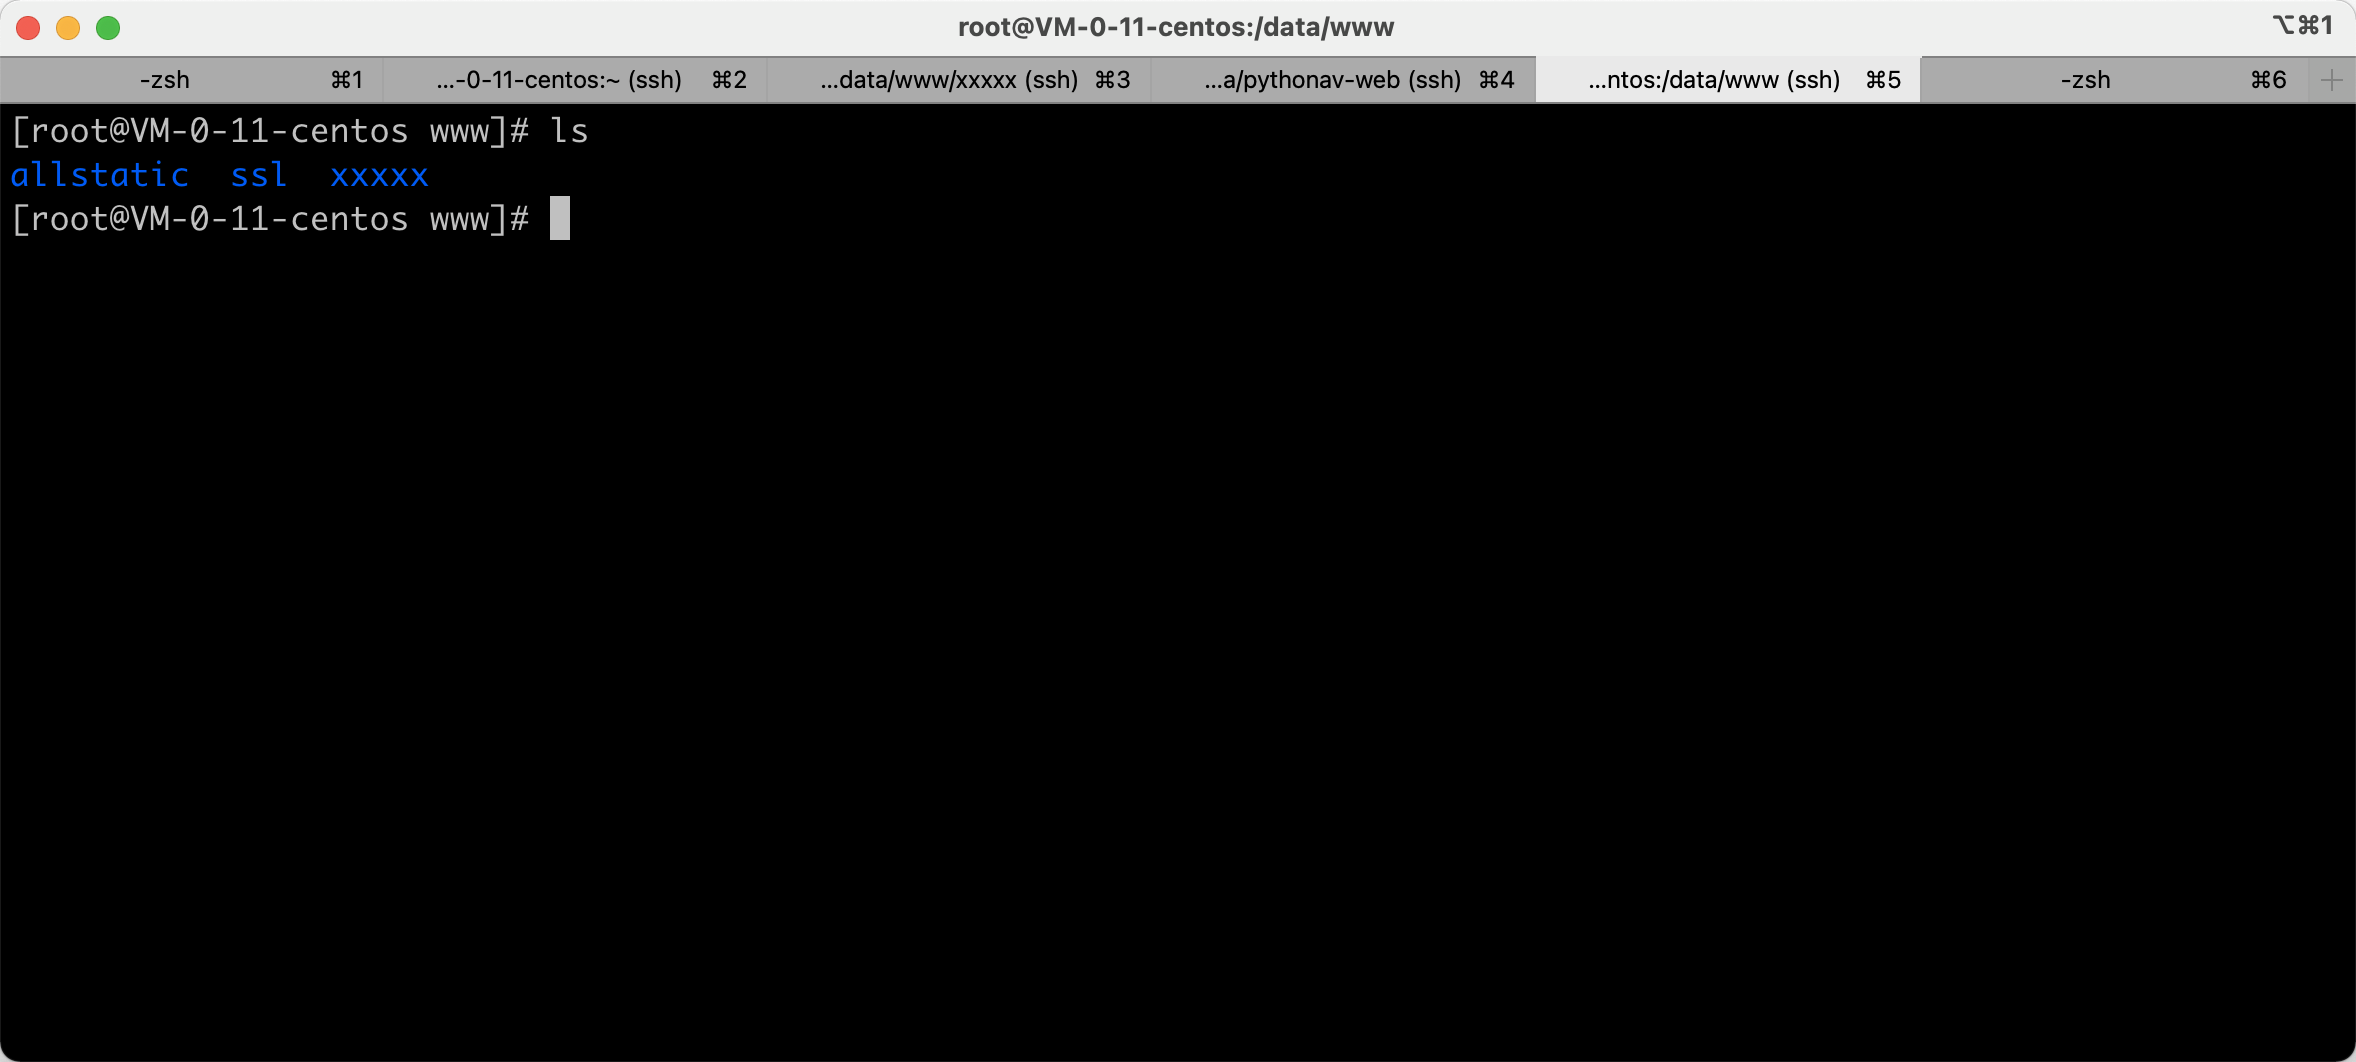
STATIC_ROOT = os.path.join(BASE_DIR, 'allstatic') # 将配置文件都保存到allstatic中
3.7 收集静态资源
source /envs/day06/bin/activate
python manage.py collectstatic  # 可以看到相关命令
"""
注意: 后续静态资源有变动. 需要重新收集
"""
3.8 uwsgi(一般和nginx联合使用)
source /envs/day06/bin/activate
pip install uwsgi
- 运行命令(不使用nginx)
# 进入项目目录
cd order-trading-platform
uwsgi --http :80 --chdir /root/order-trading-platform --wsgi-file /root/order-trading-platform/Order/wsgi.py --master --processes 4 --static-map /static=/allstatic
-
创建 uwsgi_order.ini(不使用nginx)
[uwsgi]
http = 0.0.0.0:8001
chdir = /root/order-trading-platform
wsgi-file = /root/order-trading-platform/Order/wsgi.py
processes = 4
static-map = /static=/allstatic

virtualenv = /envs/day06
# 执行命令 uwsgi --ini uwsgi_order.ini
3.9 nginx
yum install nginx -y
vim /etc/nginx/nginx.conf
修改nginx.conf配置文件:
user root;
worker_processes auto;
error_log /var/log/nginx/error.log;
pid /run/nginx.pid;

# Load dynamic modules. See /usr/share/doc/nginx/README.dynamic.
include /usr/share/nginx/modules/*.conf;

events {
    worker_connections 1024;
}

http {
    log_format  main  '$remote_addr - $remote_user [$time_local] "$request" '
                      '$status $body_bytes_sent "$http_referer" '
                      '"$http_user_agent" "$http_x_forwarded_for"';

    access_log  /var/log/nginx/access.log  main;

    sendfile            on;
    tcp_nopush          on;
    tcp_nodelay         on;
    keepalive_timeout   65;
    types_hash_max_size 4096;

    include             /etc/nginx/mime.types;
    default_type        application/octet-stream;

    # Load modular configuration files from the /etc/nginx/conf.d directory.
    # See http://nginx.org/en/docs/ngx_core_module.html#include
    # for more information.
    # include /etc/nginx/conf.d/*.conf;

    upstream django {
        server 127.0.0.1:8001;
    }

    server {
        listen       80;
        listen       [::]:80;
        # server_name  day06.pythonav.com;

        # Load configuration files for the default server block.
        # include /etc/nginx/default.d/*.conf;

		location /static {
            alias  /root/allstatic/;
        }

        location / {
            uwsgi_pass  django;
            include     uwsgi_params;
        }

    }
}
修改uwsgi配置(uwsgi_order):
[uwsgi]
socket = 127.0.0.1:8001
chdir = /root/order-trading-platform
wsgi-file = /root/order-trading-platform/Order/wsgi.py
processes = 4
virtualenv = /envs/day06
bug总结:
1.访问静态文件如果出现404 not found -> 就是文件的路径设置错误. 应设置绝对路径(/root/allstatic)
2.访问静态文件如果出现403 forbidden -> 大概率是权限问题, 将nginx.conf配置的第一行user nginx改成user root
- nginx
# 启动
systemctl start nginx

# 开机启动
systemctl enable nginx
- uwsgi
uwsgi --ini uwsgi_order.ini
- kill当前服务
sudo netstat -tulpn | grep :8001
kill -9 process_id
3.10 shell脚本, 自动实现重启等功能
3.10.1 reboot.sh(重启)
#!/usr/bin/env bash

echo -e "\033[34m--------------------wsgi process--------------------\033[0m"  # 输出

ps -ef|grep uwsgi_order.ini | grep -v grep  # 搜索有没有叫uwsgi_order.ini的进程

sleep 0.5

echo -e '\n--------------------going to close--------------------'

ps -ef |grep uwsgi_order.ini | grep -v grep | awk '{print $2}' | xargs kill -9  # 杀掉nginx的进程id

sleep 0.5

echo -e '\n----------check if the kill action is correct----------'

/envs/day06/bin/uwsgi  --ini uwsgi_order.ini &  >/dev/null  # 重新启动

echo -e '\n\033[42;1m----------------------started...----------------------\033[0m'
sleep 1

ps -ef |grep uwsgi_order.ini | grep -v grep  # 再将进程罗列出来
# 执行脚本
chmod 755 reboot.sh  # 赋予可执行权限
./reboot.sh
2.10.2 stop.sh(停止)
#!/usr/bin/env bash

echo -e "\033[34m--------------------wsgi process--------------------\033[0m"

ps -ef |grep uwsgi_order.ini | grep -v grep

sleep 0.5

echo -e '\n--------------------going to close--------------------'

ps -ef |grep uwsgi_order.ini | grep -v grep | awk '{print $2}' | xargs kill -9

sleep 0.5
3.11 数据库处理
-
登录线上服务器. 执行数据库迁移
python manage.py makemigrations
python manage.py migrate -
在.gitignore中
# database migrations
*/migrations/*.py
!*/migrations/__init__.py
原因:redis配置没有重启。
问题:关于错误应该尽可能的去避免。 -> 加上try...except... 加上日志
3.12 域名
- 租域名(阿里云) ->
iifeng.cn
域名 -> IP
www.pythonav.com -> 101.43.208.130
3.13 https
设置https协议有一个大前提: 你的网站得公安备案并通过
3.13.1 证书申请和下载
这是说明文档, 可白嫖一年的
https://developer.aliyun.com/article/1030571?spm=5176.21213303.J_6704733920.7.62bc53c9HksD9I&scm=20140722.S_community%40%40%E6%96%87%E7%AB%A0%40%401030571._.ID_community%40%40%E6%96%87%E7%AB%A0%40%401030571-RL_ssl%E5%85%8D%E8%B4%B9%E8%AF%81%E4%B9%A6-LOC_main-OR_ser-V_2-P0_0
3.13.2 证书上传
将证书文件上传至服务器,例如:上传至项目目录的ssl文件夹下。
window可以直接用xshell拖拽文件上传
3.13.3 修改nginx配置
原来的配置
user root;
worker_processes auto;
error_log /var/log/nginx/error.log;
pid /run/nginx.pid;

# Load dynamic modules. See /usr/share/doc/nginx/README.dynamic.
include /usr/share/nginx/modules/*.conf;

events {
    worker_connections 1024;
}

http {
    log_format  main  '$remote_addr - $remote_user [$time_local] "$request" '
                      '$status $body_bytes_sent "$http_referer" '
                      '"$http_user_agent" "$http_x_forwarded_for"';

    access_log  /var/log/nginx/access.log  main;

    sendfile            on;
    tcp_nopush          on;
    tcp_nodelay         on;
    keepalive_timeout   65;
    types_hash_max_size 4096;

    include             /etc/nginx/mime.types;
    default_type        application/octet-stream;

    # Load modular configuration files from the /etc/nginx/conf.d directory.
    # See http://nginx.org/en/docs/ngx_core_module.html#include
    # for more information.
    # include /etc/nginx/conf.d/*.conf;

    upstream django {
        server 127.0.0.1:8001;
    }

    server {
        listen       80;
        listen       [::]:80;
        root         /root;
        # server_name  day06.pythonav.com;

        # Load configuration files for the default server block.
        # include /etc/nginx/default.d/*.conf;

        location /static {
            alias  /root/allstatic/;
        }

        location / {
            uwsgi_pass  django;
            include     uwsgi_params;
        }

    }
}
修改成https请求的配置文件
user root;
worker_processes auto;
error_log /var/log/nginx/error.log;
pid /run/nginx.pid;

# Load dynamic modules. See /usr/share/doc/nginx/README.dynamic.
include /usr/share/nginx/modules/*.conf;

events {
    worker_connections 1024;
}

http {
    log_format  main  '$remote_addr - $remote_user [$time_local] "$request" '
                      '$status $body_bytes_sent "$http_referer" '
                      '"$http_user_agent" "$http_x_forwarded_for"';

    access_log  /var/log/nginx/access.log  main;

    sendfile            on;
    tcp_nopush          on;
    tcp_nodelay         on;
    keepalive_timeout   65;
    types_hash_max_size 4096;

    include             /etc/nginx/mime.types;
    default_type        application/octet-stream;

    # Load modular configuration files from the /etc/nginx/conf.d directory.
    # See http://nginx.org/en/docs/ngx_core_module.html#include
    # for more information.
    # include /etc/nginx/conf.d/*.conf;

    upstream django {
        server 127.0.0.1:8001;
    }

    server {
        listen      80;
        server_name www.iifeng.cn;
        rewrite ^(.*) https://$server_name$1 redirect;
    }

    server {
        listen       443 ssl;
        server_name  www.iifeng.cn;

        #证书文件
        ssl_certificate      /root/ssl/9960948_iifeng.cn.pem;
        #私钥文件
        ssl_certificate_key  /root/ssl/9960948_iifeng.cn.key;

        ssl_session_cache    shared:SSL:1m;
        ssl_session_timeout  5m;
        ssl_ciphers ECDHE-RSA-AES128-GCM-SHA256:ECDHE:ECDH:AES:HIGH:!NULL:!aNULL:!MD5:!ADH:!RC4;
        ssl_protocols TLSv1 TLSv1.1 TLSv1.2;
        ssl_prefer_server_ciphers  on;

        location / {
            uwsgi_pass  django;
            include     uwsgi_params;
           }
        location /static {
            alias  /root/allstatic/;
        }
    }
}
现在就可以用https访问我们的网站了!
Recommend
About Joyk
Aggregate valuable and interesting links.
Joyk means Joy of geeK