
7

Configure Launch screen in SwiftUI using Storyboard
source link: https://sarunw.com/posts/launch-screen-with-storyboard/
Go to the source link to view the article. You can view the picture content, updated content and better typesetting reading experience. If the link is broken, please click the button below to view the snapshot at that time.

SwiftUI project comes with a way to configure a launch screen using an Info.plist, but it is quite limited in function.
If you want greater control and flexibility, you can use a Storyboard as a launch screen instead.
How to configure a launch screen using a Storyboard
To configure a launch screen using a storyboard, you have to do the following steps.
-
Remove Launch Screen (
UILaunchScreen) key from project Info.plist. This will opt out from configuring a launch screen using Info.plist. -
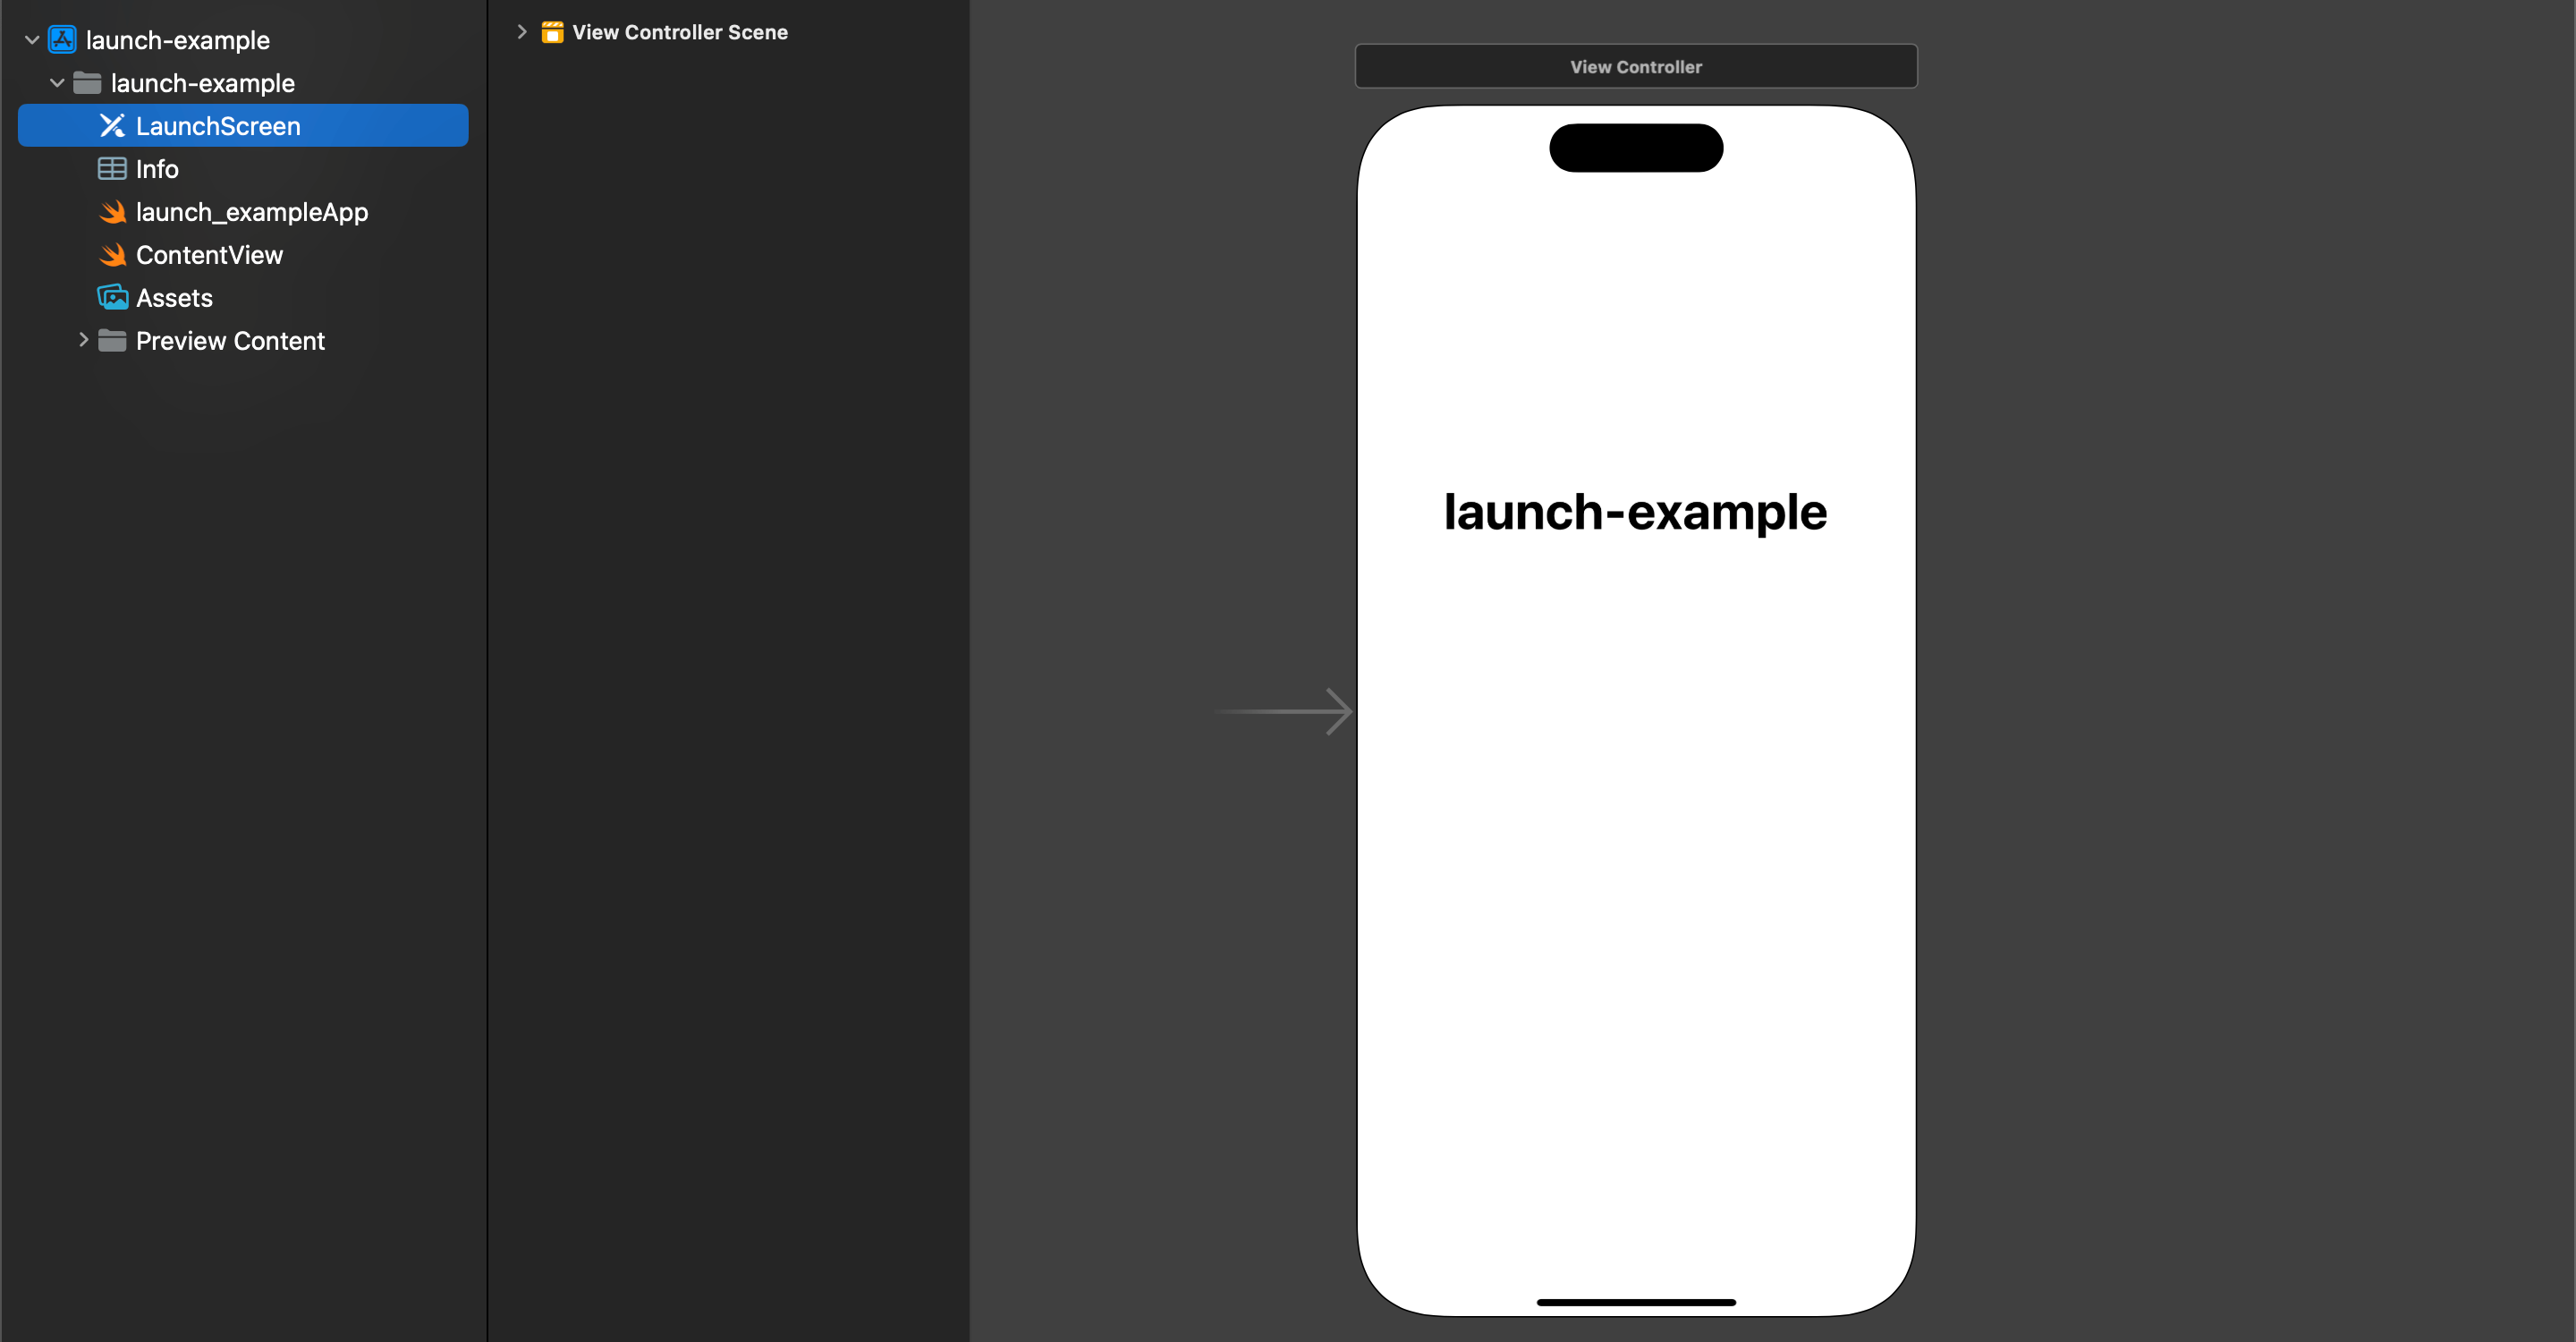
Create a new Launch screen file.
- Choose File > New > File.
- Under User Interface, select Launch Screen, and click Next.
- Give the launch screen file a name. I named it "LaunchScreen" in this case.
-
Set the newly created launch screen file as the launch screen.
-
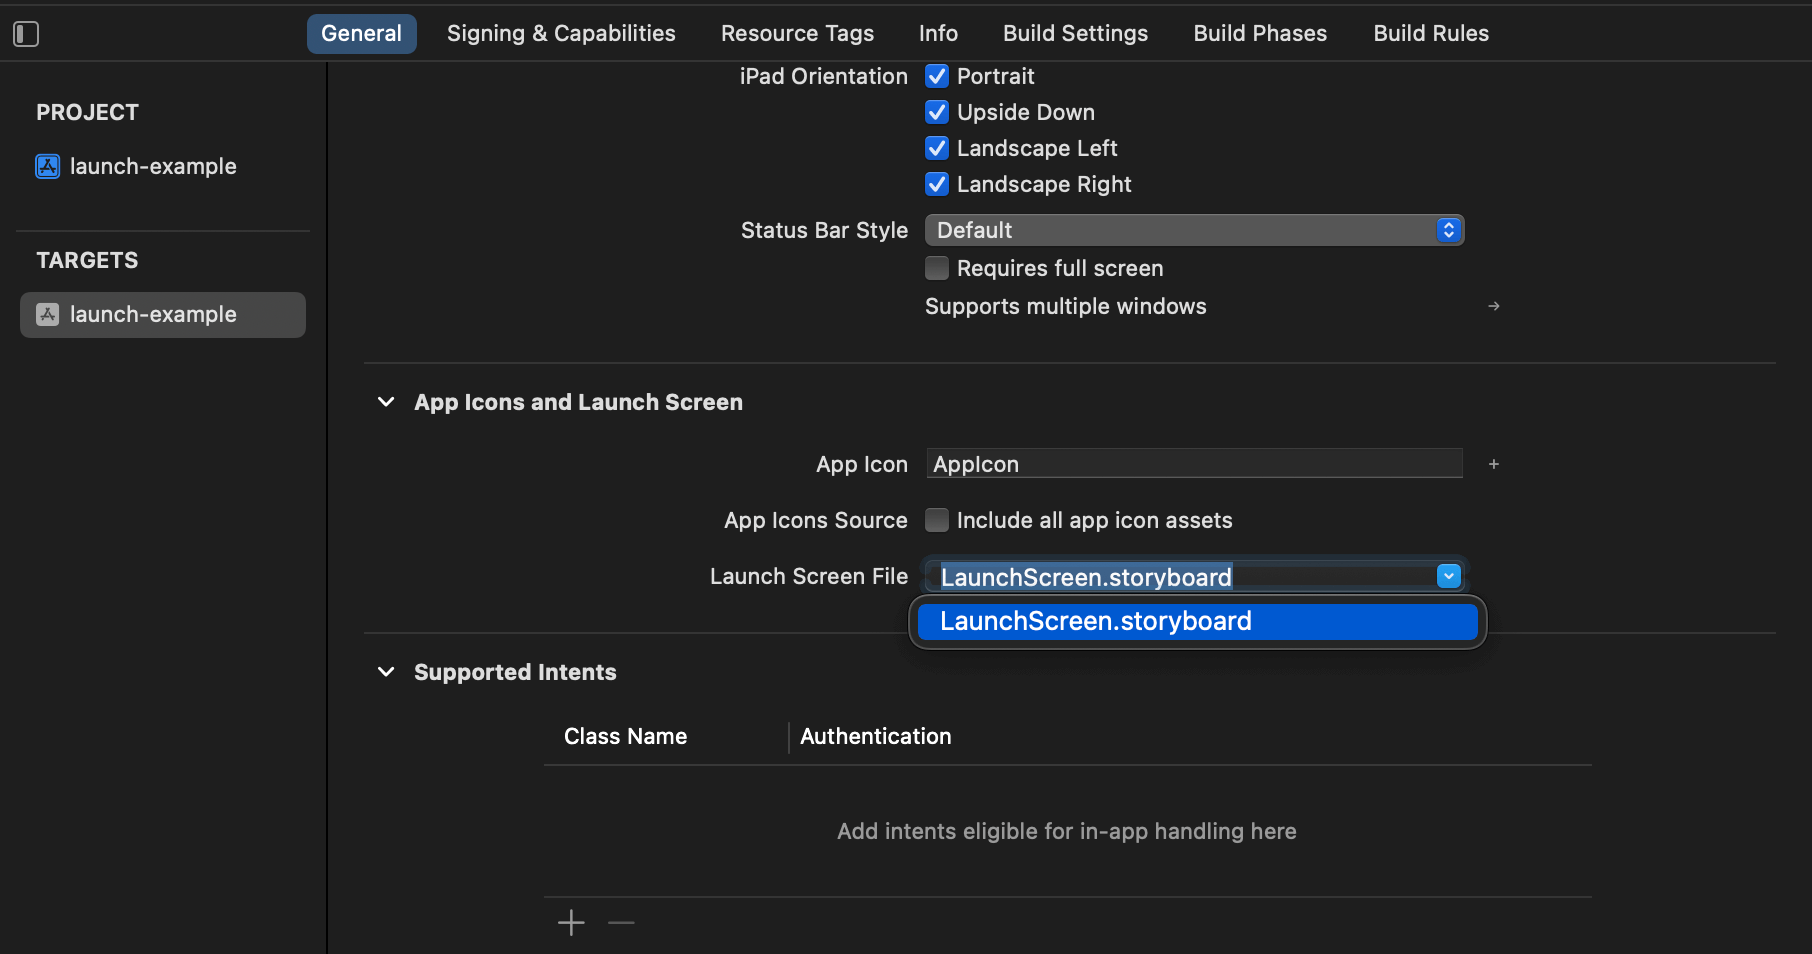
You can either do this in the "General" tab.
- Select your app target, then select the General tab and find the "App Icons and Launch Images" section.
- In the Launch Screen File field, select a launch screen file that you want to use as a launch screen.
-
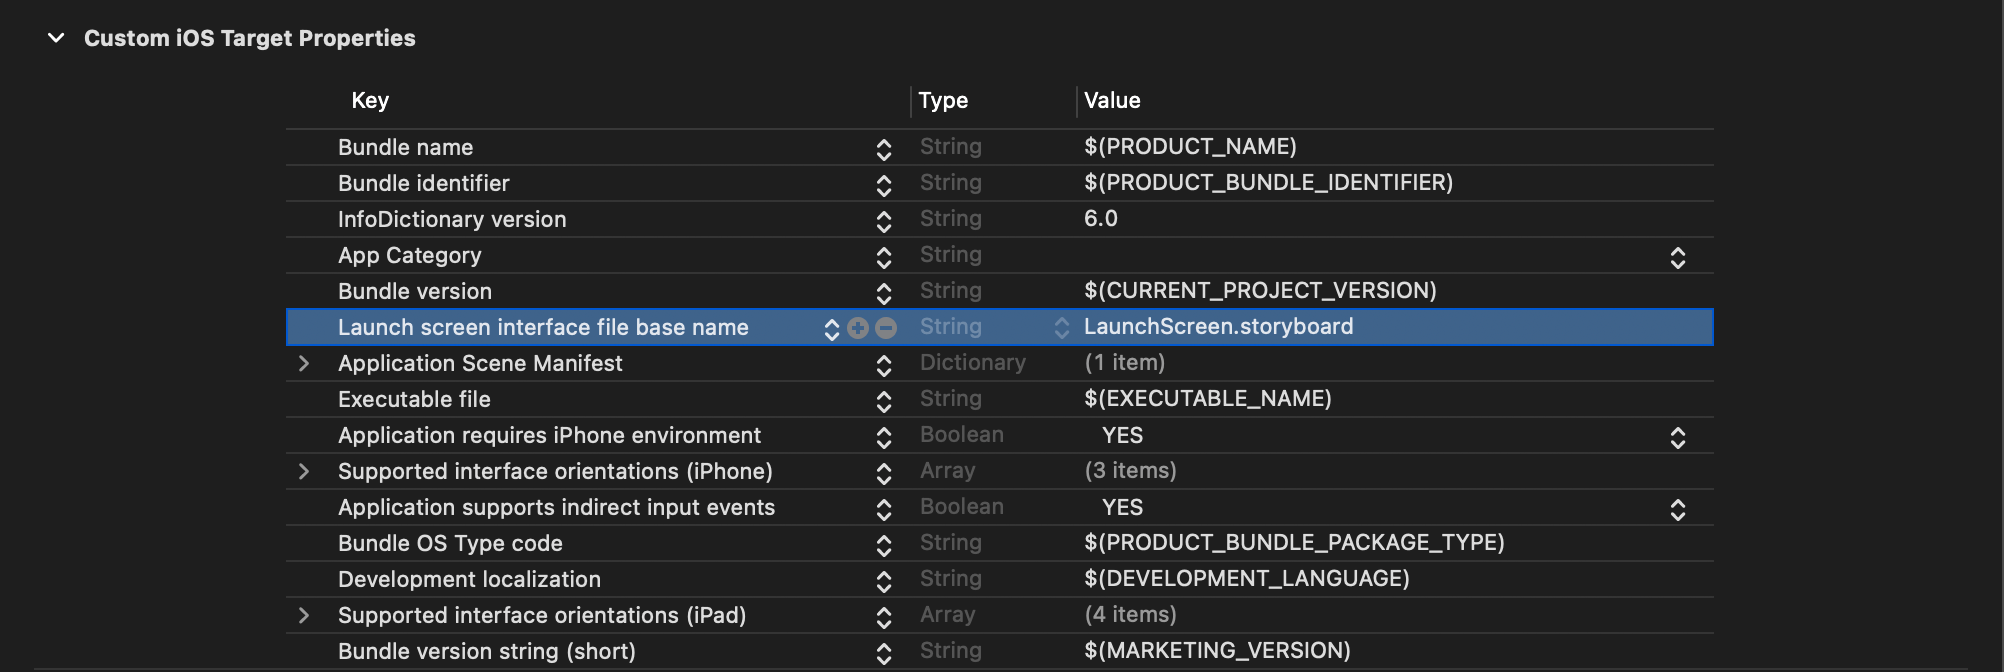
Or you can do it in Info.plist.
- Add a new key,
UILaunchStoryboardName, to the Info.plist. - Then specify the filename of your storyboard file.
- Add a new key,
-
That's all. You can now configure your launch screen from the Storyboard.
Recommend
About Joyk
Aggregate valuable and interesting links.
Joyk means Joy of geeK