

How to use SwiftUI as UIView in Storyboard
source link: https://sarunw.com/posts/swiftui-view-as-uiview-in-storyboard/
Go to the source link to view the article. You can view the picture content, updated content and better typesetting reading experience. If the link is broken, please click the button below to view the snapshot at that time.

How to use SwiftUI View as UIView in Storyboard
We can use SwiftUI view as UIViewController by wrapping it in UIHostingController. We learn this in How to use SwiftUI as UIViewController in Storyboard.
The bad news is we don't have an equivalent UIHostingView or any class that we can wrap SwiftUI view into a UIView.
Luckily, Storyboard provides an easy way we can embed a view from one view controller to another view controller via a Container View.
Adding a container view requires six steps.
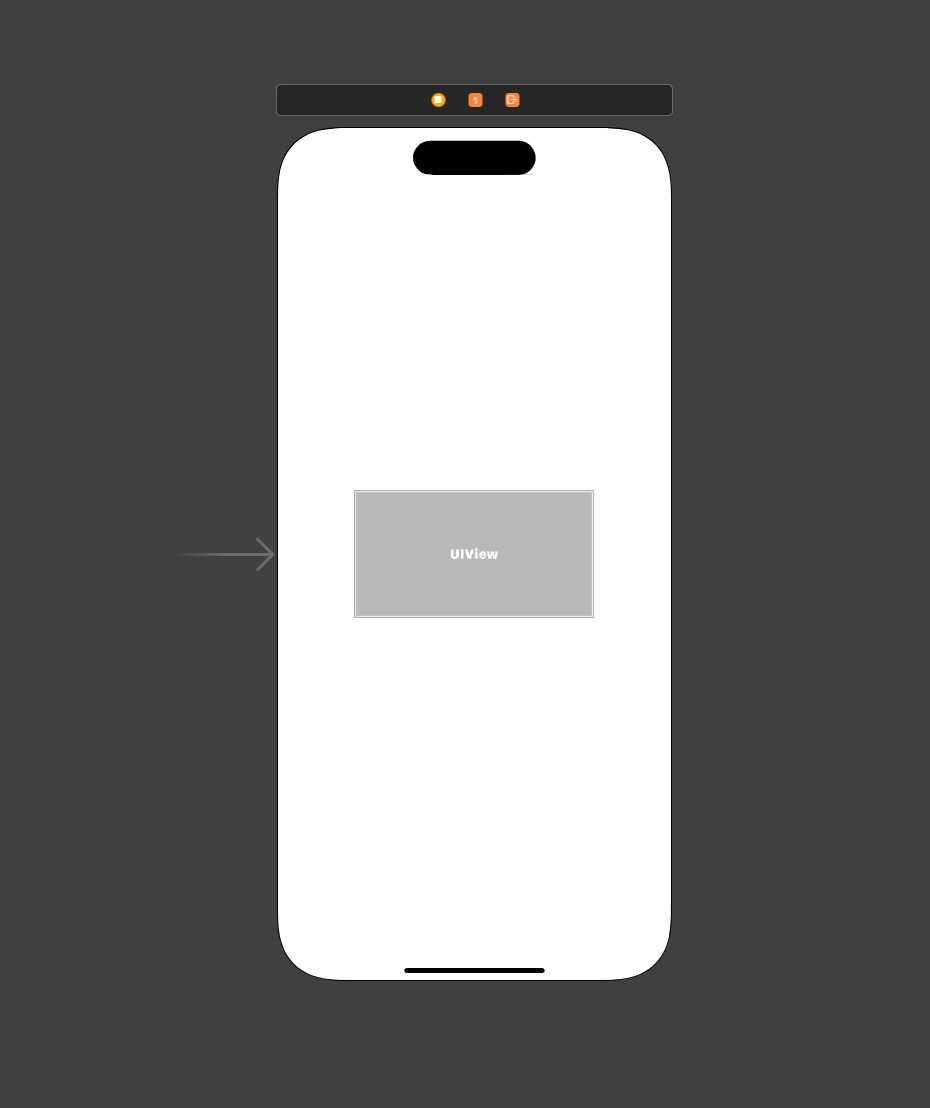
As an example, I will add a SwiftUI view at the center of a UIViewController.

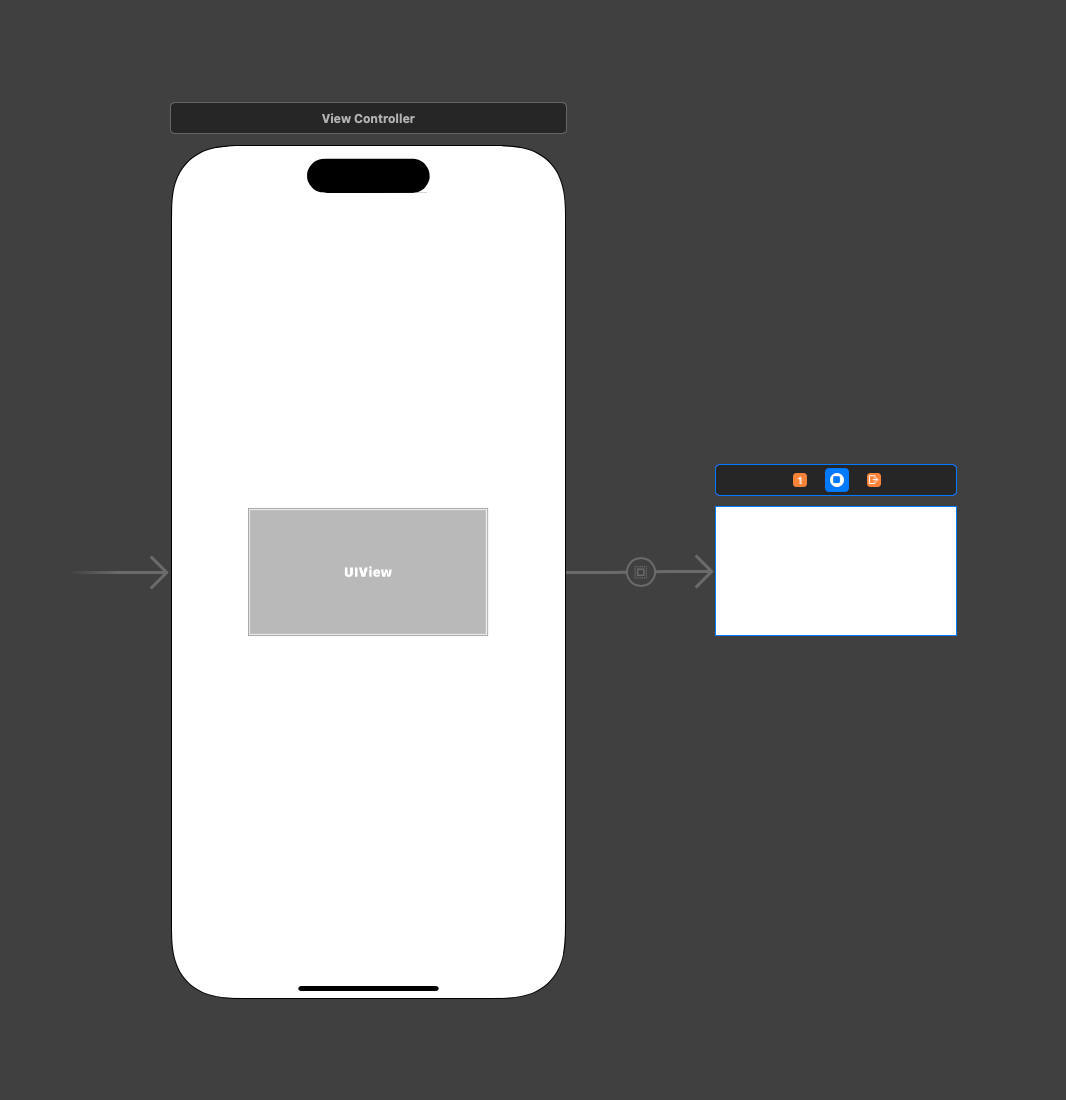
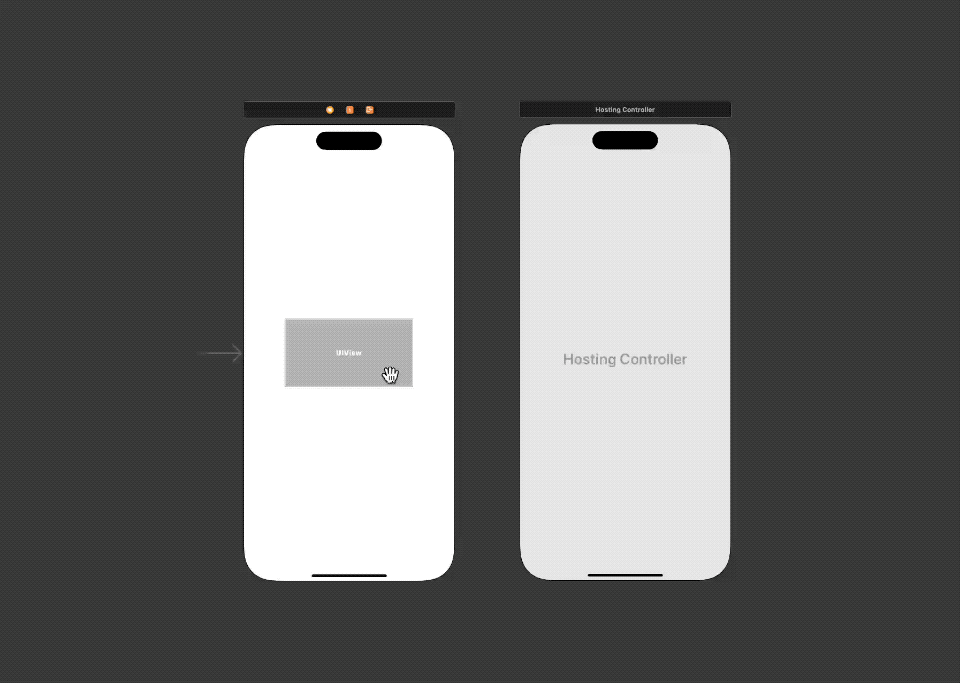
Using a SwiftUI view as a UIView.
Add a Container to the Storyboard
Open the Library either by
- View Menu > Show Library.
- ⇧ - shift + ⌘ - command + L
- Or Clicking on the + button in the top right corner.
Open Xcode Library.
You will see a Library window popping up.
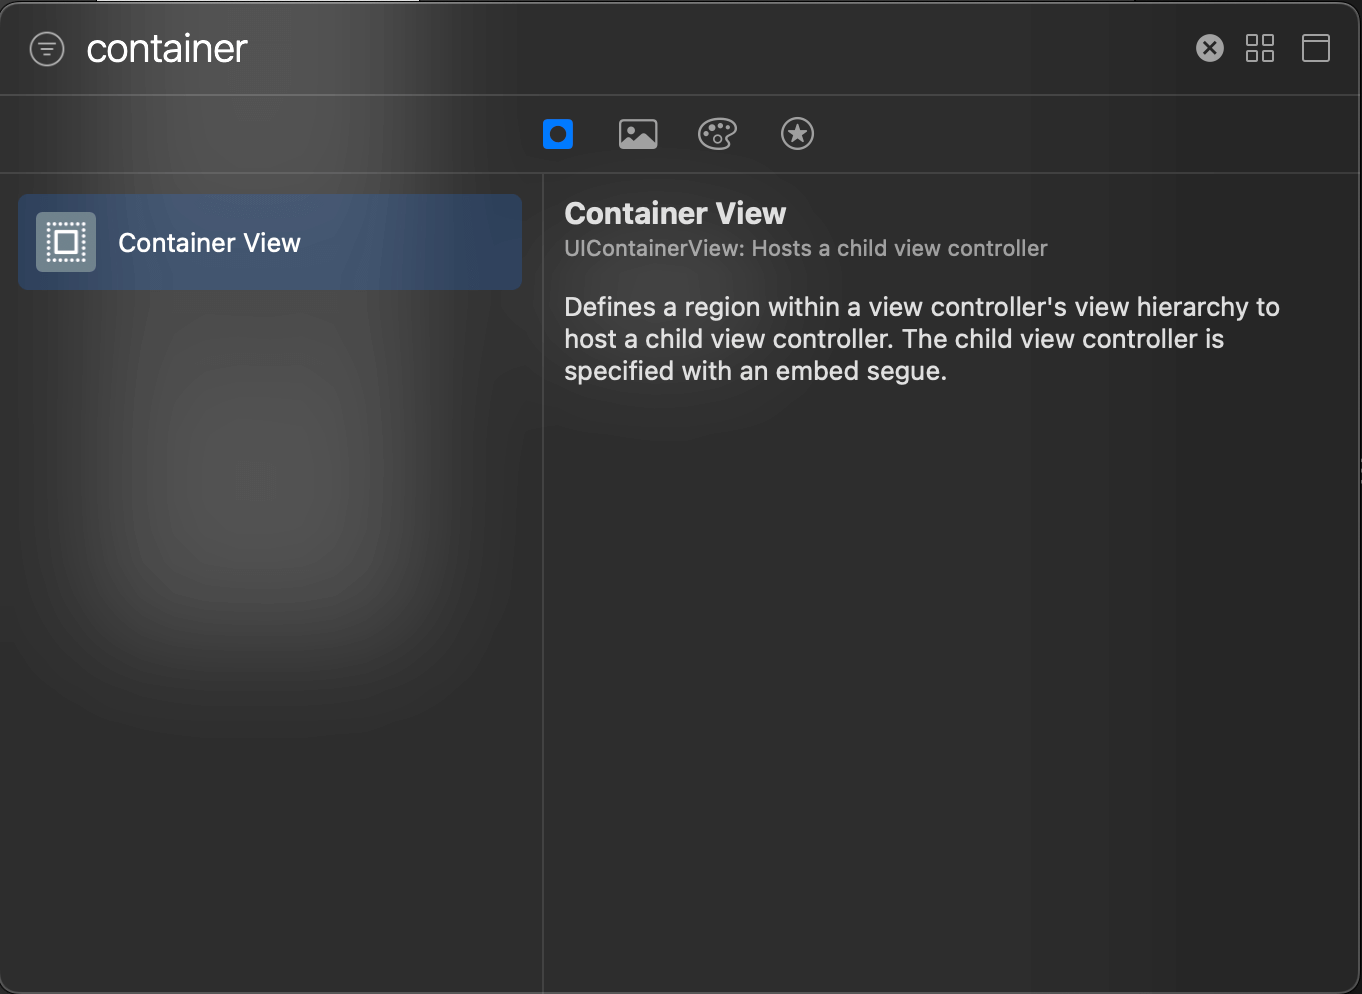
Xcode Library.
Then, search for "Container View" and drag and drop it to the Storyboard.
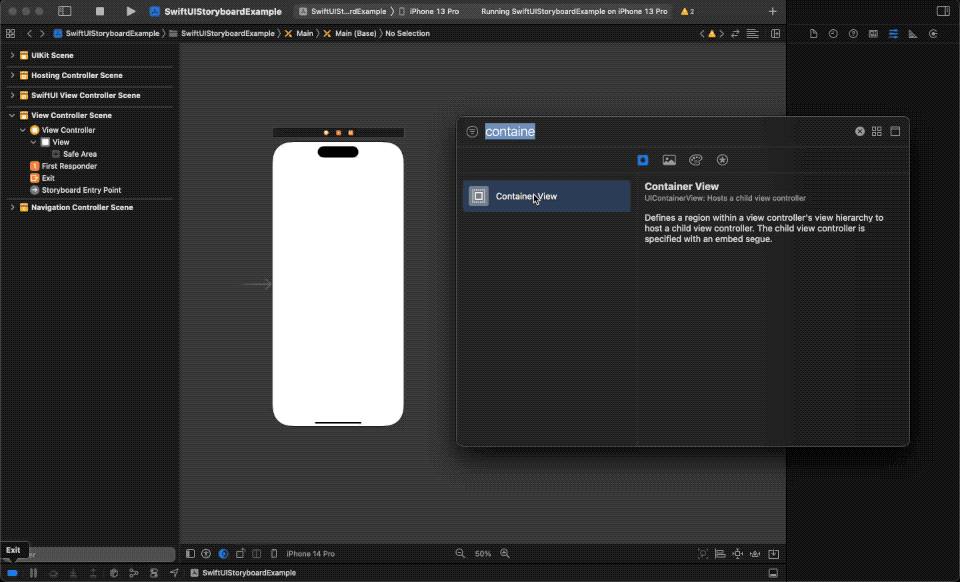
Add a Container View to the Storyboard
Remove a default embed view controller
By adding a Container View, Storyboard will create a default view controller for us.
Since we want to use SwiftUI view here, we need to swap the placeholder view controller with a UIHostingController.
To Delete the default view controller.
- Select an embed view controller.
Select an embed view controller. 2. Hit the Delete key (⌫ - Backspace/Delete).
Hit the Delete key.
Add a UIHostingController to the Storyboard
Add a UIHostingController to the Storyboard by
- Open the Library.
- Search for
UIHostingController. - Drag and drop to the Storyboard.

Add a UIHostingController to the Storyboard.
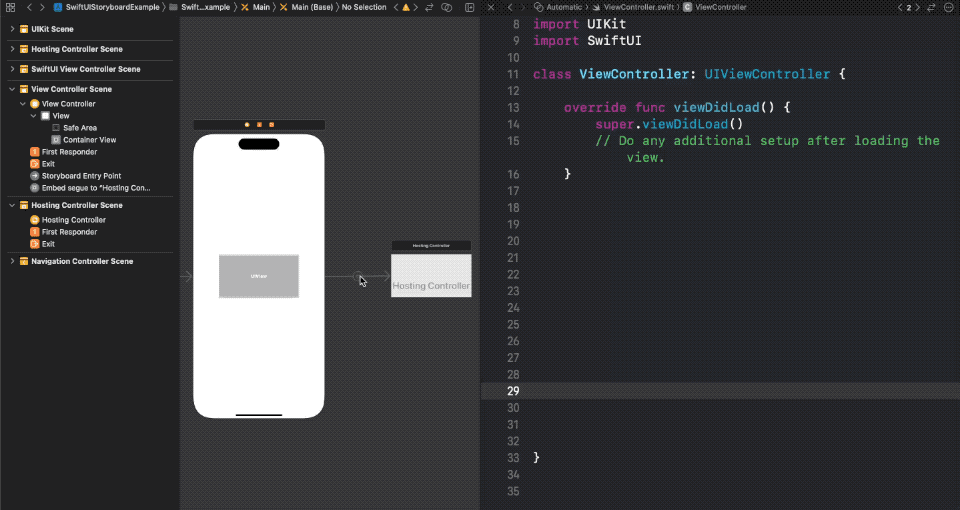
Embed a UIHostingController in the container view
To assign the UIHostingController as a view controller for the Container View, you need to do the following steps.
- Hold down the Control key
- Click on the Container View and drag to the
UIHostingController. - Select "Embed" Segue.
Add an embed segue.
Create a segue outlet
Storyboard use @IBSegueAction as a bridge between Storyboard and the code.
Here are the steps to create @IBSegueAction.
- Open the Storyboard.
- Open "Assistant editor" from Editor Menu > Assistant. This will open the Storyboard and Code editor side-by-side.
- Select the "Embed" Segue we created in the last section.
- Hold down the Control key and drag to the code editor.
- Enter the name of your segue. I named it
embedSwiftUIView.
Create a @IBSegueAction.
Implement the IBSegueAction
In the @IBSegueAction, we return a view controller that will be used as a embed view for the Container View.
This is where we create and return our SwiftUI view.
import UIKit
import SwiftUI

class ViewController: UIViewController {

override func viewDidLoad() {
        super.viewDidLoad()
        // Do any additional setup after loading the view.
    }

@IBSegueAction func embedSwiftUIView(_ coder: NSCoder) -> UIViewController? {
        return UIHostingController(coder: coder, rootView: SwiftUIView())
    }
}
We need to use UIHostingController's initializer that accepts coder here, init(coder:rootView:).
This is what we get.
Using a SwiftUI view as a UIView.
And here is the SwiftUIView implementation.
struct SwiftUIView: View {
    var body: some View {
        ZStack {
            Color.pink
            Button("Hello, SwiftUI!") {

}
            .font(.title)
            .buttonStyle(.borderedProminent)
            .padding()
        }
        .navigationTitle("SwiftUI View")
    }
}Recommend
About Joyk
Aggregate valuable and interesting links.
Joyk means Joy of geeK