

5 ways to involve your team in continuous product discovery
source link: https://uxplanet.org/5-ways-to-involve-your-team-in-continuous-product-discovery-fb972ed858dd
Go to the source link to view the article. You can view the picture content, updated content and better typesetting reading experience. If the link is broken, please click the button below to view the snapshot at that time.

5 ways to involve your team in continuous product discovery
Maintaining continuity in the discovery process, communicating your insights regularly, and working collaboratively can help you and your team empathize with your users more and ultimately build better products.
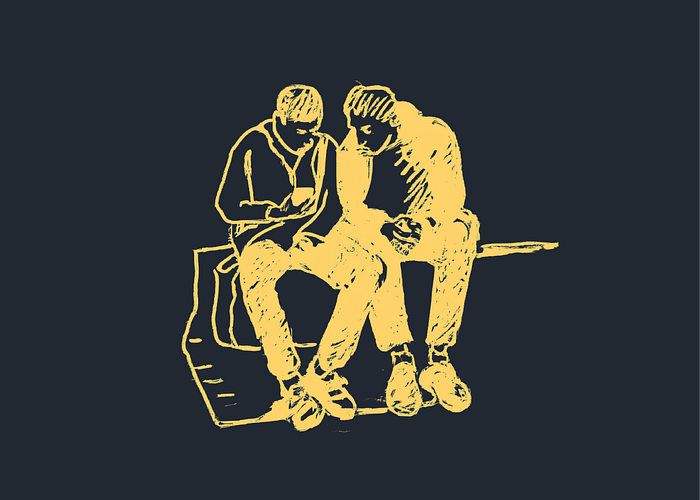
Two people sitting together, one of them holding a mobile phone and talking hand-drawn
Observing users interacting with your product or discussing their needs, problems, or desires can be incredibly impactful for building a successful product. I’m sure you know it and already doing it. But do you do it regularly? Do you involve your team in this process? How often do you present the insights?
Actions speak louder than words. There’s no substitute for actually seeing your users in action. Let’s be honest. No one pays attention to lengthy reports with dense paragraphs and slides. People’s attention spans are so short these days that you need to approach sharing information about your users and involving the team as if you are an internal community or event manager.
Frequency in the discovery process is key to generating insights regularly and keeping the ‘content machine’ moving:
At a minimum, weekly touchpoints with customers
By the team building the product
Where they conduct small research activities
In pursuit of a desired outcomeTeressa Torres about continuous discovery
Invite your teammates to the interviews
There are many reasons why you should involve your teammates and especially engineers, in the discovery process:
- They will hear different insights because they have different perspectives.
- They will help you test the idea in numerous ways, from building a prototype to provident necessary data.
- They will challenge you by asking discomforting questions.
- They will bring an analytical mindset to your product experiments
- Delivery goes smoother when your teammates participate in the discovery process because they already have the context and knowledge of the user.
And lastly, as Marty Cagan said in his book Inspired:
If you’re just using your engineers to code, you’re only getting about half their value.
And personally, I think it relates to every role in the product team and company.
With this in mind, invite your teammates to join in whenever you have any activities involving users, such as user interviews, user tests, or focus groups. Once a session is confirmed, post a message in your team’s internal communication tool with the dates and times, and ask who would like to join. Let them know they don’t need to do anything specific — they can listen and observe.
Some people don’t want to participate in these activities; interestingly, these are usually the people who can have the most significant impact from observing users. If you encounter a teammate who is hesitant to join in, contact them directly. Explain to them the significance of such activities and emphasize how enjoyable watching others discuss or interact with your product can be.
Tip #1. The ideal number of participants in the interview
When it comes to user interviews, it’s generally recommended to limit the number of additional participants to no more than two. However, in my experience, I prefer to have just one extra person present to avoid distracting the user. Interviews can already be quite stressful for people, and being 1-on-1 with someone can be overwhelming enough, let alone with two additional individuals. Moreover, having two people on the call who remain silent can feel a bit awkward.
Tip #2. How to interview with your teammates
During an interview with other teammates, I have a few rules that I like to follow. 1) one person leads the interview; 2) If another person has questions during the interview, they should send them privately in Slack to avoid disrupting the flow; 3) at the end of the interview, I allocate time for other participants to ask questions.
Tip #3. Notes and follow-up discussion
I typically don’t take notes during the interview itself, as I usually record the sessions and later debrief the transcript. However, I do write some key phrases during the interview that can help me delve deeper and ask follow-up questions.
If I have a teammate present during the interview, they can take notes instead. Often, we stay on the call after the session is over to exchange our initial impressions, and these can be very useful. In my experience, these first impressions often highlight the most important observations.
Set up an insights channel
Create a dedicated communication channel using Slack or another team messaging platform. Treat it as a community development initiative, so post there regularly. As you do your weekly interviews, create video clips of the most exciting moments and post them to the channel. Add your comments and insights to supplement the clips or ask your teammates to interpret them, it’s always interesting to see how other people think, and it adds an element of interactivity.
On top of that, you can post weekly or bi-weekly reports that cover the insights and themes you’ve discovered. You can also use the channel to announce upcoming interviews.
Tip #4. How to make more impactful clips
To make the clips more impactful, you can use text-based audio and video editing software like Descript. Here’s how to make the most of it:
Cut out any unnecessary words, sentences, and sounds (such as “like,” “well,” and “um”). When speaking, we often use a lot of filler that doesn’t add much to the conversation.
Use audiograms if you don’t want to share video of the user.
Add background music to make the clip more emotional and epic — trust me, it’s worth trying!
Tip #5. Debrief within one day
I know it’s not easy, and I don’t always do it myself on time, but it’s important to allocate time to debrief each interview at least one day after the session and to do a weekly overview. By doing this, you won’t create a backlog and will be able to share insights with your team on a regular basis. If you don’t do it right away and let everything pile up, it becomes harder to analyze, and the quality of your research suffers because you may miss important details.
Watch users’ session recordings
Using recordings and replays is a compelling way to gain insights into user behavior. It’s almost like being in the same room as your users, observing how they interact with your site or app. The only drawback is that you don’t know why users do what they do.
Sometimes it can be overwhelming, especially when dealing with thousands or millions of users, so having a clear goal when reviewing session recordings is essential. Typically, I focus on specific flows, pages, interface elements, or user segments. However, I occasionally like to pick random sessions to uncover unexpected bugs and obstacles that may not have been on my radar.
If you want to know more about how to start analyzing user session recordings, check out these great articles explaining how to pick a specific user segment or approach session recordings in general.
As for the process, I set aside at least 2 hours per week to review session recordings. Having uninterrupted time during this process is important, as you can start noticing patterns and trends through many recordings. I also highly encourage designers and engineers to review session recordings for at least an hour weekly.
Tip #6. The why behind the behavior
If you notice weird behavior in session recordings, it could be a sign that your flows and information architecture are not aligning with users’ mental models. For instance, if you observe users repeatedly going back and forth between pages, scrolling all the way down to the footer to navigate to another page, or frantically scrolling from top to bottom on a page, these could be indications of underlying issues.
Make sure you have a place where you document these observations. Take advantage of user interviews as an opportunity to ask why users engage in these unusual behaviors.
Tip #7. How to organize your observations
I organize all of my observations in spreadsheets:
1st sheet is for assignments
Columns: user segment or pages/screens, reviewer, date of last review. This is especially helpful when other people are involved in the review process, as it prevents any overlap.A separate sheet for each reviewer
Columns: user email, screen/page, description, type (Bug, behaviour), recording link.Tip #8. Privacy
It’s important to respect users’ privacy when using session recordings. Make sure to utilize any built-in settings and tools to hide sensitive data from the recordings.
Collaborate and communicate with empathy maps and user scenarios
Continuous product discovery is not only about inviting people to user interviews, communicating research timely and regularly, and establishing an ‘observation’ routine. It is also about collaboration.
Empathy maps
Empathy map is the go-to tool if you want to put yourself in your user’s shoes. Again Norman Nielsen did a great job of explaining what an Empathy Map is:
An empathy map is a collaborative visualization used to articulate what we know about a particular type of user. It externalizes knowledge about users in order to 1) create a shared understanding of user needs, and 2) aid in decision making.
Your artifacts should be based on research and real data. However, sometimes to kick things off, you need a starting point. In this case, proto-empathy maps or proto-personas can be useful. These tools can assist in establishing initial hypotheses and guiding future research to get data from potential users.
Back then, you’d usually have to get a team together to brainstorm empathy maps. But nowadays, the ideation process is much smoother with generative language models. You can use ChatGPT to get some initial ideas to kickstart your empathy map creation process.
Step 1. Ask ChatGPT to generate personas for your product

Personas generated by ChatGPT
Step 2. Ask ChatGPT to generate an Empathy map for them (I picked only one for demonstration purposes)

Empathy map generated by ChatGPT
Step 3. Assess the results with common sense, then involve your team for further ideas generation and discussion.
User scenarios
When it comes to communicating with empathy, user scenarios are an excellent tool. Writing user scenarios can help you turn a list of customer needs and product requirements into a format that’s easily digestible and engaging for others to read. The general structure is simple ‘Setup > Action > Result’. And user scenarios make really effective PRDs. ‘The Product Book’ provides a great guide on how to craft great user scenarios.
Let’s return to the ChatGPT magic to generate user scenarios for our product.
Step 1: Ask ChatGPT to generate a set of features

Features generated by ChatGPT
Step 2: Ask ChatGPT to create User Scenarios

User scenarios generated by ChatGPT (Part 1)

User scenarios generated by ChatGPT (Part 2)

User scenarios generated by ChatGPT (Part 3)
Step 3: Approach ChatGPT results with common sense
Tip #9
Feed your real personas and features set to ChatGPT to create a foundation for your entire PRDs. Or use Notion’s new AI feature to help you with that too.
Create a stakeholders repository
Create a centralized place where all discovery activities and data can be organized and accessible to anyone in the company. It can include:
- User data and contact info
- Hypothesis and insights reports
- Processes and templates
- Interview and session recordings
- Future plans and next steps
When it comes to a particular tool for a repository, I suggest:
- Notion, where you can create a highly flexible and customizable repository. Check out this comprehensive guide on how to set up Notion for user research.
- Specialized research tools, such as Condens and Dovetail. They have fewer customization options but are very convenient as they have premade templates, and all of your raw data, like user interviews or user testing, is stored in one place. Notion has a learning curve compared to them.
On a side note, tools like Condens and Dovetail haven’t completely changed how I approach product discovery and interview analysis, but they speed the process up tenfold. If you don’t put off tagging the themes in your interviews till the last minute, you can draft a preliminary report in no time. These tools are so simple but super powerful. So I encourage everyone to try including something similar to their workflow.
Recommend
About Joyk
Aggregate valuable and interesting links.
Joyk means Joy of geeK