

Build a casual side scroller with Rust
source link: https://www.ardanlabs.com/blog/2023/02/build-a-casual-side-scroller-with-rust.html
Go to the source link to view the article. You can view the picture content, updated content and better typesetting reading experience. If the link is broken, please click the button below to view the snapshot at that time.
Build a casual side scroller with Rust
Cheikh Seck
February 15, 2023Introduction
To get a feel for a programming language, I use game development as a means to get an understanding of it. By using this technique, I can set aside business requirements and focus on the underlying tech.
While writing a game with bracket-lib, I discovered some of Rust’s amazing keywords. In this post, I’d like to further explore the language semantics of Rust by building a 2d infinite scroll survival game.
The mechanics of the game will be simple and is inspired by the Futurama episode when the professor stated that his spaceship didn’t move but the “dark matter” engine moved the universe around it. Yes, it’s been nearly a decade since their last episode but this quote stuck with me since. The game I plan to build in this post will work in a similar manner because:
- The player-controlled entity will not move, with the exception of it being able to jump.
- The obstacles in the game will move towards the player and self-destruct once outside the viewport.
To better explain this choice, I want my game to truly be infinite and not reach an x coordinate that may cause an integer overflow. If the player itself is endlessly moving across the plane, it will reach a point that is beyond the system’s bounds.
I’ll be building this game with bracket-lib, a Rogue-Like ToolKit (rltk). I picked these libraries as they have great support for Webgl and the documentation is well written.
Setup
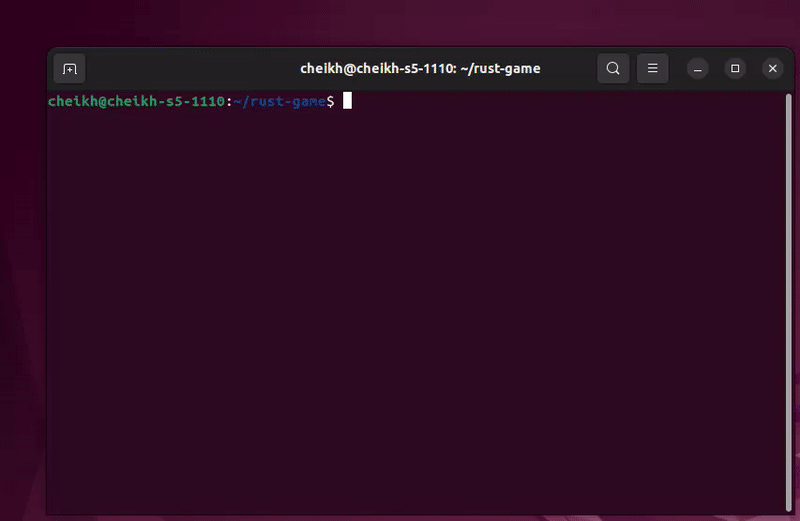
To start, I’ll execute the command cargo new rust-game to create a new project for my game. Next, I’ll update the Cargo.toml file and add the following dependencies:
…
[dependencies]
bracket-lib = "0.8"
rltk = { version = "0.8.0" }
…
While installing you may get errors related to cmake and fontconfig missing. To resolve these issues, I installed the dependencies on my system. If you’re on Ubuntu, here are the commands I ran to resolve these issues:
$ sudo apt install libfontconfig1-dev
$ sudo apt install cmake
If you have any issues, please do not hesitate to send me an email. Once installed, I’ll begin making changes to my main.rs file.
Defining State
To execute this idea, I’ll take the type-driven development approach and define the state struct of my game first. My state struct will store the following information:
- My player
yposition. This value will be used to determine if the player can jump or should be falling at a given frame. - A flag to indicate my player is falling and perform the position shifts needed
- A flag to indicate my player is jumping, and move the player upwards on each frame.
- A flag to indicate the game is over. I’ll be using this flag in the next post of the series,
With all of this in mind, my struct will look like this:
Traits
In Rust, traits can be interpreted as the Go equivalent of interfaces.
The next step I’ll take will be to implement rltk’s GameState trait for my state struct. This is done with Rust’s impl keyword and will ensure my state has the necessary methods it needs to provide to the game engine. In this case, I’ll need to implement one method called tick. This method will be called by the game engine on each frame.
By defining the GameState trait, the creators of bracket-lib gave developers a means to bring their own Rust struct that can talk to their game engine.
Here is my state struct’s implementation of GameState
In the code above, I’ve defined the tick method of my struct. Within this function, I have access to the data found in my struct as well as my terminal’s view. By pairing these two variables, I can make some interesting events happen on screen.
Initializing the main loop
To get the ball rolling, I’ll update my main function and add the code necessary to initialize my game’s loop. First, I’ll add a return type of BError to the main function because the function I’ll be using to initialize my drawing canvas (BTerm in this case) may return such an error. Here is the revised main function:
The code above will add a terminal window to my screen of size 80x50 and will have the title Hello Bracket World. Since system resources aren’t always available, the function may return an error message, hence the return type appended to function main. Next, I’ll initialize my state data struct and set the defaults I want the game to start with.
With my game state and scene (BTerm) ready, I’ll invoke the function main_loop and pass my state, so that it may be invoked on each tick, and my drawing canvas. Here is the final version of my main function:
Gameplay
In this section, I’m going to bring some life to my scene and draw objects to the screen. To achieve this, I’ll edit the tick method I defined earlier. The first statement I’ll add will clear the scene each time tick is invoked. By clearing all the objects, I can redraw these objects in different positions if need be. After that, I’ll add another statement to draw a yellow horizontal line that will act as my game’s ground. Here is the code performing this:
After adding this, I’ll add the shape representing my player. This shape’s y position will be determined by the state struct I defined earlier. For the sake of this game, the player will be a red box or, to add some flavor, a Rust crate. To do this, I’ll add the following lines to my tick method:
If you notice, I’m reading the y value of my state to determine which altitude my box should be at. The x value of my box is constant because, remember, the universe will move around the player and not the other way around. Up to this point, the scene is pretty lifeless. To animate my box, I’ll add a set of conditional statements that will change my box’s y position based on the values stored in my state struct. The first statement I’ll add will see if the box should be falling and prevent it from moving down after reaching a certain y coordinate. This y coordinate represents my ground and gives my game a sense of simulated physics. Here is the code to ensure my object will fall if told to do so:
If the state has determined my object should be going down it’ll add 1 to the stored y coordinate. By adding to this value, the object will appear to be falling. When the y coordinate is equal to my ground’s coordinate, I’ll prevent the object from falling through the floor.
The next conditional statement will check to see if the player should be jumping. On each tick, I’ll reduce 1 from my y coordinate to give the illusion of my object moving up. To prevent my box from jumping to infinity, I’ll set the going_down flag to true once the y value is less than the coordinate that represents the highest point the box can jump.
With this set, I’ll add code to update the state variable as needed based on user input.
Controlling the player
To abstract my player’s jump mechanism, I’ll define a function to update my state’s variables as needed and prevent the player from double jumping. The function will take one parameter, which will be the state struct I defined. Passing the ampersand with the mut keyword while declaring my function’s parameter type, I indicate that the changes done by the code in this function should be propagated up the call stack.
The conditional statement defined above will ensure that the player can only jump while on the ground which is another instance of simulated physics
Next, I’ll make use of Rust’s match keyword. This keyword will enable me to determine which action to execute based on the variable passed in the statement. In this case, I’m matching actions to keyboard keys and I’ll be reading the keycode of the pressed key from my context object’s key property. On match, the jump function I defined earlier will be executed.
In the code above, I trigger my jump function when the Up or Space keys are pressed. By using the VirtualKeyCode enum, I’ll have peace of mind that my code will work regardless of the end-users configuration. None will represent no key being pressed and, hence, no action will be performed. Some will execute another match statement to determine what to do with the player’s state. By having Some and None, the code to evaluate which behavior to do isn’t run on each frame update, but rather when a key is pressed. This is my perceived benefit of this code as this is how the authors of rltk handle their key press events in the documentation. None and Some constitute what is commonly known as “Rust’s memory safety.”
I’ll go back to my tick method and invoke the function player_input at the beginning of each frame. Based on the constraints set, my player will be able to jump only when it’s on the ground.
To wrap up the first part of this series, here is the current state of the game:
Ultimate Rust: Foundations
For every journey, what matters is the companions you take along. I invite you to embark on your Rust quest with Herbert as he is the sherpa that will help you cross the rugged terrain that is Rust. You may join his upcoming class here: https://www.ardanlabs.com/live-training-events/ultimate-rust-foundations-feb-27-2023.html
Conclusion
In short, writing code with Rust is quite the experience. While writing this post, I learned about Rust traits and the match keyword. One thing I like about the traits is that, from a code review perspective, I can easily identify which trait my struct is trying to implement. As for the match keyword, it enables me to define a course of action based on the value of the variable passed with the statement. In the next post, I’ll be adding obstacles to the game and making use of my struct’s game_over flag.
Resources
You can find the entire code written for this post here https://github.com/cheikhseck-ardan/rust-game
Rltk Documentation:
Recommend
About Joyk
Aggregate valuable and interesting links.
Joyk means Joy of geeK