

GPT in 60 Lines of NumPy
source link: https://jaykmody.com/blog/gpt-from-scratch/
Go to the source link to view the article. You can view the picture content, updated content and better typesetting reading experience. If the link is broken, please click the button below to view the snapshot at that time.
In this post, we'll implement a GPT from scratch in just 60 lines of numpy. We'll then load the trained GPT-2 model weights released by OpenAI into our implementation and generate some text.[1]
This post assumes familiarity with Python, NumPy, and some basic experience training neural networks. Code for this blog post can be found at github.com/jaymody/picoGPT.
What is a GPT?
GPT stands for Generative Pre-trained Transformer. It's a type of neural network architecture based on the Transformer. Jay Alammar's How GPT3 Works is an excellent introduction to GPTs at a high level, but here's the tl;dr:
- Generative: A GPT generates text.
- Pre-trained: A GPT is trained on lots of text from books, the internet, etc ...
- Transformer: A GPT is a decoder-only transformer neural network.
Large Language Models (LLMs) like OpenAI's GPT-3, Google's LaMDA, and Cohere Command XLarge are just GPTs under the hood. What makes them special is they happen to be 1) very big (billions of parameters) and 2) trained on lots of data (hundreds of gigabytes of text).
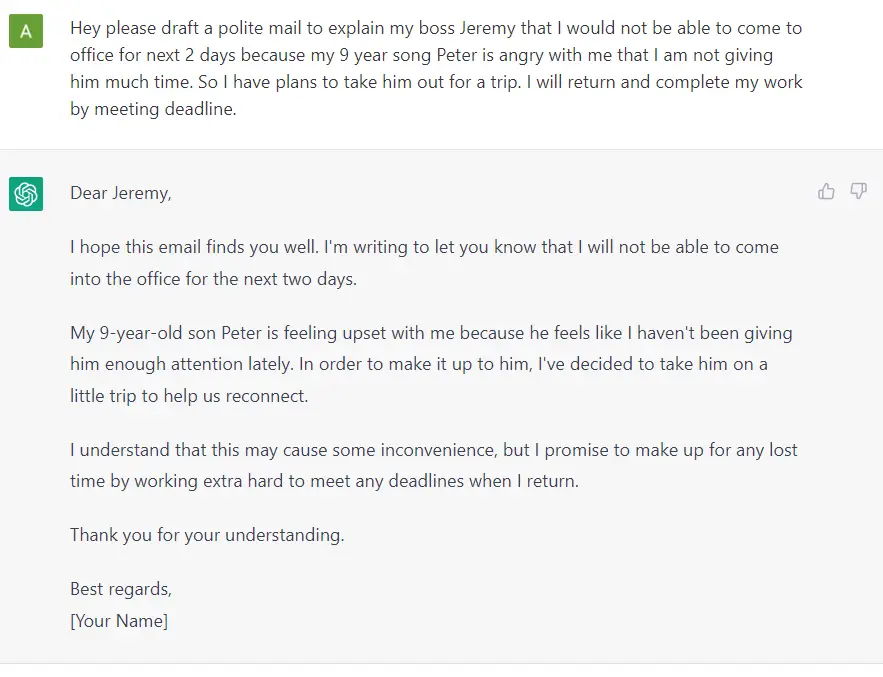
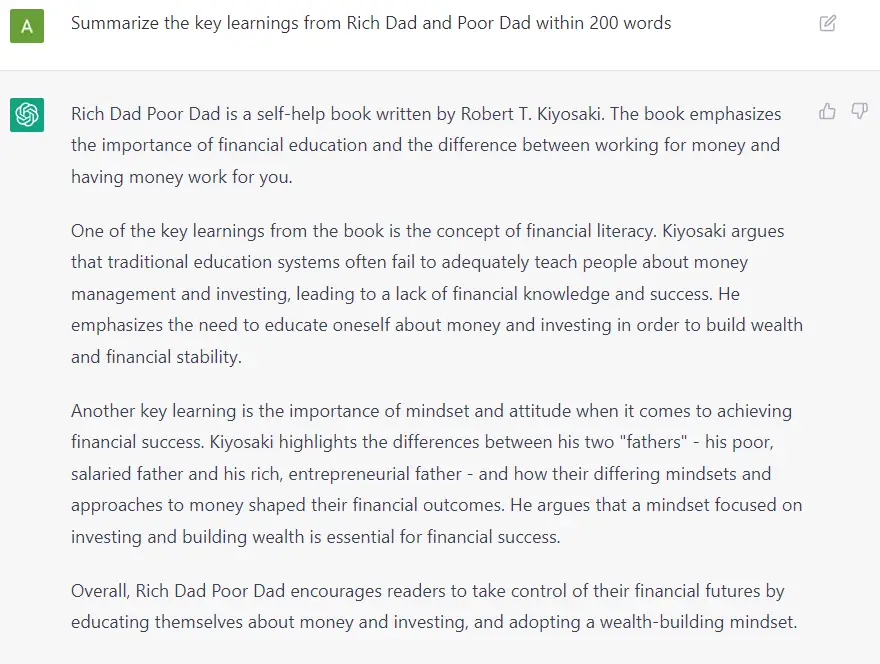
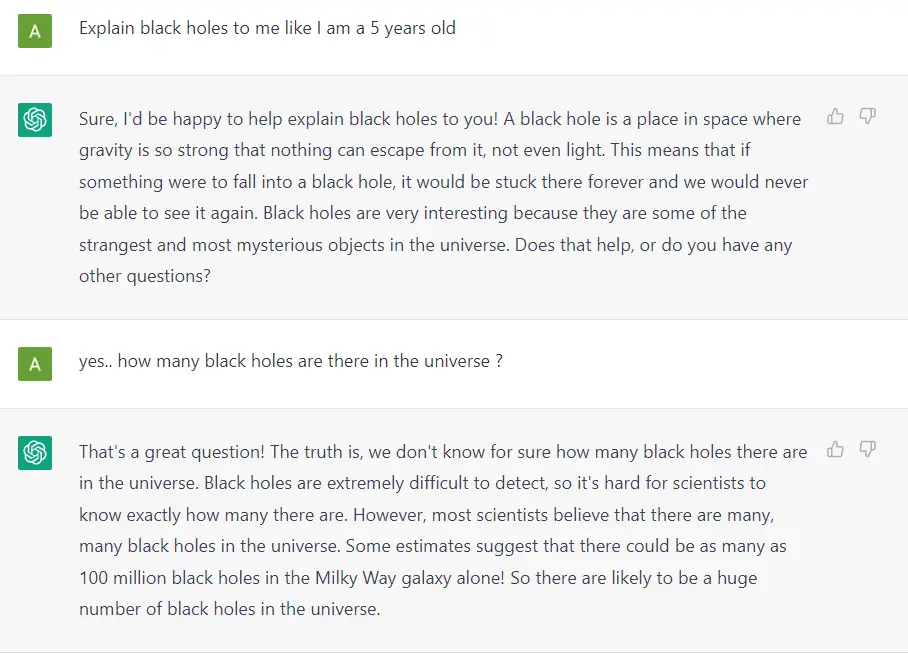
Fundamentally, a GPT generates text given a prompt. Even with this very simple API (input = text, output = text), a well trained GPT like ChatGPT can do some pretty awesome stuff like write your emails, summarize a book, give you instagram caption ideas, explain black holes to you as if you are 5 years old, code in SQL, and even write your will.
So that's a high-level overview of GPTs and their capabilities. Before we get into the fun architecture stuff, let's just quickly recap:
- Input/Output
- Generating Text
- Training
Input / Output
The function signature for a GPT looks roughly like this:
python
def gpt(inputs: list[int]) -> list[list[float]]:
    # inputs has shape [n_seq]
    # output has shape [n_seq, n_vocab]
    output = # beep boop neural network magic
    return output
Input
The input is some text represented as sequence integers that represent string tokens:
python
# integers represent tokens in our text, for example:
# text   = "not all heroes wear capes":
# tokens = "not"  "all" "heroes" "wear" "capes"
inputs =   [1,     0,    2,      4,     6]
These integer values come from the index of the tokens in a tokenizer's vocabulary, for example:
python
# the index of a token in the vocab represents the integer id for that token
# i.e. the integer id for "heroes" would be 2, since vocab[2] = "heroes"
vocab = ["all", "not", "heroes", "the", "wear", ".", "capes"]

# a pretend tokenizer that tokenizes on whitespace
tokenizer = WhitespaceTokenizer(vocab)

# the encode() method converts a str -> list[int]
ids = tokenizer.encode("not all heroes wear") # ids = [1, 0, 2, 4]

# we can see what the actual tokens are via our vocab mapping
tokens = [tokenizer.vocab[i] for i in ids] # tokens = ["not", "all", "heroes", "wear"]

# the decode() method converts back a list[int] -> str
text = tokenizer.decode(ids) # text = "not all heroes wear"
In short:
- We have a string.
- We use a tokenizer to break it down into smaller pieces called tokens.
- We use a vocabulary to map those tokens to integers.
In practice, we use more advanced methods of tokenization than simply splitting by whitespace, such as Byte-Pair Encoding or WordPiece, but the principle is the same:
- There is a
vocabthat maps string tokens to integer indices - There is an
encodemethod that convertsstr -> list[int] - There is a
decodemethod that convertslist[int] -> str
Output
The output is a 2D array, where output[i][j] is the model's predicted probability that the token at vocab[j] is the next token inputs[i+1]. For example:
python
vocab = ["all", "not", "heroes", "the", "wear", ".", "capes"]
inputs = [1, 0, 2, 4] # "not" "all" "heroes" "wear"
output = gpt(inputs)
#              ["all", "not", "heroes", "the", "wear", ".", "capes"]
# output[0] =  [0.75    0.1     0.0       0.15    0.0   0.0    0.0  ]
# given just "not", the model predicts the word "all" with the highest probability

#              ["all", "not", "heroes", "the", "wear", ".", "capes"]
# output[1] =  [0.0     0.0      0.8     0.1    0.0    0.0   0.1  ]
# given the sequence ["not", "all"], the model predicts the word "heroes" with the highest probability

#              ["all", "not", "heroes", "the", "wear", ".", "capes"]
# output[-1] = [0.0     0.0     0.0     0.1     0.0    0.05  0.85  ]
# given the whole sequence ["not", "all", "heroes", "wear"], the model predicts the word "capes" with the highest probability
To get our prediction for the next token for the whole sequence, we can simply take the token with the highest probability:
python
vocab = ["all", "not", "heroes", "the", "wear", ".", "capes"]
inputs = [1, 0, 2, 4] # "not" "all" "heroes" "wear"
output = gpt(inputs)
next_token_id = np.argmax(output[-1]) # next_token_id = 6
next_token = vocab[next_token_id] # next_token = "capes"
Taking the token with the highest probability as our final prediction is often referred to as greedy decoding or greedy sampling.
As such, a GPT is a language model, that is, it performs language modeling, the task of predicting the logical next word in a sequence.
Generating Text
Auto-Regressive
We can generate full sentences by iteratively asking our model the predict the next token. At each iteration, we append the predicted token back into the input:
python
def generate(inputs, n_tokens_to_generate):
    for _ in range(n_tokens_to_generate): # auto-regressive decode loop
        output = gpt(inputs) # model forward pass
        next_id = np.argmax(output[-1]) # greedy sampling
        inputs = np.append(out, [next_id]) # append prediction to input
    return list(inputs[len(inputs) - n_tokens_to_generate :])  # only return generated ids

input_ids = [1, 0] # "not" "all"
output_ids = generate(input_ids, 3) # output_ids = [2, 4, 6]
output_tokens = [vocab[i] for i in output_ids] # "heroes" "wear" "capes"
This process of predicting a future value (regression), and adding it back into the input (auto) is why you might see a GPT described as auto-regressive.
Sampling
We can introduce some stochasticity (randomness) to our generations by sampling from the probability distribution instead of being greedy:
python
inputs = [1, 0, 2, 4] # "not" "all" "heroes" "wear"
output = gpt(inputs)
np.random.categorical(output[-1]) # capes
np.random.categorical(output[-1]) # hats
np.random.categorical(output[-1]) # capes
np.random.categorical(output[-1]) # capes
np.random.categorical(output[-1]) # pants
Not only does it allow us to generate different sentences for the same input, but it also increases the quality of the outputs compared to greedy decoding.
It's also common to use techniques like top-k, top-p, and temperature to modify the probability distribution before sampling from it. This helps improve the quality of generations and also introduces hyper-parameters that we can play around with to get different generation behaviors (for example, increasing temperature makes our model take more risks and thus be more "creative").
Training
We train a GPT like any other neural network, using gradient descent with respect to some loss function. In the case of a GPT, we take the cross entropy loss over the language modeling task:
python
def lm_loss(inputs: list[int]) -> float:
    # the labels y are just the input shifted 1 to the left
    #
    # inputs = [not,     all,   heros,   wear,   capes]
    #      x = [not,     all,   heroes,  wear]
    #      y = [all,  heroes,     wear,  capes]
    #
    # of course, we don't have a label for inputs[-1], so we exclude it from x
    #
    # as such, for N inputs, we have N - 1 langauge modeling example pairs
    x, y = inputs[:-1], inputs[1:]

    # forward pass
    # all the predicted next token probability distributions at each position
    output = gpt(x)

    # cross entropy loss
    # we take the average over all N-1 examples
    loss = np.mean(-np.log(output[y]))

    return loss

def loss_fn(texts: list[list[str]]) -> float:
    # take the mean of the language modeling losses over all
    # text documents in our dataset
    loss = 0
    for text in texts:
        inputs = tokenizer.encode(text)
        loss += lm_loss(inputs)
    return loss / len(texts)
Notice, we don't need explicitly labelled data. Instead, we are able to produce the input/label pairs from just the raw text itself. This is referred to as self-supervised learning.
This means we can scale up train data really easily, we just throw as much text as we can get our hands on at at a GPT. For example, GPT-3 was trained on 300 billion tokens of text from the internet and books:
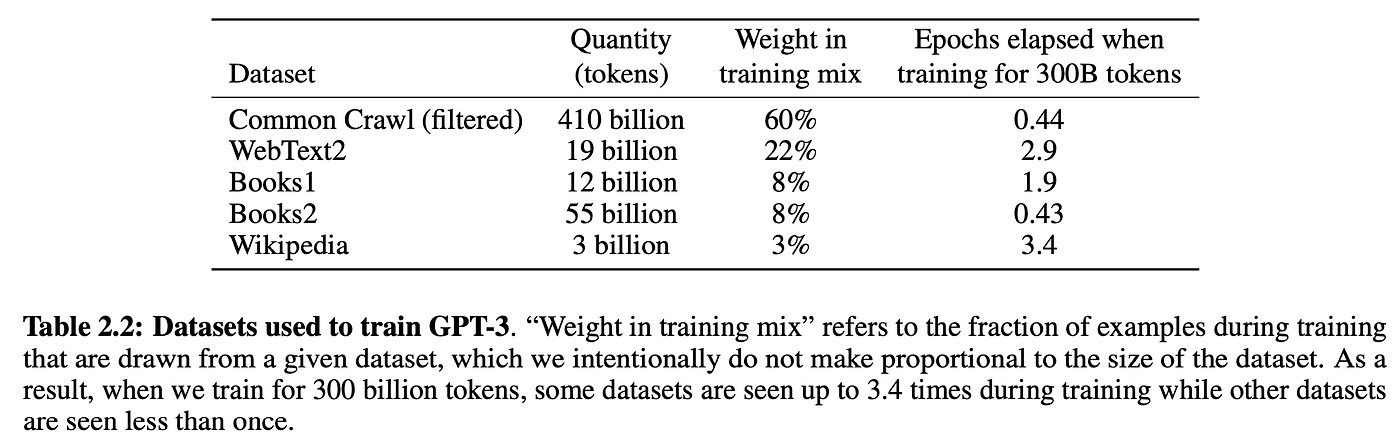
gpt-data
Of course, you need a sufficiently large model to be able to learn from all this data, which is why GPT-3 is 175 billion parameters and probably cost between $1m-10m in compute cost to train.[2]
Setup
Clone the repository for this tutorial:
shell
git clone https://github.com/jaymody/picoGPT
cd picoGPT
Then install dependencies:
shell
pip install -r requirements.txt
Note, if you are using an M1 Macbook, you'll need to change tensorflow to tensorflow-macos in requirements.txt before running pip install. This code was tested on Python 3.9.10.
A quick breakdown of each of the files:
encoder.pycontains the code for OpenAI's BPE Tokenizer, taken straight from their gpt-2 repo.utils.pycontains the code to download and load the GPT-2 model weights, tokenizer, and hyper-parameters.gpt2.pycontains the actual GPT model and generation code which we can run as a python script.gpt2_pico.pyis the same asgpt2.py, but in even fewer lines of code (removed comments, extra whitespace, and combined certain operations into a single line). Why? Because why not.
We'll be reimplementing gpt2.py from scratch, so let's delete it and recreate it as an empty file:
shell
rm gpt2.py
touch gpt2.py
As a starting point, paste the following code into gpt2.py:
python
import numpy as np


def gpt2(inputs, wte, wpe, blocks, ln_f, n_head):
    pass # TODO: implement this


def generate(inputs, params, n_head, n_tokens_to_generate):
    from tqdm import tqdm

    for _ in tqdm(range(n_tokens_to_generate), "generating"):  # auto-regressive decode loop
        logits = gpt2(inputs, **params, n_head=n_head)  # model forward pass
        next_id = np.argmax(logits[-1])  # greedy sampling
        inputs = np.append(inputs, [next_id])  # append prediction to input

    return list(inputs[len(inputs) - n_tokens_to_generate :])  # only return generated ids


def main(prompt: str, n_tokens_to_generate: int = 40, model_size: str = "124M", models_dir: str = "models"):
    from utils import load_encoder_hparams_and_params

    # load encoder, hparams, and params from the released open-ai gpt-2 files
    encoder, hparams, params = load_encoder_hparams_and_params(model_size, models_dir)

    # encode the input string using the BPE tokenizer
    input_ids = encoder.encode(prompt)

    # make sure we are not surpassing the max sequence length of our model
    assert len(input_ids) + n_tokens_to_generate < hparams["n_ctx"]

    # generate output ids
    output_ids = generate(input_ids, params, hparams["n_head"], n_tokens_to_generate)

    # decode the ids back into a string
    output_text = encoder.decode(output_ids)

    return output_text


if __name__ == "__main__":
    import fire

    fire.Fire(main)
Breaking down each of the 4 sections:
- The
gpt2function is the actual GPT code we'll be implementing. You'll notice that the function signature, in addition toinputs, includes some extra stuff.wte,wpe,blocks, andln_fare parameters for our model,n_headis a hyper-parameter that is needed during the forward pass. - The
generatefunction is the auto-regressive decoding algorithm we saw earlier. We use greedy sampling instead of sampling from probabilities for simplicity and so we can get deterministic results.tqdmis a progress bar, so we can visualize the progress of our model as it generates tokens one at a time. - The
mainfunction handles:- Loading the tokenizer (
encoder), model weights (params), and hyper-parameters (hparams) - Encoding the input prompt into token ids using the tokenizer
- Calling the generate function
- Decoding the output ids into a string
- Loading the tokenizer (
fire.Fire(main)just turns the our file into a CLI application so we can eventually run our code with:python gpt2.py "some prompt here"
Let's take a closer look at encoder, hparams, and params, in a notebook, or an interactive python session, run:
python
from utils import load_encoder_hparams_and_params
encoder, hparams, params = load_encoder_hparams_and_params("124M", "models")
This will download the necessary model and tokenizer files to models/124M and load encoder, hparams, and params.
Encoder
encoder is the BPE tokenizer used by GPT-2. Here's an example of it encoding and decoding some text:
python
>>> ids = encoder.encode("Not all heroes wear capes.")
>>> ids
[3673, 477, 10281, 5806, 1451, 274, 13]

>>> encoder.decode(ids)
"Not all heroes wear capes."
Using the vocabulary of the tokenizer, we take also take a peek at what the actual tokens look like:
python
>>> [encoder.decoder[i] for i in ids]
['Not', 'Ġall', 'Ġheroes', 'Ġwear', 'Ġcap', 'es', '.']
Notice, sometimes our tokens are words (e.g. Not), sometimes they are words but with a space in front of them (e.g. Ġall, the Ġ represents a space), sometimes there are part of a word (e.g. capes is split into Ġcap and es), and sometimes they are punctuation (e.g. .).
One nice thing about BPE is that it can encode any arbitrary string. If it encounters something that is not present in the vocabulary, it just breaks it down into substrings it does understand:
python
>>> [encoder.decoder[i] for i in encoder.encode("zjqfl")]
['z', 'j', 'q', 'fl']
We can also check the size of the vocabulary:
python
>>> len(encoder.decoder)
50257
The vocabulary, as well as the byte-pair merges, are obtained by training the tokenizer. When we load the tokenizer, we're loading the already trained vocab and byte-pair merges from some files, which were downloaded alongside the model files when we ran load_encoder_hparams_and_params. See models/124M/encoder.json (the vocabulary) and models/124M/vocab.bpe (byte-pair merges).
Hyperparameters
hparams is a dictionary that contains the hyper-parameters of our model:
python
>>> hparams
{
  "n_vocab": 50257, # number of tokens in our vocabulary
  "n_ctx": 1024, # maximum possible sequence length of the input
  "n_embd": 768, # embedding dimension (determines the "width" of the network)
  "n_head": 12, # number of attention heads (n_embd must be divisible by n_head)
  "n_layer": 12 # number of layers (determines the "depth" of the network)
}
We'll use these symbols in our code's comments to show the underlying shape of things. We'll also use n_seq to denote the length of our input sequence (i.e. n_seq = len(inputs)).
Parameters
params is a nested json dictionary that hold the trained weights of our model. The leaf nodes of the structure are NumPy arrays. If we print params, but replace the arrays with their shapes, we get:
python
>>> import numpy as np
>>> def shape_tree(d):
>>>     if isinstance(d, np.ndarray):
>>>         return list(d.shape)
>>>     elif isinstance(d, list):
>>>         return [shape_tree(v) for v in d]
>>>     elif isinstance(d, dict):
>>>         return {k: shape_tree(v) for k, v in d.items()}
>>>     else:
>>>         ValueError("uh oh")
>>>
>>> print(shape_tree(params))
{
    "wpe": [1024, 768],
    "wte": [50257, 768],
    "ln_f": {"b": [768], "g": [768]},
    "blocks": [
        {
            "attn": {
                "c_attn": {"b": [2304], "w": [768, 2304]},
                "c_proj": {"b": [768], "w": [768, 768]},
            },
            "ln_1": {"b": [768], "g": [768]},
            "ln_2": {"b": [768], "g": [768]},
            "mlp": {
                "c_fc": {"b": [3072], "w": [768, 3072]},
                "c_proj": {"b": [768], "w": [3072, 768]},
            },
        },
        ... # repeat for n_layers
    ]
}
These weights and the corresponding nested structure are taken straight from the variables in the tensorflow checkpoint:
python
>>> import tensorflow as tf
>>> tf_ckpt_path = tf.train.latest_checkpoint("models/124M")
>>> for name, _ in tf.train.list_variables(tf_ckpt_path):
>>>     arr = tf.train.load_variable(tf_ckpt_path, name).squeeze()
>>>     print(f"{name}: {arr.shape}")
model/h0/attn/c_attn/b: (2304,)
model/h0/attn/c_attn/w: (768, 2304)
model/h0/attn/c_proj/b: (768,)
model/h0/attn/c_proj/w: (768, 768)
model/h0/ln_1/b: (768,)
model/h0/ln_1/g: (768,)
model/h0/ln_2/b: (768,)
model/h0/ln_2/g: (768,)
model/h0/mlp/c_fc/b: (3072,)
model/h0/mlp/c_fc/w: (768, 3072)
model/h0/mlp/c_proj/b: (768,)
model/h0/mlp/c_proj/w: (3072, 768)
model/h1/attn/c_attn/b: (2304,)
model/h1/attn/c_attn/w: (768, 2304)
...
model/h9/mlp/c_proj/b: (768,)
model/h9/mlp/c_proj/w: (3072, 768)
model/ln_f/b: (768,)
model/ln_f/g: (768,)
model/wpe: (1024, 768)
model/wte: (50257, 768)
There's just some additional logic needed to convert the above into the nested dictionary structure params.
For reference, here's what the params dictionary of shapes looks like, but with the numbers replaced with the hyper-parameters they represent:
python
{
    "wpe": [n_ctx, n_embd],
    "wte": [n_vocab, n_embd],
    "ln_f": {"b": [n_embd], "g": [n_embd]},
    "blocks": [
        {
            "attn": {
                "c_attn": {"b": [3*n_embd], "w": [n_embd, 3*n_embd]},
                "c_proj": {"b": [n_embd], "w": [n_embd, n_embd]},
            },
            "ln_1": {"b": [n_embd], "g": [n_embd]},
            "ln_2": {"b": [n_embd], "g": [n_embd]},
            "mlp": {
                "c_fc": {"b": [4*n_embd], "w": [n_embd, 4*n_embd]},
                "c_proj": {"b": [n_embd], "w": [4*n_embd, n_embd]},
            },
        },
        ... # repeat for n_layers
    ]
}
You'll probably want to come back to the above dictionary a lot as we're coding to check the shape of the weights. We'll be using variable names for our weights that match the keys of this dictionary.
Basic Layers
Last thing before we get into the actual GPT architecture, let's implement some of the more basic neural network layers that are non-specific to the GPT.
Gaussian Error Linear Units is an alternative to the ReLU activation function, and is approximated by the following function[3]:
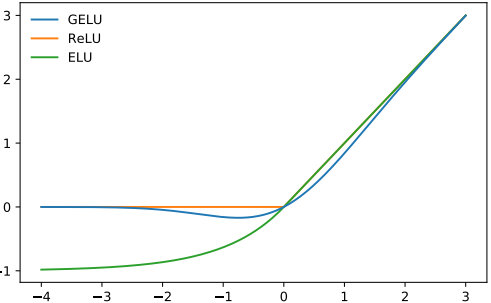
gelu
python
def gelu(x):
    return 0.5 * x * (1 + np.tanh(np.sqrt(2 / np.pi) * (x + 0.044715 * x**3)))
Like ReLU, the GeLU function operates element-wise on the input.
python
>>> gelu(np.array([[1, 2], [-4, 0]]))
array([[ 1.9546,      100.0 ],
       [-2.2918e-07,  0.0   ]])
The BERT paper popularized the use of GeLU in transformer based models, and it kind of stuck around since.
Softmax
Good ole softmax:
softmax(x)i=exi∑jexj
python
def softmax(x):
    exp_x = np.exp(x - np.max(x, axis=-1, keepdims=True))
    return exp_x / np.sum(exp_x, axis=-1, keepdims=True)
We use the max(x) trick for numerical stability.
We apply softmax over the last axis of the input.
python
>>> x = softmax(np.array([[2, 100], [-5, 0]]))
>>> x
array([[2.74878501e-43, 1.00000000e+00],
       [6.69285092e-03, 9.93307149e-01]])
>>> x.sum(axis=-1)
array([1., 1.])
Layer Normalization
Layer normalization standardizes values to have a mean of 0 and a variance of 1:
LayerNorm(x)=γ⋅x−μσ2+β
where μ is the mean of x
σ2 is the variance of x
and γ and β are learnable parameters
python
def layer_norm(x, g, b, eps: float = 1e-5):
    mean = np.mean(x, axis=-1, keepdims=True)
    variance = np.var(x, axis=-1, keepdims=True)
    x = (x - mean) / np.sqrt(variance + eps)  # normalize x to have mean=0 and var=1 over last axis
    return g * x + b  # scale and offset with gamma/beta params
This ensures that the inputs for each layer are always within a consistent range, which is suppose to speed up and stabilize the training process. Like Batch Normalization, the normalized output is then scaled and offset with two learnable vectors gamma and beta. The small epsilon term in the denominator is used to avoid a division by zero error.
Layer norm is used instead of batch norm for various reasons. The differences between various normalization techniques is outlined in this excellent blog post.
Layer normalization is applied over the last axis of the input.
python
>>> x = np.array([[2, 2, 3], [-5, 0, 1]])
>>> x = layer_norm(x, g=np.ones(x.shape[-1]), b=np.zeros(x.shape[-1]))
>>> x
array([[-0.70709087, -0.70709087,  1.41418174],
       [-1.39700038,  0.50800014,  0.88900024]])
>>> x.var(axis=-1)
array([0.999955  , 0.99999855]) # very close to 1
>>> x.mean(axis=-1)
array([-2.96059473e-16, -3.70074342e-17]) # very close to 0
Linear
Your standard matrix multiplication + bias:
python
def linear(x, w, b):  # [m, in], [in, out], [out] -> [m, out]
    return x @ w + b
Linear layers are often referred to as projections (since they are projecting from one vector space to another vector space).
python
>>> x = np.random.normal(size=(64, 784)) # input dim = 784, batch/sequence dim = 64
>>> w = np.random.normal(size=(784, 10)) # output dim = 10
>>> b = np.random.normal(size=(10,))
>>> x.shape # shape before linear projection
(64, 784)
>>> linear(x, w, b).shape # shape after linear projection
(64, 10)
GPT Architecture
The GPT architecture follows that of the transformer:
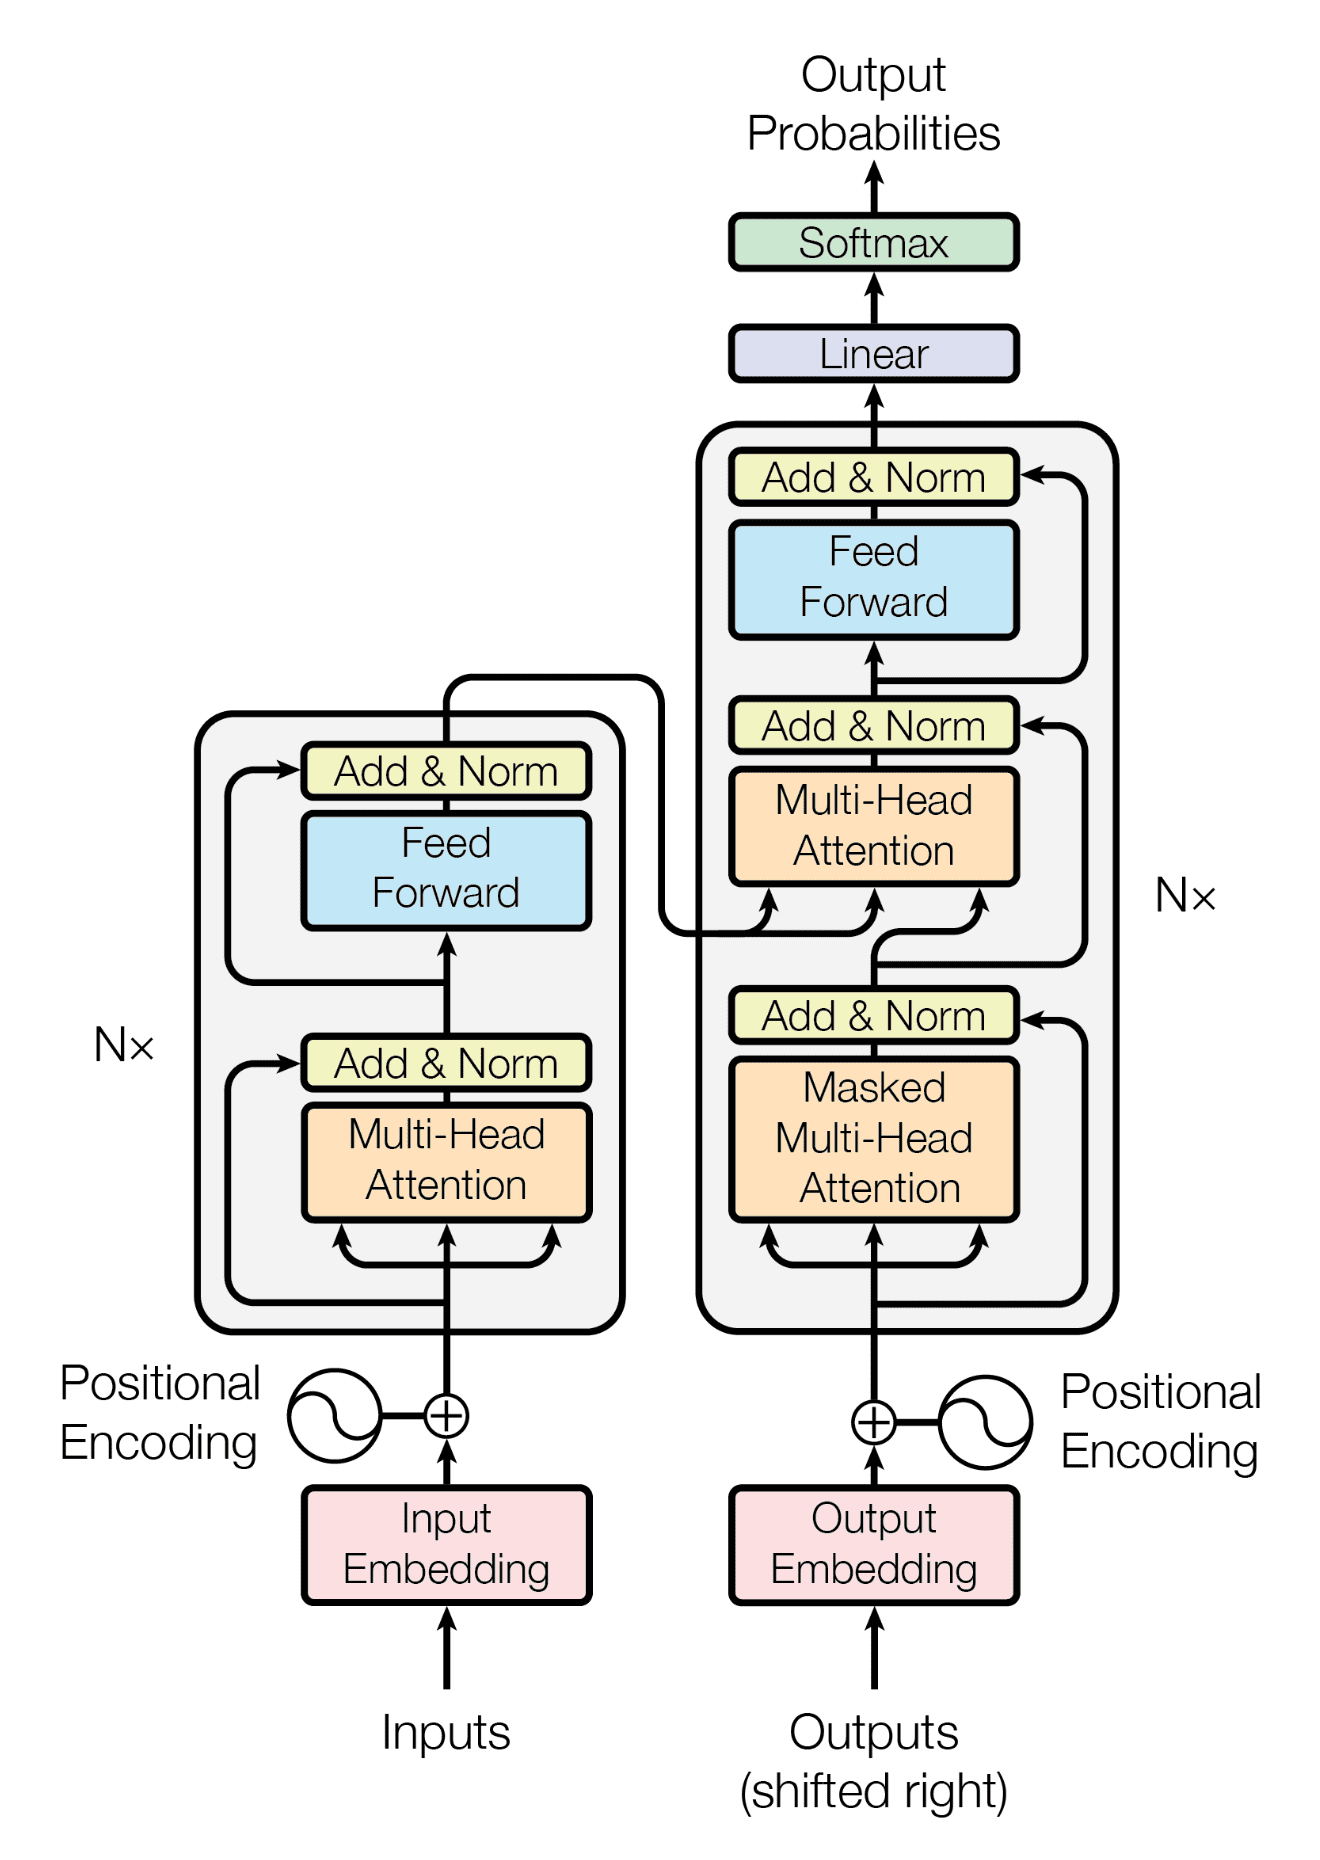
transformer
But uses only the decoder stack (the right part of the diagram):

gpt
You'll notice though, the middle "cross-attention" layer is removed since we don't have an encoder anymore.
So at a high level, a GPT has 3 parts to it:
- Text + positional embeddings
- A transformer decoder stack
- A next token prediction head
In code, it looks like this:
python
def gpt2(inputs, wte, wpe, blocks, ln_f, n_head):  # [n_seq] -> [n_seq, n_vocab]
    # token + positional embeddings
    x = wte[inputs] + wpe[range(len(inputs))]  # [n_seq] -> [n_seq, n_embd]

    # forward pass through n_layer transformer blocks
    for block in blocks:
        x = transformer_block(x, **block, n_head=n_head)  # [n_seq, n_embd] -> [n_seq, n_embd]

    # projection to vocab
    x = layer_norm(x, **ln_f)  # [n_seq, n_embd] -> [n_seq, n_embd]
    return x @ wte.T  # [n_seq, n_embd] -> [n_seq, n_vocab]
Let's break down each of these three sections into more detail.
Embeddings
Token Embeddings
Token ids by themselves are not very good representations for a neural network. For one, the relative magnitudes of the token ids falsely communicate information (for example, if Apple = 5 and Table = 10 in our vocab, then we are implying that 2 * Table = Apple). Secondly, a single number is not a lot of dimensionality for a neural network to work with.
To address these limitations, we'll take advantage of word vectors, specifically via a learned embedding matrix:
python
wte[inputs] # [n_embd] -> [n_seq, n_embd]
Recall, wte is a [n_vocab, n_embd] matrix. It acts as a lookup table, where the ith row in the matrix corresponds to the learned token vector for the ith token in our vocabulary. wte[inputs] uses integer array indexing to retrieve the word vectors for each word in our input.
Like any other parameter in our network, wte is learned. That is, it is randomly initialized at the start of training and then updated via gradient descent.
Positional Embeddings
One quirk of the transformer architecture is that it doesn't take into account position. If we randomly shuffled our input and then accordingly unshuffled the output, the output would be the same as if we never shuffled the input in the first place (meaning ordering of inputs don't matter).
Of course, the order of words in a sentence is crucial for language, so we need some way to encode positional information for our inputs. For this, we can just use another learned embedding matrix:
python
wpe[range(len(inputs))] # [n_seq] -> [n_seq, n_embd]
Recall, wpe is a [n_ctx, n_embd] matrix. The ith row of the matrix contains a vector that encodes information about the ith position in the input. Similar to wte, this matrix is learned during gradient descent.
Notice, this restricts our model to a maximum sequence length of n_ctx.[4] That is, len(inputs) <= n_ctx.
Combined
We add our token embeddings and positional embeddings to get a combined embedding for each input that encodes both the token and positional information.
python
# token + positional embeddings
x = wte[inputs] + wpe[range(len(inputs))]  # [n_seq] -> [n_seq, n_embd]

# x[i] represents the word embedding for the ith word + the positional
# embedding for the ith position
Decoder Stack
This is where all the magic happens and the "deep" in deep learning comes in. We pass our embedding through a stack of n_layer transformer decoder blocks.
python
# forward pass through n_layer transformer blocks
for block in blocks:
    x = transformer_block(x, **block, n_head=n_head)  # [n_seq, n_embd] -> [n_seq, n_embd]
Stacking more layers is what allows us to control how deep our networks is. GPT-3 for example, has a whopping 96 layers.
Projection to Vocab
In our final step, we project the output of the final transformer block to a probability distribution over our vocab:
python
# projection to vocab
x = layer_norm(x, **ln_f)  # [n_seq, n_embd] -> [n_seq, n_embd]
return x @ wte.T  # [n_seq, n_embd] -> [n_seq, n_vocab]
Couple things to note here:
- We first pass
xthrough a final layer normalization layer before doing the projection to vocab. This is specific to the GPT-2 architecture (this is not present in the original GPT and Transformer papers). - We are reusing the embedding matrix
wteto do our projection. Other implementations may choose to instead use a separate learned weight matrix for this projection, however sharing the embedding matrix has a couple of advantages.- You save some parameters (although at GPT-3 scale, this is negligible).
- The matrix is both responsible for mapping to words and from words, so in theory it may learn a richer representation compared to having two separate matrixes.
- We don't apply
softmaxat the end, so our outputs will be logits instead of probabilities between 0 and 1. This is done for several reasons:softmaxis monotonic, so for greedy samplingnp.argmax(logits)is equivalent tonp.argmax(softmax(logits))makingsoftmaxredundantsoftmaxis irreversible, meaning we can always go fromlogitstoprobabilitiesby applyingsoftmax, but we can't go back tologitsfromprobabilities, so for maximum flexibility, we output thelogits- Numerically stability (for example, to compute cross entropy loss, taking
log(softmax(logits))is numerically instable compared tolog_softmax(logits)
The projection to vocab step is also sometimes called the language modeling head.
So that's the GPT architecture at a high level, let's actually dig a bit deeper into what the decoder blocks are doing.
Decoder Block
The transformer decoder block consists of two sublayers:
- Multi-head casual self attention
- Position-wise feed forward neural network
python
def transformer_block(x, mlp, attn, ln_1, ln_2, n_head):  # [n_seq, n_embd] -> [n_seq, n_embd]
    # multi-head casual self attention
    x = x + mha(layer_norm(x, **ln_1), **attn, n_head=n_head)  # [n_seq, n_embd] -> [n_seq, n_embd]

    # position-wise feed forward network
    x = x + ffn(layer_norm(x, **ln_2), **mlp)  # [n_seq, n_embd] -> [n_seq, n_embd]

    return x
Each sublayer utilizes layer normalization on their inputs as well as a residual connection (i.e. add the input of the sublayer to the output of the sublayer).
Some things to note:
- Multi-head casual self attention is what facilitates the communication between the inputs. Nowhere else in the network does the model allow inputs to "see" each other. The embeddings, position-wise feed forward network, layer norms, and projection to vocab all operate on our inputs position-wise. Modeling relationships between inputs is tasked solely to attention.
- The Position-wise feed forward neural network is just a regular 2 layer fully connected neural network. This just adds a bunch of learnable parameters for our model to work with to facilitate learning.
- In the original transformer paper, layer norm is placed on the output
layer_norm(x + sublayer(x))while we place layer norm on the inputx + sublayer(layer_norm(x))to match GPT-2. This is referred to as pre-norm and has been shown to be important in improving the performance of the transformer. - Residual connections (popularized by ResNet) serve a couple of different purposes:
- Makes it easier to optimize neural networks that are deep (i.e. networks that have lots of layers). The idea here is that we are providing "shortcuts' for the gradients to flow back through the network, making it easier to optimize the earlier layers in the network.
- Without residual connections, deeper models see a degradation in performance when adding more layers (possibly because it's hard for the gradients to flow all the way back through a deep network without losing information). Residual connections seem to give a bit of an accuracy boost for deeper networks.
- Can help with the vanishing/exploding gradients problem.
Let's dig a little deeper into the 2 sublayers.
Position-wise Feed Forward Network
This is just a simple multi-layer perceptron with 2 layers:
python
def ffn(x, c_fc, c_proj):  # [n_seq, n_embd] -> [n_seq, n_embd]
    # project up
    a = gelu(linear(x, **c_fc))  # [n_seq, n_embd] -> [n_seq, 4*n_embd]

    # project back down
    x = linear(a, **c_proj)  # [n_seq, 4*n_embd] -> [n_seq, n_embd]

    return x
Nothing super fancy here, we just project from n_embd up to a higher dimension 4*n_embd and then back down to n_embd[5].
Recall, from our params dictionary, that our mlp params look like this:
python
"mlp": {
    "c_fc": {"b": [4*n_embd], "w": [n_embd, 4*n_embd]},
    "c_proj": {"b": [n_embd], "w": [4*n_embd, n_embd]},
}
Multi-Head Casual Self Attention
This layer is probably the most difficult part of the transformer to understand. So let's work our way up to "Multi-Head Casual Self Attention" by breaking each word down into it's own section:
- Attention
- Casual
- Multi-Head
Attention
I have another blog post on this topic, where we derive the scaled dot product equation proposed in the original transformer paper from the ground up:
attention(Q,K,V)=softmax(QKTdk)V
As such, I'm going to skip an explanation for attention in this post. You can also reference Lilian Weng's Attention? Attention! and Jay Alammar's The Illustrated Transformer which are also great explanations for attention.
We'll just adapt our attention implementation from my my blog post:
python
def attention(q, k, v):  # [n_q, d_k], [n_k, d_k], [n_k, d_v] -> [n_q, d_v]
    return softmax(q @ k.T / np.sqrt(q.shape[-1])) @ v
When q, k, and v all come from the same source, we are performing self-attention (i.e. letting our input sequence attend to itself):
python
def self_attention(x): # [n_seq, n_embd] -> [n_seq, n_embd]
    return attention(q=x, k=x, v=x)
For example, if our input is "Jay went to the store, he bought 10 apples.", we would be letting the word "he" attend to all the other words, including "Jay", meaning the model can learn to recognize that "he" is referring to "Jay".
We can enhance self attention by introducing projections for q, k, v and the attention output:
python
def self_attention(x, w_k, w_q, w_v, w_proj): # [n_seq, n_embd] -> [n_seq, n_embd]
    # qkv projections
    q = x @ w_k # [n_seq, n_embd] @ [n_embd, n_embd] -> [n_seq, n_embd]
    k = x @ w_q # [n_seq, n_embd] @ [n_embd, n_embd] -> [n_seq, n_embd]
    v = x @ w_v # [n_seq, n_embd] @ [n_embd, n_embd] -> [n_seq, n_embd]

    # perform self attention
    x = attention(q, k, v) # [n_seq, n_embd] -> [n_seq, n_embd]

    # out projection
    x = x @ w_proj # [n_seq, n_embd] @ [n_embd, n_embd] -> [n_seq, n_embd]

    return x
This enables attention to model more complex relationships since q, k, and v can now have different values (our model can learn a mapping for q, k, and v that best helps attention model relationships between inputs). It also adds yet more parameters for our model to learn.
We can reduce the number of matrix multiplication from 4 to just 2 if we combine w_q, w_k and w_v into a single matrix w_fc, perform the projection, and then split the result:
python
def self_attention(x, w_fc, w_proj): # [n_seq, n_embd] -> [n_seq, n_embd]
    # qkv projections
    x = x @ w_fc # [n_seq, n_embd] @ [n_embd, 3*n_embd] -> [n_seq, 3*n_embd]

    # split into qkv
    q, k, v = qkv = np.split(x, 3, axis=-1) # [n_seq, 3*n_embd] -> 3 of [n_seq, n_embd]

    # perform self attention
    x = attention(q, k, v) # [n_seq, n_embd] -> [n_seq, n_embd]

    # out projection
    x = x @ w_proj # [n_seq, n_embd] @ [n_embd, n_embd] = [n_seq, n_embd]

    return x
This is a bit more efficient as modern accelerators (GPUs) can take better advantage of one large matrix multiplication rather than 3 separate small ones happening sequentially.
Finally, we add bias vectors to match the implementation of GPT-2, use our linear function, and rename our parameters to match our params dictionary:
python
def self_attention(x, c_attn, c_proj): # [n_seq, n_embd] -> [n_seq, n_embd]
    # qkv projections
    x = linear(x, **c_attn) # [n_seq, n_embd] -> [n_seq, 3*n_embd]

    # split into qkv
    q, k, v = qkv = np.split(x, 3, axis=-1) # [n_seq, 3*n_embd] -> 3 of [n_seq, n_embd]

    # perform self attention
    x = attention(q, k, v) # [n_seq, n_embd] -> [n_seq, n_embd]

    # out projection
    x = linear(x, **c_proj) # [n_seq, n_embd] @ [n_embd, n_embd] = [n_seq, n_embd]

    return x
Recall, from our params dictionary, our attn params look like this:
python
"attn": {
    "c_attn": {"b": [3*n_embd], "w": [n_embd, 3*n_embd]},
    "c_proj": {"b": [n_embd], "w": [n_embd, n_embd]},
},
Casual
There is a bit of an issue with our current self-attention setup, our inputs can see into the future! For example, if our input is ["not", "all", "heroes", "wear", "capes"], during self attention we are allowing "wear" to see "capes". This means our output probabilities for "wear" will biased since the model already knows the correct answer is "capes". This is no good since our model will just learn that the correct answer for input i can be taken from input i+1.
To prevent this, we need to somehow modify our attention matrix softmax(q @ k.T / np.sqrt(k.shape[-1])) to hide or mask our inputs from being able to see into the future. For example, let's pretend our attention matrix looks like this:
undefined
       not    all    heroes wear   capes
   not 0.116  0.159  0.055  0.226  0.443
   all 0.180  0.397  0.142  0.106  0.175
heroes 0.156  0.453  0.028  0.129  0.234
  wear 0.499  0.055  0.133  0.017  0.295
 capes 0.089  0.290  0.240  0.228  0.153
Each row corresponds to a query and the columns to a key. In this case, looking at the row for "wear", you can see that it is attending to "capes" in the last column with a weight of 0.295. To prevent this, we want to set that entry to 0.0:
      not    all    heroes wear   capes
   not 0.116  0.159  0.055  0.226  0.443
   all 0.180  0.397  0.142  0.106  0.175
heroes 0.156  0.453  0.028  0.129  0.234
  wear 0.499  0.055  0.133  0.017  0.
 capes 0.089  0.290  0.240  0.228  0.153
In general, to prevent all the queries in our input from looking into the future, we set all positions i,j where j>i to 0:
undefined
       not    all    heroes wear   capes
   not 0.116  0.     0.     0.     0.
   all 0.180  0.397  0.     0.     0.
heroes 0.156  0.453  0.028  0.     0.
  wear 0.499  0.055  0.133  0.017  0.
 capes 0.089  0.290  0.240  0.228  0.153
We call this masking. One issue with our above masking approach is our rows no longer sum to 1 (since we are setting them to 0 after the softmax has been applied). To make sure our rows still sum to 1, we need to modify our attention matrix before the softmax.
This can be achieved by setting entries that are to be masked with −∞ prior to the softmax[6]:
python
def attention(q, k, v, mask):  # [n_q, d_k], [n_k, d_k], [n_k, d_v], [n_q, n_k] -> [n_q, d_v]
    return softmax(q @ k.T / np.sqrt(q.shape[-1]) + mask) @ v
where mask is the matrix (for n_seq=5):
undefined
0 -1e10 -1e10 -1e10 -1e10
0   0   -1e10 -1e10 -1e10
0   0     0   -1e10 -1e10
0   0     0     0   -1e10
0   0     0     0     0
We use -1e10 instead of -np.inf as -np.inf can cause nans.
Adding mask to our attention matrix instead of just explicitly setting the values to -1e10 works because practically, any number plus -inf is just -inf.
We can compute the mask matrix in NumPy with (1 - np.tri(n_seq)) * -1e10.
Putting it all together, we get:
python
def attention(q, k, v, mask):  # [n_q, d_k], [n_k, d_k], [n_k, d_v], [n_q, n_k] -> [n_q, d_v]
    return softmax(q @ k.T / np.sqrt(q.shape[-1]) + mask) @ v

def casual_self_attention(x, c_attn, c_proj): # [n_seq, n_embd] -> [n_seq, n_embd]
    # qkv projections
    x = linear(x, **c_attn) # [n_seq, n_embd] -> [n_seq, 3*n_embd]

    # split into qkv
    q, k, v = qkv = np.split(x, 3, axis=-1) # [n_seq, 3*n_embd] -> 3 of [n_seq, n_embd]

    # casual mask to hide future inputs from being attended to
    casual_mask = (1 - np.tri(x.shape[0])) * -1e10  # [n_seq, n_seq]

    # perform casual self attention
    x = attention(q, k, v, casual_mask) # [n_seq, n_embd] -> [n_seq, n_embd]

    # out projection
    x = linear(x, **c_proj) # [n_seq, n_embd] @ [n_embd, n_embd] = [n_seq, n_embd]

    return x
Multi-Head
We can further improve on our implementation by performing n_head separate attention computations, splitting our queries, keys, and values into heads:
python
def mha(x, c_attn, c_proj, n_head):  # [n_seq, n_embd] -> [n_seq, n_embd]
    # qkv projection
    x = linear(x, **c_attn)  # [n_seq, n_embd] -> [n_seq, 3*n_embd]

    # split into qkv
    qkv = np.split(x, 3, axis=-1)  # [n_seq, 3*n_embd] -> [3, n_seq, n_embd]

    # split into heads
    qkv_heads = list(map(lambda x: np.split(x, n_head, axis=-1), qkv))  # [3, n_seq, n_embd] -> [n_head, 3, n_seq, n_embd/n_head]

    # casual mask to hide future inputs from being attended to
    casual_mask = (1 - np.tri(x.shape[0])) * -1e10  # [n_seq, n_seq]

    # perform attention over each head
    out_heads = [attention(q, k, v, casual_mask) for q, k, v in zip(*qkv_heads)]  # [n_head, 3, n_seq, n_embd/n_head] -> [n_head, n_seq, n_embd/n_head]

    # merge heads
    x = np.hstack(out_heads)  # [n_head, n_seq, n_embd/n_head] -> [n_seq, n_embd]

    # out projection
    x = linear(x, **c_proj)  # [n_seq, n_embd] -> [n_seq, n_embd]

    return x
There are 3 added steps here:
- Split
q, k, vinton_headheads:
python
# split into heads
qkv_heads = list(map(lambda x: np.split(x, n_head, axis=-1), qkv))  # [3, n_seq, n_embd] -> [n_head, 3, n_seq, n_embd/n_head]
- Compute attention for each head:
python
# perform attention over each head
out_heads = [attention(q, k, v) for q, k, v in zip(*qkv_heads)]  # [n_head, 3, n_seq, n_embd/n_head] -> [n_head, n_seq, n_embd/n_head]
- Merge the outputs of each head:
python
# merge heads
x = np.hstack(out_heads)  # [n_head, n_seq, n_embd/n_head] -> [n_seq, n_embd]
Notice, this reduces the dimension from n_embd to n_embd/n_head for each attention computation. This is a tradeoff. For reduced dimensionality, our model gets additional subspaces to work when modeling relationships via attention. For example, maybe one attention head is responsible for connecting pronouns to the person the pronoun is referencing. Maybe another might be responsible for grouping sentences by periods. Another could simply be identifying which words are entities, and which are not. Although, it's probably just another neural network black box.
The code we wrote performs the attention computations over each head sequentially in a loop (one at a time), which is not very efficient. In practice, you'd want to do these in parallel. For simplicity, we'll just leave this sequential.
With that, we're finally done our GPT implementation! Now, all that's left to do is put it all together and test our code.
Putting it All Together
Putting everything together, we get gpt2.py, which in its entirety is a mere 120 lines of code (60 lines if you remove comments and whitespace).
We can test our implementation with:
shell
python gpt2.py \
    "Alan Turing theorized that computers would one day become" \
    --n_tokens_to_generate 8
which gives the output:
the most powerful machines on the planet.
It works!!!
We can test that our implementation gives identical results to the openai/gpt-2 repo using the following Dockerfile (Note: this won't work on M1 Macbooks because of tensorflow shenanigans and also warning, it downloads all 4 GPT-2 model sizes, which is a lot of GBs of stuff to download):
shell
docker build -t "openai-gpt-2" "https://gist.githubusercontent.com/jaymody/9054ca64eeea7fad1b58a185696bb518/raw/Dockerfile"
docker run -dt "openai-gpt-2" --name "openai-gpt-2-app"
docker exec -it "openai-gpt-2-app" /bin/bash -c 'python3 src/interactive_conditional_samples.py --length 8 --model_type 124M --top_k 1'
# paste "Alan Turing theorized that computers would one day become" when prompted
which should give an identical result:
the most powerful machines on the planet.
There's obviously a lot more work that goes into creating something like ChatGPT than just the architecture and 60 lines of NumPy. Training a model at scale, collecting terabytes of high quality text data, making the model code fast enough for practical use, and aligning the models to human interests is the life's work of the 100s of engineer/researchers. The GPT architecture just happened to be the first neural network architecture that has nice scaling properties, is highly parallelizable on GPUs, and is good at modeling sequences. The real secret sauce is the data and scale, GPT is just a vector for that[7]. However, understanding GPTs at an architectural level is still highly relevant, and my goal with this post is to provide a simple yet complete technical introduction to the GPT. ↩︎
The unsupervised language modeling training of a GPT is also often called "pre-training". This is because you can use the "pre-trained" weights as a starting point when fine-tuning on a downstream task/dataset, greatly increasing the performance versus if you tried to train from scratch or use zero-shot/few-shot prompting on just the pre-trained model. However, using just the pre-trained model by itself to generate text is what your seeing when you talk to ChatGPT. ↩︎
The BERT paper popularized the use of GeLU in transformer based models, and it kind of stuck around. There's a great paper from Noam Shazeer that surveys the performance of various activation functions on the GPT architecture. ↩︎
The original transformer paper used a calculated positional embedding which they found performed just as well as learned positional embeddings, but has the distinct advantage that you can input any arbitrarily long sequence (you are not restricted by a maximum sequence length). However, in practice, your model is only going to be as the good sequence lengths that it was trained on. You can't just train a GPT on sequences that are 1024 long and then expect it to perform well at 16k tokens long. Recently, there has also been some success with relative positional embeddings, such as Alibi and RoPE. ↩︎
Different GPT models may choose a different hidden width that is not
4*n_embd, however this is the common practice for GPT models. Also, we give the multi-head attention layer a lot of attention (pun intended) for driving the success of the transformer, but at the scale of GPT-3, 80% of the model parameters are in contained in the feed forward layer. Just something to think about. ↩︎If you're not convinced, stare at the softmax equation and convince yourself this is true (maybe even pull out a pen and paper):
softmax(x→)i=exi∑jexj↩︎Actually, I might argue that there is something inherently better about the way attention models sequences vs recurrent/convolutional layers, but I digress. ↩︎
Recommend
About Joyk
Aggregate valuable and interesting links.
Joyk means Joy of geeK