

How to Upgrade PHP on WordPress Step by Step
source link: https://www.pontikis.net/blog/how-to-upgrade-php-on-wordpress
Go to the source link to view the article. You can view the picture content, updated content and better typesetting reading experience. If the link is broken, please click the button below to view the snapshot at that time.

How to Upgrade PHP on WordPress Step by Step

Upgrade PHP on WordPress is a common task when you run a WordPress server. Some essential plugins (for example RankMath SEO) may not run with the current Debian PHP version.
In this step-by-step tutorial, we will upgrade PHP 7.3 to PHP 7.4 on a Debian Buster WordPress server running Apache and PHP as an Apache module (the most common configuration).
Run the following commands as root or using sudo.
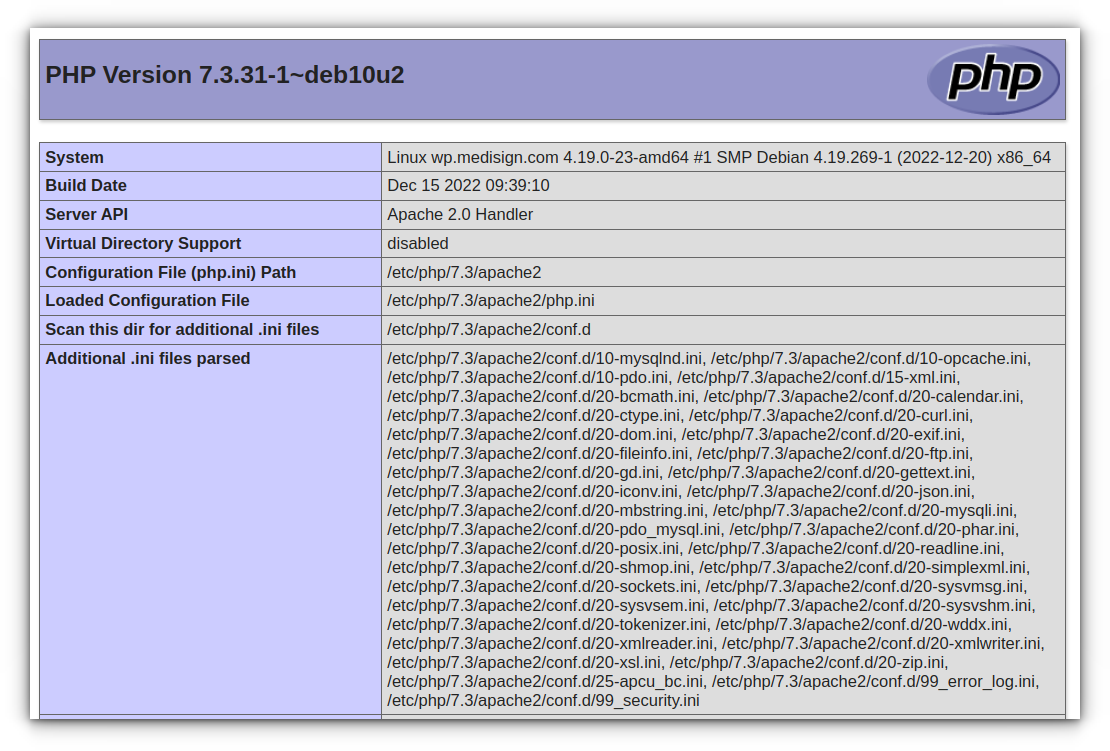
Current state:
php -vPHP 7.3.31-1~deb10u2 (cli) (built: Dec 15 2022 09:39:10) ( NTS )Copyright (c) 1997-2018 The PHP GroupZend Engine v3.3.31, Copyright (c) 1998-2018 Zend Technologieswith Zend OPcache v7.3.31-1~deb10u2, Copyright (c) 1999-2018, by Zend Technologies |
update-alternatives --config phpThere is only one alternative in link group php (providing /usr/bin/php): /usr/bin/php7.3Nothing to configure. |
STEP1 – Backup your site
Back up your database with mysqldump and the document root with tar. Put these files in a safe place (usually using scp).
As an alternative, you may use WP Migrate Lite to export your database.
STEP2 – Add the SURY repository
SURY repository offers many PHP versions.
You can add it to your system using the official guidelines for Debian:
apt-get updateapt-get -y install apt-transport-https lsb-release ca-certificates curlcurl -sSLo /usr/share/keyrings/deb.sury.org-php.gpg https://packages.sury.org/php/apt.gpgsh -c 'echo "deb [signed-by=/usr/share/keyrings/deb.sury.org-php.gpg] https://packages.sury.org/php/ $(lsb_release -sc) main" > /etc/apt/sources.list.d/php.list'apt-get update |
Remark: on Ubuntu, you may use
add-apt-repository -y ppa:ondrej/php |
STEP3 – Setup PHP 7.4
apt-get install php7.4 |
Reading package lists... DoneBuilding dependency tree Reading state information... DoneThe following additional packages will be installed:libapache2-mod-php7.4 libpcre2-8-0 php7.4-cli php7.4-common php7.4-json php7.4-opcache php7.4-readlineSuggested packages:php-pearThe following NEW packages will be installed:libapache2-mod-php7.4 php7.4 php7.4-cli php7.4-common php7.4-json php7.4-opcache php7.4-readlineThe following packages will be upgraded:libpcre2-8-01 upgraded, 7 newly installed, 0 to remove and 37 not upgraded.Need to get 3,991 kB of archives.After this operation, 17.6 MB of additional disk space will be used.Do you want to continue? [Y/n] |
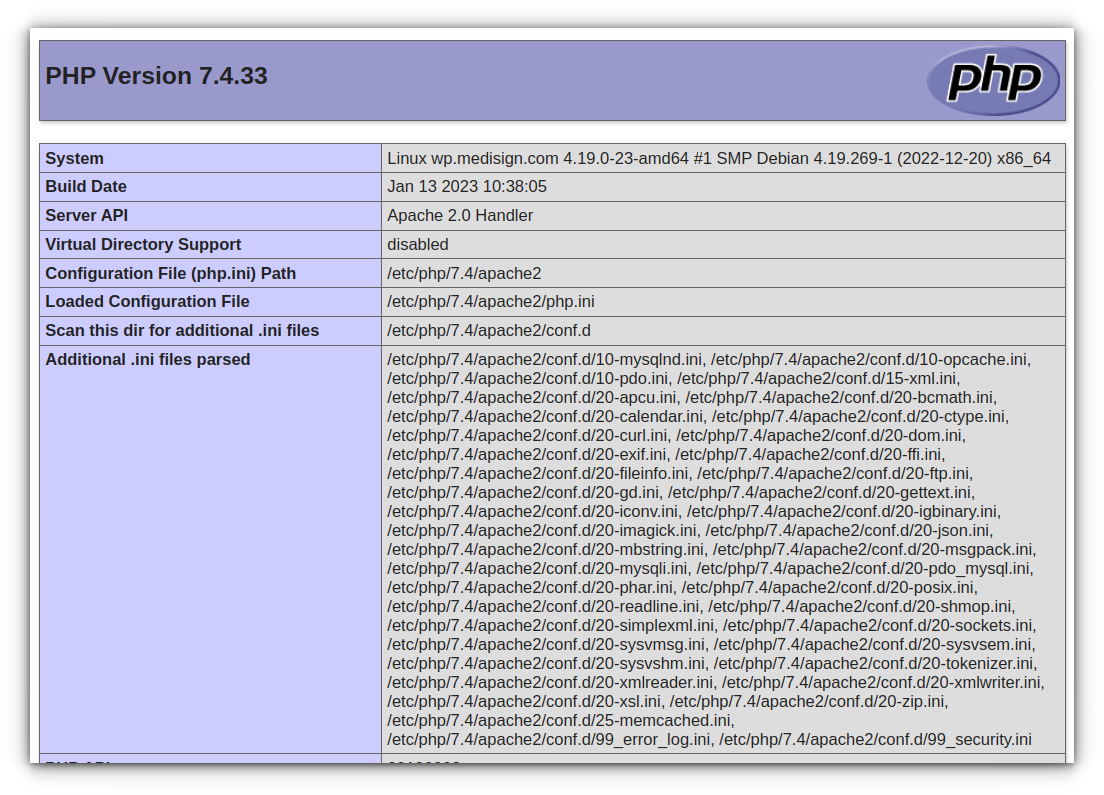
Current state:
php -vPHP 7.4.33 (cli) (built: Jan 13 2023 10:38:05) ( NTS )Copyright (c) The PHP GroupZend Engine v3.4.0, Copyright (c) Zend Technologieswith Zend OPcache v7.4.33, Copyright (c), by Zend Technologies |
update-alternatives --config phpThere are 2 choices for the alternative php (providing /usr/bin/php).Selection Path Priority Status------------------------------------------------------------* 0 /usr/bin/php7.4 74 auto mode1 /usr/bin/php7.3 73 manual mode2 /usr/bin/php7.4 74 manual modePress <enter> to keep the current choice[*], or type selection number: |
STEP4 – Setup PHP 7.4 extensions
These may vary depending on your WordPress configuration. However, the most common PHP extensions on a WordPress server are:
apt-get install php7.4-mysqlapt-get install php7.4-mbstringapt-get install php7.4-memcachedapt-get install php7.4-gdapt-get install php7.4-curlapt-get install php7.4-zipapt-get install php7.4-xmlapt-get install php7.4-imagickapt-get install php7.4-bcmathapt-get install php7.4-opcacheapt-get install php7.4-apcu |
Find a list of Extensions suggested by WordPress here.
STEP5 – Add custom configuration (if any)
In my case:
cp /etc/php/7.3/apache2/conf.d/99_error_log.ini /etc/php/7.4/apache2/conf.d/99_error_log.ini cp /etc/php/7.3/apache2/conf.d/99_security.ini /etc/php/7.4/apache2/conf.d/99_security.ini |
STEP6 – Apply the new PHP 7.4 version to Apache
a2dismod php7.3a2enmod php7.4systemctl restart apache2.service |
At this time, the changes are visible in phpinfo:
STEP7 – Switch PHP version
In case you need to change the configuration:
UPGRADE PHP 7.3 to PHP 7.4
systemctl stop apache2.servicea2dismod php7.3a2enmod php7.4update-alternatives --config phpupdate-alternatives --config pharupdate-alternatives --config phar.pharsystemctl start apache2.service |
DOWNGRADE PHP 7.4 to PHP 7.3
systemctl stop apache2.servicea2dismod php7.4a2enmod php7.3update-alternatives --config phpupdate-alternatives --config pharupdate-alternatives --config phar.pharsystemctl start apache2.service |
Entrepreneur | Full-stack developer | Founder of MediSign Ltd. I have over 15 years of professional experience designing and developing web applications. I am also very experienced in managing (web) projects.
Recommend
About Joyk
Aggregate valuable and interesting links.
Joyk means Joy of geeK