

Review: Dactyl Manuform – an ergonomic, custom built mechanical keyboard
source link: https://benfrain.com/review-dactyl-manuform-an-ergonomic-custom-built-mechanical-keyboard/
Go to the source link to view the article. You can view the picture content, updated content and better typesetting reading experience. If the link is broken, please click the button below to view the snapshot at that time.

Review: Dactyl Manuform – an ergonomic, custom built mechanical keyboard
This is the written version of this YouTube review.
I’ve built 4 Dactyl Manuforms, or similar variants, so far, and I’ve been using them for about 8 months.
Dactyl’s are kind of considered the gold-standard of home made ergonomic keyboards and for the most part I’ve been really enjoying mine.
However, a few weeks back, for the first time in my career, I’ve had to stop using this keyboard due to thumb pain. Which, isn’t exactly a glowing endorsement for a keyboard that is supposed to help in that regard.
So, we have a bit to get through and unpack here.
Background
I have made wired and wireless Dactyls. The wired ones have a 3.5” TRRS cable connecting the pairs with hot-swap sockets for the switches and OLED screens, that one runs on QMK. The wireless ones use nice!nano boards and run on ZMK. The wired one is a true Dactyl, albeit with some thumb cluster modifications. The wireless one is more of hybrid. Similar to a normal Dactyl, but with some changes to thumb positions, height and the like. But the ones I have built have all had essentially the same 62 key layout.
A review, not a build guide
This is primarily a review of Dactyl’s Manuforms as a finished article. I’m going to cover what it’s like to use one day in day out, what’s good about them, what’s not and whether I think it’s worth both your time and effort to get one made.
Firstly, I am going to cover what’s involved in making one, but not in intricate detail. I do however think it’s a substantial undertaking to build one, so important to convey some sense of just what’s involved.
I have only done a little soldering, and my tutor was YouTube. Therefore, I think if you have perseverance, and a modicum of intelligence you can, by leaning on the brilliance of others, get yourself one of these made.
So, we will cover making one next, but if you just want to know what it’s like to use, by all means skip ahead to that section.
Building a Dactyl
With a Dactyl, it’s very much a case of picking what parts you think are right. There’s no real right or wrong. I already had an idea on the case and switches I wanted, but for all the electronics stuff that I was largely clueless. I just tried to get the stuff that matched what others had already used in other YouTube videos or blog posts and amend to suit.
Hardware
The first big, and perhaps obvious, challenge with a Dactyl, is the concave key well. This is the feature you are spending all the time and money to acquire, the kind of thing production boards like the Kinesis Advantage line have championed for years. That shape means you can’t just get a flat PCB, stick your switches in, mount it into the case and be done. You need a custom shaped case and that means 3D printing. I ordered mine as I didn’t want to go down the rabbit hole of 3D printing.
All my cases were printed by Wylderbuilds. I’ll add a link to then down below. The owner, Andrew, is incredibly accommodating and I can’t recommend his service enough. He’s been shipping from the US to me in the UK and it only ever took a few days. Highly recommended.
There is some subtle difference between a true Dactyl, that has a tighter concave key well and higher thumb keys, and the new style that Wylderbuild offers, which is the style of the wireless model I built.
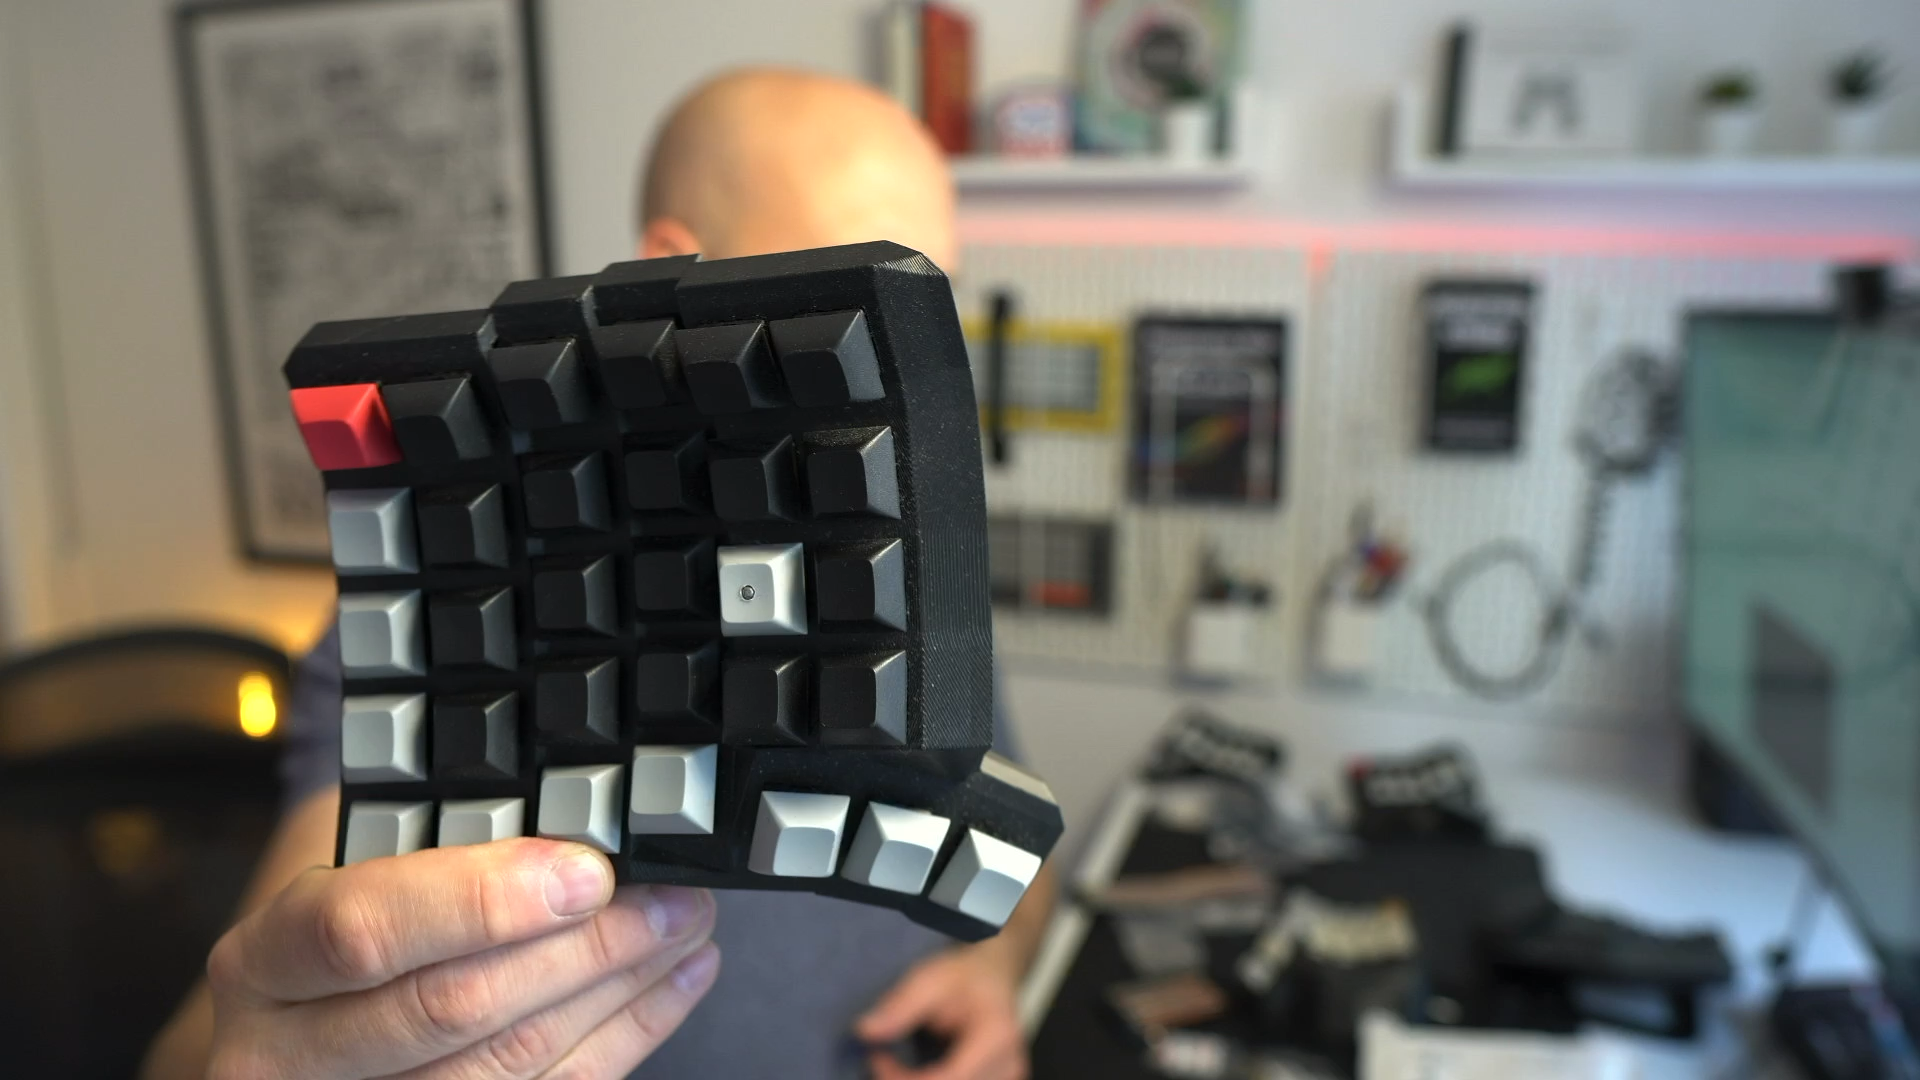
Slightly different thumb cluster than the standard Dactyl Manuform
This has lower thumb clusters with fewer keys, which I prefer. Or, at least I thought I did. But more on that later.
Lighting
For me, having had keyboards with and without OLEDs and RGB, I find OLEDs and particularly per-key LEDs a waste of time. As a user I have found little benefit from them and as a builder, they add add a lot of complexity, which in turn means things to go wrong. If you do want screens like this one, you’ll need to factor in more time and money. The OLEDs like this one are no good for a wireless build as they burn through battery.
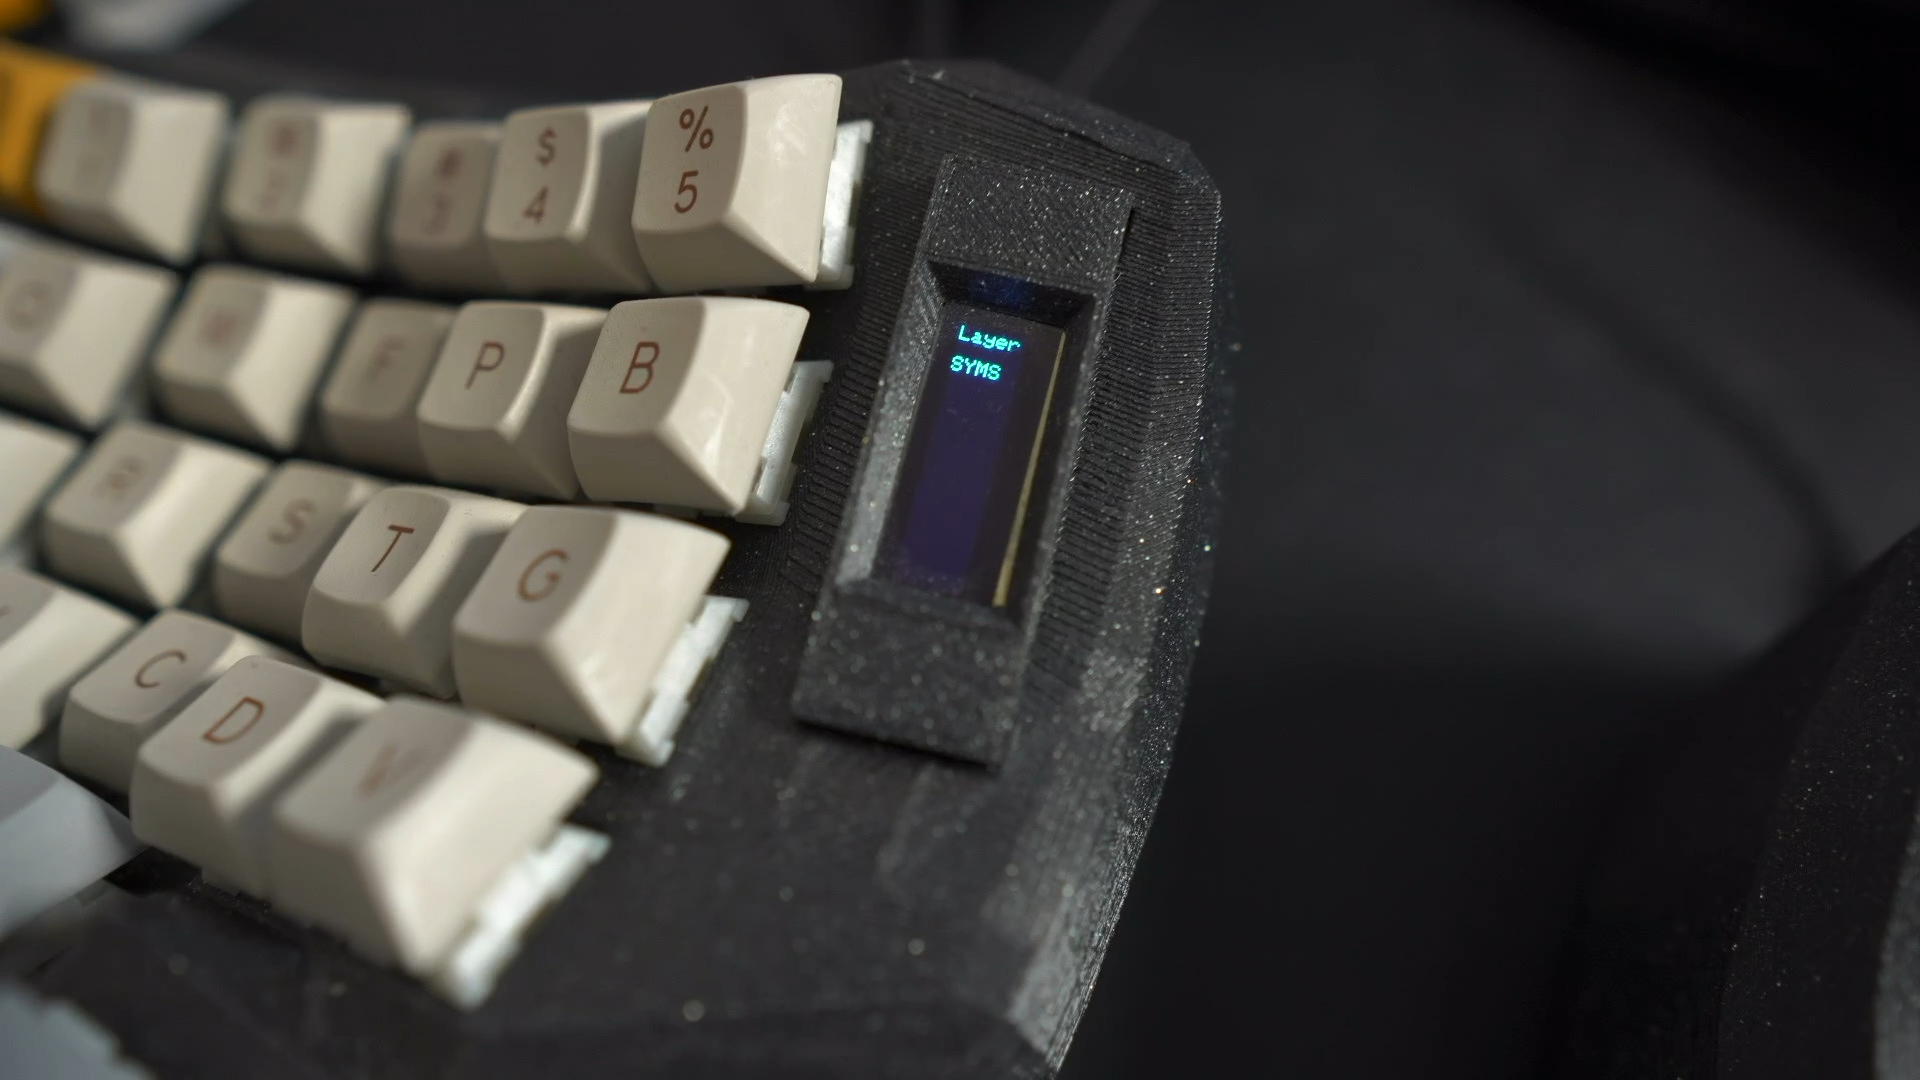
OLED screens are useful in some cases but I think an LED would be just as good
But if you fancy wireless and would like a screen there is good news. The new nice!view is a much lower power option and would be viable for a wireless build, it just wasn’t available when I built mine.
Per key switch LEDs are certainly do-able but add massively to the build time.
Hand-wiring and per switch PCBs
The thing is when it comes to how the keys actually work under the hood, due to the shape of the key well, a normal flat PCB is not an option. There are flexible PCBs available if they suit the layout you are after, but I went the hand-wired route.
That means you either need to wire each switch directly to each other in a grid, or, wire a bunch of hotswap connectors to each other, which on reflection is probably the simplest option, or use single key PCBs and wire those to each other, which is the option I went for.
I set off on my first build with the intention of adding per key LED. I used single key Amoebas, which are single key PCBs. With these, after you have soldered in your hotswap socket, diode and LED (4 pads each) – which you will need for every key – you position them where you want them, push your switches in to keep them in place, wire everything up and then cover them with hot glue. And when you are finished, if you are as neat as me, it looks like Slimer has been living in your keyboard.
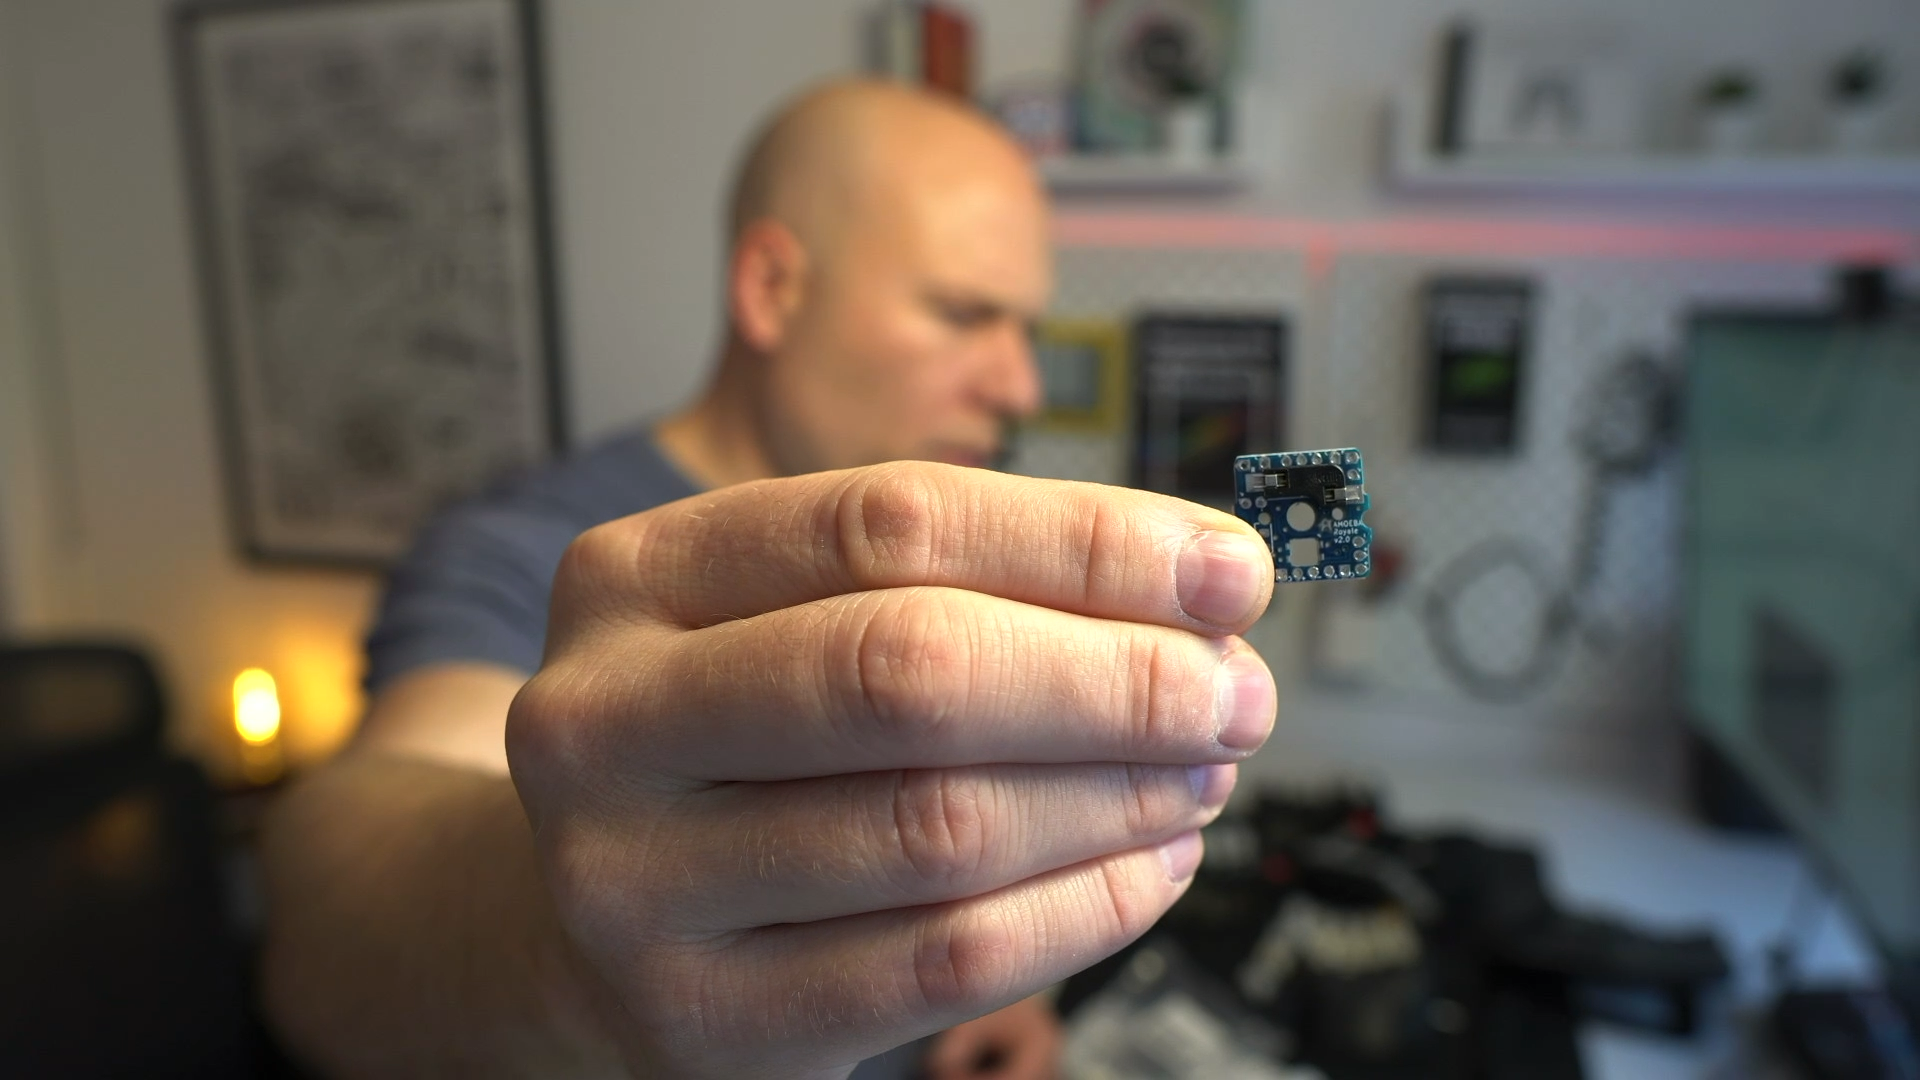
Amoeba single key PCBs are great if you need to add lighting but overkill otherwise
But, having done this a few ways, my advice would be, either get the case printed that will support hotswap sockets you can just position in, no glueing required, or just solder your favourite switches in direct and be done. That way, you skip the need for the Amoebas. They aren’t hugely expensive and nice enough to work with, but if you don’t need LEDs, it’s a needless addition.
Whichever option you go for, you need to appreciate it is a lot of soldering. And you can lose the will to continue. Even though I went to the trouble of soldering the individual LEDs into each Amoeba board for the wired Dactyl, in the end I was so sick of soldering, I just couldn’t be bothered to do the internal wiring. So they sit dormant, a testament to my shortcomings. Maybe you have more staying power but unless you are adamant you want LEDs, make life easier for yourself and give them a miss.
My preference now is to build the wireless Dactyls, and I ultimately prefer the aesthetics more. I know people who haven’t had a wireless board sometimes worry about lag but I can tell you that I’ve never noticed any lag at all so I don’t think that’s ever going to be an issue. Wireless makes the build easier in some ways; it means you don’t need to bother with TRRS sockets for the wired connection between the two halves. However, there are equivalent complications, I think are worth doing; I think it is worth adding on/off switches to the batteries for instance. Just because I do find that the ZMK software can wake up my mac when I don’t want it to, or when travelling with the board, it makes sense to have it switched off entirely.
So, let’s talk about what we are actually likely going to need to build something like this.
List of parts
You will need:
- 2 cases
- 2 n!n boards
- 2 USB 20cm male to female extension cables
- Keys switches, I’m using Gateron Oil Kings
- diodes (1N4148) for each key
- keycaps
- 10-20 brass screws and ‘receivers’
- 2 batteries. I went with 1000mAh ones
- 2 on/off switches
- 2 push button reset switches
- Pack of ‘dupont’ connectors
- Rubber feet (get ones for furniture)
Then you will need a bunch of stuff if you don’t have it already:
- Solder and iron
- Hot glue gun
- Copper tape
- Sorbathane or similar sound dampener (optional)
And in a very vague way, here are the steps:
- Stick in your key switches
- Use a soldering iron to melt in the screw threaded brass knurls
- Use copper tape to run down the column on one pin of the switches, solder a blob on each switch pin where it sticks through
- Use insulation tape over the column, making sure you don’t cover the other pin on each switch
- You need a diode per key switch and they all need bending like this. It’s far easier to do this all in one batch first, make a jig with a piece of wood and a nail
- Use one diode per switch and clip it such that is wraps around a key pin and forms a rail across for each row. You need to solder the leg of the diode onto the leg of the next diode
- Now take your DuPont connectors and if they are double ended, you will want to clip off one of the connectors and strip back the wire. If you can keep them together, one set for the rows and one for the columns that will help. Now solder one to each column, and then with your other bunch, solder them to somewhere along the rail on each row. Don’t connect to a switch pin!
- You can connect those to either side of the Nice!Nano. You will need to have installed the legs through your nice!nano too btw
- You now need to add the Reset switch, again, use the Dupont connectors and run two off the GND and RES pins and wire those to one side of the reset switch. It doesn’t matter which side of the Reset you solder to. You will likely need to drill holes in the base plate of the Dactyl to accommodate the Reset and on/off
- It’s not essential but I also added a on/off switch between the battery live. I used 1000mAh batteries in each side and they last ages but I like being able to know they are switched off when travelling
- Both the reset and on/off switch can be hot glued into position but you may want to get things working first
- Depending on your case the USB of your board may slot right into the slot on the Dactyl case. If not you can use a short USB-C cable to connect to the board and that can sit lose in the case
- Then you repeat that whole process for the other side and then plug in a USB-C cable to power on
I found it very useful to make a diagram of how things were wired. It certainly made things easier when it came to troubleshooting things when I couldn’t get the software working.
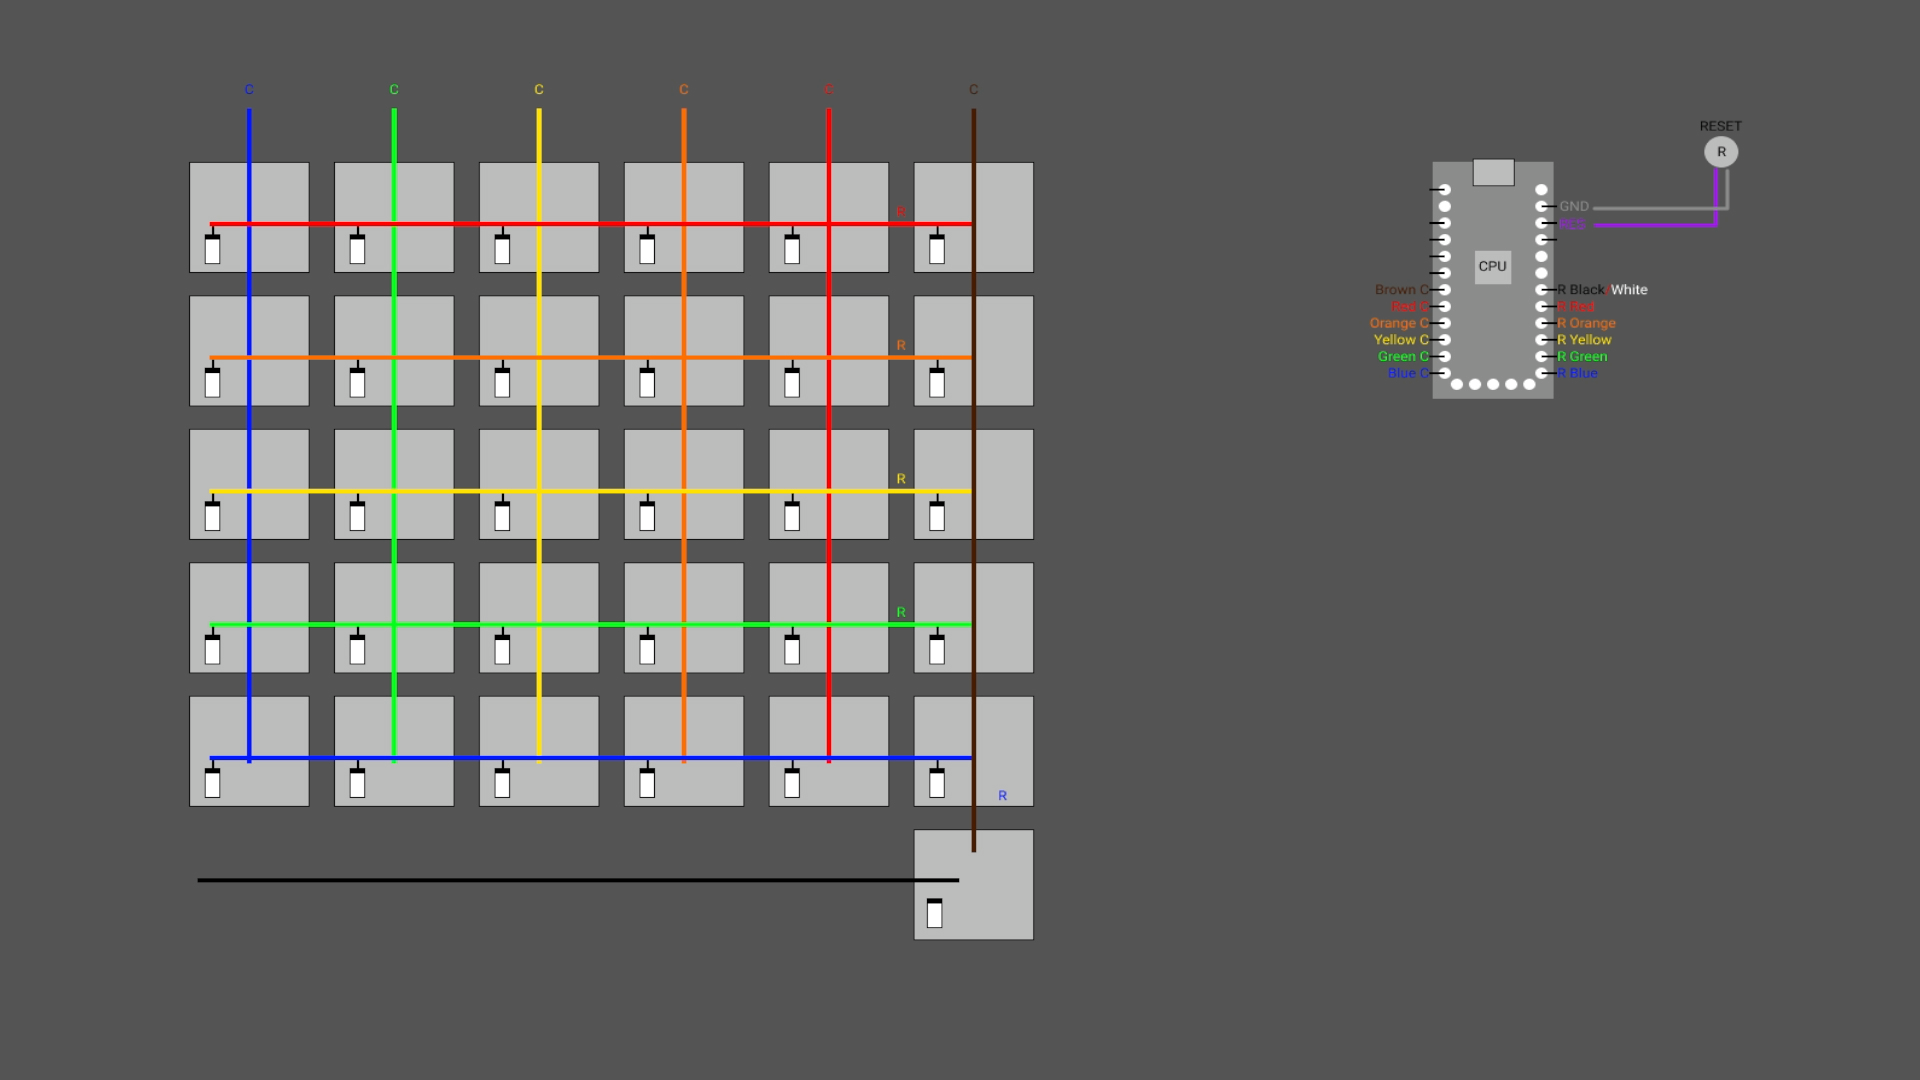
It might seem superfluous but having a diagram of what you are trying to achieve helps other help you
Software
Wireless builds like this are powered by ZMK. The basic process is that you fork the ZMK repo, create a ‘shield’ for your board, write the keymap, push up to your forked repo to GitHub, that runs a GitHub action, and creates the firmware you need as an asset. You download the asset file, connect each half, one at a time via USB, and stick it into bootloader mode with a double reset press and then drag the appropriate file to each half. It copies the firmware file, and then ejects the device. Same process on the other side and you are done. Remove the USB cable, pair with your computer like any other Bluetooth device and you are away.
The best advice I can offer you with the software is to try and get someone else’s that is most similar to the layout that you have and amend from there. My config is here: https://github.com/benfrain/zmk-config in case you want something similar to mine.
When you get stuck. And you probably will. You’ll get the best help by reading, and re-reading, the ZMK documentation and then when that inevitably doesn’t work, ask on the ZMK Discord. Can’t thank the people on there enough. There is absolutely no way I would have gotten mine working how I wanted without their help. A great community.
If you have a fairly stable idea of what you want with you layout, working in the code is no big deal. It’s nowhere near as nice as a GUI for the task but it gets the job done.
But there is no denying that it is harder work and more error prone than having a nice app or web tool to handle the job for you.
Let’s put that grievance aside for a moment and assume all the building it done and our software is loaded.
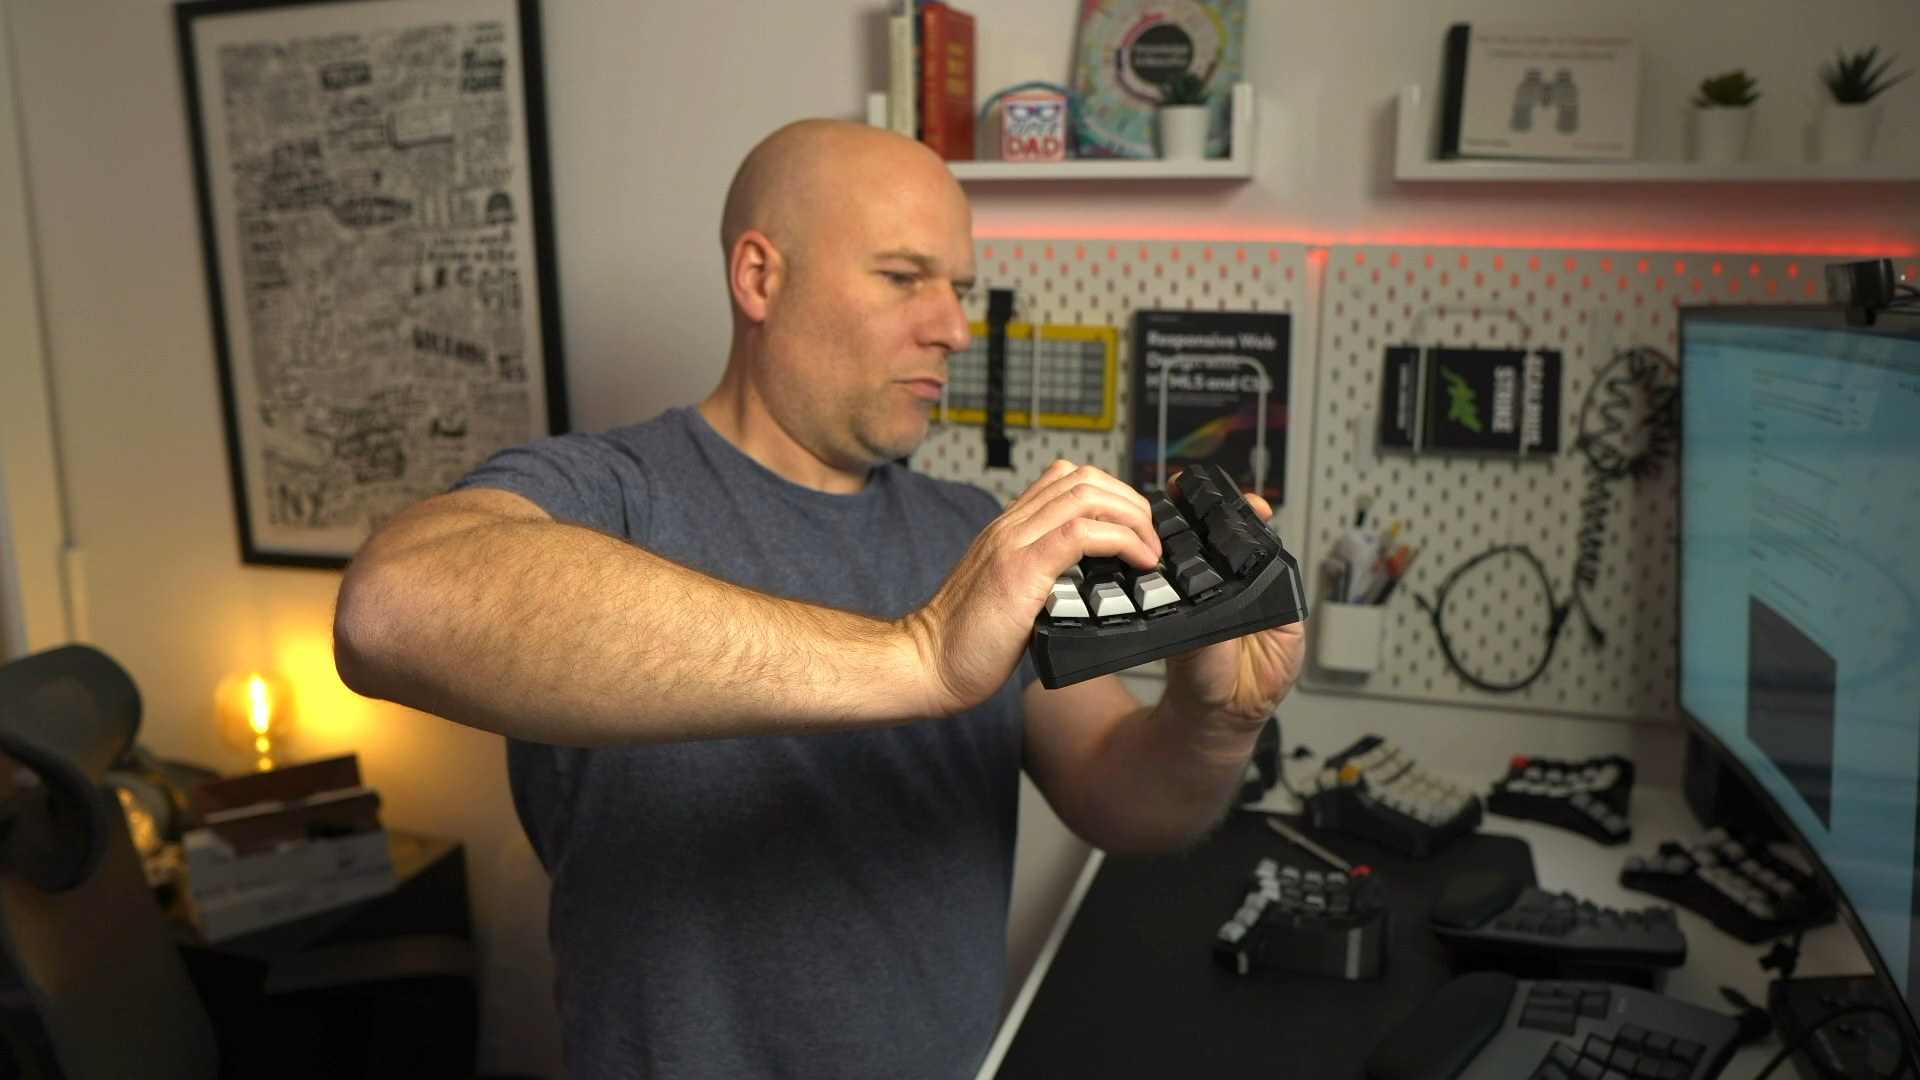
And here it is. It was at least £250 in raw cost, and that was with fairly cheap blank DSA keycaps, that I made my own homing keys with using ball-bearings and a mini hand drill. I don’t even want to think about the hours it took.
Slightly different thumb cluster than the standard Dactyl Manuform
But, let’s gloss over all the cost and frustration, and think about what a Dactyl Manuform is actually like.
The actual review
In case you skipped the last bit you should know that building one of these is no walk in the park. It takes a lot of hours to amass all the bits and pieces, wire, glue, connect, test, fix and so on. It’s also very expensive for something with rough edges and no warranty.
But what is it actually like?
Keywell
The first thing is, having a key well in which your fingers dip is very nice indeed. Having to stretch less for your top row keys is a general improvement you will miss when you are not using it. I’m surprised there aren’t more keyboards of this nature in general. Keyboards like the Maltron have been doing this since the 70s but they are still pretty niche. The modern day production version of this would be one of Kinesis’s advantage line. More on that another time.
Switches
The good news is you can use whatever key switches you want. You could do choc switches if you wanted but I opted for MX style and Gateron Oil Kings in the wireless one and Boba U4 ones in the wired model. The Gaterons in particular I like. Probably my favourite stock switch so far because you don’t generally need to do any hand lubing of them. They feel great straight out of the bag.
I’ve not seen a good solution to the hotswap side of things though when using these single PCB boards. Both these are hotswap, using Amoeba 1 key PCBs but I can imagine, even having hot-glued the b’jesus out of them, when I try and push a new key in, some of them are going to pop out on the other side. And that might lead to a connection failing. Which means opening it back up and faffing around with the connections some more.
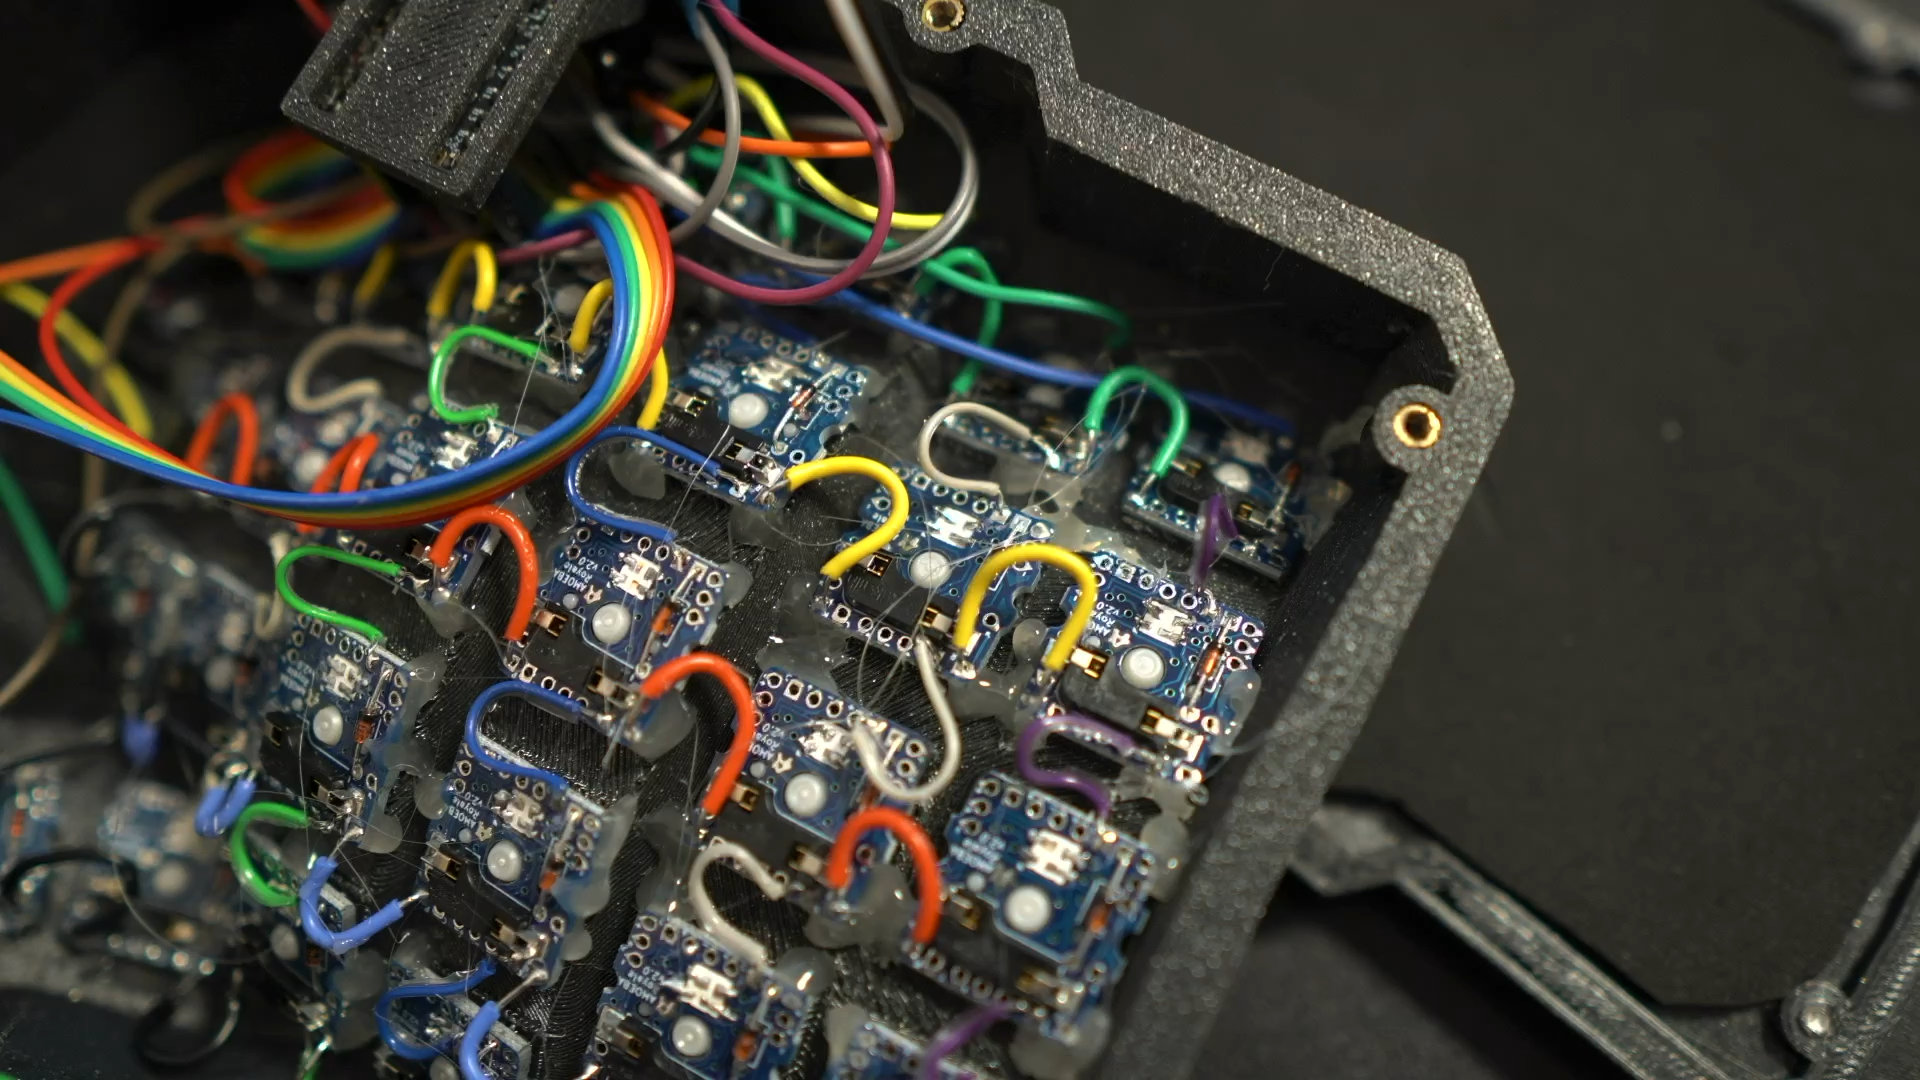
The wiring isn’t the neatest but once you add the hot glue gun, it looks like Slimer has been in there
Basically, you have to remember that this is only going to be as good as you make it. If you are looking at how I have wired and connected mine and you are shaking your head in horror, because you could do a far neater job, then this is probably a project for you. It could obviously be far neater. I just got to the point it worked and then pushed everything in and screwed it up and pretended that was OK.
The two halves sit on the desk quite solidly, I have about 6 of the little rubbery feet dotted around the bottom of each half and it stays where I put it.
Sound
There can be quite a cavity inside your Dactyl. And that can lead to unwanted and excessive noise. You can do what you want to change that sound signature. You could add something like sorbothane or butyl rubber to the base, or put any kind of material that will fit and not be conductive in there to soak up the sound, and maybe add a little heft to it too. It definitely feels a bit light for the size by default so some extra weight wouldn’t be a bad thing.
With these Gateron Oil Kings I quite like this as it is but there are plenty of options available.
Fit and finish
This is a handmade item and I don’t think there is any hiding that. Fit and finish is best described as “functional”. Don’t get me wrong, I wouldn’t say it’s an embarrassment, and given the amount of time you will be spending breathing life into this thing, you’ll almost want to show everyone you meet! But there are rough edges, you are never going to mistake this for the iKeyboard or something that RAMA would put out. And that is part of the charm of Dactyl keyboards. It will be unmistakably your keyboard, for better or worse.
Resilience
So with that in mind, how long will this last? I don’t know. Mine have been back and forth to the office in a backpack, and I’ve had two or three occasions where something had come loose inside and I had to open it up. Nothing terrible or hard to fix but this is a keyboard. It’s one of the few things you reasonably expect to ‘just work’ every time.
The actual casing is tough enough, I don’t have any concerns there. It’s basically my own handiwork that is likely to be the problem.
There are also things I miss that I wasn’t skilled enough to pull off. I have no indication of when this board is in pairing mode. Or which of the 5 profiles it can be connected to, it is currently connected to. A little multi-colour LED would be really helpful here.
The only keyboard I’ve had that has actually resulted in pain
Here is the bad news. After about 7 months of use, I’ve had to stop using mine.
If you are going to get a Dactyl, my advice is that you need the wrist support. All the Dactyls I have seen with built-in wrist rests I felt looked a bit ridiculous. I was put off getting them for that reason. However, unless you are super vigilant with your hand positions as you type, you will end up resting them in front of the board and that’s just not going to end well in the long term. So from my experience, avoid some sort of wrist rest at your peril.
Without wrist rests it is all too easy to have your hands in a poor position
Also pay attention to those thumb keys. Having used these for some time, I wouldn’t want another that didn’t have the first thumb key to the side of the first of my homing row fingers.
On the Dactyl keyboard, the first thumb cluster key is right under the first home row key. I don’t think that’s good at all. I had my command key mapped there, which on a Mac is perhaps the most used of the modifier keys. Tucking my thumb in for copy and paste has really caused me some pain. I actually ended up mapping what was on the first key of my Moonlander to the last of the thumb keys on the Dactyl. Since needing to take an extended break from the Dactyl, on my Moonlander, I’ve now created a dedicated copy/paste key while I try and recover comfort in my thumb.
Moving that key outwards has definitely helped with the comfort, but I don’t think I’d want another oft-used key where I need to contort my thumb in regularly.
Like most things ergonomic, it’s very personal. My problems might not be your problems but I just wanted to highlight, that you need to be vigilant. A concave key well alone is not going to guarantee long term comfort. Production boards are more likely to have considered all this so that is something to think about. I’m not convinced I would fair any better with a standard Dactyl thumb cluster either.
Summary
With a Dactyl, you can, in many ways, get the perfect keyboard for you. The right switches, the right colour, the preferred tenting, the right key stagger. Wireless or wired, a screen to show whatever you can think up. Per key LEDs, or a speaker in there if you want it. Sky is the limit. So there’s that.
The flip side of all that possibility is that the undertaking is massive and at times very frustrating. You are also going to end up with something that looks ‘handmade’ and unless you are buying it from a shop that makes them for you, it will have no kind of guarantee. It will not be the most resilient bit of kit you own and the time investment to getting it built and functioning is significant.
Let me also be clear on the cost. If you go like for like in terms of switches and keycaps, you are unlikely to be saving money over buying something like a Dygma Defy/Raise or ZSA Moonlander. And so much of the experience of those keyboards is hassle free and pleasurable in comparison. If you are going to do this, don’t kid yourself it will be any cheaper than a premium off-the-shelf model. Do it for the experience and the learning first and foremost.
Also, be more vigilant than I was considering your ideal key positions and hand shape. And if you suffer any pain, try and think about what layout might improve matters. For me, that lack of forethought led to me making a board to aid comfort when I didn’t have any discomfort, and I ended up with a board that caused me discomfort. If I had understood what was happening first, I could have moved an oft-used key to the outer position earlier.
I’m absolutely sold on the typing experience of a keyboard with a key well but the Dactyl is not going to be my end game. I’m fairly comfortable changing my layout in code but I think it is so much nicer done with a GUI. So I miss that. The fact that I have stared to get pain in my thumb is also a major red flag for me. I’m a little shorter than most on usable digits and can’t afford another out of action. I also think a good rest for your palms is going to be essential longer term.
So with all this wrapped up, the obsession to find the ultimate form of programmable keyboard continues. Next up, the Kinesis Advantage 360!
Thanks for reading. I’d love to hear your thoughts in the comments below.
Resources and links:
Pre-printed Dactyl cases
My ZMK Dactyl config
Flexible Dactyl PCBs
Information on single key PCBs
Good build information
How to get Royale single key PCBs printed
Build guides:
If you enjoyed this post and/or it was useful, Say thanks with a coffee. 
Recommend
About Joyk
Aggregate valuable and interesting links.
Joyk means Joy of geeK