

MotionLayout教你轻松玩转动画
source link: http://www.rousetime.com/2022/12/13/MotionLayout%E8%AE%A9%E4%BD%A0%E8%BD%BB%E6%9D%BE%E7%8E%A9%E8%BD%AC%E5%8A%A8%E7%94%BB/
Go to the source link to view the article. You can view the picture content, updated content and better typesetting reading experience. If the link is broken, please click the button below to view the snapshot at that time.

如果你还不知道MotionLayout,亦或者你知道但一直都没实际用过,那么在这里将带你全面体验MotionLayout的神奇、简单与高效。
相信你之后做动画就会对它恋恋不舍。
通过这篇文章,你将会明白关于MotionLayout的如下几个要点:
- MotionLayout是什么?
- 将MotionLayout添加到项目中并使用
- MotionScene
- ConstraintSet
- Transition
- CustomAttribute
MotionLayout是什么
首先我们来介绍一下MotionLayout,它是google推出的一种实现动画的布局view,基于ConstraintLayout为基础,可以让开发者直接通过xml布局的方式来轻松实现动画。
这里可能就有人会问,它与传统的动画又有什么不同呢,或者它的优势在哪里?
首先我们传统的动画会有以下几种:
- LayoutTransition动画
- 一些封装控件提供的动画能力,例如CoordinatorLayout
这些可能是我们用的比较多的,各自都有自己的使用场景,但MotionLayout却基本兼容了它们的使用场景,也就是说,MotionLayout是它们的结合体。
它能够自定义属性,来实现属性动画的特征;可以使用TransitionManager来实现界面的过渡动画,同时也可以结合CoordinatorLayout,来实现特效动画。
除此之外,MotionLayout在Android Studio中做了完美优化,提供了它专有的工具,能让开发者通过界面化的方式来更好的实现动画效果。
当然它也有一些局限性,例如
MotionLayout只能针对自己的直接子view进行操作,与TransitionManager不同的是,TransitionManager可以作用于其他的嵌套布局,灵活性更高。
将MotionLayout添加到项目中并使用
如果你项目中已经使用了ConstraintLayout,只要版本不是很低就无需新增依赖,可以直接使用。
如果没有的话,需要增加一下依赖:
androidx.constraintlayout:constraintlayout:2.1.4
由于MotionLayout是基于ConstraintLayout的,所以我们只要有ConstraintLayout依赖即可。
现在我们就可以直接在项目中使用了
<?xml version="1.0" encoding="utf-8"?>
<androidx.constraintlayout.motion.widget.MotionLayout xmlns:android="http://schemas.android.com/apk/res/android"
    xmlns:app="http://schemas.android.com/apk/res-auto"
    android:layout_width="match_parent"
    android:layout_height="match_parent"
    app:layoutDescription="@xml/activity_motion_layout_scene"
    app:showPaths="true">

<TextView
        android:id="@+id/tv"
        android:layout_width="wrap_content"
        android:layout_height="wrap_content"
        android:gravity="center"
        android:background="@color/colorAccent"
        android:text="@string/app_name"
        android:textColor="@android:color/white"
        app:layout_constraintStart_toStartOf="parent"
        app:layout_constraintTop_toTopOf="parent" />

</androidx.constraintlayout.motion.widget.MotionLayout>
在使用的过程中,我们如果需要做动画,需要引用动画的xml,通过layoutDescription来引用。对应的就是activity_motion_layout_scene文件
下面我们来看下文件具体内容
MotionScene
在MotionLayout中,如果你需要做动画,需要使用MotionScene,也就是说,你的动画定义都需要在MotionScene中。
它主要包括如下几个动画操作标签
- ConstraintSets
- Transition
- CustomAttribute
- KeyFramesSet
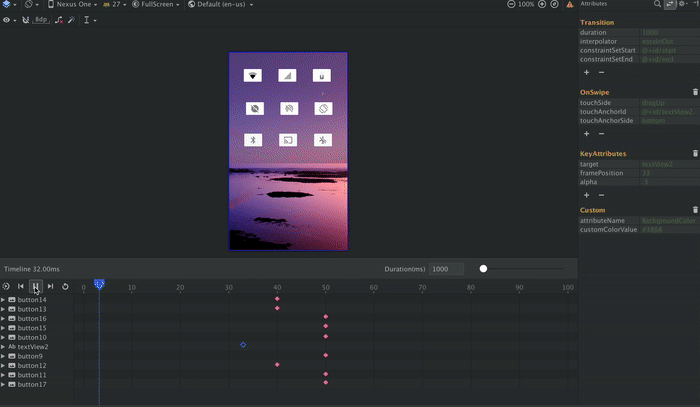
我们来给上面的TextView做一个简单的移动动画:从左上角移动到右下角。
针对这种简单的平移动画,我们可以直接使用ConstraintSet来定义动画的start与end。
ConstraintSet
这里有一点需要注意,ConstraintSet中的约束会直接影响到我们外面的layout布局的约束。
<?xml version="1.0" encoding="utf-8"?>
<MotionScene xmlns:android="http://schemas.android.com/apk/res/android"
    xmlns:app="http://schemas.android.com/apk/res-auto">

<ConstraintSet android:id="@+id/start">
        <Constraint
            android:id="@+id/tv"
            android:layout_width="wrap_content"
            android:layout_height="50dp"
            app:layout_constraintStart_toStartOf="parent"
            app:layout_constraintTop_toTopOf="parent" />
    </ConstraintSet>

<ConstraintSet android:id="@+id/end">
        <Constraint
            android:id="@id/tv"
            android:layout_width="wrap_content"
            android:layout_height="50dp"
            app:layout_constraintBottom_toBottomOf="parent"
            app:layout_constraintEnd_toEndOf="parent" />
    </ConstraintSet>

</MotionScene>
我们定义了两个ConstraintSet, 分别是start与end,其中start代表的是动画开始的位置,也就是TextView开始的展示方式。
包括它的宽高,布局约束,这些都会直接覆盖layout中的宽高与约束。
另一个end,代表的是,动画结束的位置,也就是TextView结束之后的展示方式。
这里我们将它的约束由之前的左上角,改成了右下角。
这样我们动画的开始与结束就已经定位完成。接下来要做的就是应用我们定义的start与end,让动画生效。
需要注意的是,这里定义的id是需要关联我们layout中的id,这样才能让MotionLayout进行匹配那个View需要进行动画。
Transition
为了让动画生效,我们需要使用到Transition来定义它的动画执行方式。
我们在MotionScene中再添加Transition
<Transition
        app:constraintSetEnd="@id/end"
        app:constraintSetStart="@+id/start"
        app:duration="3000">
</Transition>
这里的id,就是前面ConstraintSet中定义的id。
这样我们的动画就可以执行起来。一个平移动画就实现了,不需要任何java或者kotlin代码,直接使用xml即可。
同时Android Studio提供了图形化操作,这样你连xml都可以不用写。
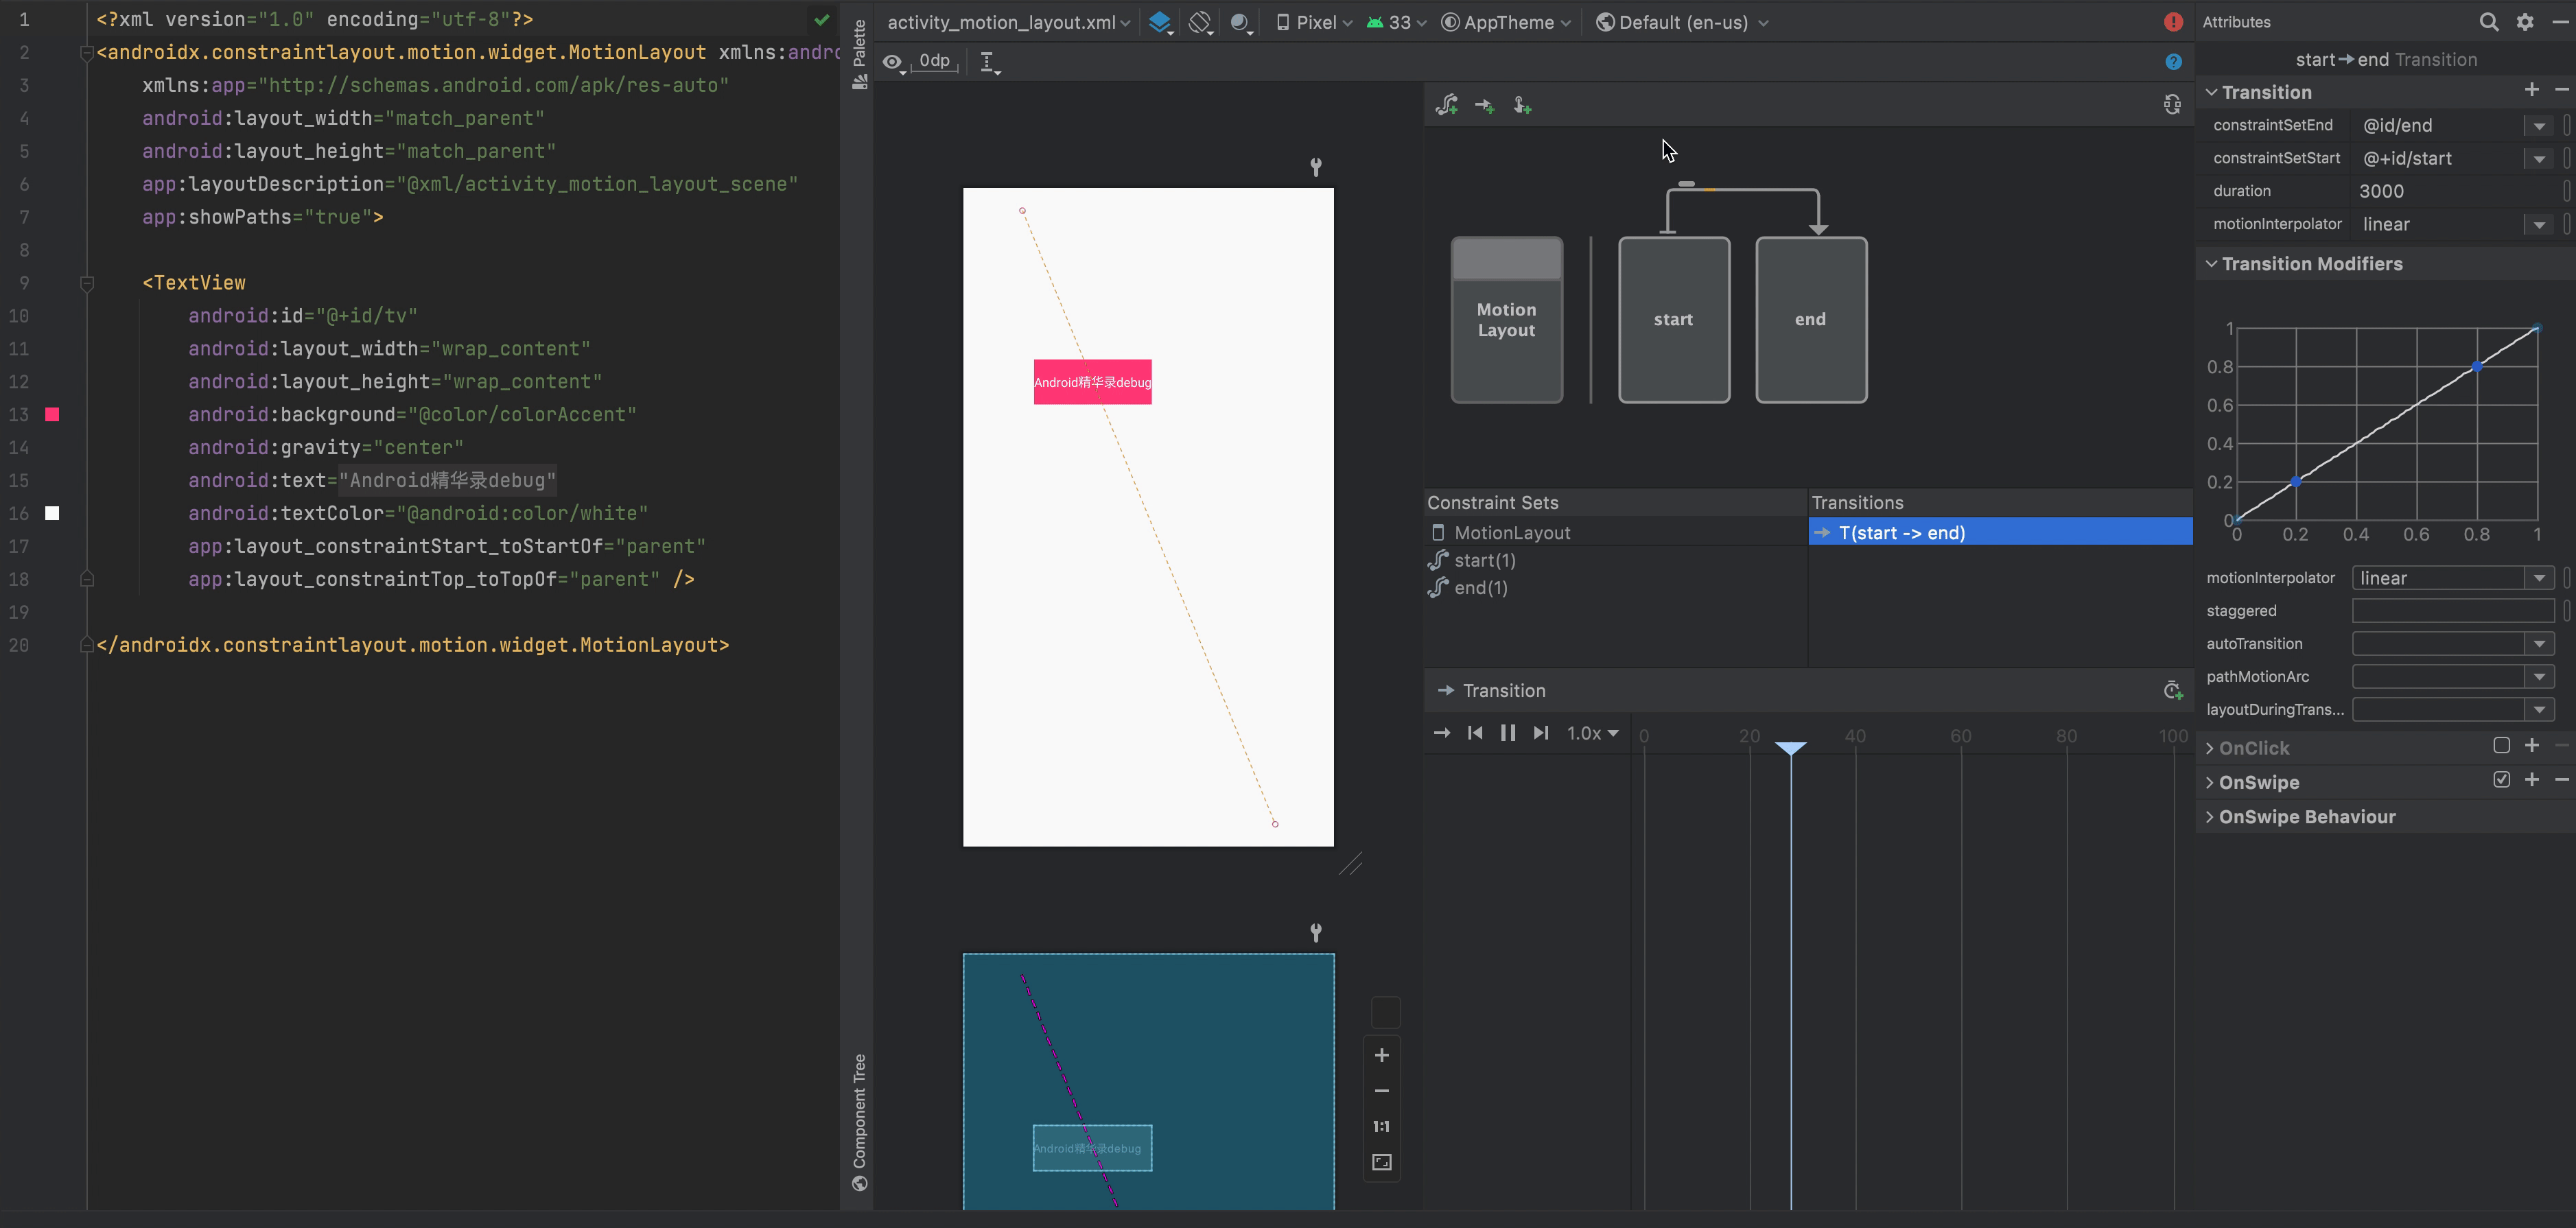
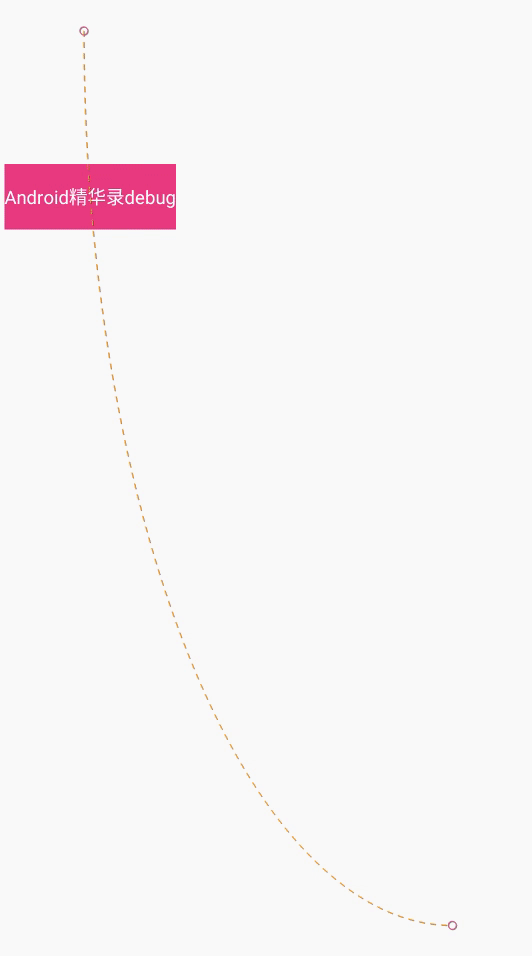
看右边的曲线图,使用的是一个线性的interpolator。我们也可以改变它的运动方式,例如使用系统提供的easeInOut
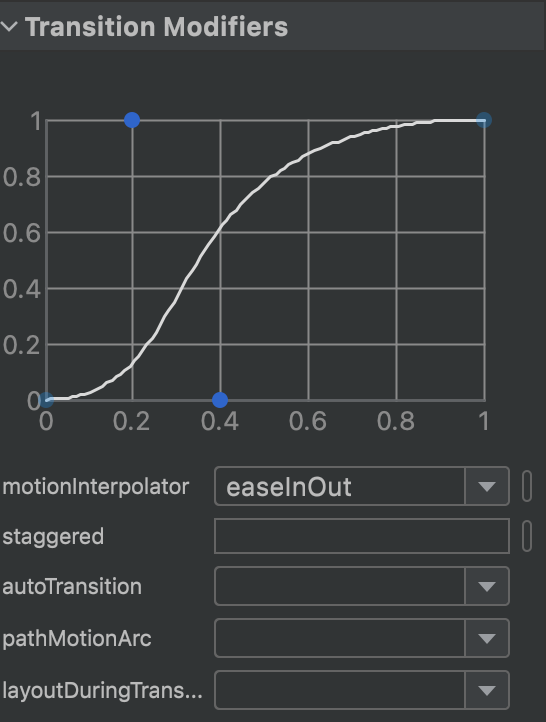
除了motioninterpolator,还提供了其他属性设置,例如我们还可以定义动画路线,使用pathMotionArc,设置为startVertical
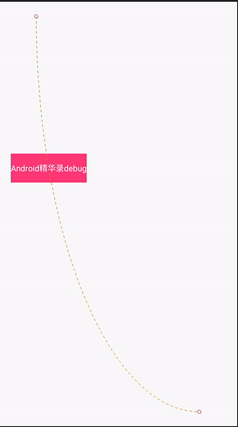
现在它的运动曲线就变成了基于竖直方向上的一个弧线。
除此之外,我们还可以为动画添加手势操作,例如OnSwipe
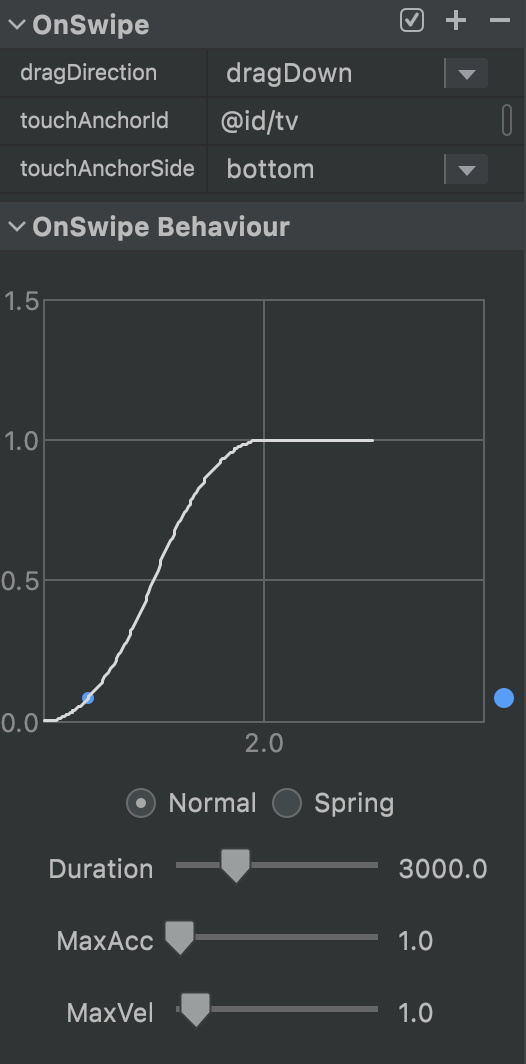
我们定义了一个滑动手势,手势方向是dragDown,对应的滑动id是我们的tv,也就是TextView,作用于TextView的滑动面是bottom。

这些代码层面都是在xml中
<Transition
    app:constraintSetEnd="@id/end"
    app:constraintSetStart="@+id/start"
    app:duration="3000"
    app:motionInterpolator="easeInOut"
    app:pathMotionArc="startVertical">
    <OnSwipe
        app:dragDirection="dragDown"
        app:touchAnchorId="@id/tv"
        app:touchAnchorSide="bottom" />
</Transition>
我们还可以使用OnClick,让动画的启动通过点击事件来触发。
<Transition
    app:constraintSetEnd="@id/end"
    app:constraintSetStart="@+id/start"
    app:duration="3000"
    app:motionInterpolator="easeInOut"
    app:pathMotionArc="startVertical">

<OnClick
        app:clickAction="toggle"
        app:targetId="@id/tv" />

</Transition>
现在我们点击TextView就能实现动画的来回切换。
CustomAttribute
在ConstraintSet除了位置边界属性设置之外,还包含了其它的内置属性,例如:
- alpha
- visibility
- elevation
- rotation
- translation
- scale
这些属性都可以直接拿来做动画使用。
如果需要作用于自定义的属性,就需要使用到CustomAttribute,跟我们的传统动画ObjectAnimator一样,只要你为需要做的自定义属性提供对应的get/set方法即可。
下面来一个简单的例子,例如改变view的背景色。
我们直接使用backgroundColor属性,由于backgroundColor属性已经支持set/get方法,所以我们可以直接拿来用。
<?xml version="1.0" encoding="utf-8"?>
<MotionScene xmlns:android="http://schemas.android.com/apk/res/android"
    xmlns:app="http://schemas.android.com/apk/res-auto">

<ConstraintSet android:id="@+id/start">
        <Constraint
            android:id="@+id/tv"
            android:layout_width="wrap_content"
            android:layout_height="50dp"
            app:layout_constraintStart_toStartOf="parent"
            app:layout_constraintTop_toTopOf="parent">
            <CustomAttribute
                app:attributeName="backgroundColor"
                app:customColorValue="@color/colorAccent" />
        </Constraint>
    </ConstraintSet>

<ConstraintSet android:id="@+id/end">
        <Constraint
            android:id="@id/tv"
            android:layout_width="wrap_content"
            android:layout_height="50dp"
            app:layout_constraintBottom_toBottomOf="parent"
            app:layout_constraintEnd_toEndOf="parent">
            <CustomAttribute
                app:attributeName="backgroundColor"
                app:customColorValue="@color/colorPrimary" />
        </Constraint>
    </ConstraintSet>

<Transition
        app:constraintSetEnd="@id/end"
        app:constraintSetStart="@+id/start"
        app:duration="3000"
        app:motionInterpolator="easeInOut"
        app:pathMotionArc="startVertical">
        <OnSwipe
            app:dragDirection="dragDown"
            app:touchAnchorId="@id/tv"
            app:touchAnchorSide="bottom" />
    </Transition>

</MotionScene>
属性名称是backgroundColor,属性值使用的是customColorValue,这里根据自身的属性值来决定使用哪种,目前支持的有如下几种。
- customColorValue
- customIntegerValue
- customFloatValue
- customStringValue
- customDimension
- customBoolean
- customReference
- customPixelDimension
有了自定义属性的功能,可以说基本可以实现我们日常需要的90%的动画需求。
至于剩下的10%,涉及的都是复杂的动画实现。我们现在的动画实现都是给个start与end,中间的动画过程我们都没有进行干涉。一旦涉及到更灵活更复杂的动画需求,就需要手动设置动画的每一个进度的值。
针对定制化的动画,MotionLayout也提供了解决方案,具体实现方式可以期待之后的文章。
最后来个调查:你是否觉得MotionLayout让动画实现更加趋于简单了呢?
android_startup: 提供一种在应用启动时能够更加简单、高效的方式来初始化组件,优化启动速度。不仅支持Jetpack App Startup的全部功能,还提供额外的同步与异步等待、线程控制与多进程支持等功能。
AwesomeGithub: 基于Github的客户端,纯练习项目,支持组件化开发,支持账户密码与认证登陆。使用Kotlin语言进行开发,项目架构是基于JetPack&DataBinding的MVVM;项目中使用了Arouter、Retrofit、Coroutine、Glide、Dagger与Hilt等流行开源技术。
flutter_github: 基于Flutter的跨平台版本Github客户端,与AwesomeGithub相对应。
android-api-analysis: 结合详细的Demo来全面解析Android相关的知识点, 帮助读者能够更快的掌握与理解所阐述的要点。
daily_algorithm: 每日一算法,由浅入深,欢迎加入一起共勉。
Recommend
About Joyk
Aggregate valuable and interesting links.
Joyk means Joy of geeK