

自动跑测试记录后发送邮件提醒并自动解析数据 - 鉴尘人
source link: https://www.cnblogs.com/renjc/p/autotest.html
Go to the source link to view the article. You can view the picture content, updated content and better typesetting reading experience. If the link is broken, please click the button below to view the snapshot at that time.
使用脚本自动跑实验(Ubuntu),将实验结果记录在文件中,并在实验结束之后将结果通过邮件发送到邮箱,最后在windows端自动解析成excel表格(因为要在windows的origin上作图)。
SHELL
- 脚本中可以创建变量,如直接
x='100'或r='rm -rf'即可,${x}在执行的时候以字符串形式读取。
- 注意变量创建时使用单引号,等于号前后不要有空格,可以是命令,可以使变量,反正都是字符串。
- 如何以数字方式解析变量?被以
$(())包裹的变量将以数字形式解析,比如在某行中有这个参数:--num=$((${n}*1000000)),这里${n}将被以数字形式解析。 - 变量为路径:建议使用绝对路径。如想创建用于接收结果文件
receive='/home/renjc/easy-test2.txt'之后touch ${receive},当然变量本质上是以字符串形式读取的,用receive='../xx.txt'当然也行,还更灵活,就是程序容易整错。
- 脚本中若想执行命令,直接新一行然后将命令打上去就可以了,不需要额外的东西,脚本本质上还是一行一行执行的
- 若命令中想带参数,可以直接用变量替换
- 数组,
volumn='128 512 1024 2048'即是数组,也可以当做一串字符串来解析。
- 函数,函数直接写在执行前就行
$(date)代表当前时间,带年月日时分秒的那种。- shell脚本的函数参数并不需要申明什么的,
${1}就代表函数第一个参数,以此类推,其中按照惯例,${0}代表函数名(或者说程序名)。调用函数也很简单,recordstart name ${v}即可调用,函数名后面的都是参数,在函数中使用${1},${2},${3}识别。 echo -n "xx" >> ${receive},只有echo的话,会输出到控制台中,加上>> ${receive}会输出到这个文件里面,加上-n代表这一行不换行,因为echo默认是每次都换行的。
使用以上几种组合基本可以完成绝大部分实验与程序。以下作为例子
这个作为例子(已折叠,可展开)receive='/home/renjc/spkv/resault/easy-test2.txt' touch ${receive}
ulimit -Sn 16384 ulimit -Hn 32768 #解除堆栈限制,可能需要,先预备
rocksdb_base='rocksdb-base/db_bench' rocksdb_split='rocksdb-split/db_bench' wisckey='WiscKey-master/WiscKey/out-static/db_bench'
# database="${rocksdb_base} ${rocksdb_split} ${wisckey}" rmstore='rm -rf /home/renjc/spkv/db/*'
recordstart(){ #${1} db_name,${2} number of threads,${3} value_size,${4} number of rows time=$(date) echo "db_name: ${1}" >> ${receive} echo "thread_num: ${2}" >> ${receive} echo "value_size: ${3}" >> ${receive} echo "num:${4}" >> ${receive} echo "start_time: ${time}" >> ${receive} echo -n "resault GB is:" >> ${receive} echo "scale=2;${3}*${4}/1024/1000/1000"|bc >> ${receive} }
recordend(){ time=$(date) echo "done_time: ${time},----clean store and sleep 10s-------------------" >> ${receive} ${rmstore} sleep 10s }
#rocksdb 用一个杠两个杠都行,leveldb/wisckey只能用两个,统一采用两个杠杠。 const_arg='--db=/home/renjc/spkv/db --bloom_bits=0 --write_buffer_size=134217728' rocksdb_arg='--compression_type=none' #Wisckey do not support but rocksdb need sperate_arg='--enable_blob_files=true' #rokcsdb的键值分离版本就是原来的版本上加一个参数,所以使用相同路径加一个参数 benchmarks='--benchmarks=fillrandom,stats,readrandom,stats' volumn='128 512 1024 2048' num='5 10' echo "test start" >> ${receive}
for v in ${volumn} do for n in ${num} do recordstart r_sperate 1 ${v} 10000000 ./${rocksdb_base} ${const_arg} ${rocksdb_arg} --num=$((${n}*1000000)) --value_size=${v} ${benchmarks} ${sperate_arg} >> ${receive} recordend recordstart r_split 1 ${v} 10000000 ./${rocksdb_split} ${const_arg} ${rocksdb_arg} --num=$((${n}*1000000)) --value_size=${v} ${benchmarks} >> ${receive} recordend recordstart wisckey 1 ${v} 10000000 ./${wisckey} ${const_arg} --num=$((${n}*1000000)) --value_size=${v} ${benchmarks} >> ${receive} recordend done done
echo "all done" >> ${receive}
echo "run over \n file in attach" | mutt -s "Test run over" [email protected] -a ${receive}
自动发送邮件
mail如何添加附件没整成功,现在使用mutt命令实现,控制台执行:
sudo apt-get install mutt安装
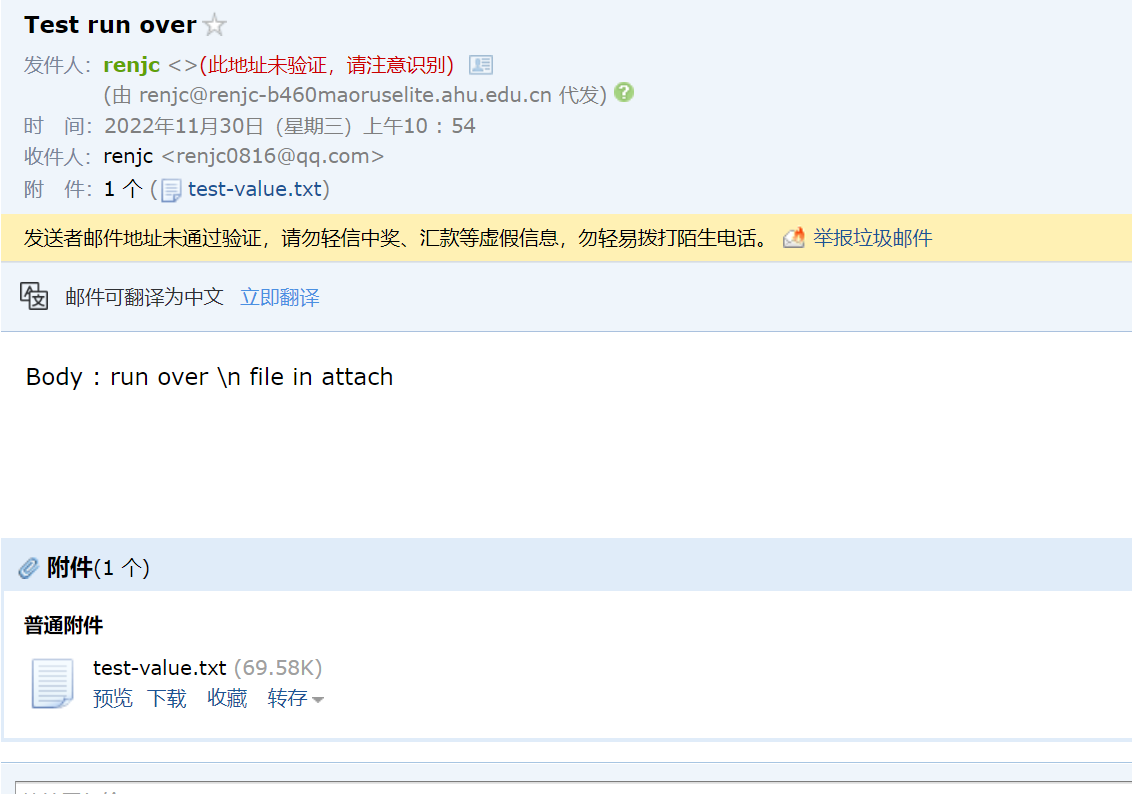
echo "Body : run over \n file in attach" | mutt -s "Test run over" [email protected] -a 'path'即可。
其中,"Body"开头的是邮件内容,-s后面的是邮件标题,-a后面的'path'是附件地址,正常使用不用带单引号,写在脚本里时可以用之前创建的${receive}代替。邮件是立刻发送的,收件箱里找不到请到垃圾箱里面找找。如下:
自动解析实验结果生成excel表格
这个程序自己写去
如何生成excel可读取的文件?csv文件:csv文件可以被excel读取,第一行表示excel的那个列名,用逗号分割,底下的数据也是,每一行代表excel表格内的一行,每一列的内容用逗号分割,英文的逗号。
至于解析实验结果,就逐行读取,然后捕捉自己想要的关键词就行了,性能啥的就不用考虑优化了,咋简单咋来。
下面的是自用的解析rocksdb的参数的,仅供参考
自用rocksdb参数解析(已折叠,可展开)#include <iostream> #include <string> #include <sstream> #include <vector> #include <fstream> #include <iomanip>
#define default_file_path "E:\\Code\\Windows\\FileOperate\\easy-test.txt" #define resault_file_name "E:\\Code\\Windows\\FileOperate\\resault.csv" using namespace std;
struct arguments { arguments(string s,string t):name(s),data(t){} string name; string data; };
void readFile(vector<arguments>& resault,const string& file_path); void trimEmpty(string &s);//用于去除字符串首尾空格 void recordString(const string& type, string& s,vector<arguments>& resault);//用于格式化并记录data void recordInFile(const vector<arguments>& resault);//解析结果记录到文件中,测试用 void recordCSVMode(const vector<arguments>& resault); void printInShell(const vector<arguments>& resault);//打印到控制台,测试用
//按顺序存放需要捕捉的关键词,问题在于只能顺序 //如果该行以该关键词结尾,那么就将所有的东西记录下来 //注意,这个数组并不是最终参数结果,有的一行记了两三个参数 const static vector<string> key_words = {"db_name","thread_num","start_time","Values","Entries","RawSize","FileSize", "fillrandom","Cumulative compaction","Cumulative writes","Cumulative stall", "readrandom","Cumulative compaction","Cumulative writes","Cumulative stall","done_time"}; const static int length = key_words.size();
int main(int arg_count, char *arg_value[]){ string file_path = default_file_path; //默认路径 if(arg_count > 1) file_path = arg_value[1]; //argv[0]为程序名,这点由shell传统决定,argv[1]是程序名的输入
vector<arguments> resault; readFile(resault,file_path);
// printInShell(resault); // recordInFile(resault); recordCSVMode(resault);
// getchar(); return 0; }
void readFile(vector<arguments>& resault,const string& file_path){ int flag = 0; string line;//按行读取 ifstream fp(file_path);
while(getline(fp, line)) { string head = line.substr(0,line.find(":")); trimEmpty(head); if(key_words[flag] == head) { string tail = line.substr(line.find(":")+1); recordString(key_words[flag],tail,resault); // resault.push_back(arguments(key_words[flag],tail)); flag = flag == length - 1 ? 0 : flag + 1; } } }
void trimEmpty(string &s){ //删除字符串的前后空格 if (!s.empty()){ s.erase(0, s.find_first_not_of(" ")); s.erase(s.find_last_not_of(" ") + 1); } }
void recordString(const string& type, string& s,vector<arguments>& resault){ //为什么不使用精确的下表标位置 //因为数据的长度不一定,所以必须使用标点符号等来相对定位。 trimEmpty(s); if(type == "fillrandom" || type == "readrandom"){ int start = s.find("op")+3; int len = s.find(";") - start; string kops = s.substr(start,len); resault.push_back(arguments("Kops",kops)); start = s.find(";")+1; len = s.find_last_of("s")+1 - start; s = s.substr(start,len); trimEmpty(s); resault.push_back(arguments("Speed",s)); return; }
if(type == "Cumulative stall") { string stall_time = s.substr(0,s.find(" ")); resault.push_back(arguments("Cumulative stall",stall_time)); s = s.substr(s.find(",") + 2); resault.push_back(arguments("Average stall",s)); return; }
if(type == "start_time" || type == "done_time"){ s = s.substr(s.find_last_of(":")-5,8); }else if(type == "Values"){ s = s.substr(0,s.find(" ")); }else if(type == "RawSize" || type == "FileSize"){ s = s.substr(0,s.find_last_of(" ")); }else if(type == "Cumulative compaction"){ s = s.substr(0,s.find(" ")+3); }else if(type == "Cumulative writes"){ int start = s.find_last_of(":") + 2; int length = s.find_last_of(",") - start; s = s.substr(start,length); } resault.push_back(arguments(type,s)); return; }
void recordInFile(const vector<arguments>& resault){ ofstream record; remove(resault_file_name); record.open(resault_file_name, ios::app); for (size_t i = 0; i < resault.size(); i++) { record << left << setw(25) << setfill(' ') << resault[i].name; record << resault[i].data << endl; } }
void recordCSVMode(const vector<arguments>& resault){ //key_words的长度并不是最终参数的数量 ofstream record; remove(resault_file_name); record.open(resault_file_name, ios::app); size_t point = 0,point_t = 0; string head = resault[0].name; while(resault[point+1].name != head){ record << resault[point++].name << ","; } record << resault[point].name << endl; for (size_t i = 0; i < resault.size(); i++) { if(point_t < point) { ++point_t; record << resault[i].data << ","; } else { point_t = 0; record << resault[i].data << endl; } } }
void printInShell(const vector<arguments>& resault){ // 格式化输出,left表示偏左,setw是设置宽度,stefill是设置填充字符 for (size_t i = 0; i < resault.size(); i++) { cout << left << setw(25) << setfill(' ') << resault[i].name; cout << resault[i].data << endl; } }


刚打开可能数据显得有点拥挤,可以另存为excel正常的格式进行调整,要不然调整了这csv文件也保存不下来的。
好了,这波整完就可以开始摸鱼啦把实验放那跑,跑完手机会收到邮件提示,回去自动解析一波就行,至于更多的分类啥的功能,都可以在程序中实现。
(>.o)
__EOF__
Recommend
About Joyk
Aggregate valuable and interesting links.
Joyk means Joy of geeK