

SwiftUI List Style examples
source link: https://sarunw.com/posts/swiftui-list-style/
Go to the source link to view the article. You can view the picture content, updated content and better typesetting reading experience. If the link is broken, please click the button below to view the snapshot at that time.

In this article, I will show you all 6 list styles that you can use with SwiftUI List view in iOS.
You can easily support sarunw.com by checking out this sponsor.

Sponsor sarunw.com and reach thousands of iOS developers.
SwiftUI List Styles
The SwiftUI List view has many styles to choose from. If we don't specify any list style, it will default to the .automatic list style.
The .automatic list style means we left the style choice in SwiftUI hand. SwiftUI will choose the one that appropriates for the context.
This might vary based on platforms, e.g., iPhone, iPad, Mac, or even the place where List view is used.
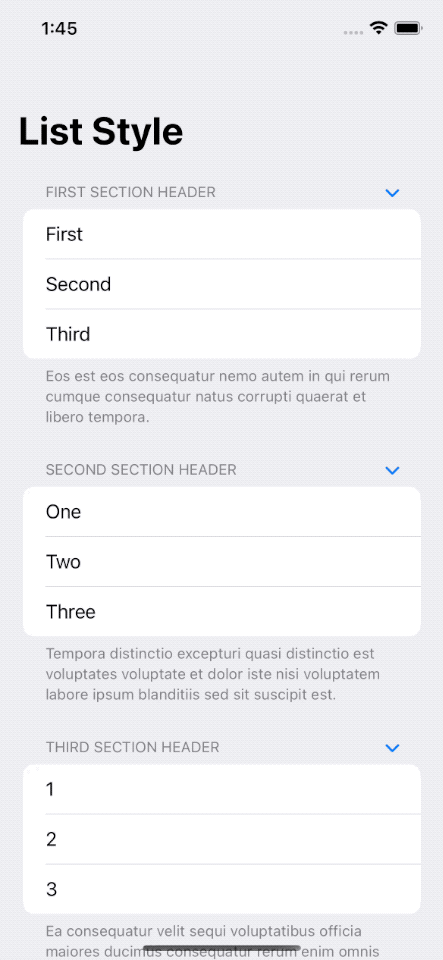
For iOS, the default list style (.automatic ) is .insetGrouped.

Inset Grouped list style.
How to change SwiftUI List style
If you want to control your own style choice, you can customize your list style using .listStyle(_:) modifier**.
We apply the .listStyle modifier to the list that you want to change the style. In this example, I set the list style to .insetGrouped.
List {
  Text("Row 1")
  Text("Row 2")
  ...
}
.listStyle(.insetGrouped)
6 iOS ListStyles
SwiftUI supports many styles that vary based on the platforms.
In this article, we will only focus on iOS. We have six options.
We will use the same code for all styles. The only difference is the list style we specified in the .listStyle modifier.
NavigationStack {
    List {
        Section {
            Text("First")
            Text("Second")
            Text("Third")
        } header: {
            Text("First Section Header")
        } footer: {
            Text("Eos est eos consequatur nemo autem in qui rerum cumque consequatur natus corrupti quaerat et libero tempora.")
        }

Section {
            Text("One")
            Text("Two")
            Text("Three")
        } header: {
            Text("Second Section Header")
        } footer: {
            Text("Tempora distinctio excepturi quasi distinctio est voluptates voluptate et dolor iste nisi voluptatem labore ipsum blanditiis sed sit suscipit est.")
        }

Section {
            Text("1")
            Text("2")
            Text("3")
        } header: {
            Text("Third Section Header")
        } footer: {
            Text("Ea consequatur velit sequi voluptatibus officia maiores ducimus consequatur rerum enim omnis totam et voluptates eius consectetur rerum dolorem quis omnis ut ut.")
        }
    }
    .navigationTitle("List Style")
    // This is the only difference.
    .listStyle(.insetGrouped)
}
Automatic
As mentioned earlier, SwiftUI will use Inset Grouped style when setting automatic (.automatic) or DefaultListStyle on iOS.
List {
    // ...
}
// Leave blank or .listStyle(.automatic) yield the same result in iOS.
.listStyle(.automatic)
Inset Grouped
Example of Inset Grouped .insetGrouped or InsetGroupedListStyle.
List {
    // ...
}
.listStyle(.insetGrouped)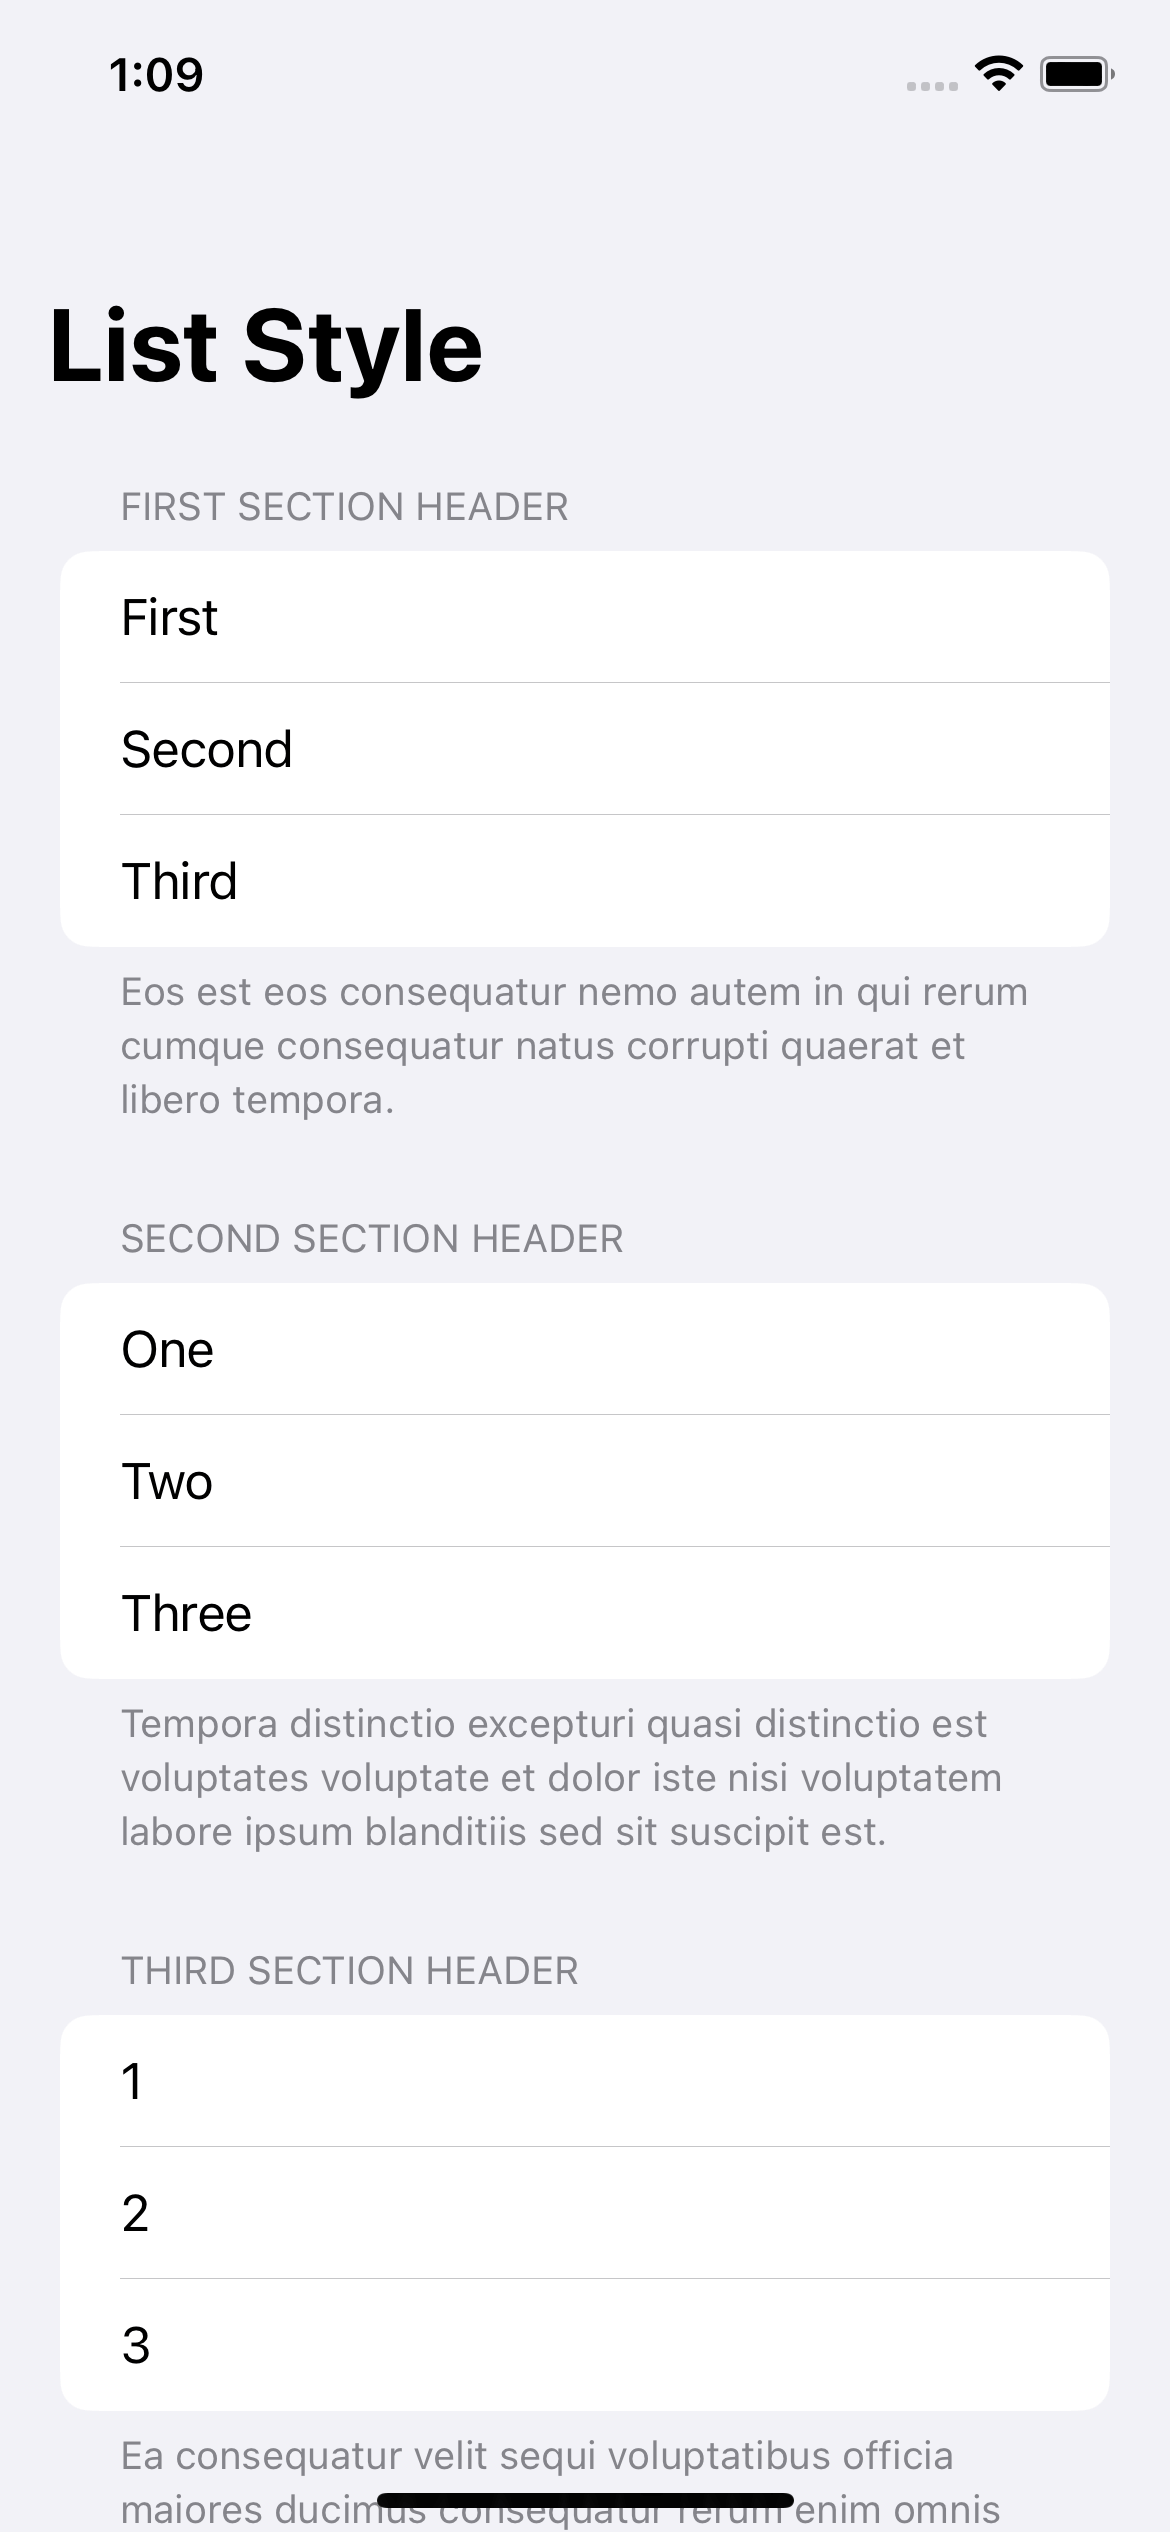
.insetGrouped
Grouped
Example of Grouped .grouped or GroupedListStyle.
List {
    // ...
}
.listStyle(.grouped)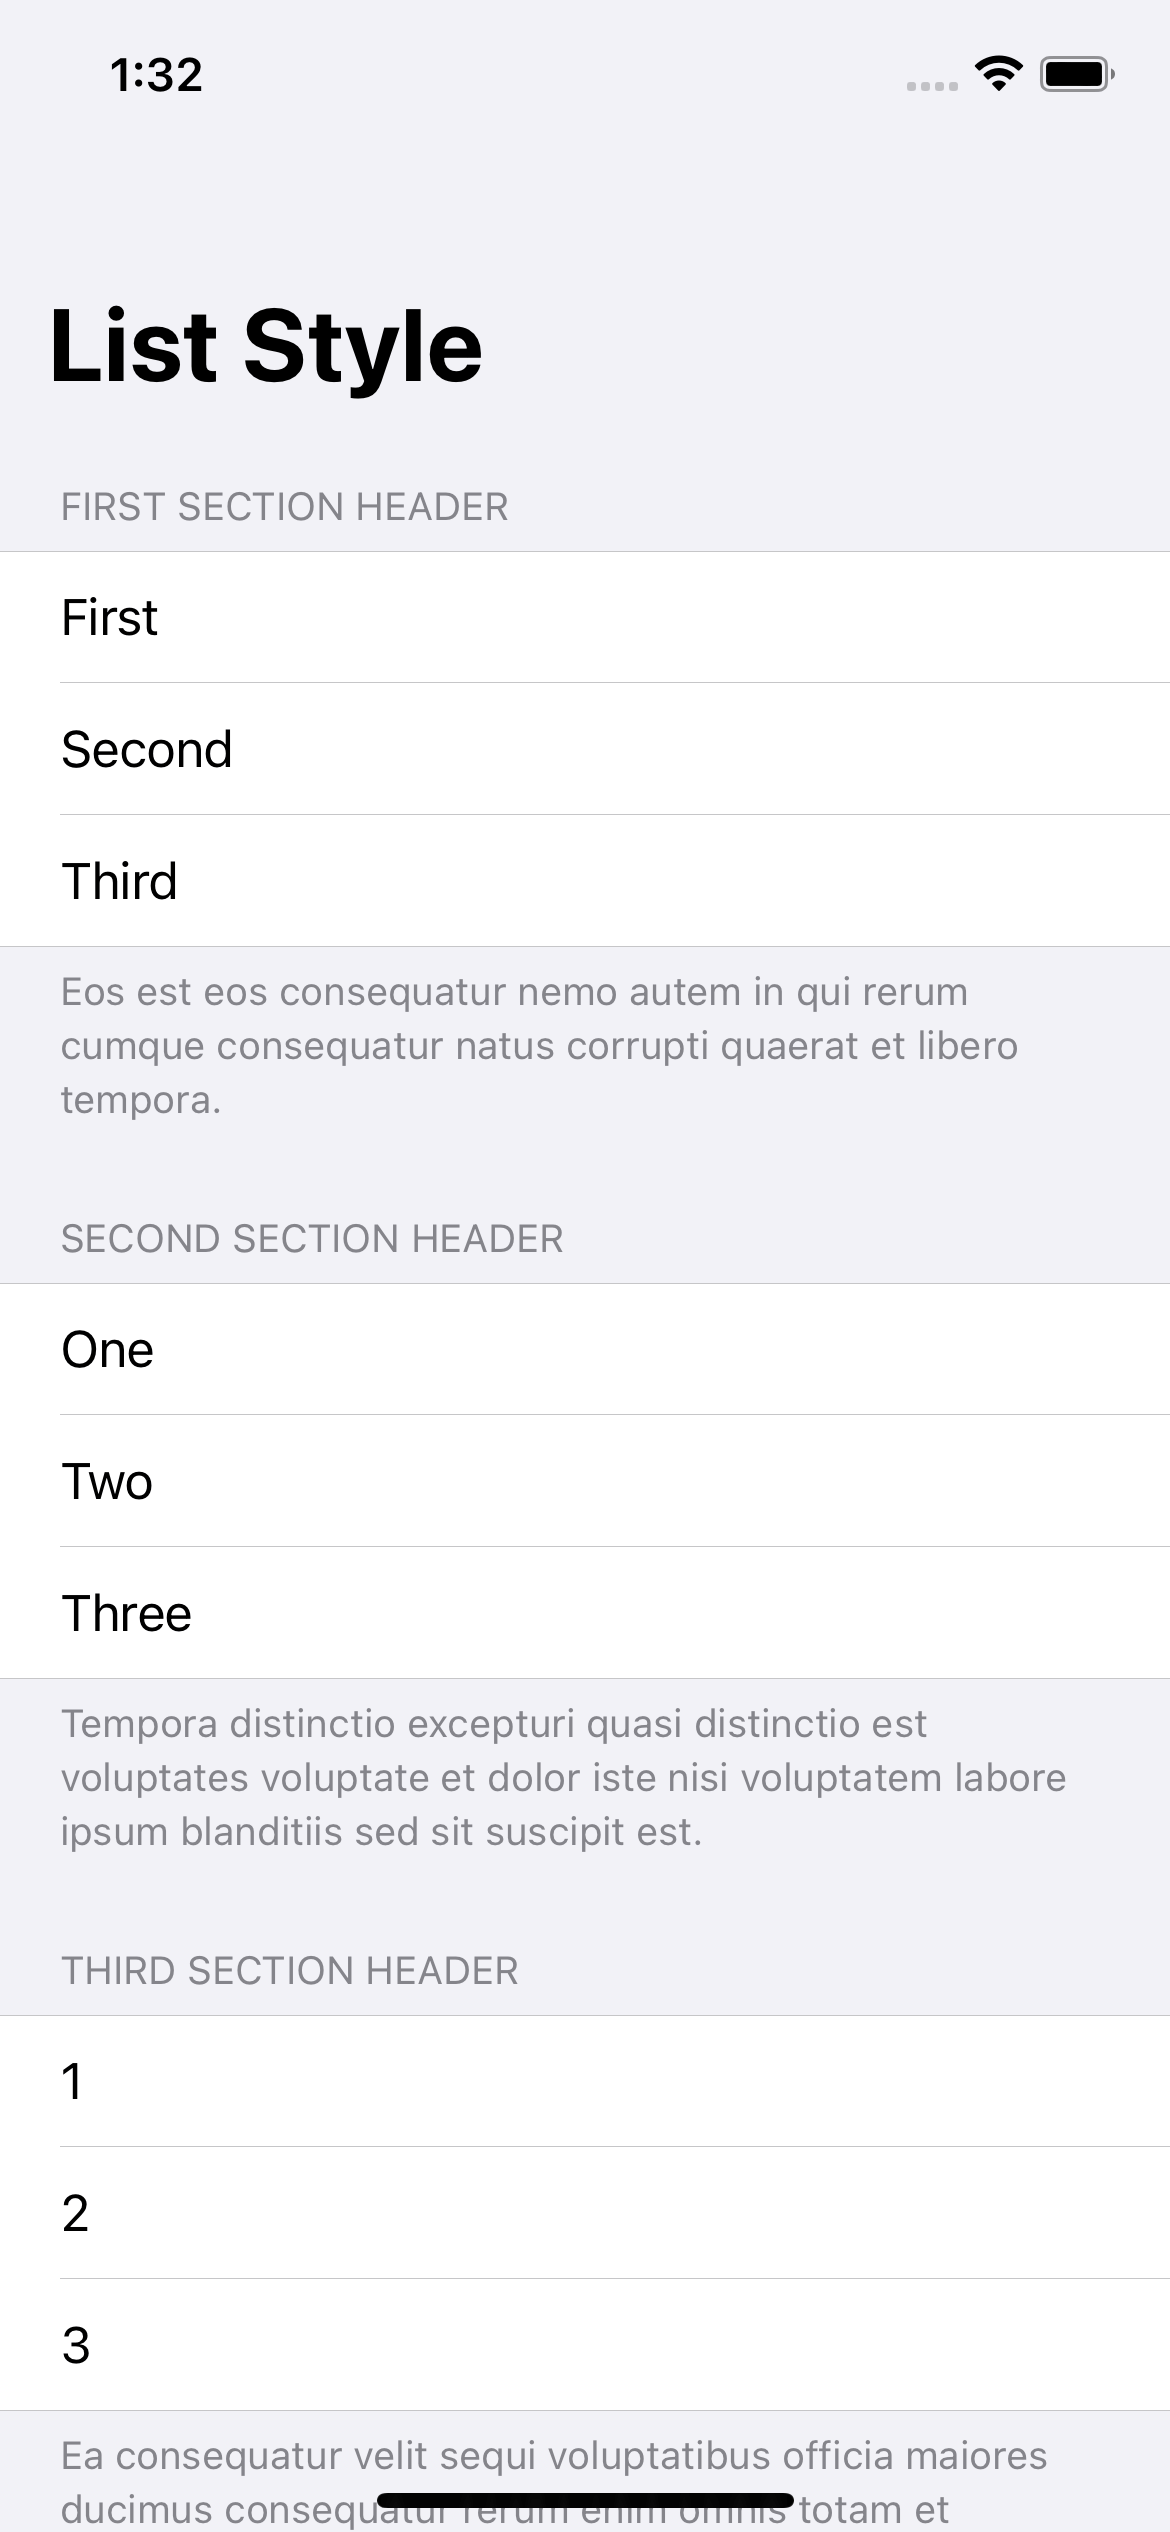
.grouped
Inset
Example of Inset .inset or InsetListStyle.
List {
    // ...
}
.listStyle(.inset)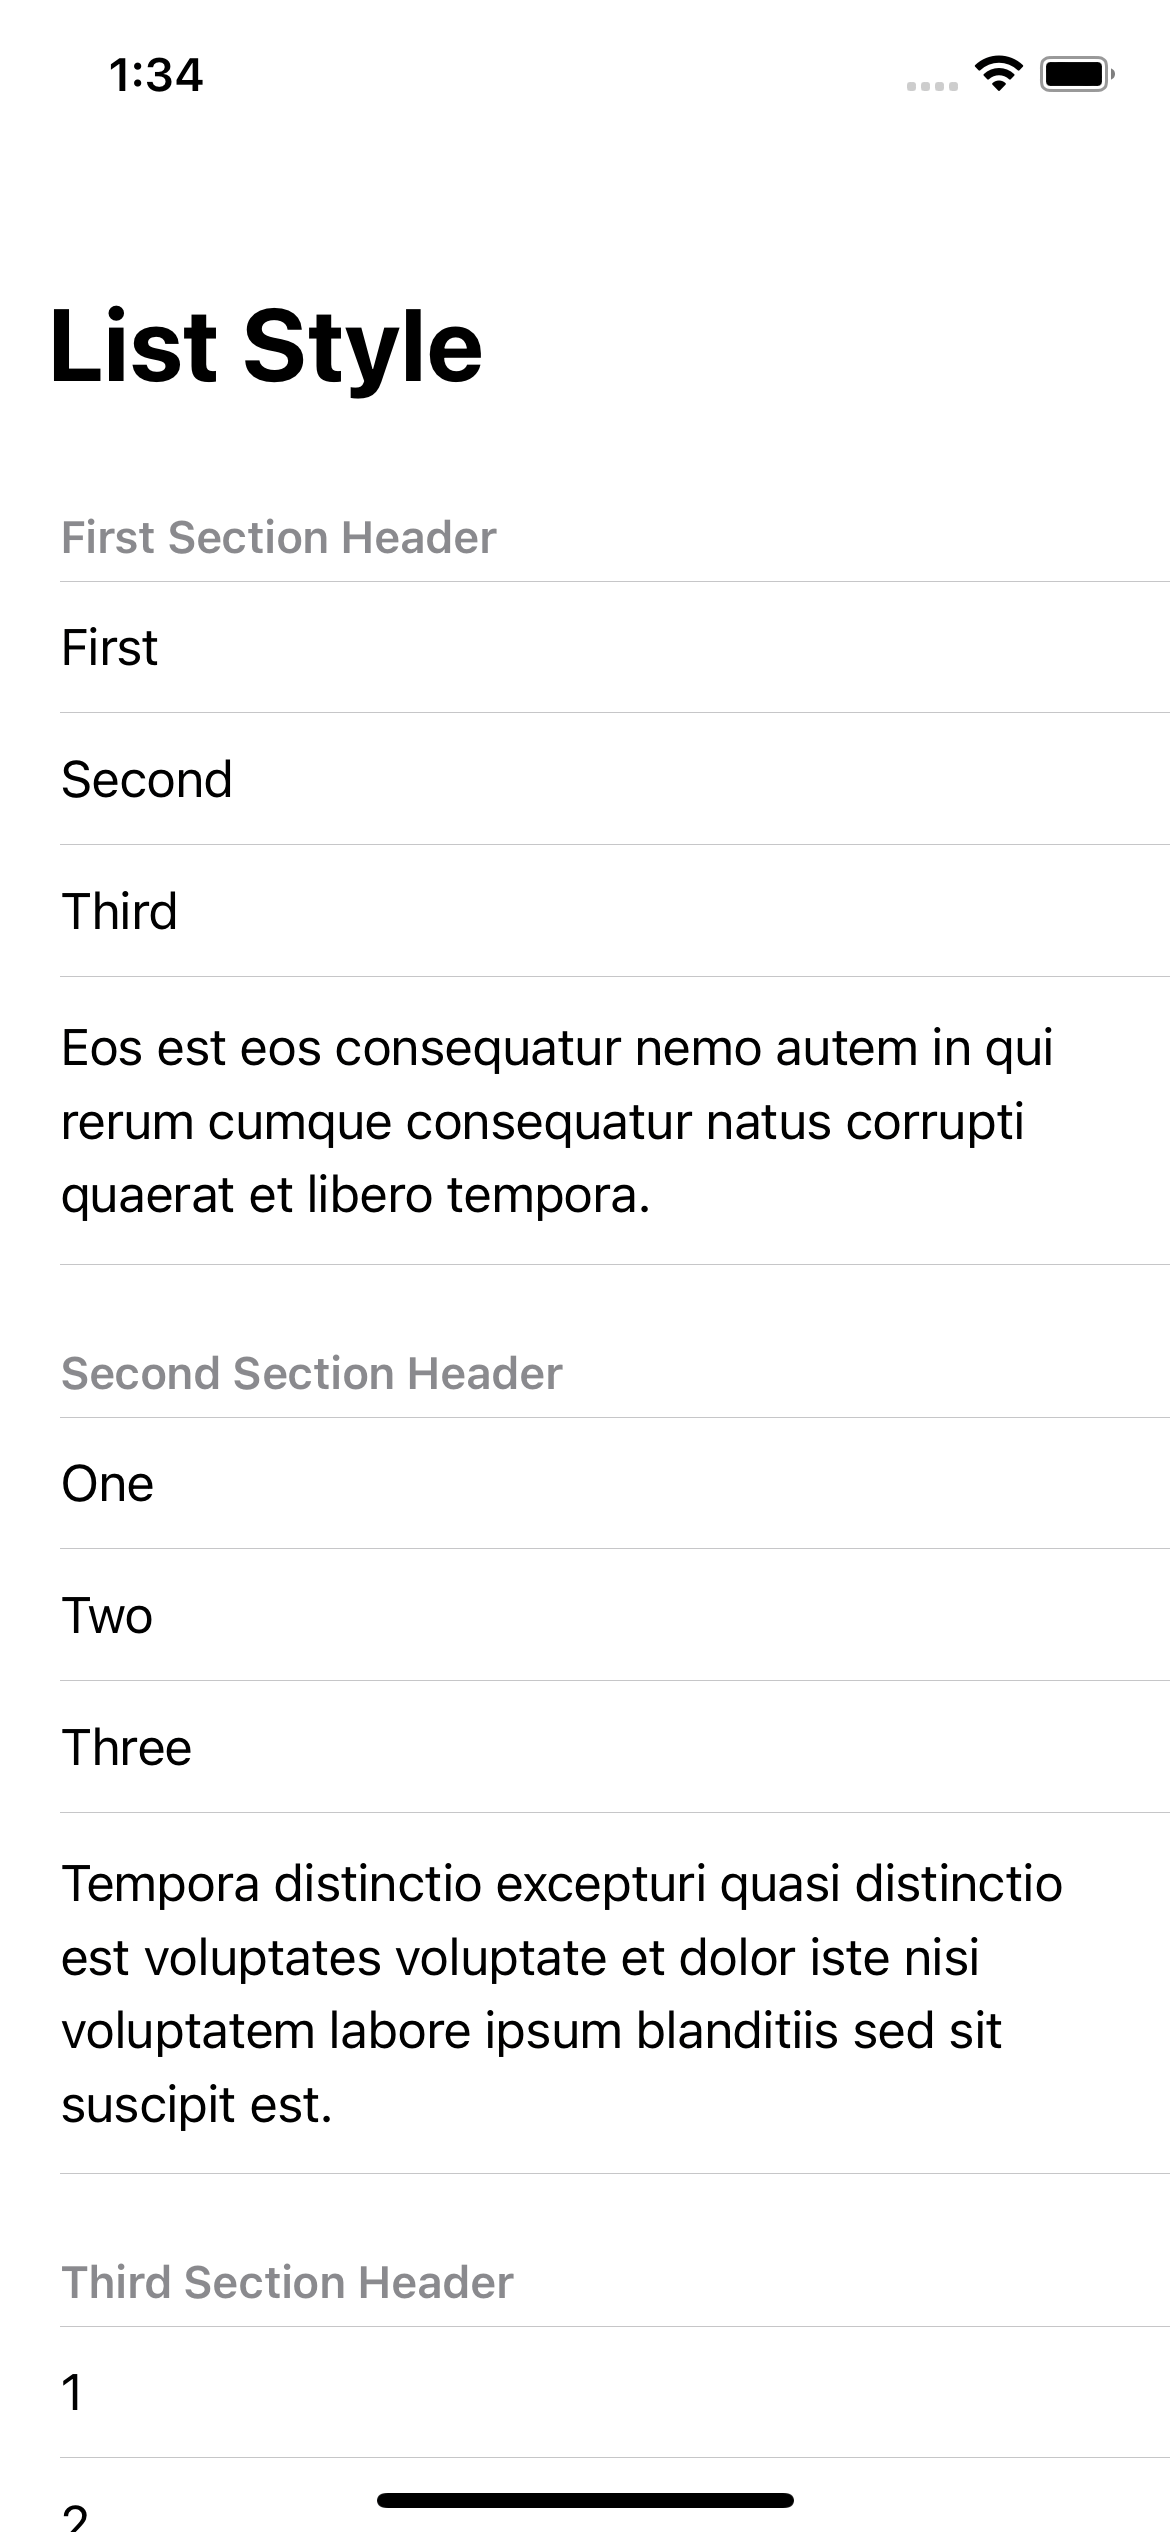
.inset
Plain
Example of Plain .plain or PlainListStyle.
List {
    // ...
}
.listStyle(.plain)
.plain
Sidebar
The sidebar style (.sidebar or SidebarListStyle) comes equipped with a special function. On macOS and iOS, the sidebar list style displays disclosure indicators in the section headers that allow the user to collapse and expand sections.
List {
    // ...
}
.listStyle(.sidebar)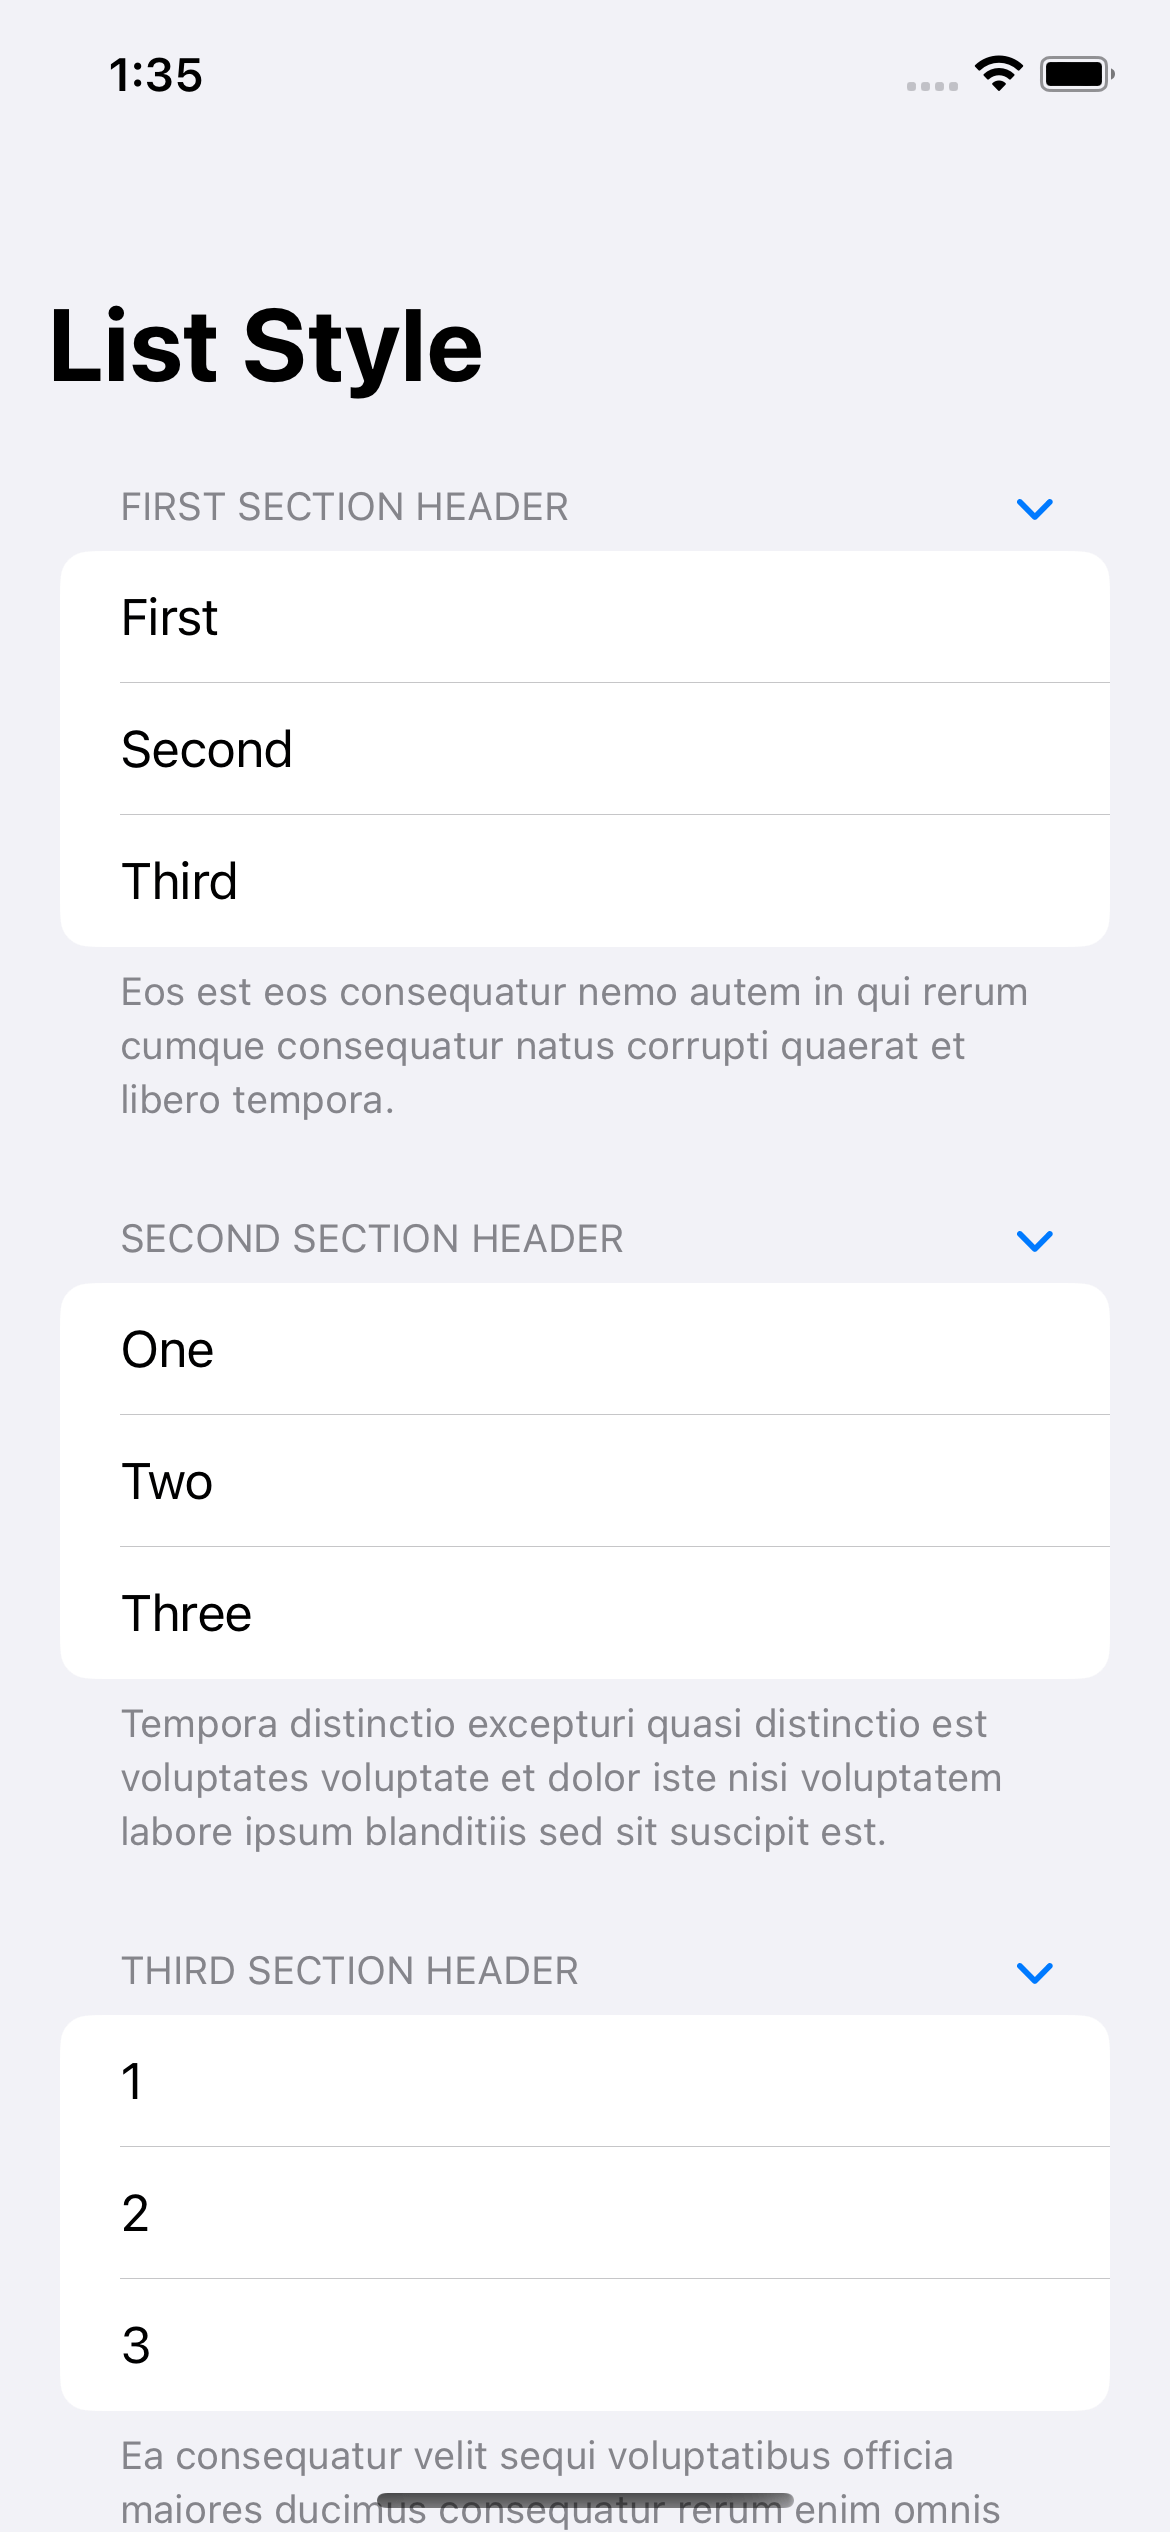
.sidebar
Tap on disclosure indicators in the section headers will collapse and expand that section.
Tap on disclosure indicators in the section headers will collapse and expand that section.
You can easily support sarunw.com by checking out this sponsor.
Sponsor sarunw.com and reach thousands of iOS developers.
Conclusion
Here are all six styles for your comparison.
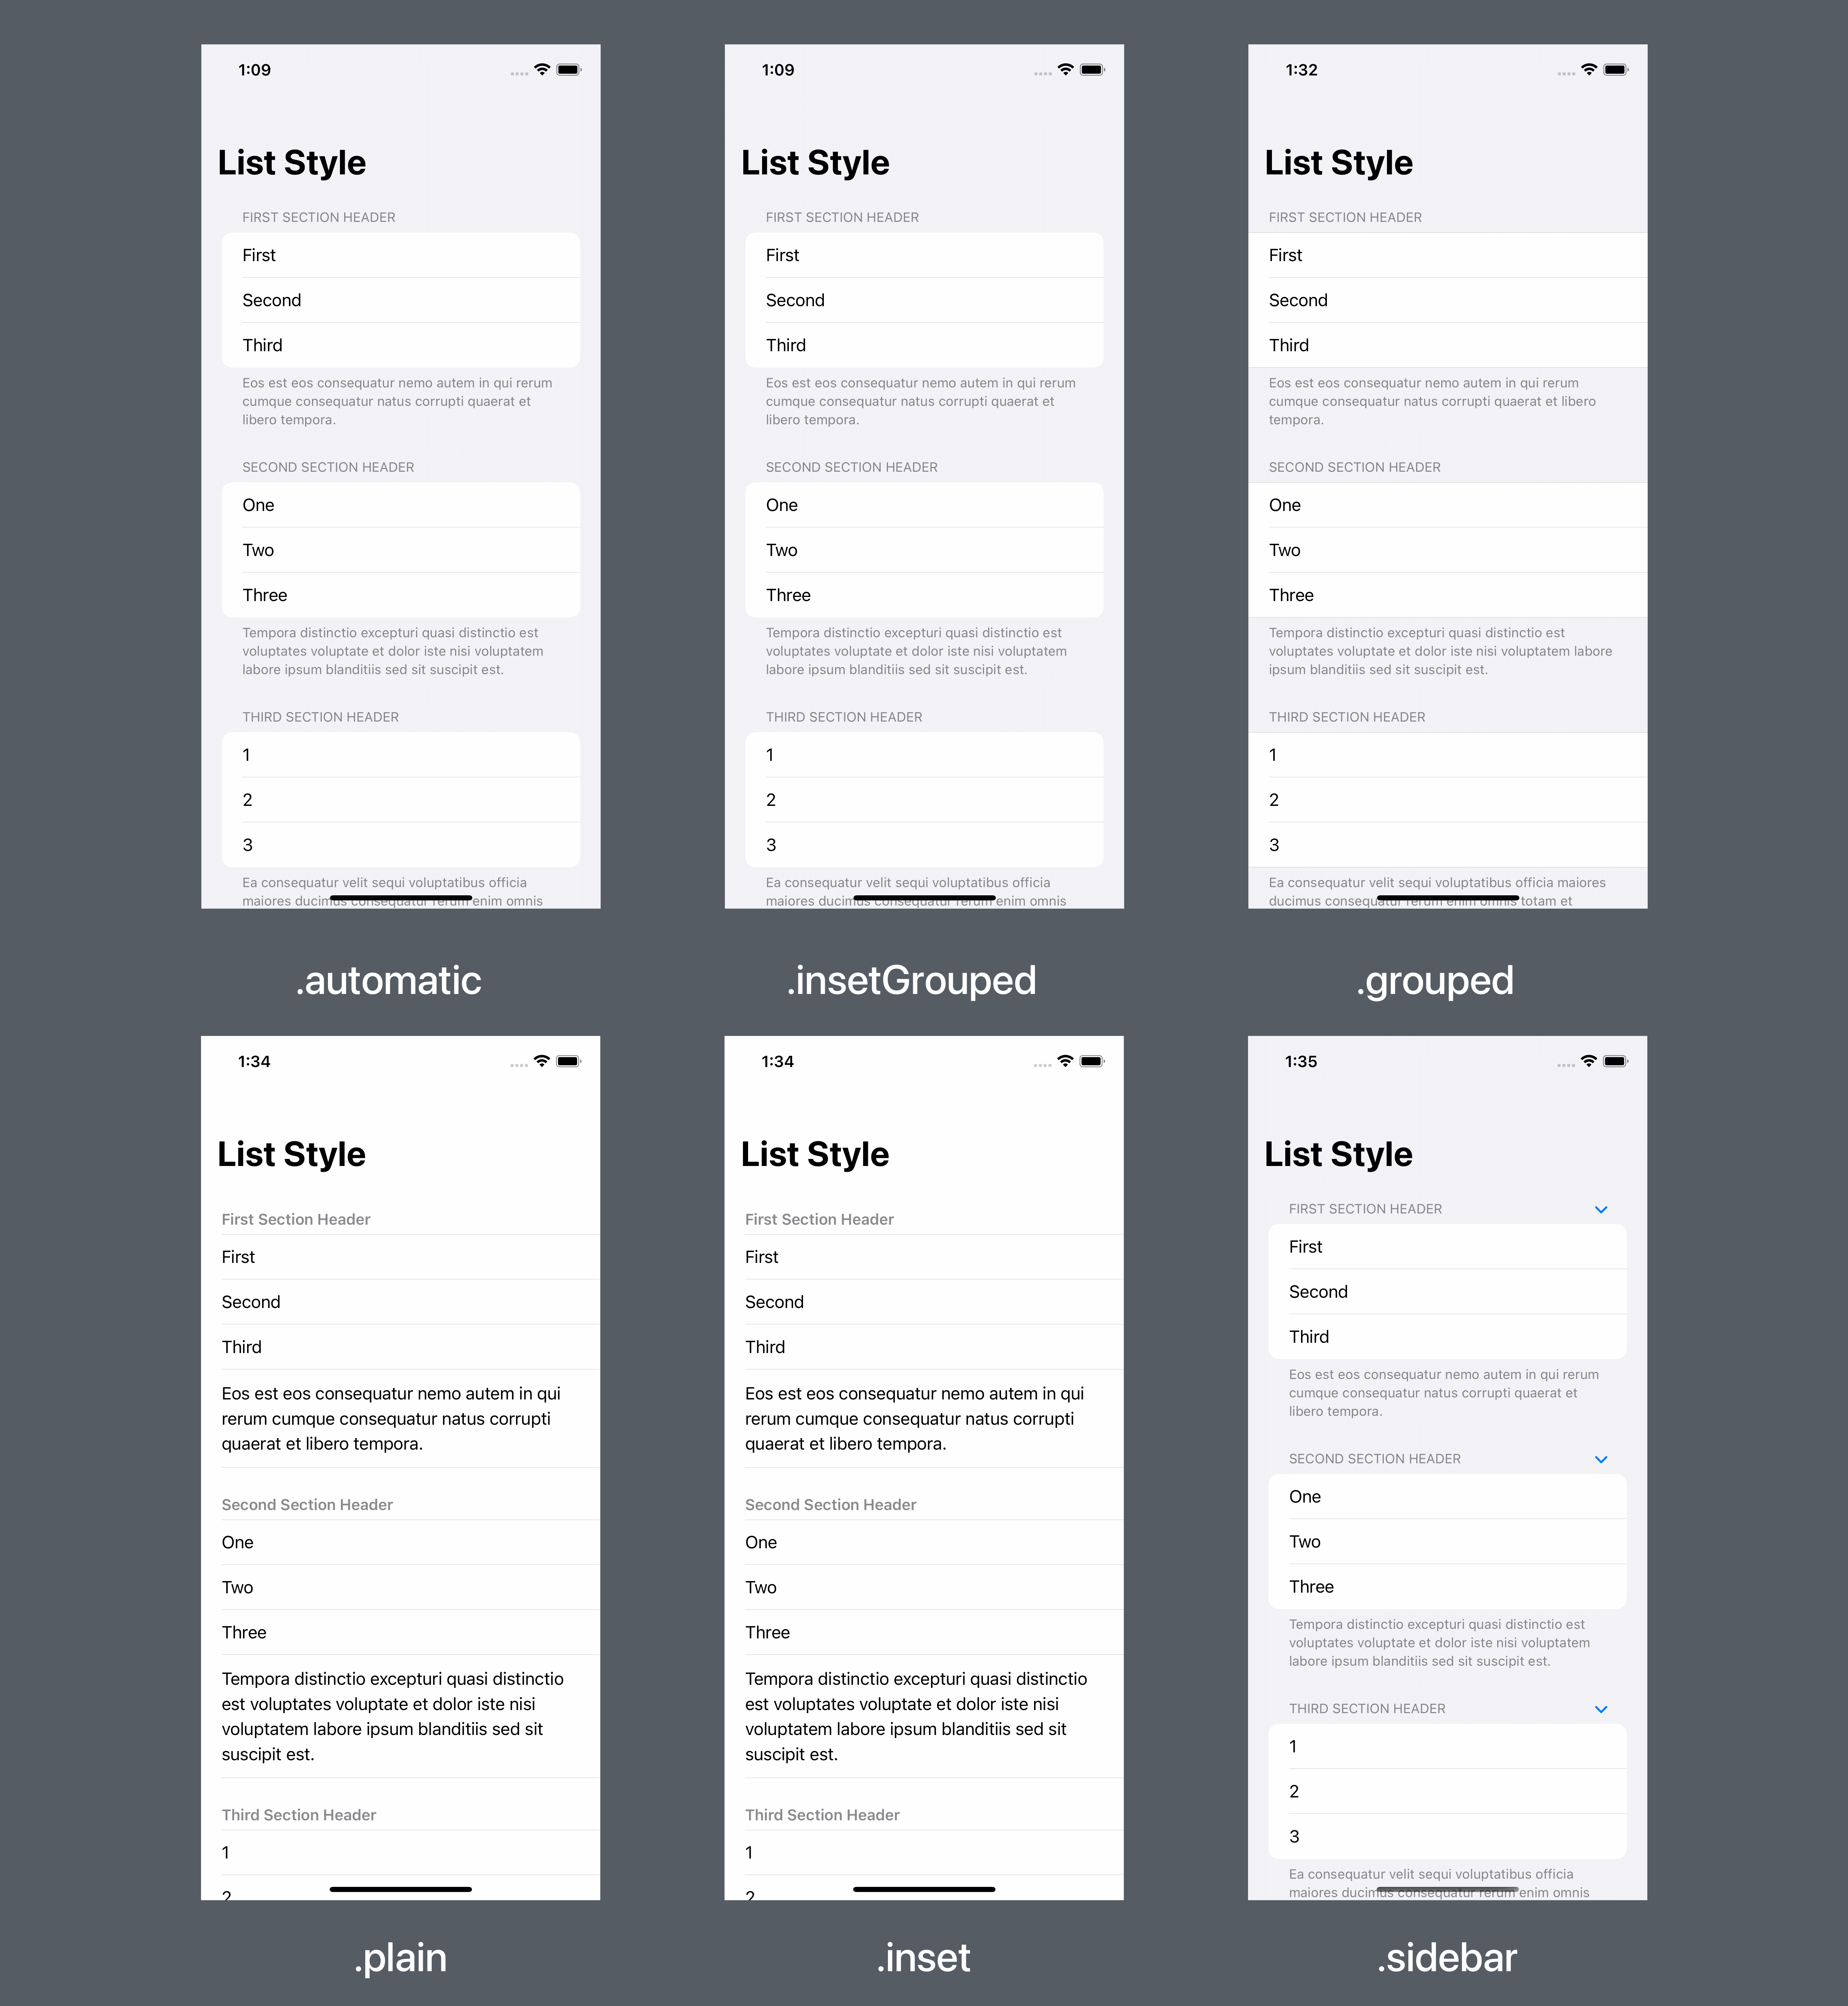
All six list styles you can use in iOS.
Recommend
About Joyk
Aggregate valuable and interesting links.
Joyk means Joy of geeK