

Setup Docker in Macbook M1 in 2 Quick Steps
source link: https://blog.bitsrc.io/setup-docker-in-macbook-m1-in-2-quick-steps-13680e1f0076
Go to the source link to view the article. You can view the picture content, updated content and better typesetting reading experience. If the link is broken, please click the button below to view the snapshot at that time.

Setup Docker in Macbook M1 in 2 Quick Steps
Photo by Rubaitul Azad on Unsplash
This quick 2-step guide will help you set up docker and Kubernetes in Macbook M1.
Step 1: Super-Easy Installation Of Docker And Kubernetes
To start with the setup, the first thing you need to do is download and install Rancher Desktop setup. This simple tool will make container setup and management super-easy.
Step 2: Single Click To Launch Docker And Kubernetes
Once you are done with the installation, launch docker and Kubernetes by launching Rancher Desktop. Once started, it will ask for administrator permission. Allow access, and the docker and Kubernetes services will start automatically. It allows you to disable Kubernetes if you don’t need it.

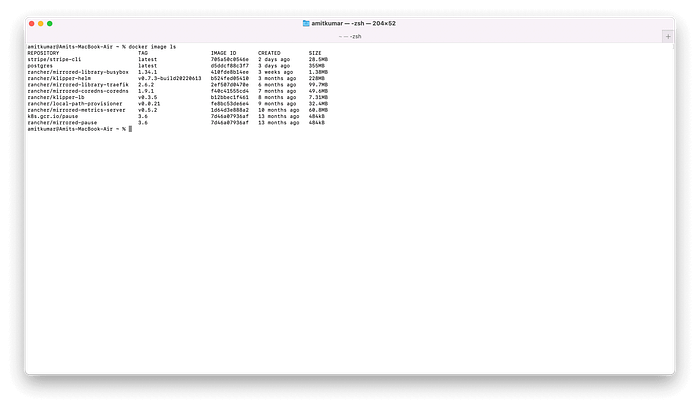
Step 3: Testing Docker Setup
Quickly follow the documentation here to test the docker and docker-compose setup.
Build apps with reusable components like Lego
Bit’s open-source tool help 250,000+ devs to build apps with components.
Turn any UI, feature, or page into a reusable component — and share it across your applications. It’s easier to collaborate and build faster.
Split apps into components to make app development easier, and enjoy the best experience for the workflows you want:
→ Micro-Frontends
→ Design System
→ Code-Sharing and reuse
→ Monorepo
Recommend
About Joyk
Aggregate valuable and interesting links.
Joyk means Joy of geeK