

Creating Local Notifications in Flutter [FREE]
source link: https://www.raywenderlich.com/34019063-creating-local-notifications-in-flutter
Go to the source link to view the article. You can view the picture content, updated content and better typesetting reading experience. If the link is broken, please click the button below to view the snapshot at that time.

Creating Local Notifications in Flutter
Learn how to create cross-platform local notifications in Flutter using the flutter_local_notifications package.
Version

Local notifications are a useful tool to notify users of important messages in your app. Not only do they increase user engagement for your apps, but they also allows you to deliver important information that can help your users stay up to date on important information.
In this tutorial, you’ll develop PomoTimer, an app that implements the Pomodoro Technique and notifies users when it’s time to take a break. In the process, you’ll learn:
- The anatomy of local notifications on Android and iOS.
- How to schedule local notifications in Flutter using the flutter_local_notifications package.
- About how you can customize the sound of local notifications in Flutter.
- How to cancel a scheduled notification.
Getting Started
Download the project by clicking Download Materials at the top or bottom of the tutorial. Next, extract it to a suitable location. Then, open the Starter project in VS Code. You can also use Android Studio, though you’ll have to adapt the instructions as needed.
VS Code should prompt you to get dependencies. Click the button to get them. You can also run flutter pub get from the terminal to get the dependencies.
After getting dependencies, build and run the project. You should see the following screen:
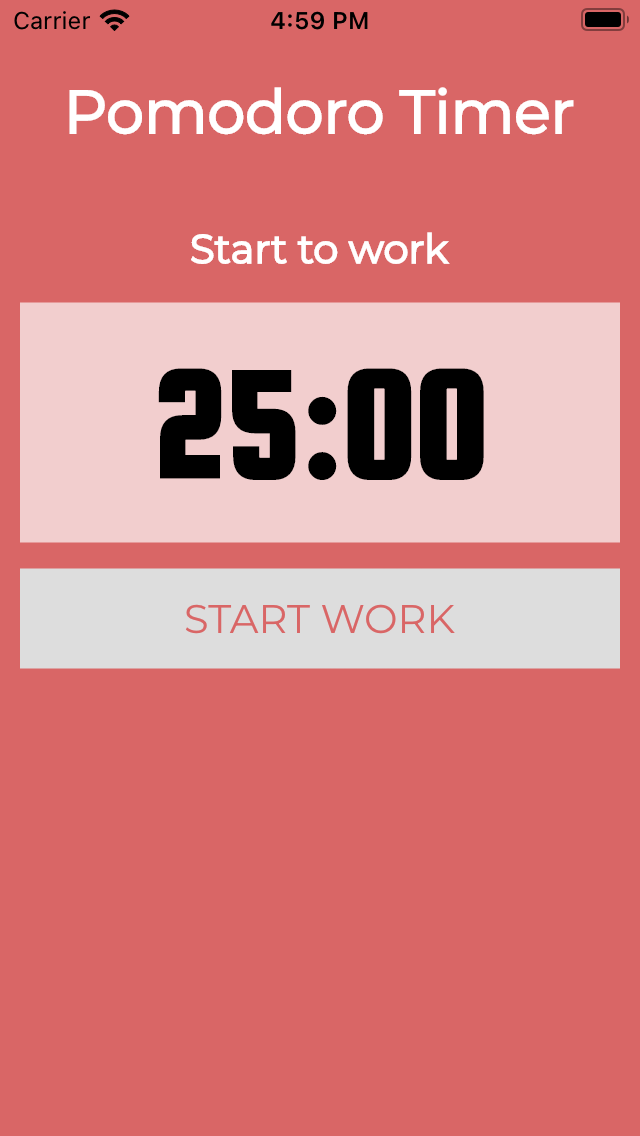
By default, the timer waits for a work session. Tap the START WORK button to start one. It should start counting down, and you should see a DISCARD button. Now tap DISCARD. It enters the rest session, and the button changes to START REST. The session starts when you tap the button, and the timer turns to begin the work state after the session is over.
Don’t worry if you don’t understand what’s happening with the timers. They’re based on the Pomodoro Technique and you’ll cover that in the next section.
As you can see, the starter project already comes with a ready-to-use Pomodoro timer. But it doesn’t notify the user when work or break time is up. You’ll add this feature later in this tutorial. But next, you’ll learn the theory behind the Pomodoro Technique.
The Pomodoro Technique
The Pomodoro Technique is a time management technique to help people focus on their work. Its idea is to organize your work with the following flow:
- Start with a 25 minute work session and focus on your work during the session.
- Take 5 minutes break. During the break, you can do anything to rejuvenate yourself.
- Repeat Step 1. Focus on your work for 25 minutes again.
- After 4 consecutive work sessions, take a longer break of 15 minutes.
The idea of the Pomodoro Technique is to remind people to focus on their work for a certain amount of time. Then, it reminds them to rest after half an hour of concentration. This technique fits well for people who need to concentrate on their work with limited distractions, for example, programmers.
To know more about this technique, watch the introductory video about it here.
Adjusting the Timer Setting
Currently, the timer is 25 minutes for work, 5 minutes for a short break and 15 minutes for a long break. It’s great if you want to use the Pomodoro Technique. But it’s not so good for developers as you need to wait 25 minutes for each test run.
Therefore, you need to change the configuration to a shorter interval to cut out those idle times.
To do that, open lib/widget/pomodoro_timer.dart and modify the following variables:
const int kWorkDuration = 5; // production: 25 minutes
const int kRestDuration = 2; // production: 300 (5 minutes)
const int kLongRestDuration = 3; // production: 900 (15 minutes)
That shortens the work interval from 25 minutes to five seconds, a short break from five minutes to two seconds and a long break from 15 minutes to three seconds. You can now quickly test things out without waiting too long.
Now, build and run the app to see the changes:

Understanding Local Notifications
When users finish using your app, they close it or switch it to the background. As a result, your app becomes non-interactive. It can’t show anything to the user at this stage if something happens.
You can use the notification system to let the user know that something occurred in the app.
There are two kinds of notifications that both iOS and Android offer. The first is local notifications, and the other one is push notifications. Local notifications let you schedule messages to the user at a specific time in the future locally from the phone. Push notifications allow you to send messages to users from a backend server.
You’re going to focus on local notifications. It’s good for pre-determined events such as alarms or reminders.
Anatomy of a Local Notification
A notification is a tiny card that contains information. The operating system provides some of this information while the developer provides the rest.
The following shows the information that an iOS local notification contains:

Translating the numbered bubbles into points, you have the:
- App icon: The icon of your application, provided by iOS.
- Title: The notification title, provided by you.
- Notification time: The time that the notification was created.
- Body: The notification body, provided by you.
Android is similar, except that Android supports a few extra features:

- Small icon: Defaults to showing the app icon if you don’t provide one.
- App Name: The name of the application, provided by Android.
- Time: The scheduled time of the notification.
- Large icon: An icon provided by you. A common use case is the profile photo.
- Title: The notification title, provided by you.
- Body: The notification body message, provided by you.
Setting Up Local Notifications in Flutter
You’ll use the flutter_local_notifications package to send notifications. So, open pubspec.yaml and add the following line below the dependencies section:
flutter_local_notifications: ^9.5.3+1
Save the file and/or click Get Packages to install the package. Alternatively, you can run the flutter pub add command from the terminal to install it:
flutter pub add flutter_local_notifications
Next, you need to modify AppDelegate.swift in the ios/Runner folder to make the package run correctly on iOS. Open ios/Runner/AppDelegate.swift and add the following lines in didFinishLaunchingWithOptions:
if #available(iOS 10.0, *) {
      UNUserNotificationCenter.current().delegate = self as? UNUserNotificationCenterDelegate
    }
GeneratedPluginRegistrant.register(with: self)
The code above defines the delegate of the notification system and links the package with the native iOS system.
It’s good practice to build and run your Flutter app after adding new packages and before adding new code. So, build and run the app to ensure it works for Android and iOS before going forward.
Building the Local Notification Helper Library
You’ll use a helper library to send local notifications instead of sending them in the PomodoroTimer widget. This means you’ll put all notification logic in the helper library, including initializing, scheduling and canceling notifications.
That’ll make the code more readable, easier to maintain and reusable.
Setting up the Notification Service
You’ll build the notification helper library in lib/local_notice_service.dart. Open the file and import the following at the top:
import 'package:flutter_local_notifications/flutter_local_notifications.dart';
import 'package:timezone/timezone.dart' as tz;
import 'package:timezone/data/latest.dart' as tzData;
You imported the flutter_local_notifications and timezone packages. You’ll use the first to set up and send the local notifications and the last one to create the time object based on the user’s time zone, which the notification package uses.
Next, define a new _localNotificationsPlugin member variable to initialize the local notification plugin in LocalNoticeService:
final _localNotificationsPlugin = FlutterLocalNotificationsPlugin();
You’ll use _localNotificationsPlugin throughout the library to control the native notification system.
Moving forward, add a setup() method to initialize the plugin for each platform:
Future<void> setup() async {
  // #1
  const androidSetting = AndroidInitializationSettings('@mipmap/ic_launcher');
  const iosSetting = IOSInitializationSettings();

  // #2
  const initSettings =
      InitializationSettings(android: androidSetting, iOS: iosSetting);

  // #3
  await _localNotificationsPlugin.initialize(initSettings).then((_) {
    debugPrint('setupPlugin: setup success');
  }).catchError((Object error) {
    debugPrint('Error: $error');
  });
}
Here’s the explanation of the code above:
- Define the platform-specific notification settings for Android and iOS.
- Construct a platform-agnostic setting using the initialization settings from the two platforms.
- Initialize the notification plugin with the general setting.
To test how far you’ve gone, invoke setup() between WidgetsFlutterBinding.ensureInitialized(); and runApp(const PomodoroApp()); in lib/main.dart:
await LocalNoticeService().setup();
That initializes the helper library. Remember to import lib/local_notice_service.dart:
import 'local_notice_service.dart';
Build and run or restart the app, and you should see a new “Permission” dialog on iOS:
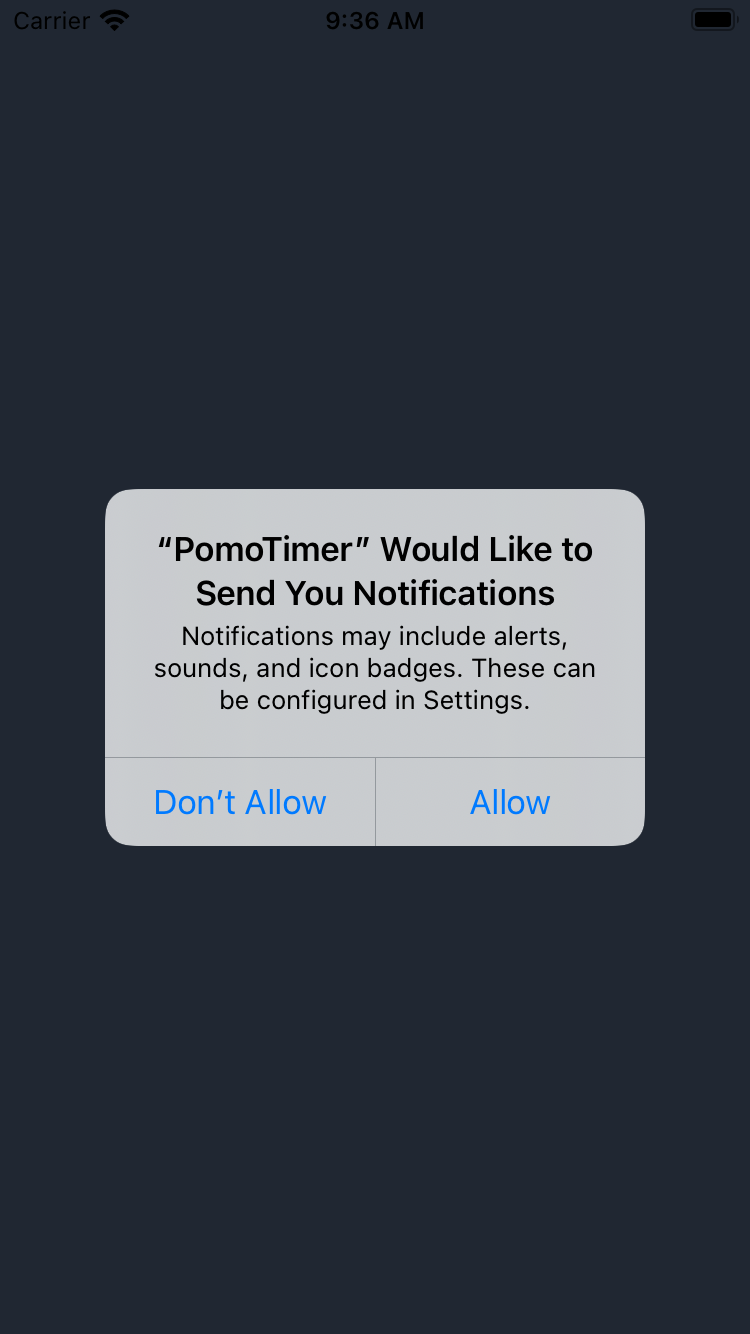
Tap Allow to grant the permission to show the notifications. This applies only to iOS.
Making Your First Local Notification
After setting up the logic to initialize local notifications, go back to lib/local_notice_service.dart and replace the body of addNotification with the following:
// #1
tzData.initializeTimeZones();
final scheduleTime =
  tz.TZDateTime.fromMillisecondsSinceEpoch(tz.local, endTime);

// #2
final androidDetail = AndroidNotificationDetails(
  channel, // channel Id
  channel  // channel Name
);

final iosDetail = IOSNotificationDetails();

final noticeDetail = NotificationDetails(
  iOS: iosDetail,
  android: androidDetail,
);

// #3
final id = 0;

// #4
await _localNotificationsPlugin.zonedSchedule(
  id,
  title,
  body,
  scheduleTime,
  noticeDetail,
  uiLocalNotificationDateInterpretation:
     UILocalNotificationDateInterpretation.absoluteTime,
  androidAllowWhileIdle: true,
);
In the code above, you’ve done the following:
- Initialized the timezone data and defined the time to wake the notification up. Since the plugin uses
tz.TZDateTimeas input for time, you need to convert theendTimevalue totz.TZDateTime. - Defined the details of the notification. The detail contains the setting of the notification for each platform(
androidDetailandiosDetail), such as enabling/disabling the sound and badge. Notice that you need to define a channel ID and name of the notification for Android. Channels are used to distinguish between different notifications. - Defined the ID of the notification. It’s useful when you want to cancel a particular notification. In this tutorial, you don’t need to cancel any particular notification. Therefore, you can use 0 for all notifications.
- Scheduled the notification based on the user’s time zone.
Now, you need to modify PomodoroTimer to call the library. Open lib/widget/pomodoro_timer.dart and import the helper library at the beginning of the file:
import '../local_notice_service.dart';
Next, add the following code to enterAtWork() just before the call to _startTimer();:
LocalNoticeService().addNotification(
  'Notification Title',
  'Notification Body',
  DateTime.now().millisecondsSinceEpoch + 1000,
  channel: 'testing',
);
The code above will schedule the notification for the next second when you tap START WORK.
Run the app. You should receive a notification after tapping START WORK.
This is the result on iOS:

…and on Android:

Notification Channels
In the addNotification() method, you may have noticed there’s a field named channel.
This is a feature offered by Android to distinguish different notifications made by the app. The value is ignored on iOS.
Different channels can have their preferences, such as sound and notification availability. For example, you can enable the ‘work completed’ notification and disable the ‘rest ended’ notification.
Here’s an example setting of different channels in Android.

Congratulations on coming this far! It’s time to notify users of concrete Pomodoro events. :]
Scheduling the Pomodoro Timer Notification Alerts
Your local notifications helper library is ready to send notifications. All you now need to do is modify the settings according to the Pomodoro session type.
Adding the Pomodoro Work Completed Notification
You want to notify the user when a Pomodoro work session completes whether the app is in the foreground or not. To do so, open lib/widget/pomodoro_timer.dart and modify the code you added to enterAtWork() in the previous section to this:
LocalNoticeService().addNotification(
  'Work Complete',
  "Let's take some rest",
  _endTime,
  channel: 'work-end',
);
Tapping START WORK will invoke enterAtWork(). _endTime defines the time the notification will fire in miliseconds. Since you have the end time, you invoke addNotification to notify the user that a work session has ended.
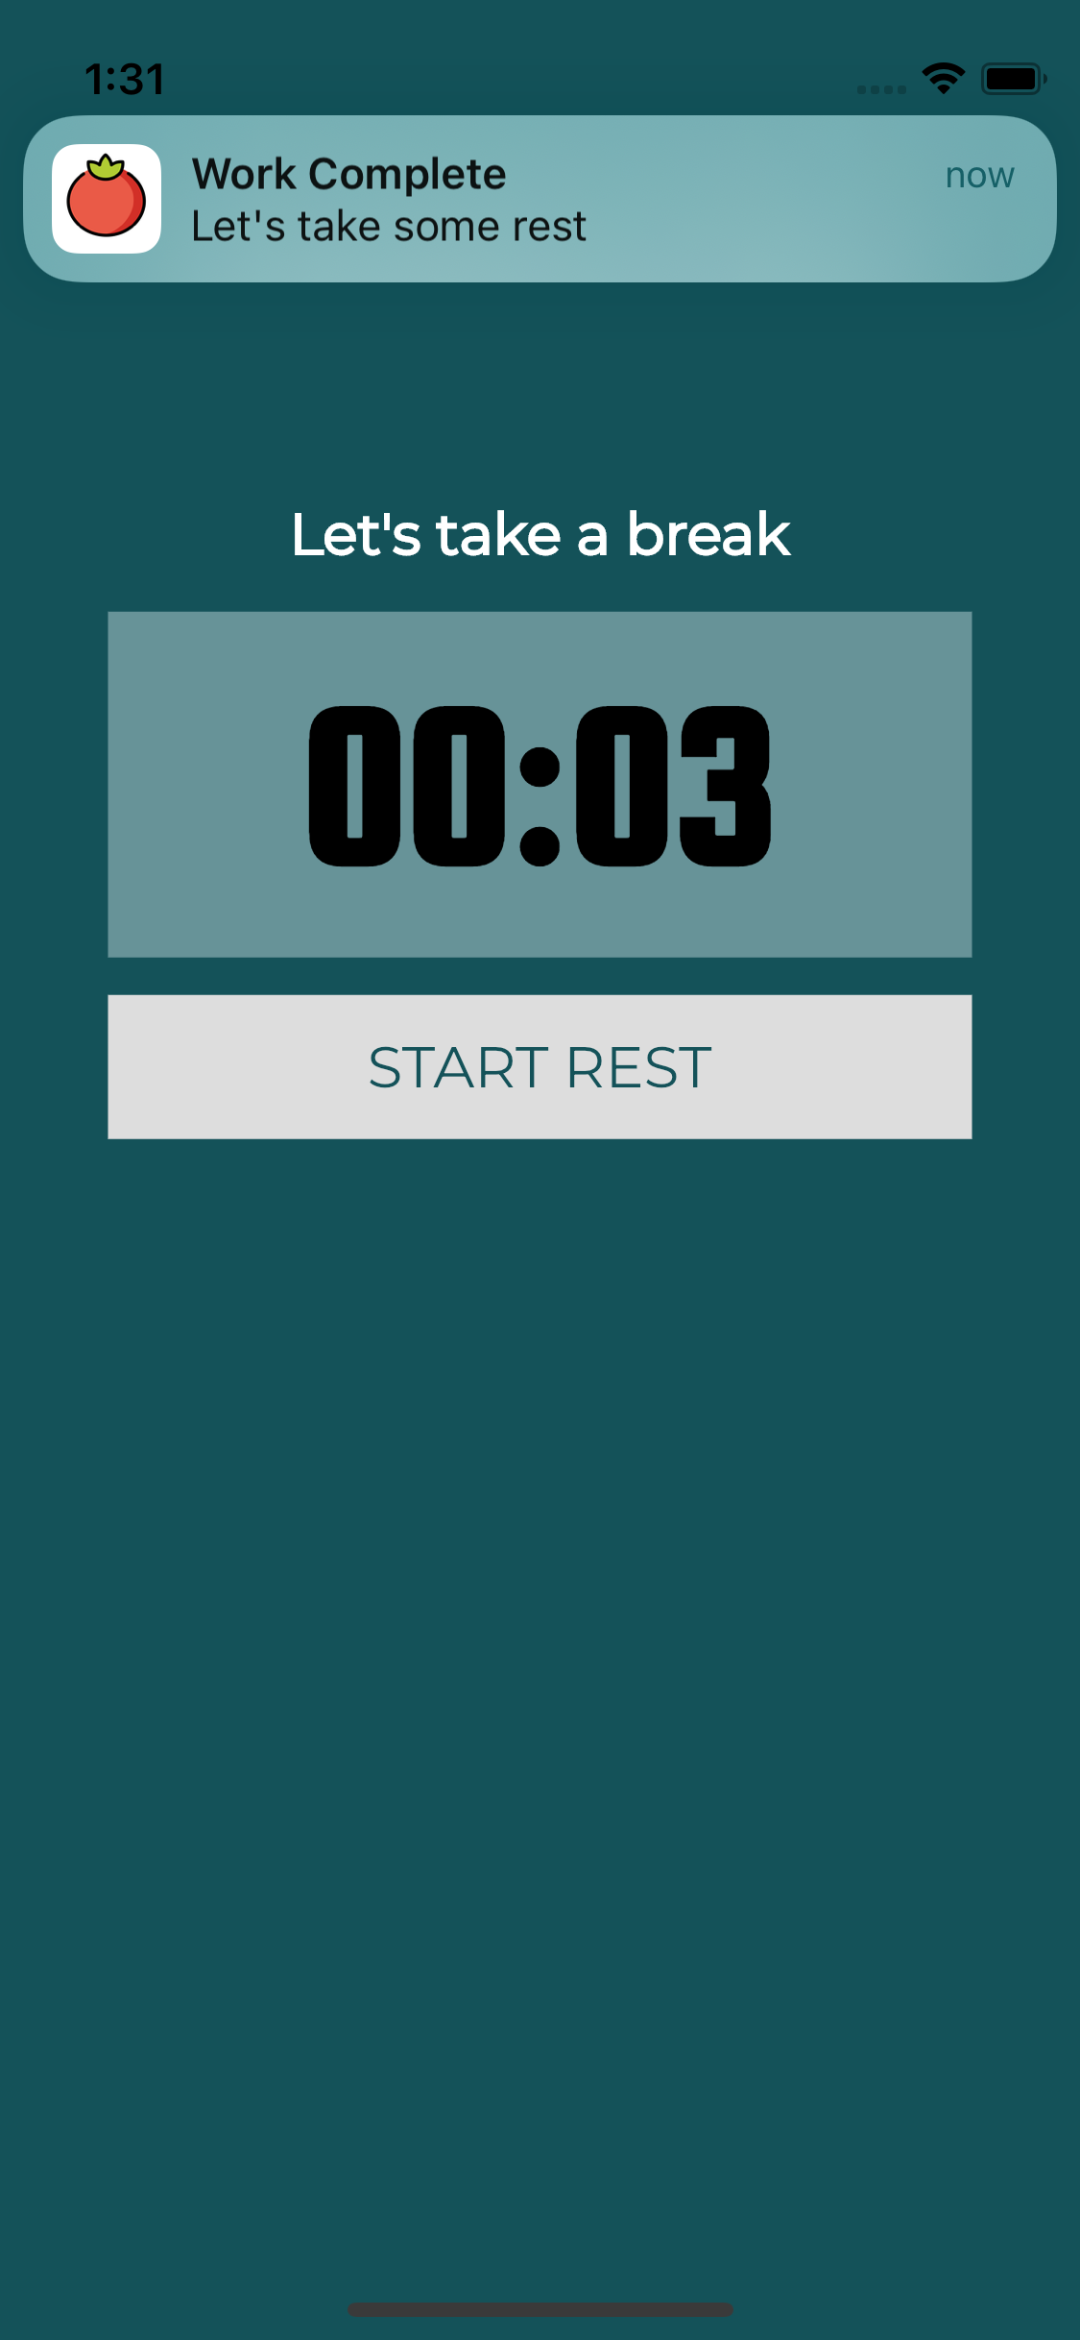
Hot reload the app and tap START WORK. You should receive a notification after the work session timer runs out:
Adding the Pomodoro Rest Ended Notification
To notify the user when a rest session ends, you’ll add the ‘rest ended’ notification. While still in lib/widget/pomodoro_timer.dart, look for enterAtRest(). Then add the following code before _startTimer():
LocalNoticeService().addNotification(
  'Rest Complete',
  'Let start to work',
  _endTime,
  channel: 'rest-end',
);
The code above is similar to the ‘work completion’ one. The user invokes enterAtWork() when they tap START REST to enter a rest session.
Hot reload the app, tap START WORK and wait for the work session to complete. Then tap START REST to see the notification message at the end of the rest session:

Canceling a Scheduled Notification
PomodoroTimer allows the user to discard the notification during the Pomodoro work or rest session. Currently, the notification sent to the operating system isn’t removed when you discard the session. Thus, there is an issue where the notification is still showing up after users discard the session. Therefore, you need to tell the system to cancel the notification when the users discard the session.
First, add a cancelAllNotification() method to LocalNoticeService. Open lib/local_notice_service.dart and add the following:
void cancelAllNotification() {
  _localNotificationsPlugin.cancelAll();
}
_localNotificationsPlugin.cancelAll() is a function provided by flutter_local_notifications to cancel all notifications.
The package also provides a method to cancel the notification by ID:
_localNotificationsPlugin.cancel(notificationId);
The notificationId is a value you provide when creating the notification. Currently, the project uses 0 for all notifications.
Since the PomoTimer only has one notification at a time, it’s fine to use cancelAllNotification() for the discard action.
Adding Cancel Notification to PomodoroTimer
Now, you can add the cancel function to the PomodoroTimer discard action. Open lib/widget/pomodoro_timer.dart and modify the contents of onButtonClicked to the following:
if (_state == PomodoroState.beingWork) {
  enterAtWork();
} else if (_state == PomodoroState.atWork) {
  // Discard
  // #1
  LocalNoticeService().cancelAllNotification();
    _endAtWork(false);
} else if (_state == PomodoroState.beginRest) {
    enterAtRest();
} else if (_state == PomodoroState.atRest) {
  // Discard
  // #2
  LocalNoticeService().cancelAllNotification();
  _endAtRest();
}
Here’s the explanation of the above logic:
-
onButtonClicked()is the handler of the button click event for START WORK, START REST and DISCARD. - Block
#1is the state during the work session and the action here is to discard the work session. - Similar to discarding the work session, block
#2is the button handler to discard the rest session. - You added
LocalNoticeService().cancelAllNotification()to cancel the notification.
Hot reload the app and test to see whether or not the notifications have been canceled. Tap START WORK to start a work session, tap DISCARD to discard it, then wait for five seconds to confirm that the notification doesn’t show. Do the same for the ‘start rest’ notification too.
Customizing the Notification Sound
Notification sound is a good way to make your notifications unique from other applications. Besides, different sounds help users to distinguish notifications for different purposes. For example, in the PomoTimer, you can define different sounds for ‘work completed’ and ‘rest ended’ to help users know whether it’s time for work or rest.
Unlike setting the textual message, the setup for notification sounds for iOS and Android are different. The supporting sound file formats of those platforms are different too.
Setting the Sound for iOS
There are three steps you can follow to customize the sound for iOS:
- Modify
LocalNoticeServiceto support sound for iOS. - Add the sound files to the iOS project.
- Define the sound file in the
addNotification()method.
First, open lib/local_notice_service.dart and add requestSoundPermission: true to IOSInitializationSettings() in setup(). After adding, the iosSetting variable definition should be the same as below:
const iosSetting = IOSInitializationSettings(requestSoundPermission: true);
This will request permission to play sound on iOS.
Next, modify iosDetail in addNotification() to look like this:
final iosDetail = sound == ''
    ? null
    : IOSNotificationDetails(presentSound: true, sound: sound);
What you added enables the app to play the given sound file with the notification.
However, you need to add that sound file to the iOS Xcode project before you can play it. To add it, you need to open ios/Runner.xcworkspace with Xcode. You can type the commands below in your VS Code terminal to open it in Xcode:
cd ./ios
open Runner.xcworkspace
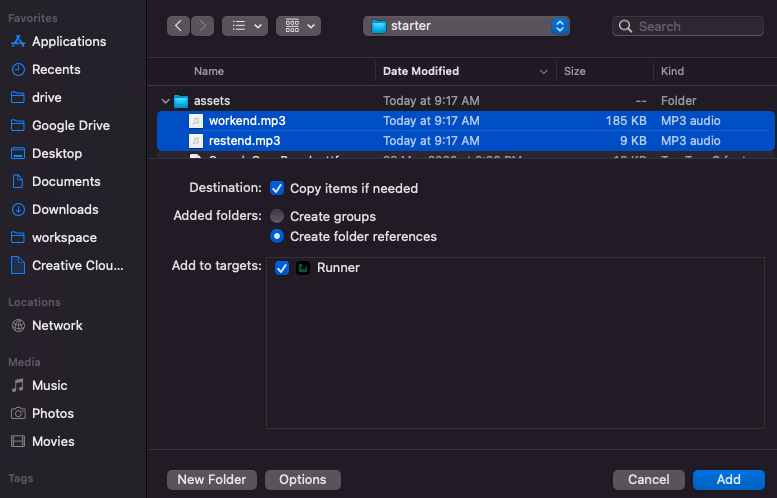
Then, select Runner in the Project Navigator, right-click, and select Add Files to Runner:

In the file dialog, select workend.mp3 and restend.mp3 in the assets folder. Then click Add in the lower right area:
Lastly, open lib/widget/pomodoro_timer.dart and modify LocalNoticeService().addNotification() for enterAtWork and enterAtRest to contain the sound argument as follows:
// In enterAtWork()
LocalNoticeService().addNotification(
  'Work Complete',
  "Let's take some rest",
  _endTime,
  sound: 'workend.mp3', //Add this
  channel: 'work-end',
);

// In enterAtRest()
LocalNoticeService().addNotification(
  'Rest Complete',
  'Let start to work',
  _endTime,
  sound: 'restend.mp3', //Add this
  channel: 'rest-end',
);
Build and run the app; you should see that the notification sound works for iOS.
Setting the Sound for Android
There are also three steps to set the sound for the Android platform:
- Modify
LocalNoticeServiceto support sound for Android. - Prepare the sound files in the Android resource folder.
- Define the sound file in
addNotification().
Open lib/local_notice_service.dart and modify androidDetail in addNotification() as follows:
// #1
var soundFile = sound.replaceAll('.mp3', '');

// #2
final notificationSound =
    sound == '' ? null : RawResourceAndroidNotificationSound(soundFile);
// #3
final androidDetail = AndroidNotificationDetails(
  channel,
  channel,
  playSound: true,
  sound: notificationSound
);
Here’s the highlight of the above:
- Remove the sound file extension to locate the corresponding resource.
-
RawResourceAndroidNotificationSounddescribes the location of the sound file. - Set
playSoundtotruein theandroidDetaildefinition. This enables playing the file.
The second part is to prepare the sound files. For Android, simply copy the sound files: workend.mp3 and restend.mp3 in the assets folder to the Android raw resource folder located at android/app/src/main/res/raw.
Since you’ve defined which sound to play in addNotification() when implementing the iOS part, you don’t need to do anything else on the PomodoroTimer widget.
Build and run the app. Notification sounds should be working for both Android and iOS now. Congratulations. :]
To clarify, ensure the notification settings for Android and iOS are like these:
<

Notification Sound File Formats
When adding notification sounds, it’s important to consider the format of the file.
For iOS, the supported sound file formats are wav, mp3, aiff, and caf. Also, the duration of the sound should be less than 30 seconds. If the duration is longer than that, iOS will play the default sound instead.
On the other hand, the supported file formats on Android include wav, mp3, m4a and ogg.
Since you’re developing for both iOS and Android, you need to make sure the sound file’s format is wav or mp3 and that the duration is less than 30 seconds.
Where to Go From Here?
You can download the completed project files by clicking Download Materials at the top or bottom of the tutorial.
In this tutorial, you learned how to integrate local notifications into a Flutter app using flutter_local_notifications.
Since the local notification plugin is based on the Native SDK from iOS and Android, it’s good for you to learn about the native platform SDKs. You can check out the following articles and documents to learn more:
We hope you enjoyed this tutorial. If you have any questions or comments, please join the forum discussion below!
raywenderlich.com Weekly
The raywenderlich.com newsletter is the easiest way to stay up-to-date on everything you need to know as a mobile developer.
Recommend
About Joyk
Aggregate valuable and interesting links.
Joyk means Joy of geeK