

Python实用模块(三十三)httpx
source link: https://xugaoxiang.com/2022/07/31/python-module-33-httpx/
Go to the source link to view the article. You can view the picture content, updated content and better typesetting reading experience. If the link is broken, please click the button below to view the snapshot at that time.

之前我们介绍过使用 requests 来进行 http 操作,本篇介绍另一个功能非常类似的第三方库 httpx,它提供了同步和异步的 API,同时支持 HTTP/1.1 和 HTTP/2,是一个全功能的 HTTP 客户端。
使用 pip 安装,执行命令
pip install httpx在安装 python 库的同时,还安装了命令行工具 httpx.exe
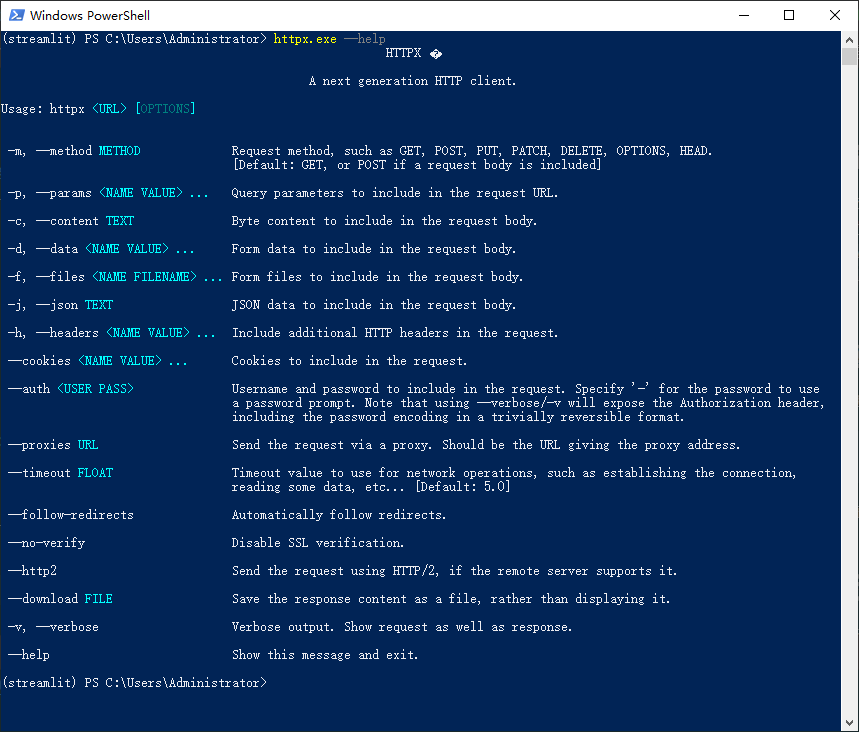
来看几个简单的示例
# get方法请求url
httpx.exe https://github.com -m get

# post方法请求url,同时上传一个文本文件
httpx.exe https://domain.com -m post -f test.txt
还是拿之前的 flask 后端例子来讲
from flask import Flask, jsonify, request
from flask_restful import Api, Resource, reqparse

USERS = [
    {"name": "zhangsan"},
    {"name": "lisi"},
    {"name": "wangwu"},
    {"name": "zhaoliu"}
]

class Users(Resource):

    def get(self):
        return jsonify(USERS)

    def post(self):
        args = reqparse.RequestParser() \
            .add_argument('name', type=str, location='json', required=True, help="名字不能为空") \
            .parse_args()

        if args['name'] not in USERS:
            USERS.append({"name": args['name']})

        return jsonify(USERS)

    def delete(self):
        USERS = []
        return jsonify(USERS)

class UserId(Resource):

    def __init__(self):
        self.parser = reqparse.RequestParser()
        self.parser.add_argument('name', type=str)
        self.parser.add_argument('age', type=int)

    def get(self, userid):
        datas = self.parser.parse_args()

        return jsonify(
            {"name": USERS[int(userid)].get('name'), "age": datas.get('age')}
        )

    def post(self, userid):
        file = request.files['file']
        file.save('flask_file.txt')

        return jsonify({
            'msg' : 'success'
        })

app = Flask(__name__)
api = Api(app, default_mediatype="application/json")

api.add_resource(Users, '/users')
api.add_resource(UserId, '/user/<userid>')

app.run(host='0.0.0.0', port=5000, use_reloader=True, debug=True)启动后端服务后,接着来看看客户端的请求。httpx 的基本用法和 requests 近乎相同,很多时候,只需要将原来的代码中的 requests 换成 httpx 就行。
import httpx

# 使用get方法
r = httpx.get('http://127.0.0.1:5000/users')

# http返回码
print(r.status_code)

# http头
print(r.headers['content-type'])
# 也可以使用 r.headers.get('content-type')

# 接口返回的json
print(r.json())
import httpx
import json

param = {'name': 'xugaoxiang'}
headers = {"Content-type": "application/json"}

# post请求
r = httpx.post('http://127.0.0.1:5000/users', data=json.dumps(param), headers=headers)

print(r.status_code)
print(r.json())
import httpx

# delete请求
r = httpx.delete('http://127.0.0.1:5000/users')
print(r.json())
print(r.status_code)
除此之外,像 put、head、options 方法的请求也是类似的,这里就不再举例了
r = httpx.put(url, data={'key': 'value'})
r = httpx.head(url)
r = httpx.options(url)
上面示例中的用法是 httpx 提供的 top-level API,这在写一些测试脚本或者做系统原型时问题不大,但真正要在实际项目中去用的话,就会有性能上的问题。这是因为 httpx 在进行每一次的请求时都会去重新建立一个链接,也就是原有的链接没有被复用,这在高并发的情况就显得特别低效。
类似于 requests 模块中的 Session,httpx 提供了 Client,它会使用 http 连接池,大大减少链接重新建立的次数,减少 cpu 的使用率,降低了网络拥堵,提升系统效率。
Client 的使用比较简单,推荐的做法是将 Client 作为 context 管理器,看下面的示例
import httpx

with httpx.Client() as client:
    # 请求部分,将原来的 httpx 换成 client 就可以了,参数是一样的
    r = client.get('http://127.0.0.1:5000/users')
    print(r.json())
    print(r.status_code)
同步请求与异步请求
默认情况下,httpx 提供的是标准同步 API,如果想使用异步请求,可以这样
import httpx
import asyncio

async def make_async_request():
    async with httpx.AsyncClient()  as client:
        r = await client.get('http://127.0.0.1:5000/users')
        print(r.json())
        print(r.status_code)

asyncio.run(make_async_request())
http2支持
要使能 http2,我们需要额外安装库 httpx[http2]
# 这个包名取的太奇怪了
pip install httpx[http2]
然后在初始化 client 的时候加上 http2 的支持
with httpx.Client(http2=True)  as client:
    r = client.get('http://127.0.0.1:5000/users')
Python实用模块专题
更多有用的 python 模块,请移步
Recommend
About Joyk
Aggregate valuable and interesting links.
Joyk means Joy of geeK