
3

如何在一台Mac上建立分区安装正式版与Beta双系统
source link: https://justinyan.me/post/4945
Go to the source link to view the article. You can view the picture content, updated content and better typesetting reading experience. If the link is broken, please click the button below to view the snapshot at that time.


北京时间6月7日凌晨1点钟,苹果WWDC 2022如期而至,带来了macOS Ventura的更新。目前Beta版本还只是针对开发者开放,大家可以在https://developer.apple.com/上下载。
以往我一般会在一台旧的Mac上安装Beta版,因为不想破坏主力Mac的生产环境。今年我可以选择在我的主力MacBook上建立一个APFS分区来安装Beta版啦。
一、 对Mac进行分区
- 首先确保你的系统至少是 macOS High Sierra 或以上的版本。
- 打开Disk Utility.app(在
/Applications/Utilities/Disk Utility.app)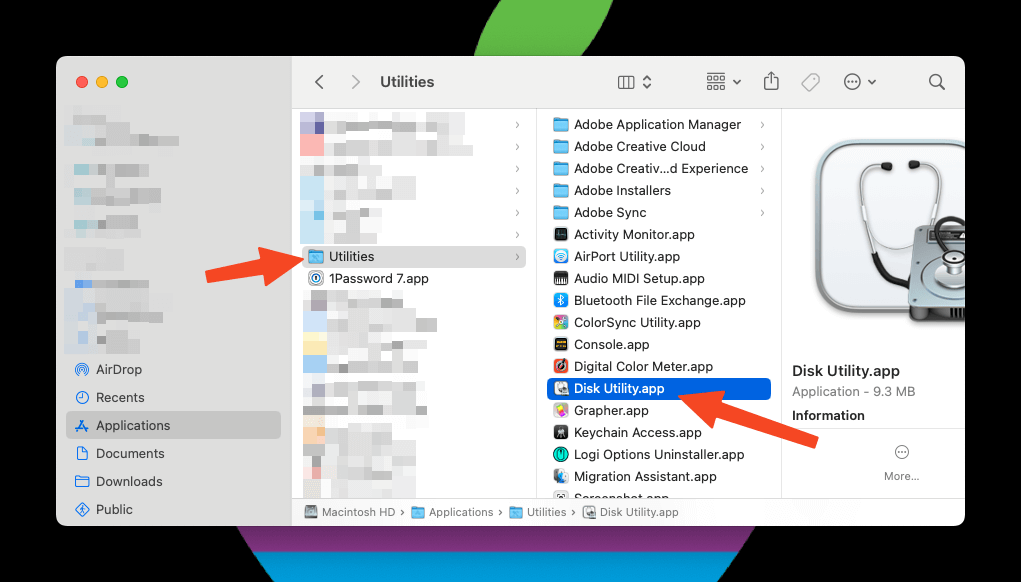
- 选中侧边栏的Macintosh HD这个卷,然后点右边菜单栏上的
+号,选择Edit > Add APFS Volume。(只有对APFS分区的卷才可以这样操作) - 输入卷名然后选择
Add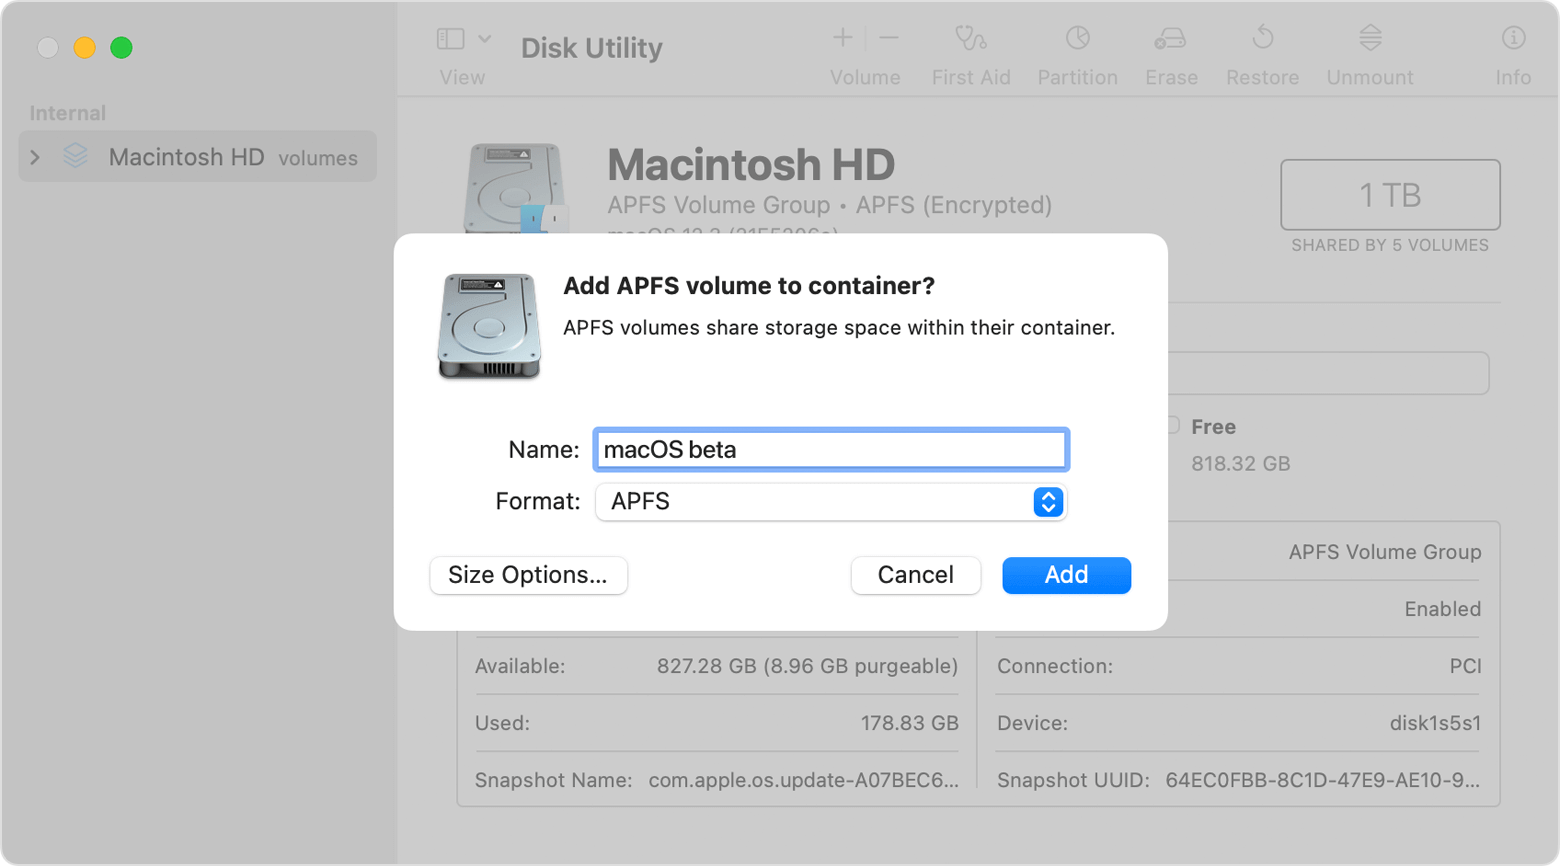
这样就分区好啦。分区的时候可以选择Size Options,我啥都没选直接默认搞定。
二、下载macOS Beta版
- 首先你得有一个Apple Developer Account,可以到官网注册一个。我记得现在免费的帐号也是可以登录的。
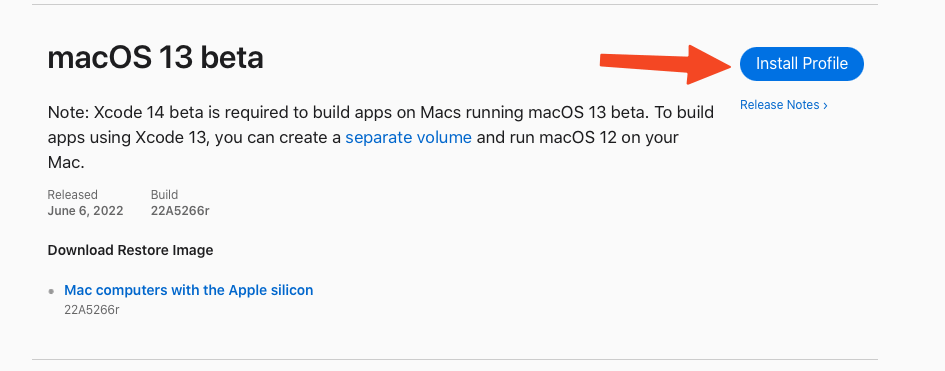
- 然后我们到这个页面https://developer.apple.com/develop/,点一下Downloads:

- 找到想要下载的macOS beta然后点Install Profile下载:
- 下载完成后会得到一个
InstallAssistant.pkg安装包,直接打开一步步continue到结束。 - 安装完成后,你的
/Applications目录会多出来一个Install macOS 13 beta.app这样的App,打开它。在选择安装硬盘界面时,点击Show All Disks…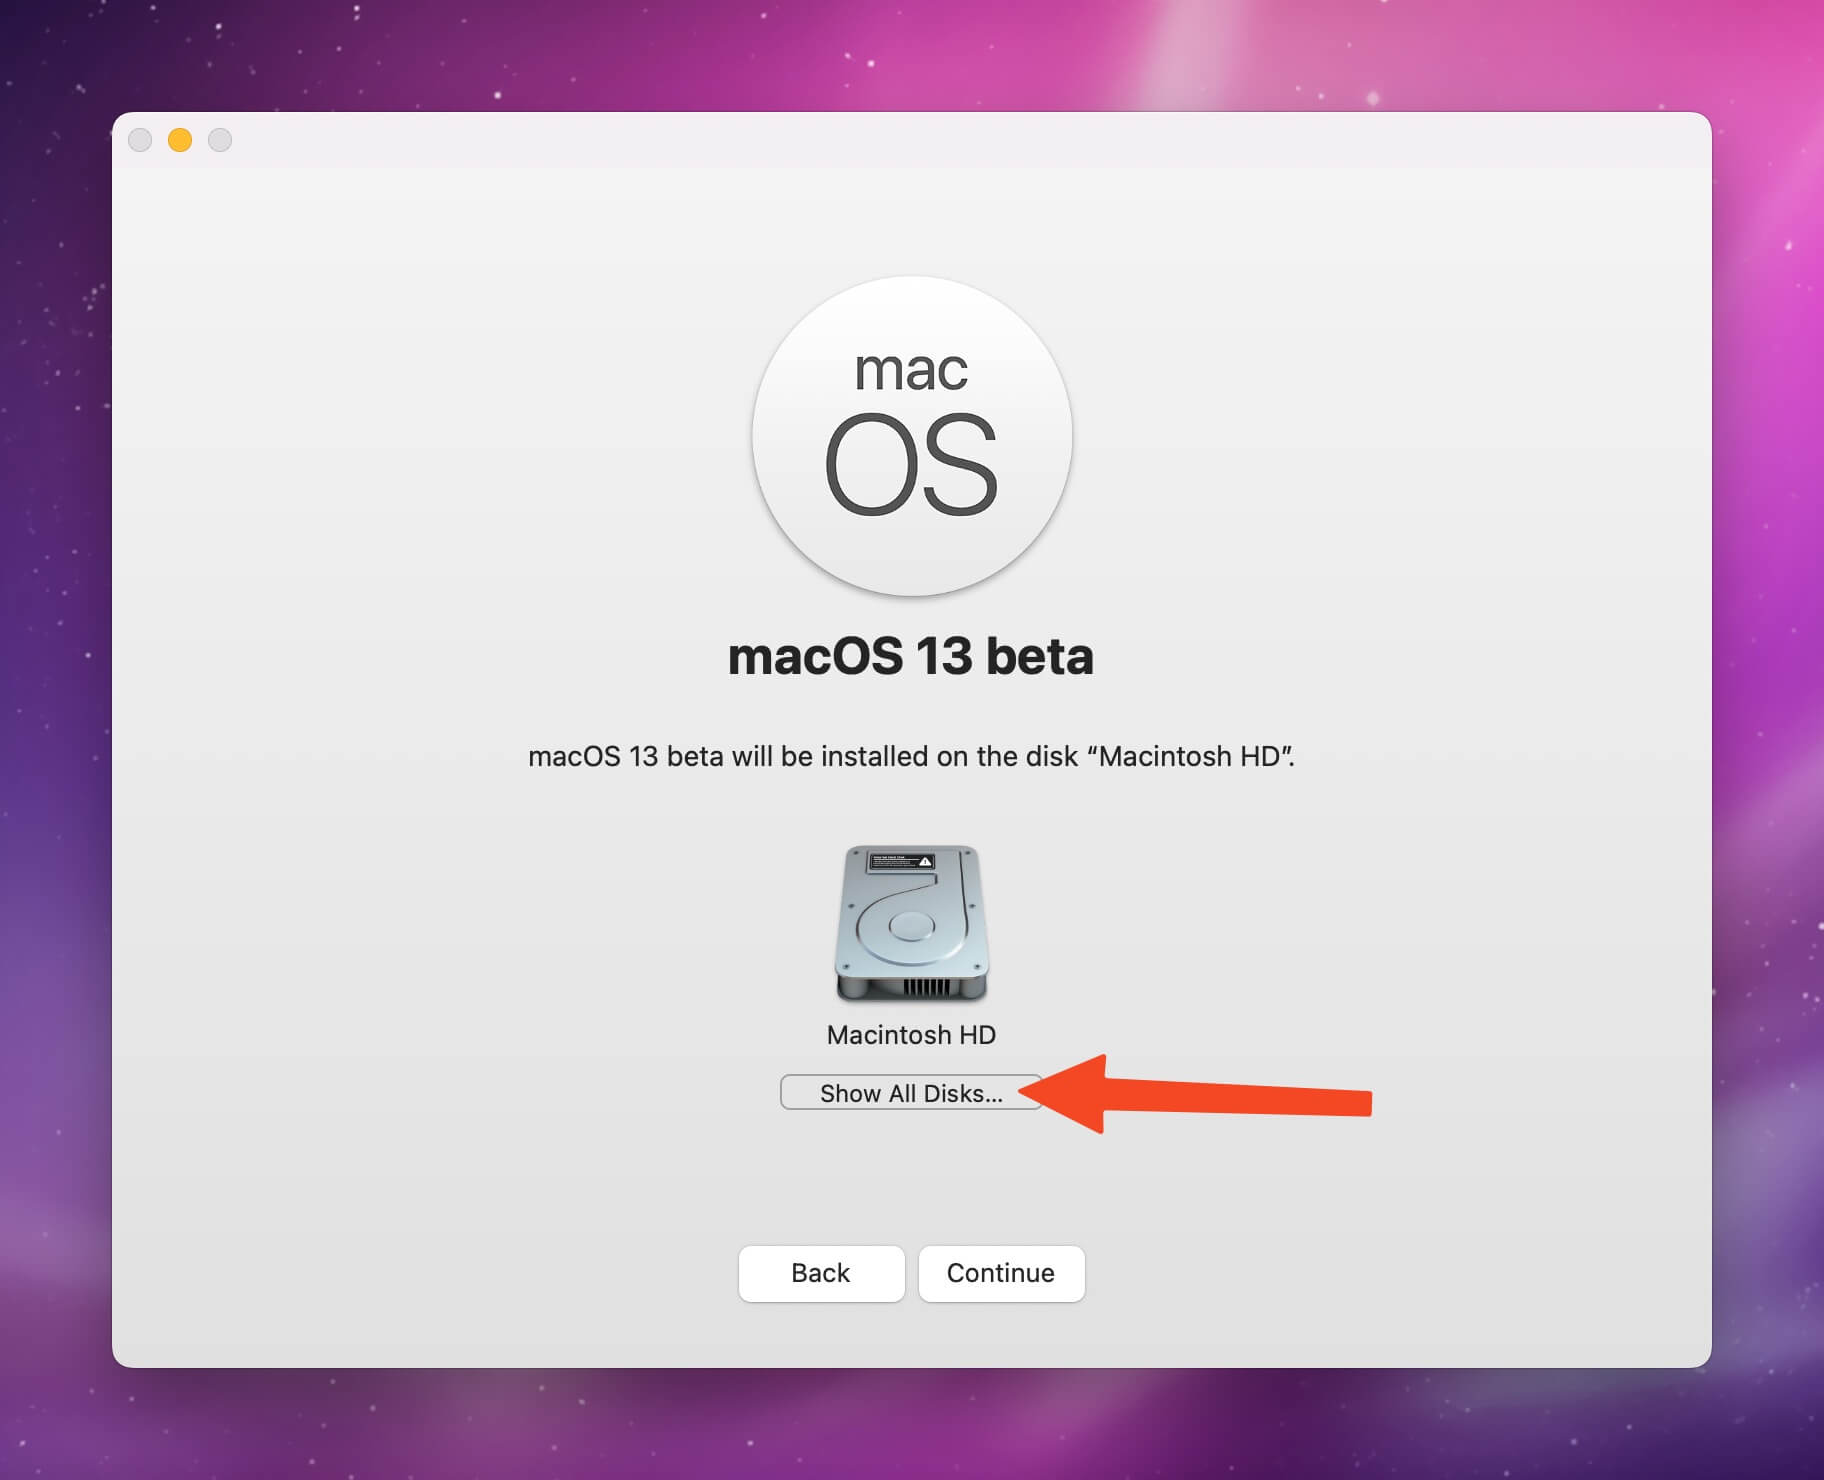
- 然后选中刚才第一步里建立的
macOS Beta分区,如果你看不到这个分区,说明请返回第一步重试。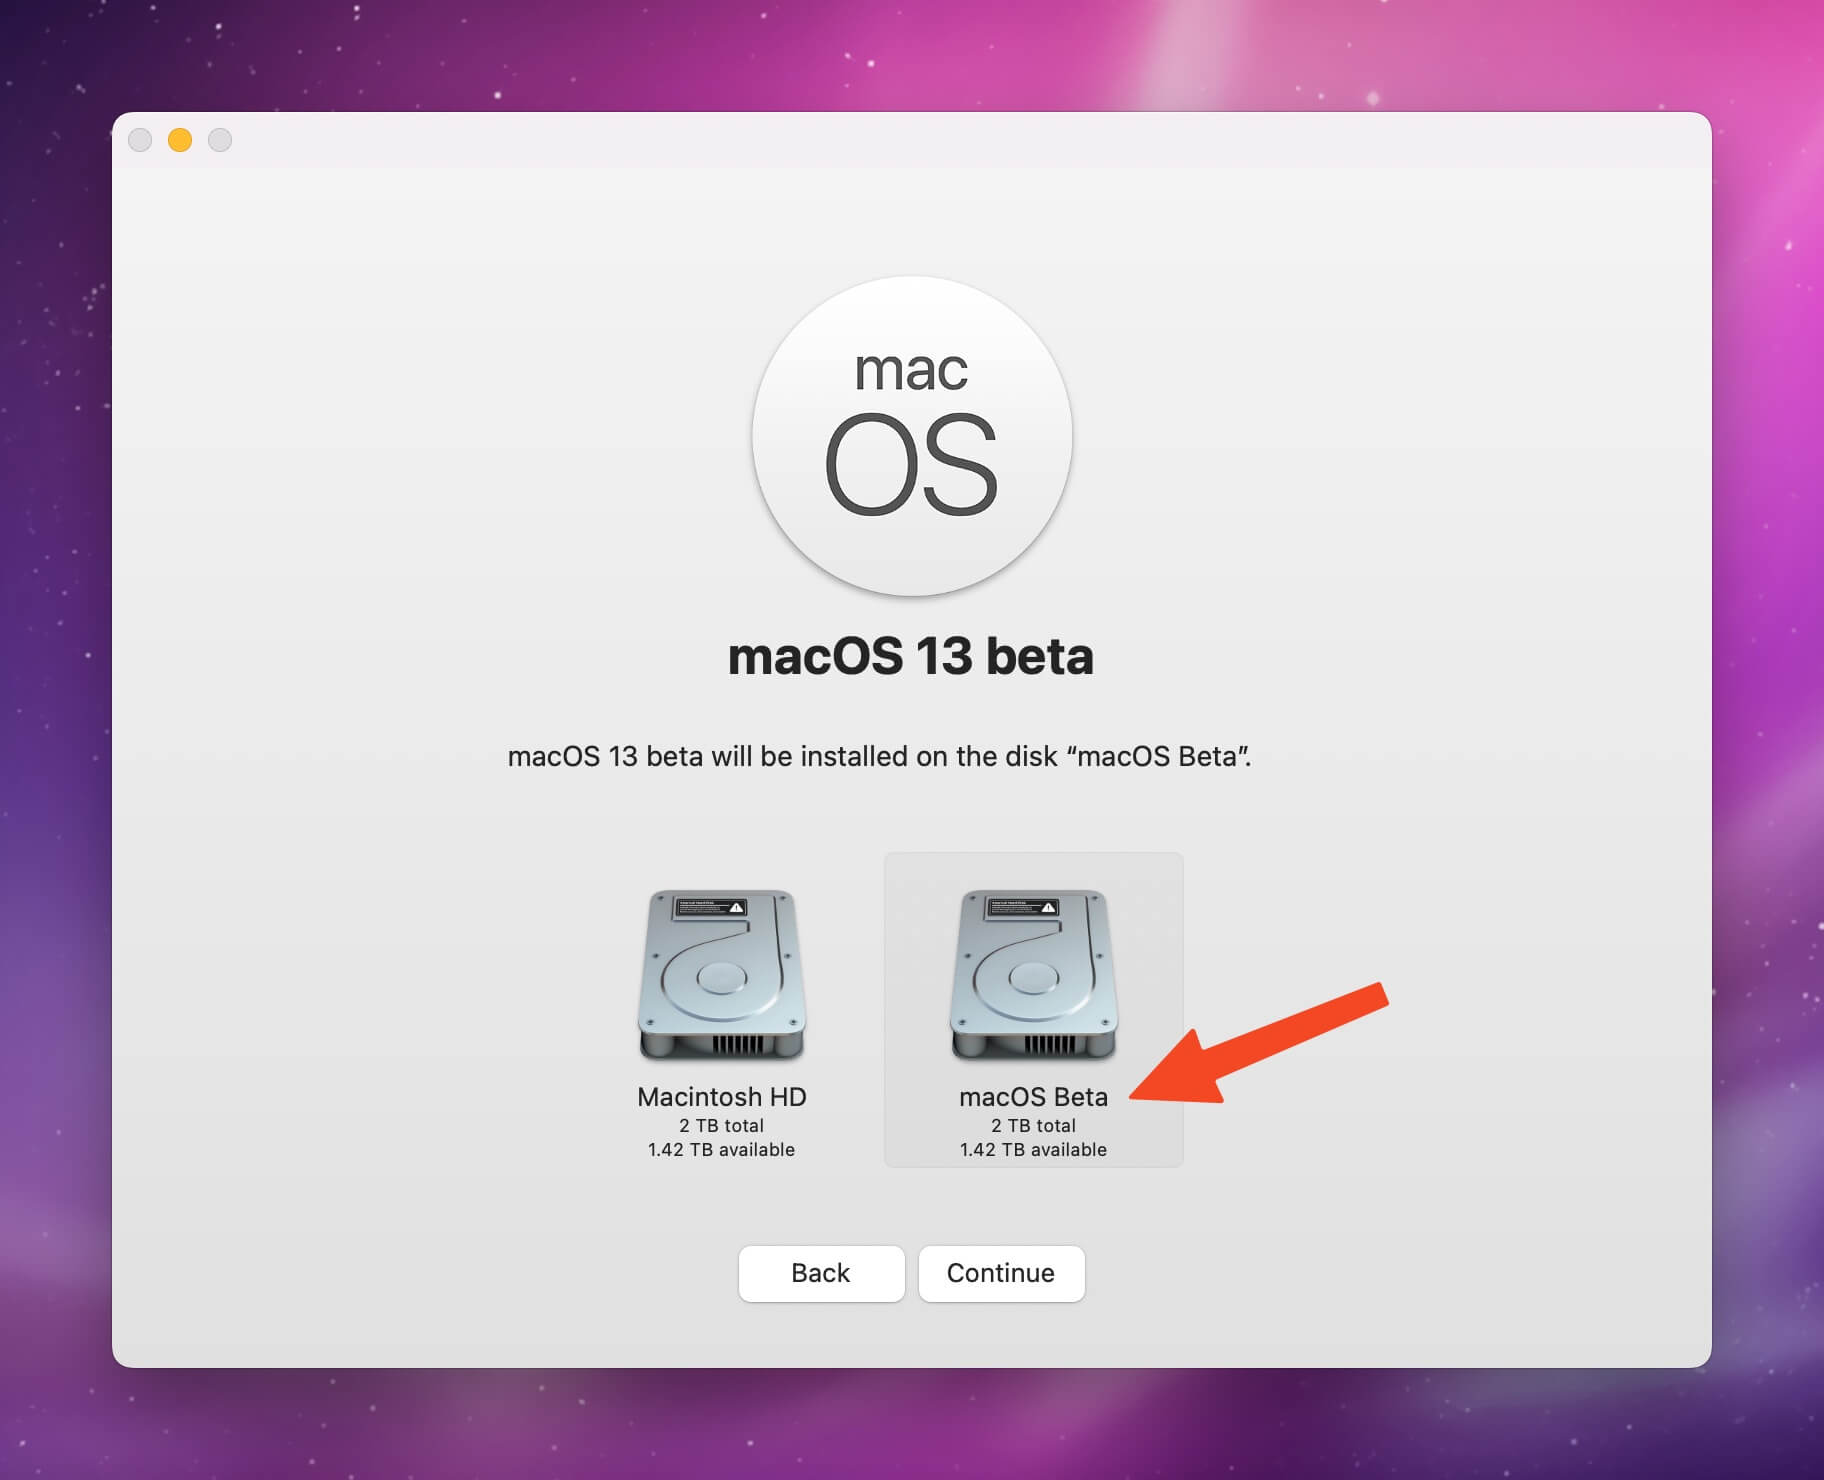
-
接下来就是安装啦,安装结束后会提醒你重启,重启后直接就进入新的操作系统啦。
三、如何旋选择用哪个macOS版本启动
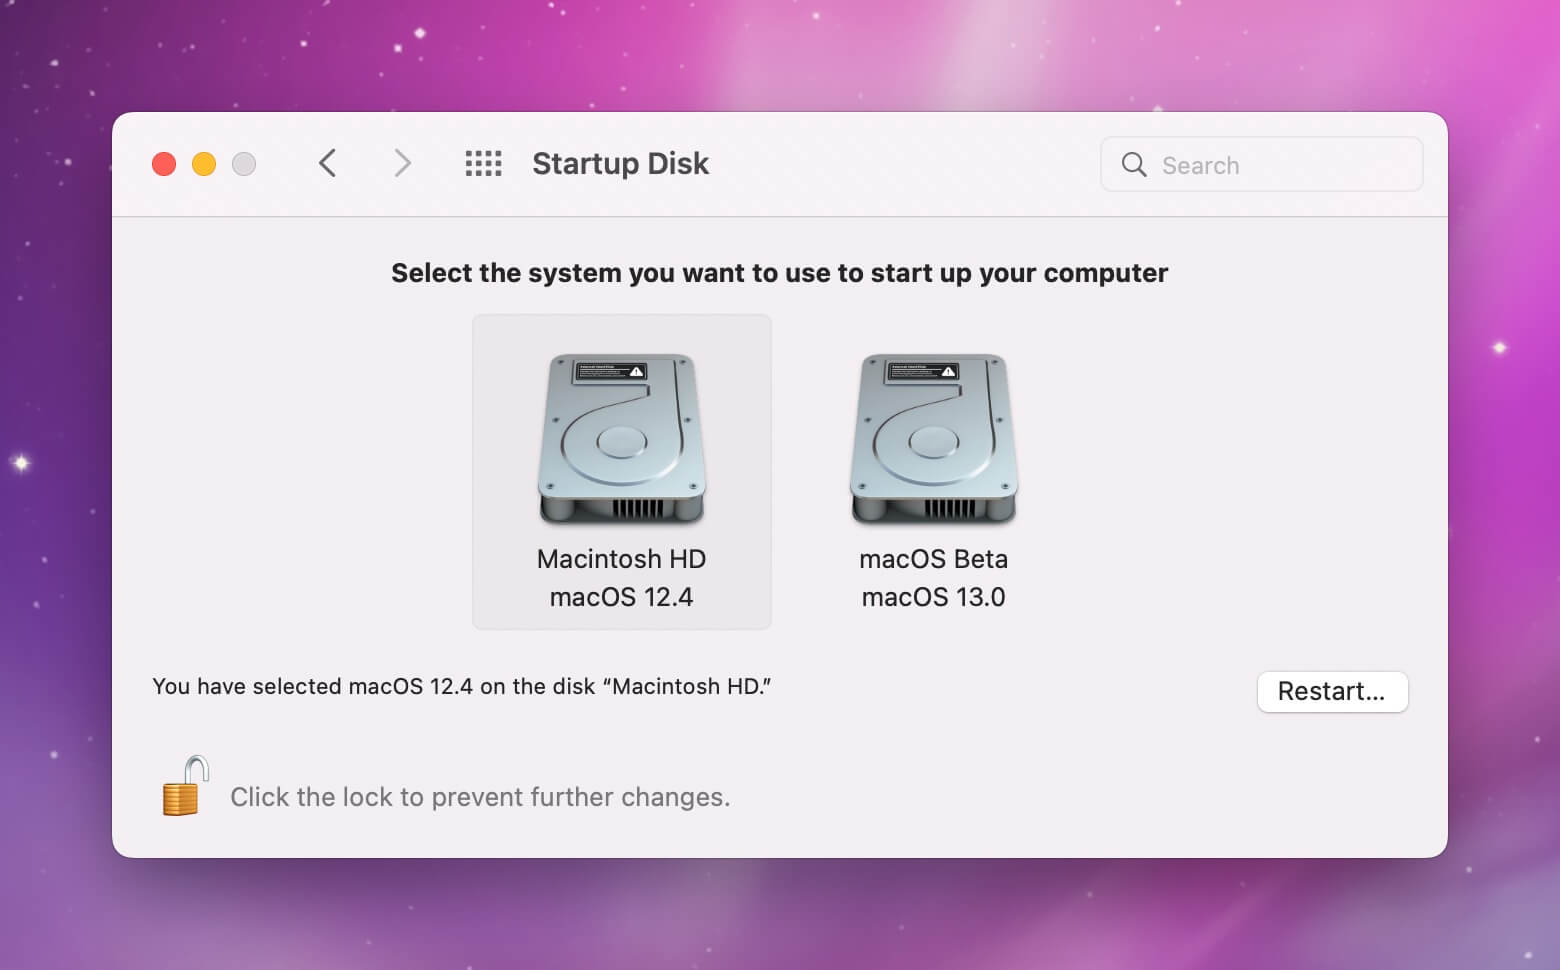
- 打开
System Preferences(Ventura叫System Settings),选择Startup Disk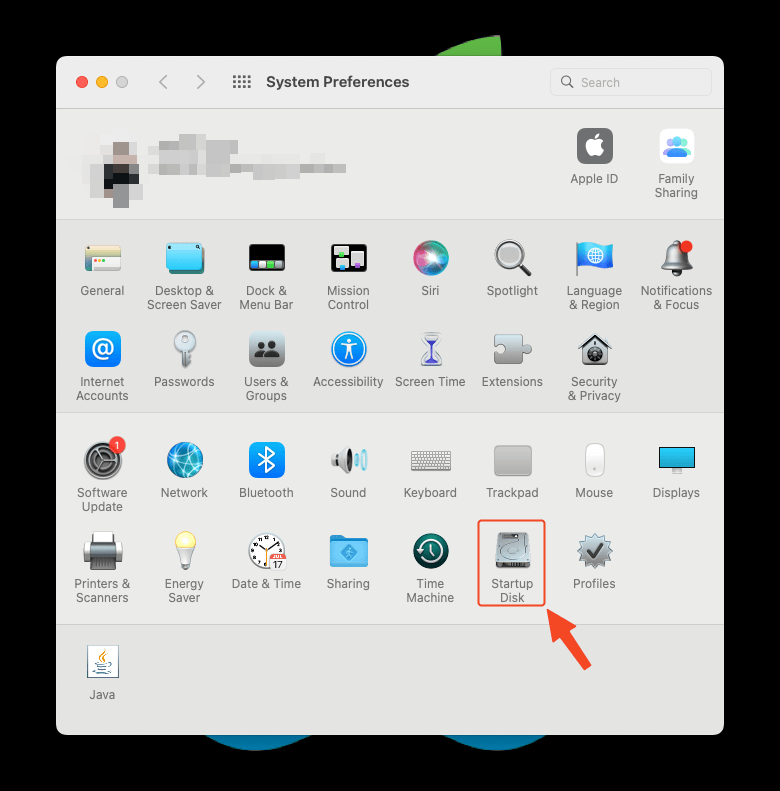
- 选择你想要启动的系统盘,然后重启Mac即可。
四、这样就实现两个macOS系统同时存在啦
我如此这般体验了一下Ventura,比之前用两台Mac体验好的地方在于,我可以用更好的硬件来跑原生的macOS beta啦!之前都是旧的MacBook其实体验起来总是各种问题。
在不安装任何第三方的Window Tiling/Management的状态下,Ventura的Stage Manager还是挺好用的。
Recommend
About Joyk
Aggregate valuable and interesting links.
Joyk means Joy of geeK