
I Built A Chrome Extension To Instantly Find eToro’s Stocks On Finviz’s Stock Sc...
source link: https://medium.com/@ajay_613/i-built-a-chrome-extension-to-instantly-find-etoros-stocks-on-finviz-s-stock-screener-89243d4493d9
Go to the source link to view the article. You can view the picture content, updated content and better typesetting reading experience. If the link is broken, please click the button below to view the snapshot at that time.


I Built A Chrome Extension To Instantly Find eToro’s Stocks On Finviz’s Stock Screener
While being trapped indoors during the pandemic (just like everyone else) I created an eToro account, and I kickstarted my journey of owning a Rolex, Rolls Royce, and a Rover.
Clearly that didn’t happen. Which is why you’re reading my articles on Medium.com instead of watching me flex on IG.
Not only am I not drowning in cold, hard cash, I’m also a terrible trader. And that’s something I’ve been trying to fix (the terrible trader part) by watching gurus (Rayner Teo & Sean Dekmar are my go-tos) on YouTube.
While binge-watching their videos, I came across Finviz’s Stock Screener. It’s a pretty cool platform where you can filter out over 8,000 stocks based on different technical factors, which then helps you plan your trades better.

The problem though is that a some of them aren’t on eToro, and you wouldn’t know this at first glance.
So my usual workflow would always be to copy over the ticker, head onto eToro’s search, paste in the ticker, to see if it is available. If Finviz gives me a list of 100 stocks, then I’d need to do this action a 100 times.
Fun. Fun.
Surely, there should be a better way.
Rather than finding a tool that already does what I want or complaining that there isn’t one.
I decided to build my own tool from the ground up.
The Scope
- Build a chrome extension that reads the stock tickers from Finviz, and passes it to a backend.
- Use Laravel on the backend to check against the values in the database, and return a boolean value for each ticker
- I probably need to figure out a way to get the data from eToro. Seems like they don’t have an official API. So find a workaround for this.
Game Plan
- Write messy code. The messier the better. I’m building this over a short time, and it’s for myself so the code doesn’t need to be properly structured. It just needs to work. Also, keep away from module builders, I don’t have a whole day to figure out how to configure Webpack.
- Limit scrapping the tickers to the Overview tab on Finviz for the proof-of-concept
- If I have time, figure out a way to include a payment / billing feature on the extension. The broke-me needs to get paid.
- Maybe later, I could extend the functionality to CoinGecko as well. Story for another day. Don’t get carried away and work on that now.
- Come up with a name for the extension, and find an icon, etc. Save this to the end. Don’t waste time early on.
Let The Coding Begin
- Installation / Project Setup
Google has a very detailed Getting Started guide that you can refer to get things started.
Guide - https://developer.chrome.com/docs/extensions/mv3/getstarted/
The guide also gives you a link to a completed example (codebase). I’m simply going to download that, and start messing around with the code to get going quicker.
Oh one more thing. Once you download the codebase, you can load it up as unpacked extension via Chrome. The steps are outlined in the same guide, so you can refer to it if you’d like to give it a shot as well.
2. Figuring out the codebase
Based on the documentation, the main files are:
- manifest.json — All the metadata, permissions, etc., get thrown in here.
- background.js — handles the events that are really important to the extension itself. Think lifecycle events. The logic to handle different lifecycle events gets thrown in here.
- popup.html — basically the UI layer. All the html logic, css for the UI elements goes in here. The popup.html also has a corresponding JS file, and this handles the logic to manipulate the UI layer.
- and popup.js — JS file to handle events from popup.html, and you can also inject content scripts, etc.
First order of business — Go to manifest.json, and change the name & description.
manifest.json
{
	"name": "Finviz X eToro extension",
	"description": "Show if the ticker exists on eToro",
	//
}
Do note that any time you make changes to the manifest.json, you need to head to chrome://extensions, and reload the extension.
The next thing I did was to head to popup.html, and I added some styling to the body, and I added a h2 element. I just wanted to see if the changes reflect instantly — and they do.
Also popup.html has a green button, and it has a corresponding click event in the popup.js file, which delegates to a setPageBackgroundColor method.
I’m not going to change much but I’m going to add in a console.log in each method, and see how it looks like in the chrome dev tools.
popup.js
let changeColor = document.getElementById("changeColor");// When the button is clicked, inject setPageBackgroundColor into current page
changeColor.addEventListener("click", async () => {
  let [tab] = await chrome.tabs.query({ active: true, currentWindow: true });// line that I added in
  console.log('button clicked');   chrome.scripting.executeScript({
    target: { tabId: tab.id },
    function: setPageBackgroundColor,
  });
});// The body of this function will be execuetd as a content script inside the
// current page
function setPageBackgroundColor() {// line that I added in
  console.log('setPageBackgroundColor method called.');   chrome.storage.sync.get("color", ({ color }) => {
    document.body.style.backgroundColor = color;
  });
}
The Result:

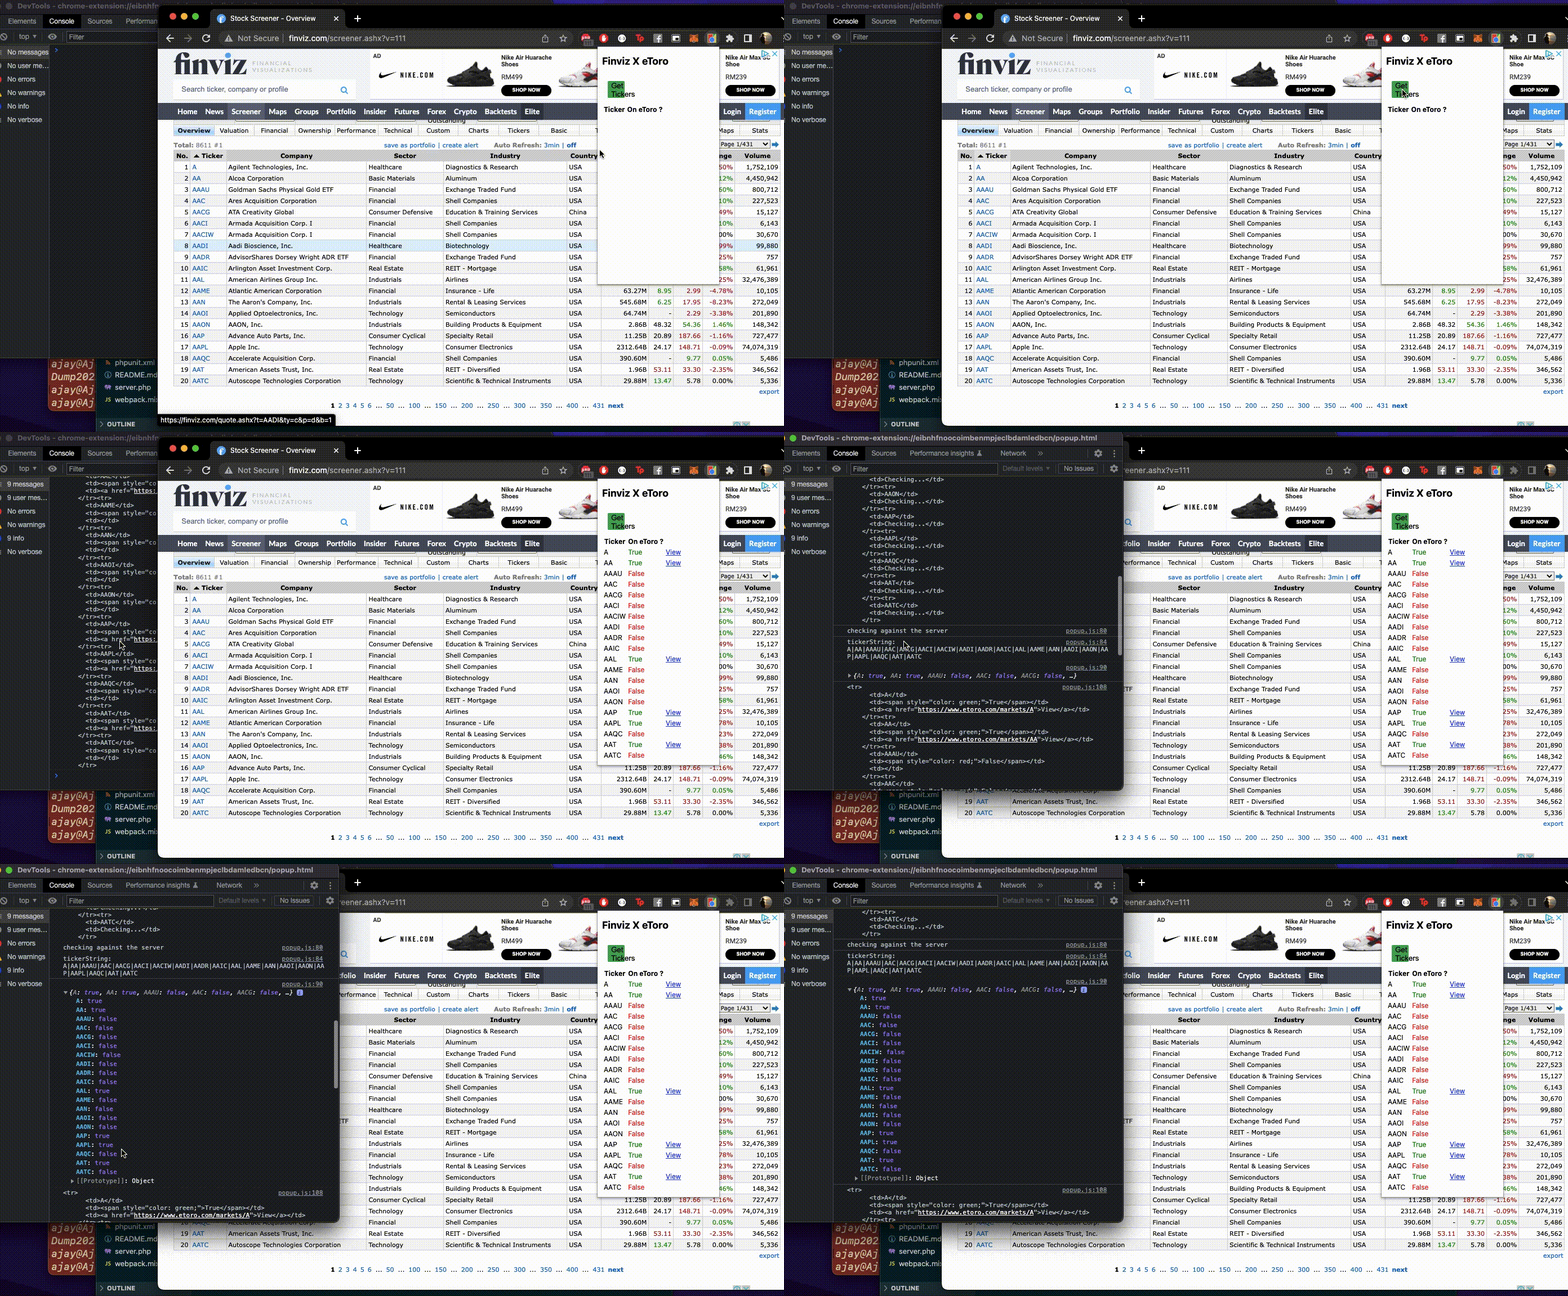
Seems like any code that I write inside the button’s event listener shows up in the dev tools for the extension, and the code in the setPageBackgroundColor method gets executed in the dev tools for the browser (finviz page).
Both environments are supposed to be isolated.
Here’s what I’m going to do — every time, the green button is clicked, I’m going to get the tickers from the finviz page, and console.log them out in setPageBackgroundColor. For now, I’m going to fit as much logic as possible in this method itself.
I’m not even going to rename the method at this point, I’ll clean this up at the end.
3. Scrapping the tickers from Finviz
Probably the easiest part.
All I had to do was inspect the table element in the HTML, and get the class. From there, do a querySelectorAll, and map the inner html.
Boom! Done!
let tickers = Array.from(document.querySelectorAll('.screener-link-primary'))
  .map(function (tickerHtml) {
    return tickerHtml.innerHTML;
})console.log(tickers);
Moving on.

4. Display the tickers as a list in the extension a.k.a popup.html
This wasn’t entirely straightforward.
To get this done, I had to understand the way chrome extensions are structured.
I went through the following links:
Architecture Overview — https://developer.chrome.com/docs/extensions/mv3/architecture-overview/
Message Passing — https://developer.chrome.com/docs/extensions/mv3/messaging/
chrome.storage — https://developer.chrome.com/docs/extensions/reference/storage/
The gist of it is that the code you write directly for the extension itself and the code you “inject” into the current page are completely isolated. So you need to use their Messaging API to share data between the two.
You can read the links above to get a better understand of how things work.
Here’s what I did:
I copied over the chrome.runtime.sendMessage part from the Message Passing guide above, and I added to the content script part (setPageBackgroundColor method).
I added a corresponding chrome.runtime.onMessage.addListener part at the bottom of the popup.js. Also copied over from the Message Passing guide above.
And it all worked like a charm.
setPageBackgroundColor method a.k.a the content script part
function setPageBackgroundColor() {

let tickers = Array.from(document.querySelectorAll('.screener-link-primary'))
  .map(function (tickerHtml) {
    return tickerHtml.innerHTML;
  })	console.log(tickers);	chrome.runtime.sendMessage({
    identifier: "finvizOverviewTab",
    tickers: tickers
  }, function (response) {
    console.log(response.farewell);
  });}
popup.js (at the bottom of the file)
chrome.runtime.onMessage.addListener(
  function (request, sender, sendResponse) {
    console.log(sender.tab ?
      "from a content script:" + sender.tab.url :
      "from the extension");
    if (request.identifier === "finvizOverviewTab")  {
      console.log('tickers', request.tickers); 			// manipulate the DOM     }    sendResponse({ farewell: "goodbye" });
  }
);
Result

5. Displaying the tickers on the extension (Error)
I felt like everything was working, I took a break, and I wanted to display the tickers on the extension itself and the dev tools, and bam this error popped up.
At first glance this was puzzling cause the manifest.json file has the activeTab permission so I figured it’ll be all good but turns out programming doesn’t work that way.
Error
Uncaught (in promise) Error: Cannot access contents of the page. Extension manifest must request permission to access the respective host.

Solution
Turns out you need to a host_permissions key to your manifest.json file to get things working.
"host_permissions": [
    "*://finviz.com/"
 ],
This seems to get the job done.
Result

The first half of the hurdle is done. Now, I need to sort out the backend. I won’t be covering too much of how the backend works in this article. I’ll cover that in another one.
6. Fetch the data from the backend
At this point, all I had to do was pass the list of tickers from the page over to the backend via a HTTP call, get the json response back, and handle it accordingly.
To keep things simple, I converted the array of tickers into a string like so:
let tickerString = tickers.join('|');
and then appended that to the url. I used the fetch API to make the HTTP call to the backend
let results = await fetch('<http://example-backend.test/check-tickers-status?tickers=>' + tickerString)
  .then(response => response.json())
  .then(response => response.data);   console.log(results);
The backend would then return an object with all the tickers and a corresponding boolean value. I simply displayed these values in the popup.
Result

7. Highlighting the text on screen
Now it’s great that I can clearly see the tickers that are on eToro on the extension’s popup itself but I also wanted to highlight the items on the finviz page as well.
Here’s how I did it — I copied over this chunk of code from the Messaging Guide above
and I edited it like so:
chrome.tabs.query({ active: true, currentWindow: true }, function (tabs) {
    chrome.tabs.sendMessage(tabs[0].id, {
      'identifier': 'tickerResults',
      'results': results
    }, function (response) {
      console.log(response.farewell);
    });
  });
and in the setPageBackgroundColor method (content script), I added a listener to handle the message
chrome.runtime.onMessage.addListener(
    function (request, sender, sendResponse) {
      console.log(sender.tab ?
        "from a content script:" + sender.tab.url :
        "from the extension");
      if (request.identifier === "tickerResults") {

console.log('received the ticker results from the extension', request.results);				// update the dom
      }

sendResponse({ 'farewell': "goodbye" });
    }
  );
Result

The last thing to do to close this off was to take the results that were passed from the extension to the content script, and then update the dom.
Here’s how I did this:
let tickerResultsFromEtoro = request.results;let tickersHtmlElements = Array.from(document.querySelectorAll('.screener-link-primary'));let tickers = tickersHtmlElements.map(function (tickerHtml) {
    return tickerHtml.innerHTML;
  })for (let key in tickerResultsFromEtoro) {
          if (tickerResultsFromEtoro[key]) {
            let element = tickersHtmlElements[tickers.indexOf(key)];
            element.parentElement.parentElement.style.background = '#c6ddc6';            let thirdCol = element.parentElement.parentElement.children[2];            thirdCol.innerHTML = thirdCol.innerHTML + `<a href="<https://www.etoro.com/markets/${key}>" target="__blank" class="screener-link-primary" style="float:right;">Open on eToro</a>`
          }
        }
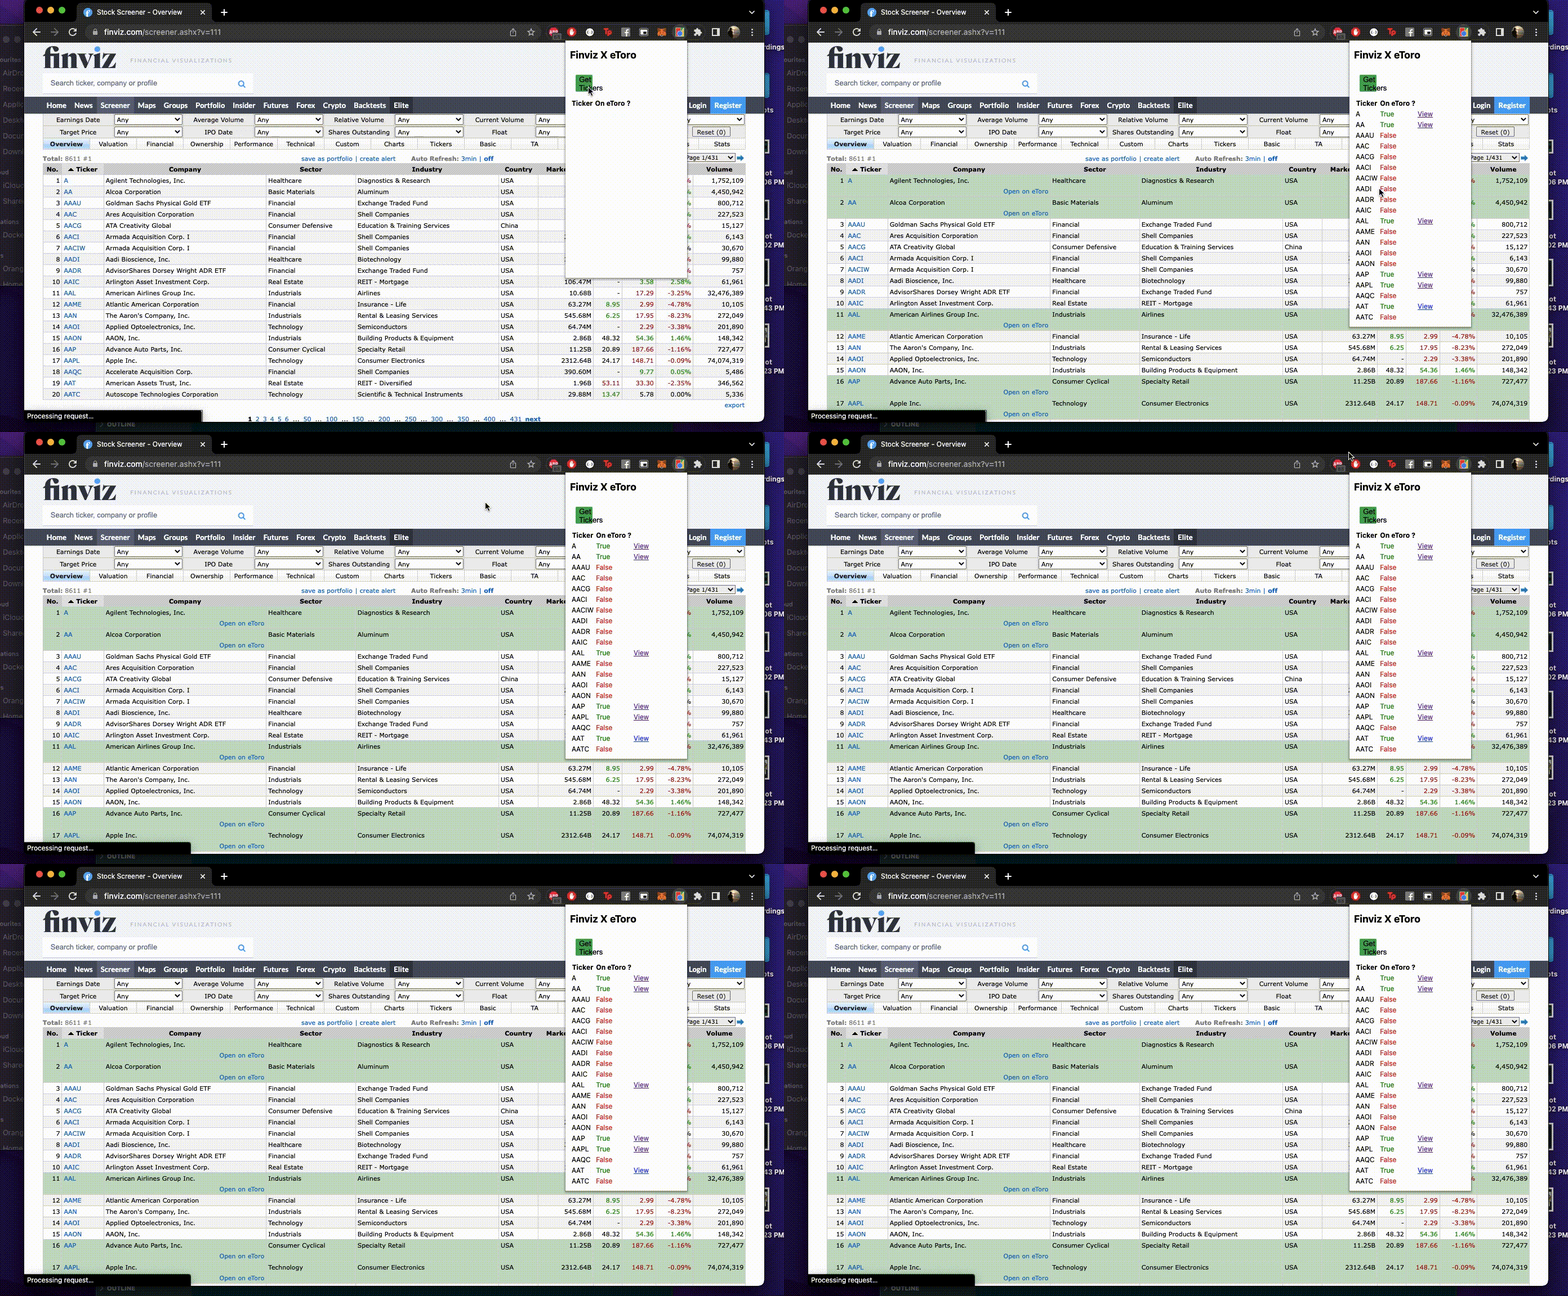
Result

Let me get some basic CSS in, and make the popup.js look slightly better.

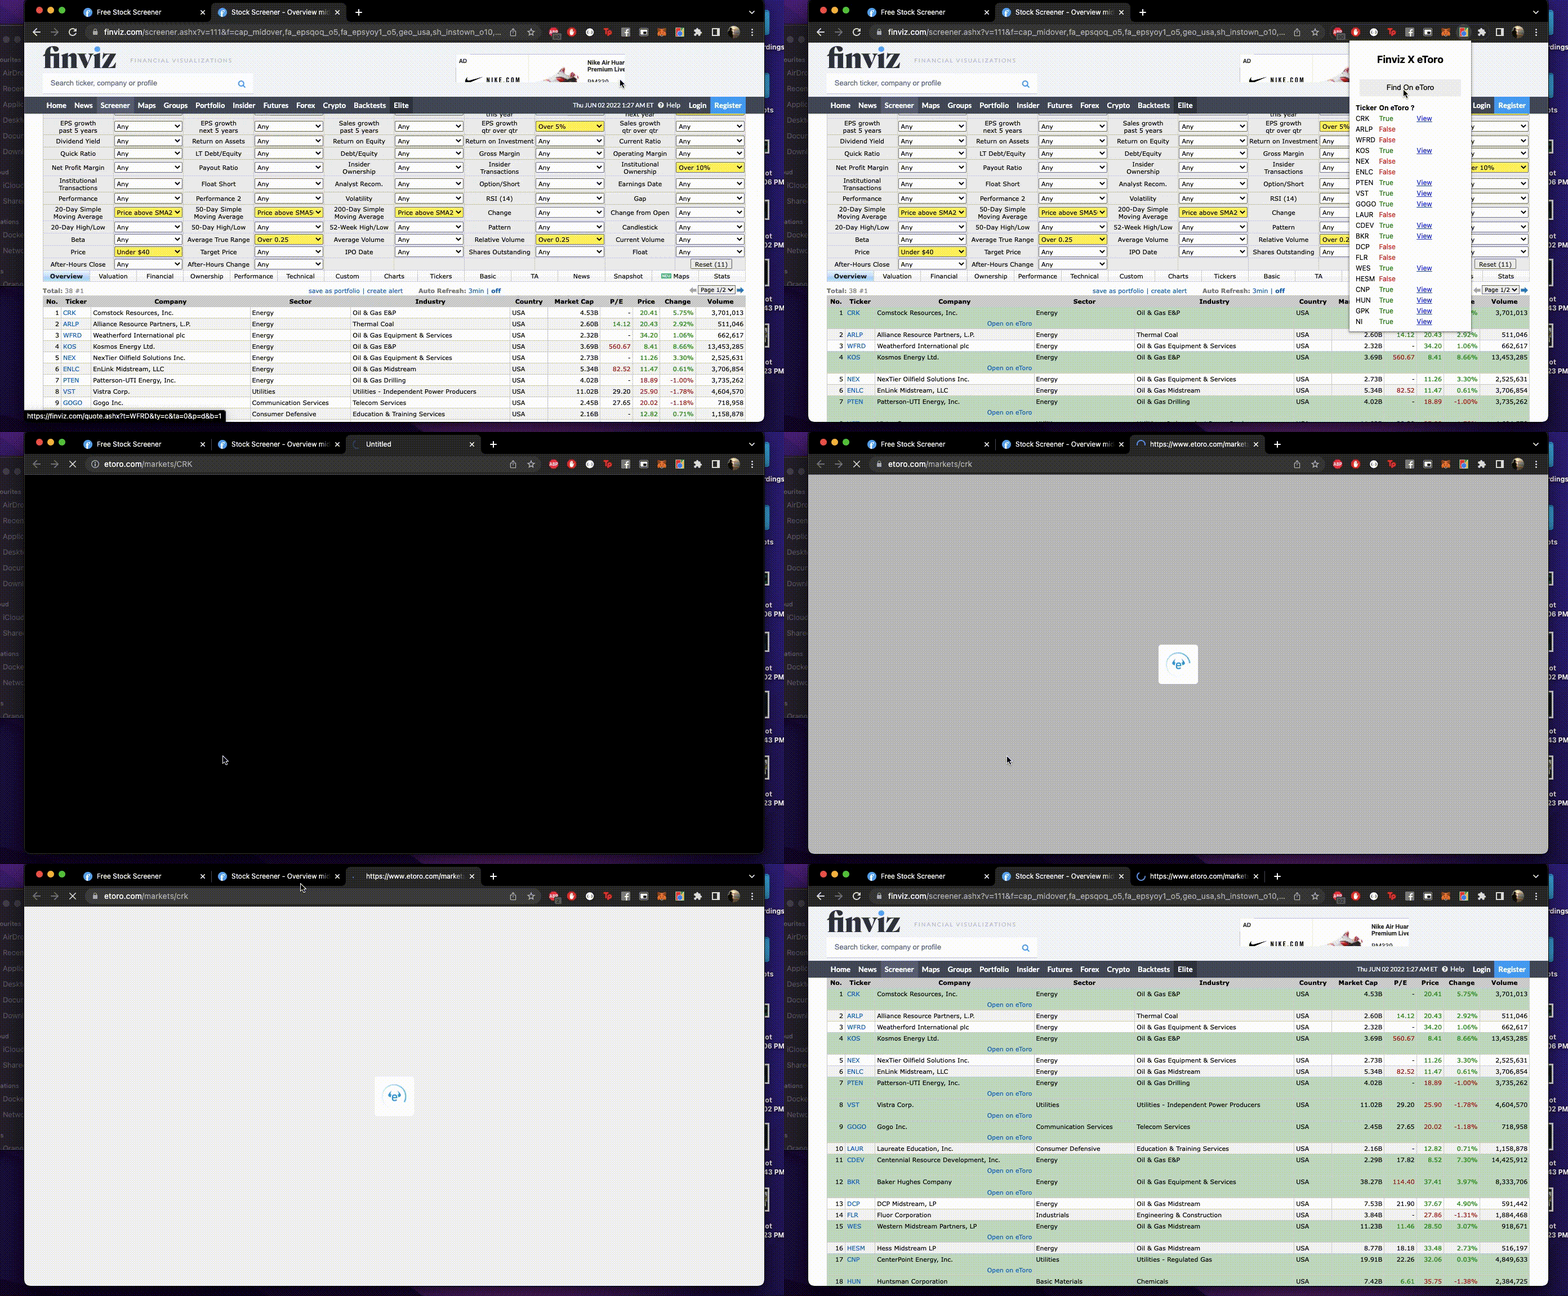
Great! It works.
Now I can quickly see which tickers are available on eToro, and which ones aren’t. I just saved myself a lot of time & effort.
Impressed.

Developer Experience
If you know vanilla JS, it should be a breeze.
Else you might have some trouble figuring things around. But the good thing here is that the documentation is on point. Just follow the getting started guide, and you’ll be able to get moving with no issues.
The other thing I liked was that I didn’t need to install a bunch of different tools or packages. I could just download the codebase, and I can get the chrome extension running in the browser.
I’ll definitely build more chrome extensions that I can use myself. You should give it a shot too!
What’s next?
The current version of the Finviz X eToro extension is quite basic. I can make it better, and here’s what I’ll be working on this week to make it better:
- Add a permissions check on the background.js to make the extension clickable only when the user is on Finviz.com
- Use the storage API to store the previous results so the extension is not blank every time it’s clicked on it.
- Do some CSS work, and make the extension shippable
- Might look into incorporating a business model into the extension. Thinking X no. of free scans, and then they should pay to use it for additional scans. Let’s see.
How about the backend?
Well, most of the logic for this chrome extension is handled on the backend. eToro doesn’t have an official API so I had to find a workaround to get the data from eToro. Once I got this data, I simply used Laravel to handle the incoming HTTP requests from the chrome extension.
Would you like to know more about how I built the backend?
Follow me on Medium.com, and once we hit 100 follows, I’ll drop an in-depth guide on how I got the backend up and running.
Also Read: I Tried Automating My Files & Folders With PHP For The First Time
Recommend
About Joyk
Aggregate valuable and interesting links.
Joyk means Joy of geeK