

服务网关:项目整合 SpringCloud Gateway 网关
source link: https://developer.51cto.com/article/708738.html
Go to the source link to view the article. You can view the picture content, updated content and better typesetting reading experience. If the link is broken, please click the button below to view the snapshot at that time.

服务网关:项目整合 SpringCloud Gateway 网关-51CTO.COM

今天,我们就在项目中整合SpringCloud Gateway来为项目增加API网关,同时,会将SpringCloud Gateway与Sentinel进行整合实现网关的限流能力。说干就干,小伙伴们跟上发车速度。
项目整合网关
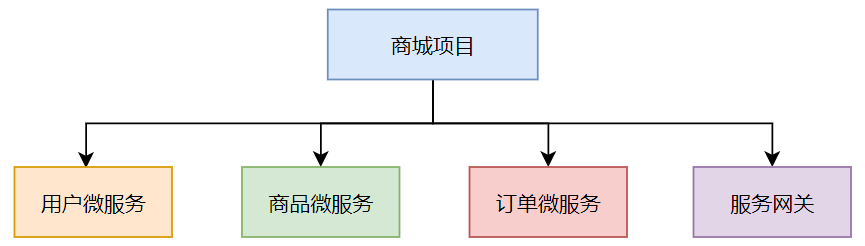
我们需要在项目中增加一个服务网关模块shop-gateway,在服务网关模块中实现网关的能力。此时,我们的项目中就会有用户微服务、商品微服务、订单微服务和服务网关。
新建网关模块
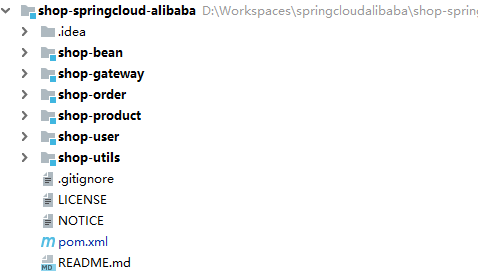
在项目中新建shop-gateway模块,新增网关模块后项目的结构如下图所示。
初步整合SpringCloud Gateway
(1)在服务网关shop-gateway模块的pom.xml文件中添加如下依赖。
<dependencies>
    <dependency>
        <groupId>org.springframework.cloud</groupId>
        <artifactId>spring-cloud-starter-gateway</artifactId>
    </dependency>
</dependencies>
(2)在服务网关shop-gateway模块的resources目录下新建application.yml文件,并在文件中添加如下配置信息。
server:
  port: 10001
spring:
  application:
    name: server-gateway
  cloud:
    gateway:
      globalcors:
        cors-configurations:
          '[/**]':
            allowedOrigins: "*"
            allowedMethods: "*"
            allowCredentials: true
            allowedHeaders: "*"

      routes:
        - id: user-gateway
          uri: http://localhost:8060
          order: 1
          predicates:
            - Path=/server-user/**
          filters:
            - StripPrefix=1

        - id: product-gateway
          uri: http://localhost:8070
          order: 1
          predicates:
            - Path=/server-product/**
          filters:
            - StripPrefix=1

        - id: order-gateway
          uri: http://localhost:8080
          order: 1
          predicates:
            - Path=/server-order/**
          filters:
            - StripPrefix=1
我们重点来看下 spring.cloud.gateway 节点下的配置。
- globalcors:此节点下的配置是为了解决SpringCloud Gateway跨域的问题。
- routes:表示一个路由数组,可以在此节点下配置多个路由信息。
- id:当前路由的唯一标识。
- order:路由的优先级,数字越小表示优先级越高。
- predicates:网关断言,也就是路由转发的条件,也是一个数组,可以配置多个路由转发条件。
- Path:当客户端请求的路径满足Path的规则时,进行路由转发操作。
- filters:网关过滤器,在过滤器中可以修改请求的参数和header信息,以及响应的结果和header信息,网关过滤器也是一个数组,可以配置多个过滤规则。
- StripPrefix:网关在进行路由转发之前,会去掉1层访问路径。
(3)在服务网关shop-gateway模块的io.binghe.shop包下新建GatewayStarter类,表示服务网关的启动类,源码如下所示。
/**
 * @author binghe (公众号:冰河技术)
 * @version 1.0.0
 * @description 服务网关启动类
 */
@SpringBootApplication
public class GatewayStarter {
    public static void main(String[] args){
        SpringApplication.run(GatewayStarter.class, args);
    }
}
(4)由于之前项目中整合了Nacos和Sentinel,所以,在启动项目前,要分别启动Nacos和Sentinel。
- 进入到Nacos的bin目录下,输入如下命令启动Nacos。
startup.cmd -m standalone进入Sentinel Jar包所在的目录,输入如下命令启动Sentinel。
java -Dserver.port=8888 -Dcsp.sentinel.dashboard.server=localhost:8888 -Dproject.name=sentinel-dashboard -jar sentinel-dashboard-1.8.4.jar(5)分别启动用户微服务、商品微服务、订单微服务和服务网关。
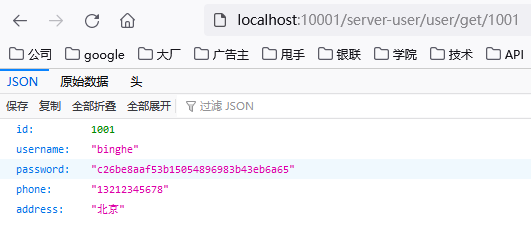
(6)通过服务网关访问用户微服务,在浏览器中输入http://localhost:10001/server-user/user/get/1001,如下所示。

用户微服务返回的原始数据如下所示。
{
  "id": 1001,
  "username": "binghe",
  "password": "c26be8aaf53b15054896983b43eb6a65",
  "phone": "13212345678",
  "address": "北京"
}
可以看到,通过服务网关能够正确访问到用户微服务。
(7)通过服务网关访问商品微服务,在浏览器中输入http://localhost:10001/server-product/product/get/1001,如下所示。
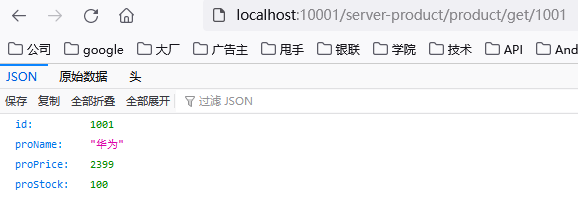
商品微服务返回的原始数据如下所示。
{
  "id": 1001,
  "proName": "华为",
  "proPrice": 2399,
  "proStock": 100
}
可以看到,通过服务网关能够正确访问到商品微服务。
(8)通过服务网关访问订单微服务,在浏览器中输入http://localhost:10001/server-order/order/test_sentinel,如下所示。

可以看到,通过服务网关能够正确访问到订单微服务。
网关整合Nacos
在初步整合SpringCloud Gateway中,我们在服务网关模块的application.yml文件中硬编码配置了服务转发的地址,如下所示。
- 硬编码用户微服务地址
uri: http://localhost:8060- 硬编码商品微服务地址
uri: http://localhost:8070- 硬编码订单微服务地址
uri: http://localhost:8080这里,我们将网关整合Nacos实现从Nacos注册中心获取转发的服务地址。
(1)在服务网关shop-gateway模块的pom.xml文件中继续添加如下依赖。
<dependency>
    <groupId>com.alibaba.cloud</groupId>
    <artifactId>spring-cloud-starter-alibaba-nacos-discovery</artifactId>
</dependency>
(2)在服务网关shop-gateway模块的启动类io.binghe.shop.GatewayStarter上添加@EnableDiscoveryClient注解,如下所示。
/**
 * @author binghe (公众号:冰河技术)
 * @version 1.0.0
 * @description 服务网关启动类
 */
@SpringBootApplication
@EnableDiscoveryClient
public class GatewayStarter {
    public static void main(String[] args){
        SpringApplication.run(GatewayStarter.class, args);
    }
}
(3)将application.yml备份一份,命名为application-simple.yml,并修改application.yml配置文件,修改后的文件如下所示。
server:
  port: 10001
spring:
  application:
    name: server-gateway

  cloud:
    nacos:
      discovery:
        server-addr: 127.0.0.1:8848

    gateway:
      globalcors:
        cors-configurations:
          '[/**]':
            allowedOrigins: "*"
            allowedMethods: "*"
            allowCredentials: true
            allowedHeaders: "*"
      discovery:
        locator:
          enabled: true

      routes:
        - id: user-gateway
          uri: lb://server-user
          order: 1
          predicates:
            - Path=/server-user/**
          filters:
            - StripPrefix=1

        - id: product-gateway
          uri: lb://server-product
          order: 1
          predicates:
            - Path=/server-product/**
          filters:
            - StripPrefix=1

        - id: order-gateway
          uri: lb://server-order
          order: 1
          predicates:
            - Path=/server-order/**
          filters:
            - StripPrefix=1
上述配置中增加了Nacos相关的配置,如下所示。
spring:
  cloud:
    nacos:
      discovery:
        server-addr: 127.0.0.1:8848
新增了让SpringCloud Gateway可以发现Nacos中的服务配置,如下所示。
Spring:
  cloud:
    gateway:
      discovery:
        locator:
          enabled: true
另外,将硬编码的服务转发地址修改成从Nacos中按照名称获取微服务地址,并按照负载均衡策略分发。
- 从Nacos中获取用户微服务
uri: lb://server-user- 从Nacos中获取商品微服务
uri: lb://server-product- 从Nacos中获取订单微服务
uri: lb://server-order其中,lb指的是从Nacos中按照微服务的名称获取微服务地址,并按照负载均衡的策略分发。使用lb从Nacos中获取微服务时,遵循如下的格式。
lb://微服务名称微服务的名称就是各个微服务在application.yml文件中配置的服务名称。
spring:
  application:
    name: 服务名称
(4)分别启动用户微服务、商品微服务、订单微服务和服务网关。
(5)通过服务网关访问用户微服务,在浏览器中输入http://localhost:10001/server-user/user/get/1001,如下所示。
用户微服务返回的原始数据如下所示。
{
  "id": 1001,
  "username": "binghe",
  "password": "c26be8aaf53b15054896983b43eb6a65",
  "phone": "13212345678",
  "address": "北京"
}
可以看到,通过服务网关能够正确访问到用户微服务。
(6)通过服务网关访问商品微服务,在浏览器中输入http://localhost:10001/server-product/product/get/1001,如下所示。

商品微服务返回的原始数据如下所示。
{
  "id": 1001,
  "proName": "华为",
  "proPrice": 2399,
  "proStock": 100
}
可以看到,通过服务网关能够正确访问到商品微服务。
(7)通过服务网关访问订单微服务,在浏览器中输入http://localhost:10001/server-order/order/test_sentinel,如下所示。

可以看到,通过服务网关能够正确访问到订单微服务。
网关整合Nacos最简配置
SpringCloud Gateway整合Nacos后,可以不用手动指定其他微服务的名称来从Nacos中获取微服务的地址。接下来,我们就来实现SpringCloud Gateway网关整合Nacos的最简配置。
(1)将application.yml备份一份,命名为application-nacos.yml,并修改application.yml配置文件,修改后的文件如下所示。
server:
  port: 10001
spring:
  application:
    name: server-gateway

  cloud:
    nacos:
      discovery:
        server-addr: 127.0.0.1:8848

    gateway:
      globalcors:
        cors-configurations:
          '[/**]':
            allowedOrigins: "*"
            allowedMethods: "*"
            allowCredentials: true
            allowedHeaders: "*"
      discovery:
        locator:
          enabled: true
可以看到,在application.yml文件中,去掉了spring.cloud.gateway.routes 节点及其下面的所有配置。
(2)分别启动用户微服务、商品微服务、订单微服务和服务网关。
(3)通过服务网关访问用户微服务,在浏览器中输入http://localhost:10001/server-user/user/get/1001,如下所示。

用户微服务返回的原始数据如下所示。
{
  "id": 1001,
  "username": "binghe",
  "password": "c26be8aaf53b15054896983b43eb6a65",
  "phone": "13212345678",
  "address": "北京"
}
可以看到,通过服务网关能够正确访问到用户微服务。
(4)通过服务网关访问商品微服务,在浏览器中输入http://localhost:10001/server-product/product/get/1001,如下所示。

商品微服务返回的原始数据如下所示。
{
  "id": 1001,
  "proName": "华为",
  "proPrice": 2399,
  "proStock": 100
}
可以看到,通过服务网关能够正确访问到商品微服务。
(5)通过服务网关访问订单微服务,在浏览器中输入http://localhost:10001/server-order/order/test_sentinel,如下所示。

可以看到,通过服务网关能够正确访问到订单微服务。
注意:SpringCloud Gateway整合Nacos最简配置时,通过网关访问微服务的格式如下所示。
http(s)://网关IP:网关端口/访问的目标微服务名称/接口地址网关整合Sentinel限流
Sentinel从1.6.0版本开始,提供了SpringCloud Gateway的适配模块,并且可以提供两种资源维度的限流,一种是route维度;另一种是自定义API分组维度。
- route维度:对application.yml文件中配置的spring.cloud.gateway.routes.id限流,并且资源名为spring.cloud.gateway.routes.id对应的值。
- 自定义API分组维度:利用Sentinel提供的API接口来自定义API分组,并且对这些API分组进行限流。
实现route维度限流
(1)在服务网关shop-gateway模块的pom.xml文件中添加如下依赖。
<dependencies>
    <dependency>
        <groupId>com.alibaba.cloud</groupId>
        <artifactId>spring-cloud-starter-alibaba-sentinel</artifactId>
    </dependency>

    <dependency>
        <groupId>com.alibaba.cloud</groupId>
        <artifactId>spring-cloud-alibaba-sentinel-gateway</artifactId>
    </dependency>

    <dependency>
        <groupId>org.springframework.cloud</groupId>
        <artifactId>spring-cloud-starter-gateway</artifactId>
    </dependency>

    <dependency>
        <groupId>com.alibaba.cloud</groupId>
        <artifactId>spring-cloud-starter-alibaba-nacos-discovery</artifactId>
    </dependency>

    <dependency>
        <groupId>com.alibaba.csp</groupId>
        <artifactId>sentinel-spring-cloud-gateway-adapter</artifactId>
    </dependency>
</dependencies>
(2)在服务网关shop-gateway模块中新建io.binghe.shop.config包,并在包下新建GatewayConfig类。基于Sentinel 的Gateway限流是通过其提供的Filter来完成的,使用时只需注入对应的SentinelGatewayFilter实例以及 SentinelGatewayBlockExceptionHandler 实例即可。
GatewayConfig类的源代码如下所示。
/**
 * @author binghe (公众号:冰河技术)
 * @version 1.0.0
 * @description 网关配置类
 */
@Configuration
public class GatewayConfig {

    private final List<ViewResolver> viewResolvers;

    private final ServerCodecConfigurer serverCodecConfigurer;

    @Value("${spring.cloud.gateway.discovery.locator.route-id-prefix}")
    private String routeIdPrefix;

    public GatewayConfig(ObjectProvider<List<ViewResolver>> viewResolversProvider,
                                ServerCodecConfigurer serverCodecConfigurer) {
        this.viewResolvers = viewResolversProvider.getIfAvailable(Collections::emptyList);
        this.serverCodecConfigurer = serverCodecConfigurer;
    }

    /**
     * 初始化一个限流的过滤器
     */
    @Bean
    @Order(Ordered.HIGHEST_PRECEDENCE)
    public GlobalFilter sentinelGatewayFilter() {
        return new SentinelGatewayFilter();
    }

    @PostConstruct
    public void init() {
       this.initGatewayRules();
       this.initBlockHandlers();
    }

    /**
     * 配置初始化的限流参数
     */
    private void initGatewayRules() {
        Set<GatewayFlowRule> rules = new HashSet<>();

        /**
         * Sentinel整合SpringCloud Gateway使用的API类型为Route ID类型,也就是基于route维度时,
         * 由于Sentinel为SpringCloud Gateway网关生成的API名称规则如下:
         * 生成的规则为:${spring.cloud.gateway.discovery.locator.route-id-prefix}后面直接加上目标微服务的名称,如下所示。
         * ${spring.cloud.gateway.discovery.locator.route-id-prefix}目标微服务的名称
         * 其中,${spring.cloud.gateway.discovery.locator.route-id-prefix}是在yml文件中配置的访问前缀
         *
         * 为了让通过服务网关访问目标微服务链接后,请求链路中生成的API名称与流控规则中生成的API名称一致,以达到启动项目即可实现访问链接的限流效果,
         * 而无需登录Setinel管理界面手动配置限流规则,可以将
         * resource参数设置为${spring.cloud.gateway.discovery.locator.route-id-prefix}目标微服务的名称
         *
         * 当然,如果不按照上述配置,也可以在项目启动后,通过服务网关访问目标微服务链接后,在Sentinel管理界面的请求链路中找到对应的API名称所代表的请求链路,
         * 然后手动配置限流规则。
         **/
//        //用户微服务网关
//        rules.add(this.getGatewayFlowRule("user-gateway"));
//        //商品微服务网关
//        rules.add(this.getGatewayFlowRule("product-gateway"));
//        //订单微服务网关
//        rules.add(this.getGatewayFlowRule("order-gateway"));
        //用户微服务网关
        rules.add(this.getGatewayFlowRule(getResource("server-user")));
        //商品微服务网关
        rules.add(this.getGatewayFlowRule(getResource("server-product")));
        //订单微服务网关
        rules.add(this.getGatewayFlowRule(getResource("server-order")));
        //加载规则
        GatewayRuleManager.loadRules(rules);
    }

    private String getResource(String targetServiceName){
        if (routeIdPrefix == null){
            routeIdPrefix = "";
        }
        return routeIdPrefix.concat(targetServiceName);
    }

    private GatewayFlowRule getGatewayFlowRule(String resource){
        //传入资源名称生成GatewayFlowRule
        GatewayFlowRule gatewayFlowRule = new GatewayFlowRule(resource);
        //限流阈值
        gatewayFlowRule.setCount(1);
        //统计的时间窗口,单位为
        gatewayFlowRule.setIntervalSec(1);
        return gatewayFlowRule;
    }

    /**
     * 配置限流的异常处理器
     */
    @Bean
    @Order(Ordered.HIGHEST_PRECEDENCE)
    public SentinelGatewayBlockExceptionHandler sentinelGatewayBlockExceptionHandler() {
        return new SentinelGatewayBlockExceptionHandler(viewResolvers, serverCodecConfigurer);
    }

    /**
     * 自定义限流异常页面
     */
    private void initBlockHandlers() {
        BlockRequestHandler blockRequestHandler = new BlockRequestHandler() {
            @Override
            public Mono<ServerResponse> handleRequest(ServerWebExchange serverWebExchange, Throwable throwable) {
                Map map = new HashMap<>();
                map.put("code", 1001);
                map.put("codeMsg", "接口被限流了");
                return ServerResponse.status(HttpStatus.OK).
                        contentType(MediaType.APPLICATION_JSON_UTF8).
                        body(BodyInserters.fromObject(map));
            }
        };
        GatewayCallbackManager.setBlockHandler(blockRequestHandler);
    }
}
GatewayConfig类的源代码看上去比较多,但是都是一些非常简单的方法,冰河在这里就不再赘述了。
这里有个需要特别注意的地方:
Sentinel1.8.4整合SpringCloud Gateway使用的API类型为Route ID类型时,也就是基于route维度时,由于Sentinel为SpringCloud Gateway网关生成的API名称规则如下:
生成的规则为:${spring.cloud.gateway.discovery.locator.route-id-prefix}后面直接加上目标微服务的名称,如下所示。
{spring.cloud.gateway.discovery.locator.route-id-prefix}目标微服务的名称。其中,${spring.cloud.gateway.discovery.locator.route-id-prefix}是在yml文件中配置的访问前缀。
为了让通过服务网关访问目标微服务链接后,请求链路中生成的API名称与流控规则中生成的API名称一致,以达到启动项目即可实现访问链接的限流效果,而无需登录Setinel管理界面手动配置限流规则,可以将生成GatewayFlowRule对象的resource参数设置为${spring.cloud.gateway.discovery.locator.route-id-prefix}目标微服务的名称
当然,如果不按照上述配置,也可以在项目启动后,通过服务网关访问目标微服务链接后,在Sentinel管理界面的请求链路中找到对应的API名称所代表的请求链路,然后手动配置限流规则。
(3)将服务网关shop-gateway模块的application.yml文件备份一份名称为application-nacos-simple.yml的文件,并将application.yml文件的内容修改成如下所示。
server:
  port: 10001
spring:
  application:
    name: server-gateway
  main:
    allow-bean-definition-overriding: true
  cloud:
    nacos:
      discovery:
        server-addr: 127.0.0.1:8848
    sentinel:
      transport:
        port: 7777
        dashboard: 127.0.0.1:8888
      web-context-unify: false
      eager: true

    gateway:
      globalcors:
        cors-configurations:
          '[/**]':
            allowedOrigins: "*"
            allowedMethods: "*"
            allowCredentials: true
            allowedHeaders: "*"
      discovery:
        locator:
          enabled: true
route-id-prefix: gateway-- spring.cloud.sentinel.eager表示程序启动时,流控规则是否立即注册到Sentinel,配置为true表示立即注册到Sentinel。
- spring.cloud.gateway.discovery.locator.route-id-prefix:生成流控规则API名称的前缀。
(4)在IDEA中配置启动服务网关shop-gateway模块的参数-Dcsp.sentinel.app.type=1,如下所示。
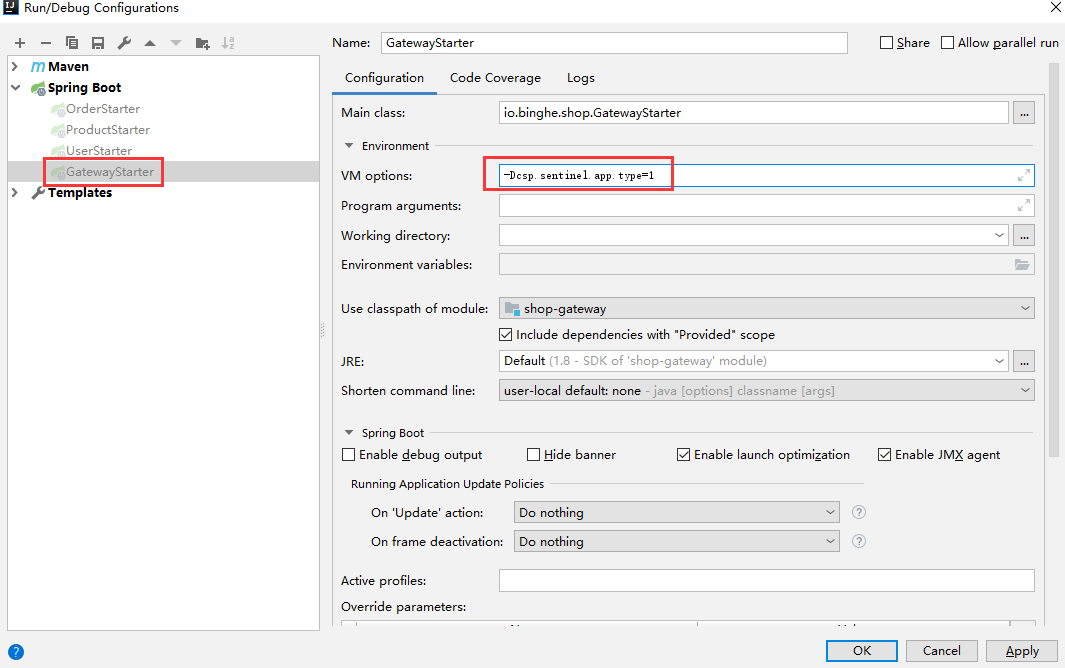
如果是在命令行启动网关服务的Jar包,则可以使用如下命令。
java -Dcsp.sentinel.app.type=1 shop-gateway.jar或者在启动类io.binghe.shop.GatewayStarter的main()方法中添加一行System.setProperty("csp.sentinel.app.type", "1");代码,如下所示。
/**
* @author binghe (公众号:冰河技术)
* @version 1.0.0
* @description 服务网关启动类
*/
@SpringBootApplication
@EnableDiscoveryClient
public class GatewayStarter {
public static void main(String[] args){
System.setProperty("csp.sentinel.app.type", "1");
SpringApplication.run(GatewayStarter.class, args);
}
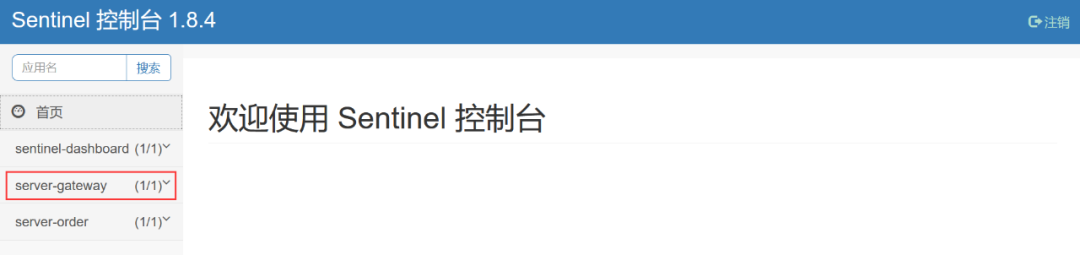
}(5)分别启动用户微服务、商品微服务、订单微服务和服务网关,启动后会在Sentinel管理界面左侧菜单栏中看到server-gateway菜单,如下所示。
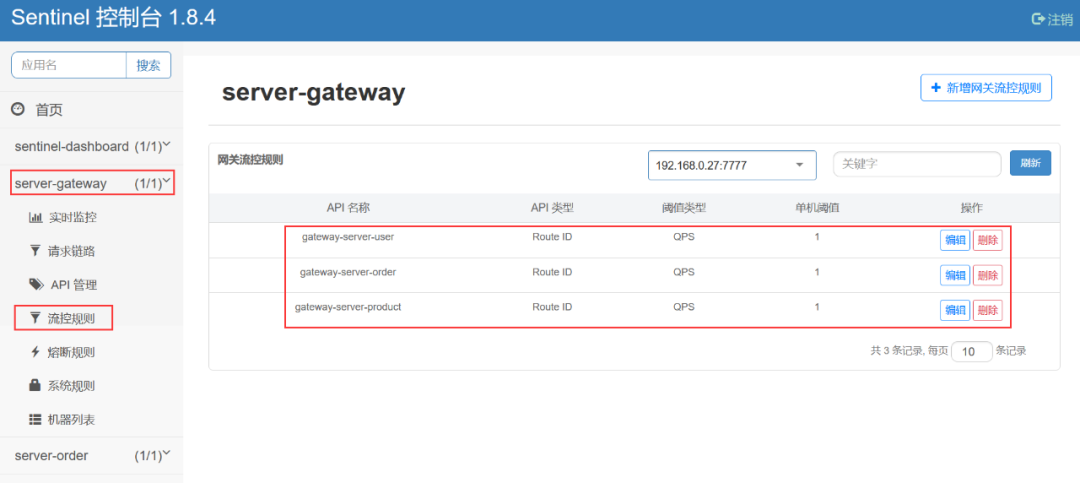
在server-gateway菜单下的流控规则子菜单中可以看到网关的流控规则已经注册到Sentinel,如下所示。
(6)通过服务网关访问用户微服务,在浏览器中输入http://localhost:10001/server-user/user/get/1001,不断刷新页面,如下所示。
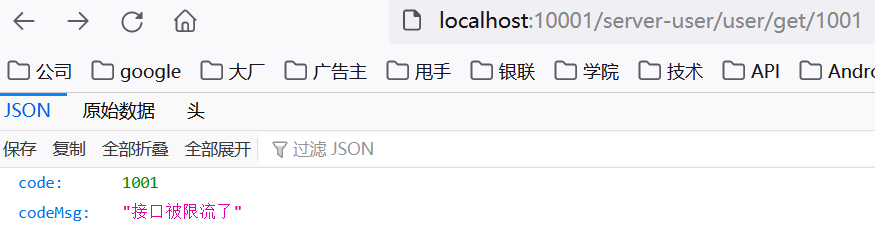
用户微服务返回的原始数据如下所示。
{
  "code": 1001,
  "codeMsg": "接口被限流了"
}
可以看到,通过服务网关不断刷新用户微服务时,触发了服务限流,并返回了自定义的限流结果数据。
(7)通过服务网关访问商品微服务,在浏览器中输入http://localhost:10001/server-product/product/get/1001,不断刷新页面,如下所示。
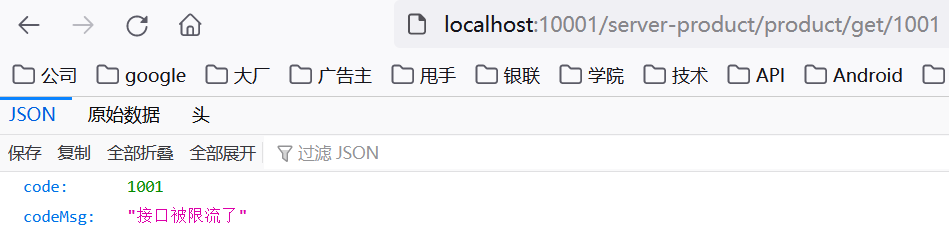
商品微服务返回的原始数据如下所示。
{
  "code": 1001,
  "codeMsg": "接口被限流了"
}
可以看到,通过服务网关不断刷新商品微服务时,触发了服务限流,并返回了自定义的限流结果数据。
(8)通过服务网关访问订单微服务,在浏览器中输入http://localhost:10001/server-order/order/test_sentinel,不断刷新页面,如下所示。
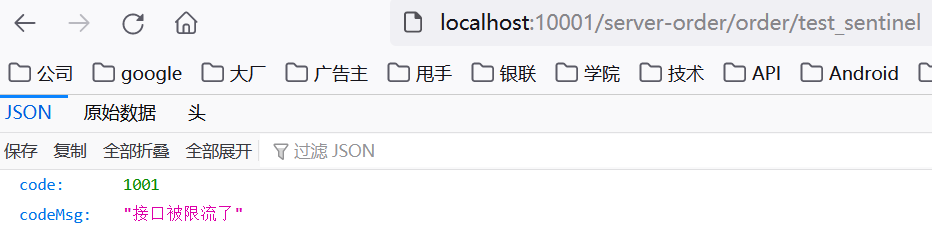
可以看到,通过服务网关不断刷新订单微服务时,触发了服务限流,并返回了自定义的限流结果数据。
实现自定义API分组维度限流
前面,我们实现了route维度的限流,接下来,我们再基于Sentinel与SpringCloud gateway实现自定义API分组维度的限流。
(1)在服务网关shop-gateway模块的io.binghe.shop.config.GatewayConfig配置类中新增initCustomizedApis()方法,初始化API管理的信息,源码如下所示。
private void initCustomizedApis() {
    Set<ApiDefinition> definitions = new HashSet<>();
    ApiDefinition api1 = new ApiDefinition("user_api1")
        .setPredicateItems(new HashSet<ApiPredicateItem>() {{
            // 以/server-user/user/api1 开头的请求
            add(new ApiPathPredicateItem().setPattern("/server-user/user/api1/**").
                setMatchStrategy(SentinelGatewayConstants.URL_MATCH_STRATEGY_PREFIX));
        }});
    ApiDefinition api2 = new ApiDefinition("user_api2")
        .setPredicateItems(new HashSet<ApiPredicateItem>() {{
            // 以/server-user/user/api2/demo1 完成的url路径匹配
            add(new ApiPathPredicateItem().setPattern("/server-user/user/api2/demo1"));
        }});
    definitions.add(api1);
    definitions.add(api2);
    GatewayApiDefinitionManager.loadApiDefinitions(definitions);
}
上述代码中,配置了两个API分组,每个API分组的规则如下。
- user_api1分组:匹配以/product-serv/product/api1开头的所有请求。
- user_api2分组:精确匹配/server-user/user/api2/demo1。
(2)在服务网关shop-gateway模块的io.binghe.shop.config.GatewayConfig配置类中init()方法中调用initCustomizedApis()方法,为了避免route维度的限流对自定义API分组维度的限流产生影响,这里,同时在init()方法中注释掉调用initGatewayRules()方法,修改后的init()方法的代码如下所示。
@PostConstruct
public void init() {
    //this.initGatewayRules();
    this.initBlockHandlers();
    this.initCustomizedApis();
}
(3)在用户微服务shop-user的io.binghe.shop.user.controller.UserController类中新增四个测试接口,源码如下所示。
@GetMapping(value = "/api1/demo1")
public String api1Demo1(){
log.info("访问了api1Demo1接口");
return "api1Demo1";
}
@GetMapping(value = "/api1/demo2")
public String api1Demo2(){
log.info("访问了api1Demo2接口");
return "api1Demo2";
}
@GetMapping(value = "/api2/demo1")
public String api2Demo1(){
log.info("访问了api2Demo1接口");
return "api2Demo1";
}
@GetMapping(value = "/api2/demo2")
public String api2Demo2(){
log.info("访问了api2Demo2接口");
return "api2Demo2";
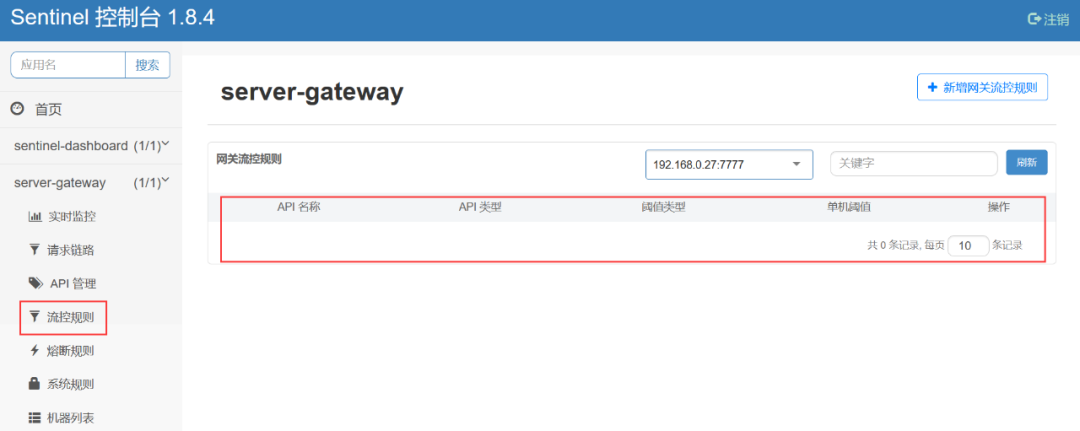
}(4)分别启动用户微服务、商品微服务、订单微服务和服务网关,启动后会在Sentinel管理界面左侧菜单栏中看到server-gateway菜单,如下所示。

此时,由于我们注释了调用以route维度限流的方法,所以,在流控规则里的限流规则为空,如下所示。
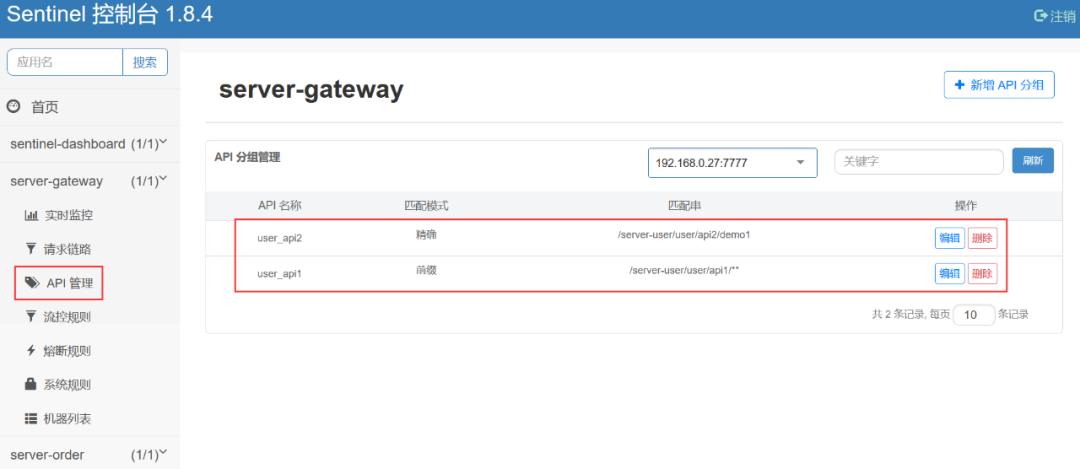
在API管理里面会发现我们定义的API分组已经自动注册到Sentinel中了,如下所示。
(5)在Sentinel管理界面的流控规则中,新增网关流控规则,如下所示。
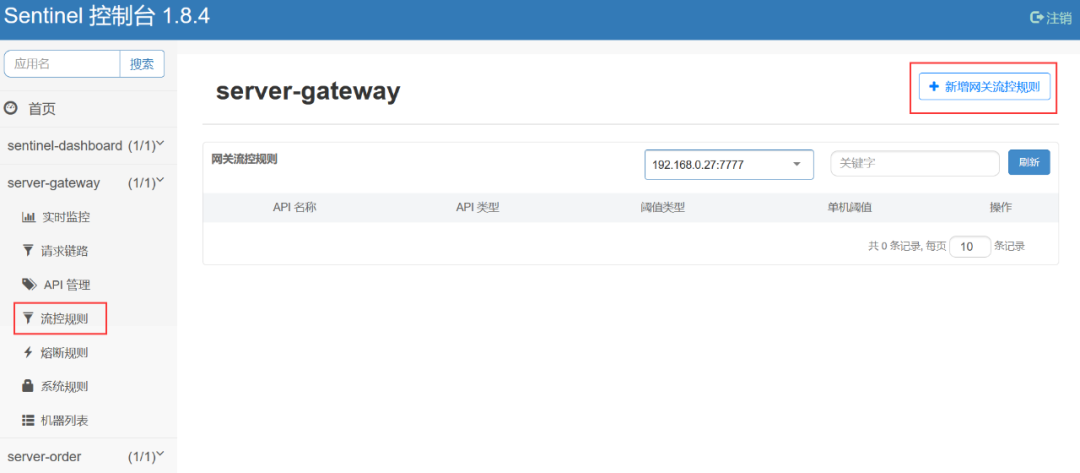
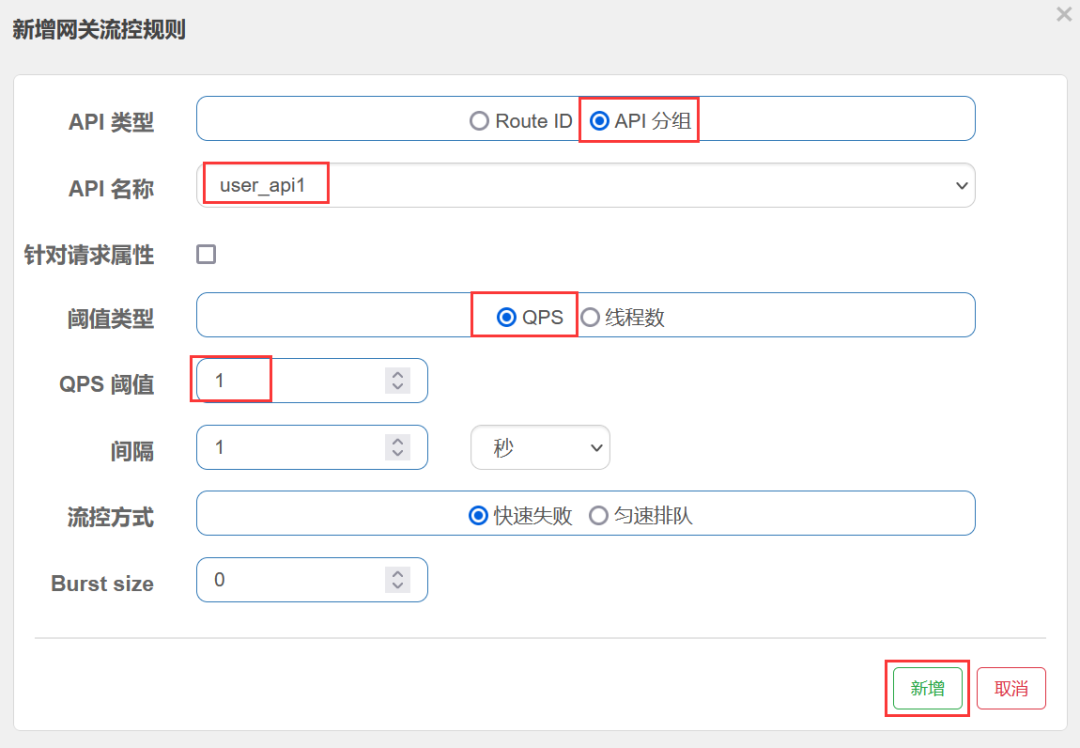
点击新增网关流控规则后,会弹出新增网关流控规则配置框,按照如下方式为user_api1分组配置限流规则。
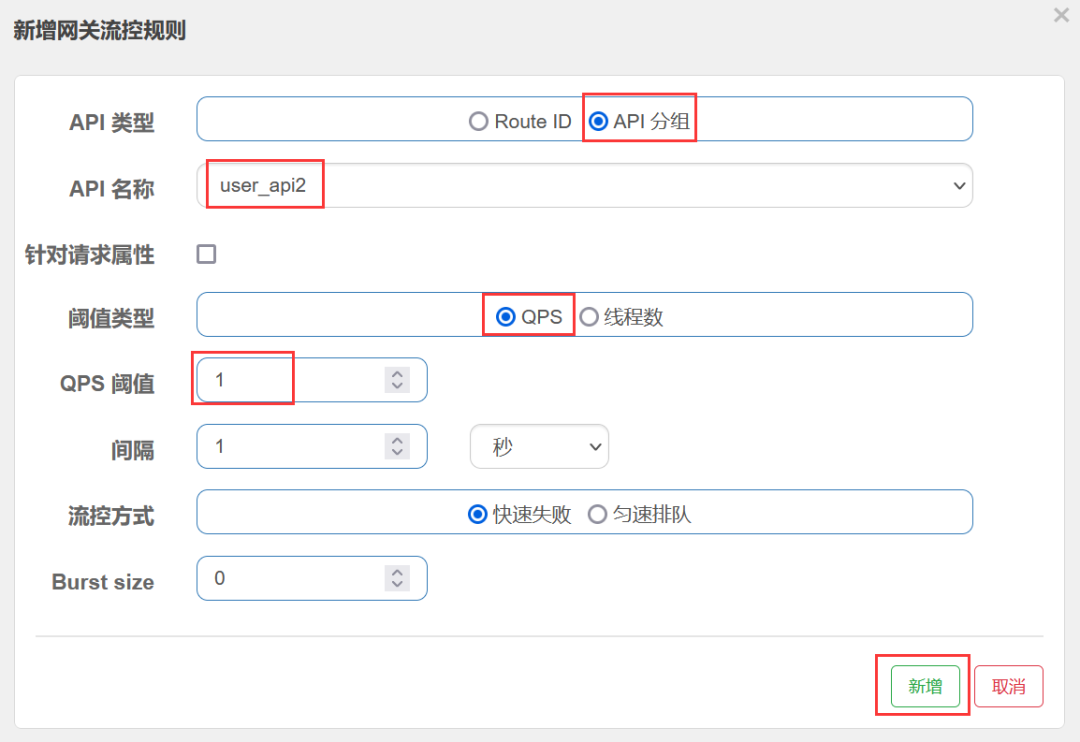
点击新增按钮后,按照同样的方式为user_api2分组配置限流规则。
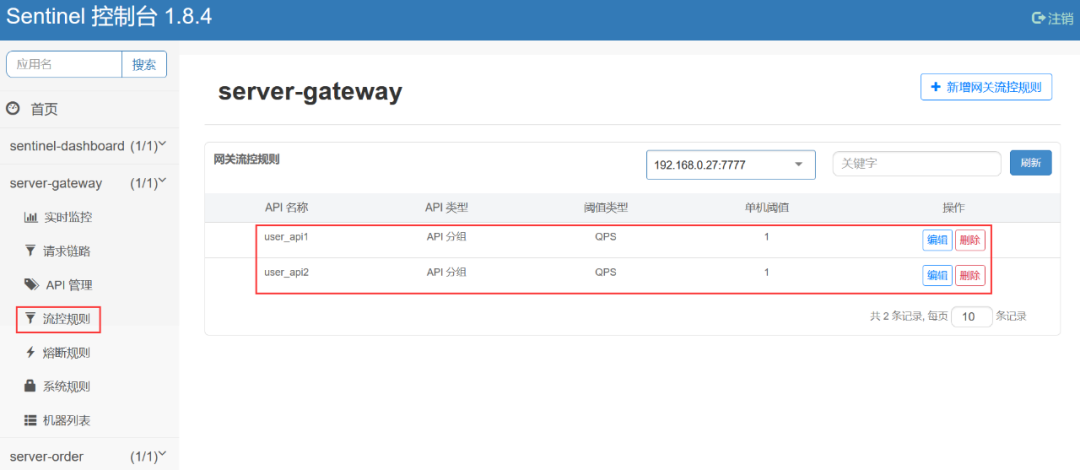
配置完毕后,在流控规则中的限流规则如下所示。
(6)预期的测试结果如下。
- 当频繁访问http://localhost:10001/server-user/user/api1/demo1时会被限流。
- 当频繁访问http://localhost:10001/server-user/user/api1/demo2时会被限流。
- 当频繁访问http://localhost:10001/server-user/user/api2/demo1时会被限流。
- 当频繁访问http://localhost:10001/server-user/user/api2/demo2时不会被限流。
注意:只有最后一个不会被限流。
(7)在浏览器上频繁访问http://localhost:10001/server-user/user/api1/demo1,如下所示。
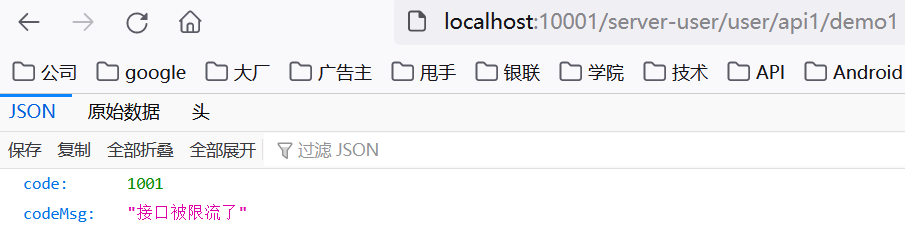
返回的原始数据如下所示。
{
  "code": 1001,
  "codeMsg": "接口被限流了"
}
说明触发了服务限流,并返回了自定义的限流结果数据。
(8)在浏览器上频繁访问http://localhost:10001/server-user/user/api1/demo2,如下所示。
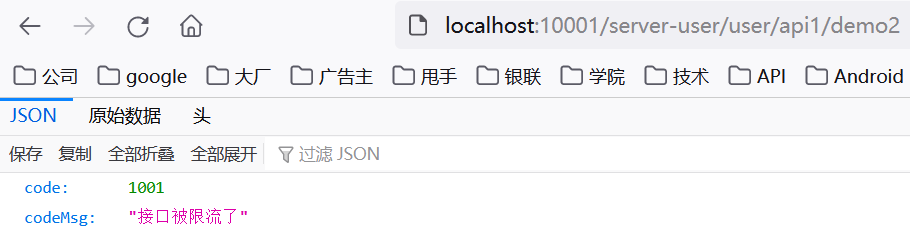
返回的原始数据如下所示。
{
  "code": 1001,
  "codeMsg": "接口被限流了"
}
说明触发了服务限流,并返回了自定义的限流结果数据。
(9)在浏览器上频繁访问http://localhost:10001/server-user/user/api2/demo1,如下所示。
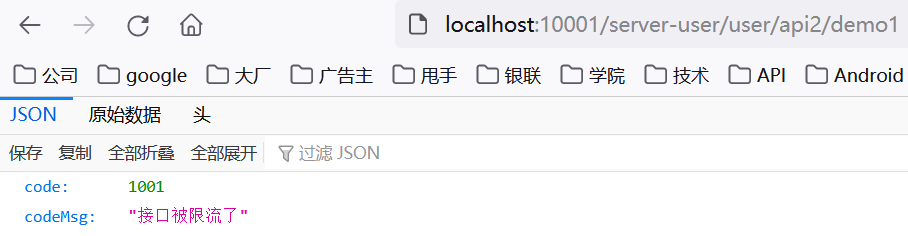
返回的原始数据如下所示。
{
  "code": 1001,
  "codeMsg": "接口被限流了"
}
说明触发了服务限流,并返回了自定义的限流结果数据。
(10)在浏览器上频繁访问http://localhost:10001/server-user/user/api2/demo2,如下所示。

可以看到,访问http://localhost:10001/server-user/user/api2/demo2时,无论访问的频率多频繁,都不会触发Sentinel限流。
至此,我们就成功在项目中整合了SpringCloud Gateway网关,并通过Sentinel整合SpringCloud Gateway实现了网关的限流操作。
Recommend
About Joyk
Aggregate valuable and interesting links.
Joyk means Joy of geeK