

nginx + ModSecurity 搭建WAF 基于Ubuntu20.04
source link: https://jason1314zhang.github.io/blog/nginx-ModSecurity-%E6%90%AD%E5%BB%BAWAF-Ubuntu-20-04/
Go to the source link to view the article. You can view the picture content, updated content and better typesetting reading experience. If the link is broken, please click the button below to view the snapshot at that time.
0x00 背景
这段时间参加了字节跳动安全风控部门的训练营,6人一组对含有漏洞的WEB应用进行渗透测试。渗透测试后搭建WAF对vul WEB应用进行防护。
网上关于CentOS搭建ModSecurity WAF的文章比较多,这里我记录一下 Ubuntu 20.04 + Apache + nginx + ModSecurity实现简单的WAF功能
ModSecurity
0x01 环境准备
安装相关依赖sudo apt install gcc g++ make build-essential autoconf automake libtool gettext pkg-config libpcre3 libpcre3-dev libxml2 libxml2-dev libcurl4 libgeoip-dev libyajl-dev doxygen
0x02 安装ModSecurity模块
这里安装的是ModSecurity v3版本,不依赖于Apache服务器
cd /usr/local/src
sudo git clone --depth 1 -b v3/master --single-branch https://github.com/SpiderLabs/ModSecurity
cd ModSecurity/
sudo git submodule init      # 初始化子模块
sudo git submodule update    # 更新子模块
sudo ./build.sh
sudo ./configure
sudo make
sudo make install
git clone过慢可以选择Github镜像站,子模块update时无法直接修改Github镜像源,可以查看.gitmodules文件,手动git clone子模块到指定文件夹。
[submodule "test/test-cases/secrules-language-tests"]
        path = test/test-cases/secrules-language-tests
        url = https://github.com/SpiderLabs/secrules-language-tests
[submodule "others/libinjection"]
        path = others/libinjection
        url = https://github.com/libinjection/libinjection.git
[submodule "bindings/python"]
        path = bindings/python
        url = https://github.com/SpiderLabs/ModSecurity-Python-bindings.git
0x03 安装nginx服务器
安装依赖sudo apt install zlib1g zlib1g-dev openssl openssl-dev
安装nginx
cd /usr/local/src/
sudo wget http://nginx.org/download/nginx-1.16.1.tar.gz
sudo tar zxvf nginx-1.16.1.tar.gz
cd nginx-1.16.1
sudo ./configure  --with-http_stub_status_module --with-http_ssl_module
sudo make
sudo make install
给nginx创建软链接ln -s /usr/local/nginx/sbin/nginx /usr/bin/nginx
查看nginx是否安装成功nginx -v
0x04 安装ModSecurity-nginx连接器
cd /usr/local/src
sudo git clone --depth 1 https://github.com/SpiderLabs/ModSecurity-nginx.git
cd ModSecurity/
sudo ./configure --with-http_stub_status_module  --with-http_ssl_module --add-dynamic-module=../ModSecurity-nginx
sudo make modules
/usr/local/nginx/modules目录会生成ngx_http_modsecurity_module.so文件,然后在nginx配置文件首行添加load_module /usr/local/nginx/modules/ngx_http_modsecurity_module.so;
0x05 配置OWASP CRS规则
在/usr/local/nginx创建modsec配置文件路径,将ModSecurity自身配置文件复制到modsec文件夹
sudo cp /usr/local/src/ModSecurity/modsecurity.conf-recommended /usr/local/nginx/modsec/modsecurity.confsudo cp /usr/local/src/ModSecurity/unicode.mapping /usr/local/nginx/modsec/
修改modsecurity.conf文件的内容SecRuleEngine DetectionOnly为SecRuleEngine On
在modsec文件夹创建main.conf,在该文件填入Include ./modsecurity.conf
下载OWASP CRS规则
cd modsec
sudo git clone https://github.com/SpiderLabs/owasp-modsecurity-crs.git
cd owasp-modsecurity-crs
sudo cp crs-setup.conf.example  crs-setup.conf
修改modsec下主配置文件main.conf,加入下列内容,将owasp的规则库加入main.conf
Include ./owasp-modsecurity-crs/crs-setup.conf
Include ./owasp-modsecurity-crs/rules/*.conf
0x06 测试nginx与ModSecurity的WAF效果
在ngnix.conf文件的http{}中加入以下内容
modsecurity on;
modsecurity_rules_file /usr/local/nginx/modsec/main.conf;
设置nginx端口为80,Apache端口为8000
输入恶意url:http://server_ip:80/?
没有开启WAF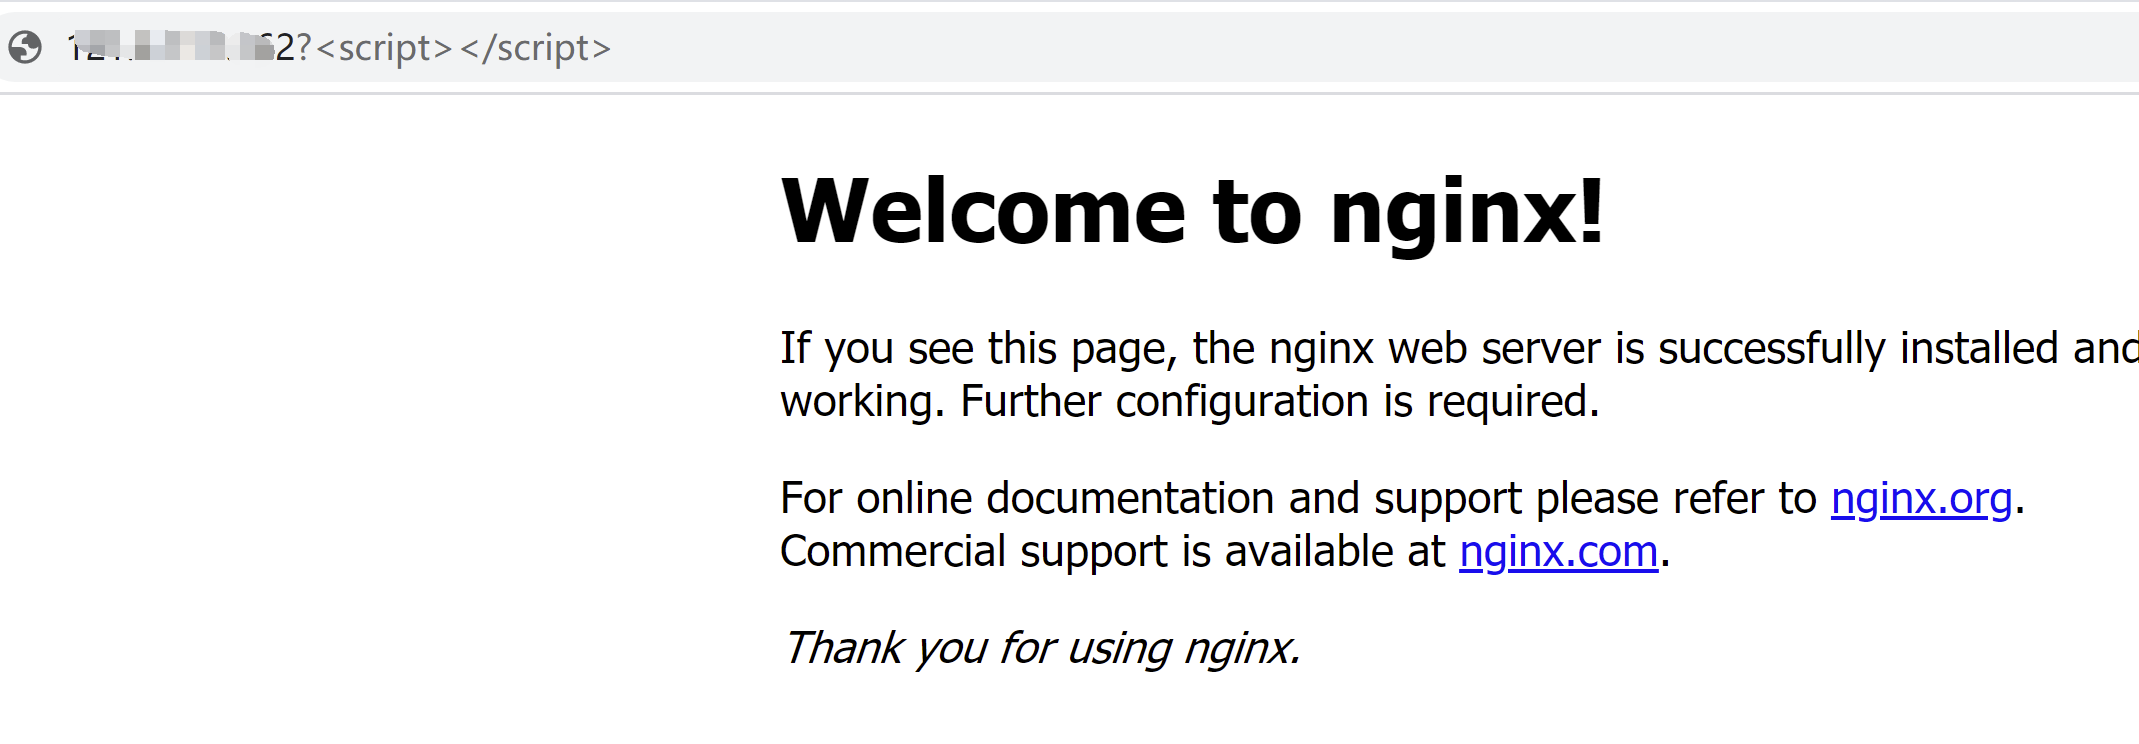
开启WAF状态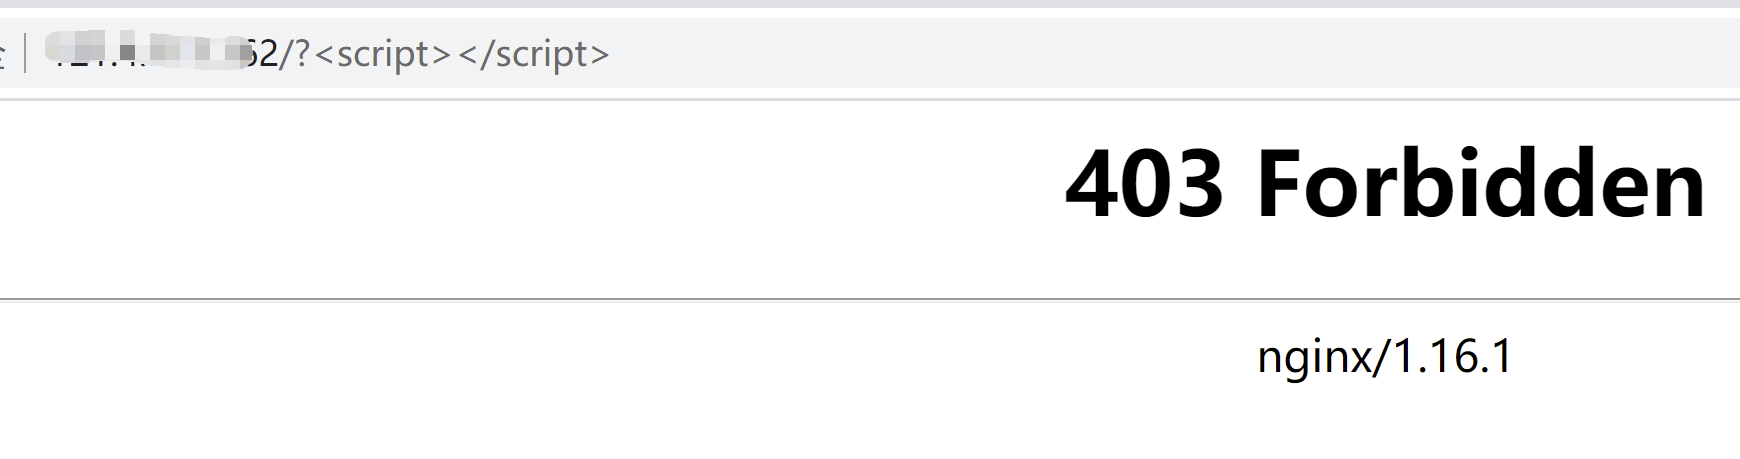
0x07 nginx作为反向代理WAF(待完善)
设置nginx端口为80,Apache端口为8000
让nginx作为反向代理WAF,恶意流量不放行,正常流量转发到Apache服务器8000端口
修改ngnix.conf文件中http模块内容,添加几台实际应用服务器负载均衡。
upstream webservers{
        server your_server1_ip:port;
        server your_server2_ip:port;
}
然后修改http模块中的server模块,添加重定向模块
location / {
        proxy_pass http:webservers;
}
如果直接访问服务器80端口的ngnix,请求将被转发到8000端口的Apache服务器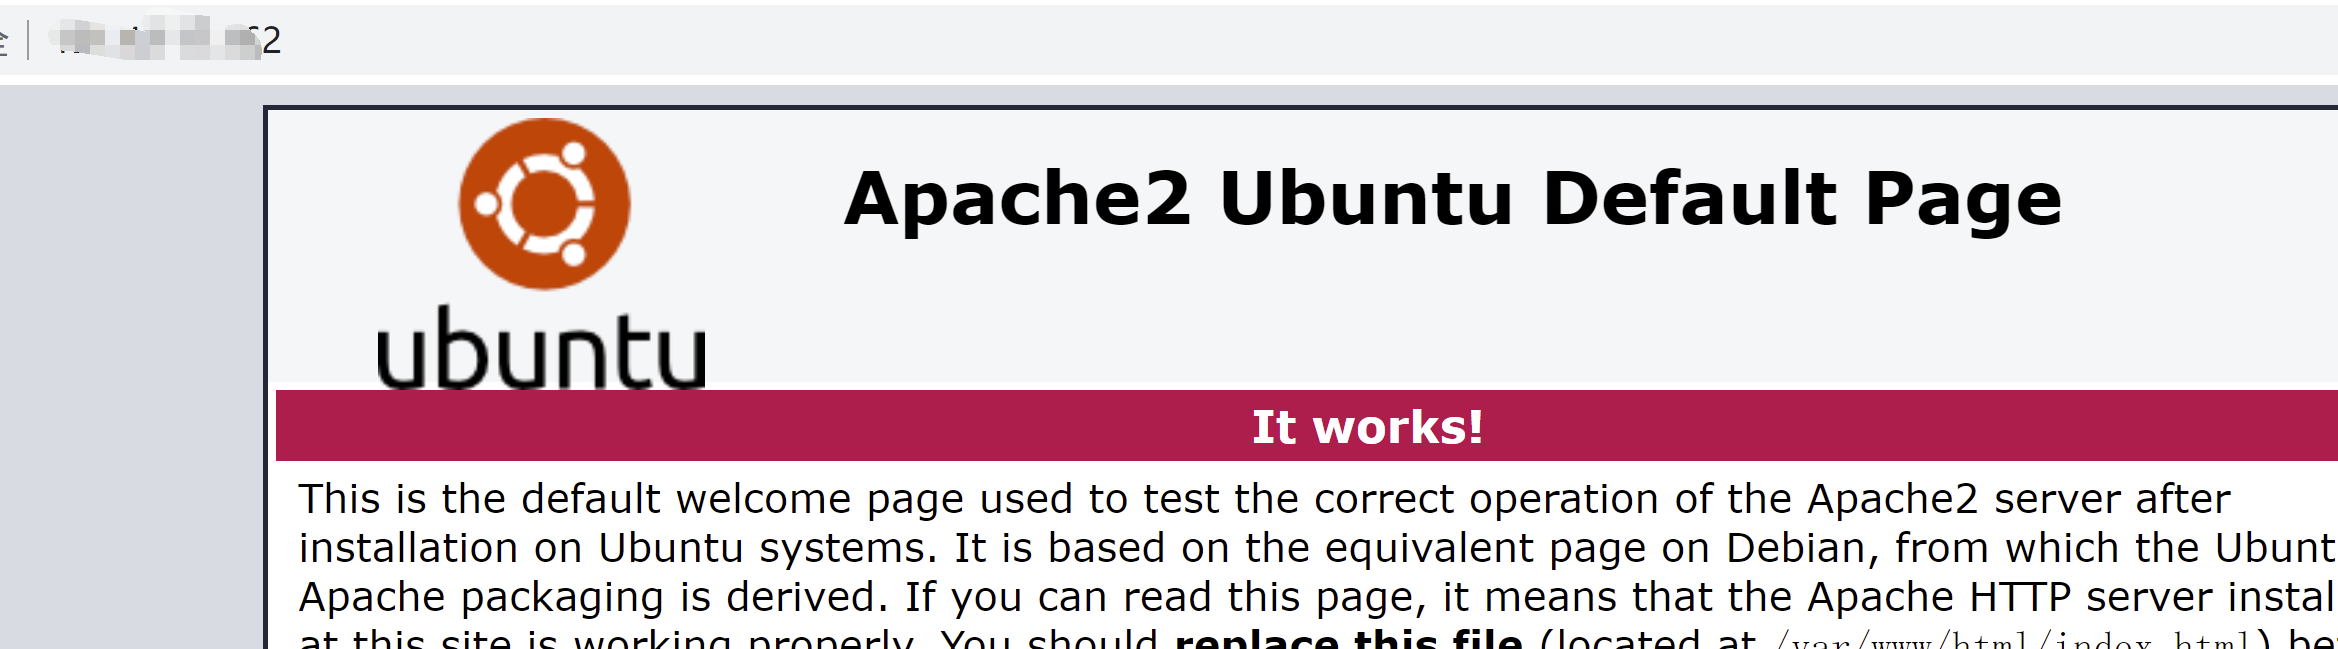
攻击者的对80端口发起的恶意请求会被拦截
将nginx作为反向代理服务器,同时作为WAF,为后端应用服务器提供负载均衡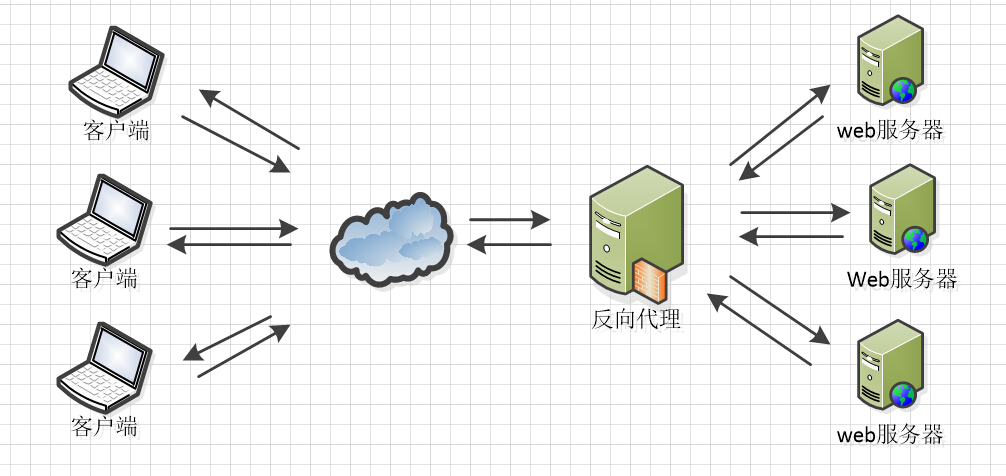
这样可以只给外网开放一个端口(例如80),从而保护内网其他应用服务器的安全(减少攻击面)
https://www.linuxbabe.com/security/modsecurity-nginx-debian-ubuntu
Recommend
About Joyk
Aggregate valuable and interesting links.
Joyk means Joy of geeK