

jackson学习之十(终篇):springboot整合(配置类)_Java web_程序员欣宸_InfoQ写作平台
source link: https://xie.infoq.cn/article/b5cbb127853d765507d9ba3c2
Go to the source link to view the article. You can view the picture content, updated content and better typesetting reading experience. If the link is broken, please click the button below to view the snapshot at that time.

jackson 学习之十 (终篇):springboot 整合 (配置类)
- 2022 年 4 月 15 日
本文字数:4194 字
阅读完需:约 14 分钟
欢迎访问我的 GitHub
这里分类和汇总了欣宸的全部原创(含配套源码):https://github.com/zq2599/blog_demos
本文是《jackson 学习》系列的终篇,经过前面的一系列实战,相信您已可以熟练使用 jackson 灵活的执行各种 json 序列化和反序列化操作,那么,本篇就以轻松的方式来完成整个系列吧;
上一篇介绍的是在 springboot 中通过配置文件对 jackson 做设置,今天要聊的是另一种常用的 jackson 配置方式:配置类,就是自己编写代码实例化和配置 springboot 全局使用的 ObjectMapper 实例;
如果您不想编码,可以在 GitHub 下载所有源码,地址和链接信息如下表所示(https://github.com/zq2599/blog_demos):

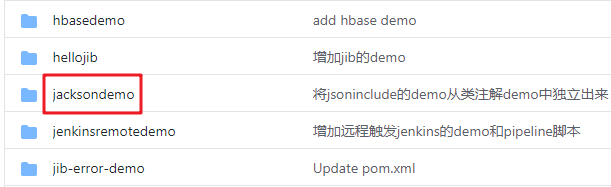
这个 git 项目中有多个文件夹,本章的应用在 jacksondemo 文件夹下,如下图红框所示:
jacksondemo 是父子结构的工程,本篇的代码在 springbootconfigbean 子工程中,如下图:

在父工程 jacksondemo 下新增子工程 springbootconfigbean,pom.xml 如下:
<?xml version="1.0" encoding="UTF-8"?><project xmlns="http://maven.apache.org/POM/4.0.0" xmlns:xsi="http://www.w3.org/2001/XMLSchema-instance"xsi:schemaLocation="http://maven.apache.org/POM/4.0.0 https://maven.apache.org/xsd/maven-4.0.0.xsd"><modelVersion>4.0.0</modelVersion><parent><artifactId>jacksondemo</artifactId><groupId>com.bolingcavalry</groupId><version>1.0-SNAPSHOT</version><relativePath>../pom.xml</relativePath></parent><groupId>com.bolingcavalry</groupId><artifactId>springbootconfigbean</artifactId><version>0.0.1-SNAPSHOT</version><name>springbootconfigbean</name><description>Demo project for Spring Boot with Jackson, configuration from config bean</description><properties><java.version>1.8</java.version></properties><!--不用spring-boot-starter-parent作为parent时的配置--><dependencyManagement><dependencies><dependency><groupId>org.springframework.boot</groupId><artifactId>spring-boot-dependencies</artifactId><version>2.3.3.RELEASE</version><type>pom</type><scope>import</scope></dependency></dependencies></dependencyManagement><dependencies><dependency><groupId>org.springframework.boot</groupId><artifactId>spring-boot-starter-web</artifactId></dependency><dependency><groupId>org.springframework.boot</groupId><artifactId>spring-boot-starter-test</artifactId><scope>test</scope><exclusions><exclusion><groupId>org.junit.vintage</groupId><artifactId>junit-vintage-engine</artifactId></exclusion></exclusions></dependency><!-- swagger依赖 --><dependency><groupId>io.springfox</groupId><artifactId>springfox-swagger2</artifactId></dependency><!-- swagger-ui --><dependency><groupId>io.springfox</groupId><artifactId>springfox-swagger-ui</artifactId></dependency></dependencies><build><plugins><plugin><groupId>org.springframework.boot</groupId><artifactId>spring-boot-maven-plugin</artifactId></plugin></plugins></build></project>
本文最重要的代码是配置类 JacksonConfig.java,如下,需要 ConditionalOnMissingBean 注解避免冲突,另外还给实例指定了名称 customizeObjectMapper,如果应用中通过 Autowired 使用此实例,需要指定这个名字,避免报错"There is more than one bean of 'ObjectMapper ' type":
@Configurationpublic class JacksonConfig {@Bean("customizeObjectMapper")@Primary@ConditionalOnMissingBean(ObjectMapper.class)public ObjectMapper getObjectMapper(Jackson2ObjectMapperBuilder builder) {ObjectMapper mapper = builder.build();// 日期格式mapper.setDateFormat(new SimpleDateFormat("yyyy-MM-dd hh:mm:ss"));// 美化输出mapper.enable(SerializationFeature.INDENT_OUTPUT);return mapper;}}
对于 JacksonConfig.getObjectMapper 方法内的设置,如果您想做更多设置,请参考《jackson学习之三:常用API操作》里面的设置内容;
启动类依然很简单:
package com.bolingcavalry.springbootconfigbean;import org.springframework.boot.SpringApplication;import org.springframework.boot.autoconfigure.SpringBootApplication;@SpringBootApplicationpublic class SpringbootConfigBeanApplication {public static void main(String[] args) {SpringApplication.run(SpringbootConfigBeanApplication.class, args);}}
swagger 配置:
package com.bolingcavalry.springbootconfigbean;import org.springframework.context.annotation.Bean;import org.springframework.context.annotation.Configuration;import springfox.documentation.builders.ApiInfoBuilder;import springfox.documentation.builders.PathSelectors;import springfox.documentation.builders.RequestHandlerSelectors;import springfox.documentation.service.ApiInfo;import springfox.documentation.service.Contact;import springfox.documentation.service.Tag;import springfox.documentation.spi.DocumentationType;import springfox.documentation.spring.web.plugins.Docket;import springfox.documentation.swagger2.annotations.EnableSwagger2;@Configuration@EnableSwagger2public class SwaggerConfig {@Beanpublic Docket createRestApi() {return new Docket(DocumentationType.SWAGGER_2).apiInfo(apiInfo()).tags(new Tag("JsonPropertySerializationController", "JsonProperty相关测试")).select()// 当前包路径.apis(RequestHandlerSelectors.basePackage("com.bolingcavalry.springbootconfigbean.controller")).paths(PathSelectors.any()).build();}//构建 api文档的详细信息函数,注意这里的注解引用的是哪个private ApiInfo apiInfo() {return new ApiInfoBuilder()//页面标题.title("SpringBoot整合Jackson(基于配置文件)")//创建人.contact(new Contact("程序员欣宸", "https://github.com/zq2599/blog_demos", "[email protected]"))//版本号.version("1.0")//描述.description("API 描述").build();}}
最后是测试用的 Controller 类,要注意的是在使用 ObjectMapper 实例的地方,用 Autowired 注解的时候,记得带上 Qualifier 注解:
package com.bolingcavalry.springbootconfigbean.controller;import com.bolingcavalry.springbootconfigbean.bean.Test;import com.fasterxml.jackson.core.JsonProcessingException;import com.fasterxml.jackson.databind.ObjectMapper;import io.swagger.annotations.Api;import io.swagger.annotations.ApiOperation;import org.slf4j.Logger;import org.slf4j.LoggerFactory;import org.springframework.beans.factory.annotation.Autowired;import org.springframework.beans.factory.annotation.Qualifier;import org.springframework.web.bind.annotation.RequestBody;import org.springframework.web.bind.annotation.RequestMapping;import org.springframework.web.bind.annotation.RequestMethod;import org.springframework.web.bind.annotation.RestController;@RestController@RequestMapping("/jsonproperty")@Api(tags = {"JsonPropertySerializationController"})public class JsonPropertySerializationController {private static final Logger logger = LoggerFactory.getLogger(JsonPropertySerializationController.class);@Qualifier("customizeObjectMapper")@AutowiredObjectMapper mapper;@ApiOperation(value = "测试序列化", notes = "测试序列化")@RequestMapping(value = "/serialization", method = RequestMethod.GET)public Test serialization() throws JsonProcessingException {Test test = new Test();logger.info(mapper.writeValueAsString(test));return test;}@ApiOperation(value = "测试反序列化", notes="测试反序列化")@RequestMapping(value = "/deserialization",method = RequestMethod.PUT)public String deserialization(@RequestBody Test test) {return test.toString();}}
启动 SpringbootConfigBeanApplication 后,浏览器打开:http://localhost:8080/swagger-ui.html
先验证序列化接口/jsonproperty/serialization:
再验证反序列化接口 /jsonproperty/deserialization:


至此,整个《jackson 学习》系列就全部完成了,希望这十篇内容能够给您带来一些参考,助您在编码过程中更加得心应手的使用 Jackson;
欢迎关注 InfoQ:程序员欣宸
版权声明: 本文为 InfoQ 作者【程序员欣宸】的原创文章。
原文链接:【https://xie.infoq.cn/article/b5cbb127853d765507d9ba3c2】。文章转载请联系作者。

程序员欣宸
搜索"程序员欣宸",一起畅游Java宇宙 2018.04.19 加入
前腾讯、前阿里员工,从事Java后台工作,对Docker和Kubernetes充满热爱,所有文章均为作者原创,个人Github:https://github.com/zq2599/blog_demos
Recommend
About Joyk
Aggregate valuable and interesting links.
Joyk means Joy of geeK