

面试官 -- 跨域请求如何携带 Cookie ?
source link: https://developer.51cto.com/article/705516.html
Go to the source link to view the article. You can view the picture content, updated content and better typesetting reading experience. If the link is broken, please click the button below to view the snapshot at that time.

最近在参加面试找工作,陆陆续续的面了两三家。其中面试官问到了一个问题:如何解决跨域问题?我巴巴拉拉的一顿说,大概了说了四种方法,然后面试官紧接着又问:那跨域请求怎么携带cookie呢?(常规的面试套路,一般都会顺着你的回答往深了问)由于之前的项目都是同源的,不牵涉跨域访问,所以一时没有回答出来,后来研究了下,所以有了这篇文章。
阅读本文,你将学到:
1.学会`withCredentials`属性;
2.学会`axios`配置`withCredentials`;
3.学会设置`Access-Control-Allow-Origin`属性;
4.学会设置`Access-Control-Allow-Credentials`属性;
5.学会解决跨域请求携带源站cookie的问题
一. 搭建一个跨域请求的环境
- 使用express搭建第一个服务A(http://localhost:8000),运行在8000端口上;
- A服务托管index.html(用于在前端页面发送网络请求)文件;
- 在A服务中写一个处理请求的路由,加载index.html页面时,种下cookie(这里种cookie为了在请求B服务时携带上);
- 使用express搭建第二个服务B(http://localhost:8003),运行在8003端口上;
- 在A服务托管的index.html页面去请求B服务,然后把cookie传过去;
先看下代码结构,相对比较的简单:
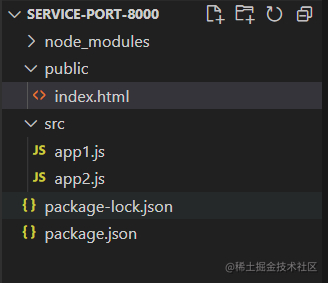
A服务的代码:
// src/app1.js
const express = require("express");
const app = express();
// `index.html` 加载时会请求login接口
// 设置`cookie`
app.get("/login", (req, res) => {
  res.cookie("user", "jay", { maxAge: 2000000, httpOnly: true });
  res.json({ code: 0, message: "登录成功" });
});

// 此接口是检测`cookie`是否设置成功,如果设置成功的话,浏览器会自动携带上`cookie`
app.get("/user", (req, res) => {
  // req.headers.cookie: user=jay
  const user = req.headers.cookie.split("=")[1];
  res.json({ code: 0, user });
});

// 托管`index.html`页面
// 这样的话在`index.html`中发起的请求,默认的源就是`http://localhost:8000`
// 然后再去请求`http://localhost:8003`就会出现跨域了
app.use("/static", express.static("public"));
app.listen("8000", () => {
  console.log("app1 running at port 8000");
});
index.html的代码:
<!DOCTYPE html>
<html lang="en">
  <head>
    <meta charset="UTF-8" />
    <met
    <meta name="viewport" content="width=device-width, initial-scale=1.0" />
    <title>Document</title>
  </head>
  <body>
    <h2>this is index.html at port 8000</h2>
    <button id="button">发送同源请求</button>
    <button id="cross-button">发送跨域请求</button>
    <script src="https://cdn.jsdelivr.net/npm/axios/dist/axios.min.js"></script>
    <script>
      const button = document.querySelector("#button");
      const crossButton = document.querySelector("#cross-button");
      axios.get("http://localhost:8000/login", {}).then((res) => {
        console.log(res);
      });
      // 发送同域请求
      button.onclick = function () {
        axios.get("http://localhost:8000/user", {}).then((res) => {
          console.log(res);
        });
      };
      // 发送跨域请求
      crossButton.onclick = function () {
        axios({
          method: "get",
          url: "http://localhost:8003/anotherService",
        }).then((res) => {
          console.log(res);
        });
      };
    </script>
  </body>
</html>
B服务的代码:
// src/app2.js
const express = require("express");
const app = express();
// 定义一个接口,index.html页面请求这个接口就是跨域(因为端口不同)
app.get("/anotherService", (req, res) => {
  res.json({ code: 0, msg: "这是8003端口返回的" });
});
app.listen("8003", () => {
  console.log("app2 running at port 8003");
});
这个时候环境基本就搭建好了。
二、解决跨域携带cookie问题
首先我们先在A服务的index.html页面中得到一个cookie,运行A服务:
npm install express -D
node src/app1.js
然后打开http://localhost:8000/static/index.html: 没有问题的话,页面长这样:
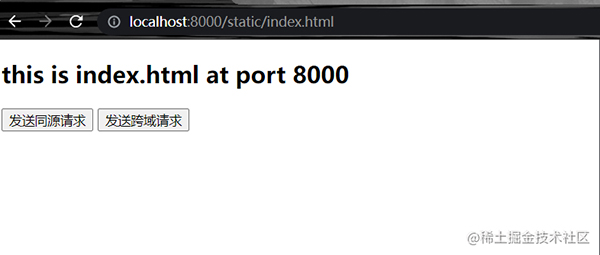
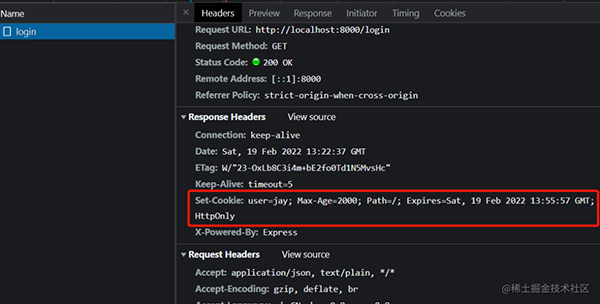
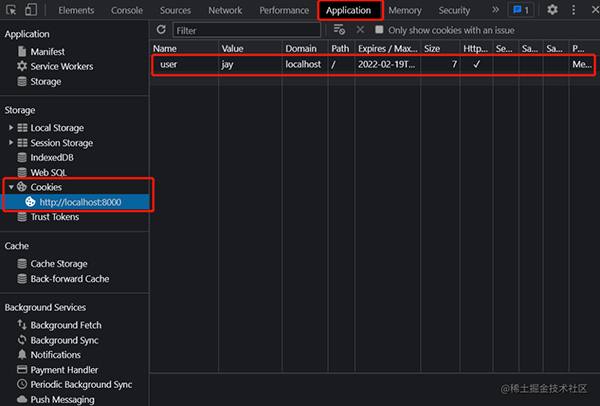
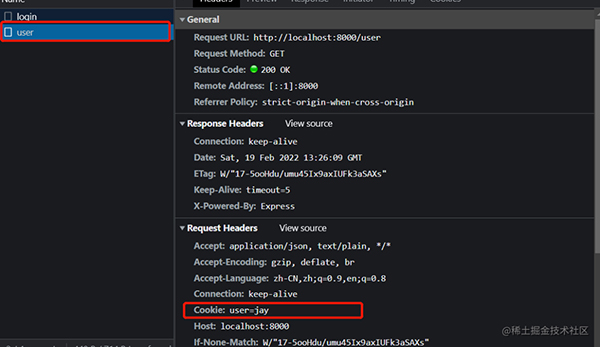
这个时候F12打开控制台:可以看到发送了一个login请求,并且设置了cookie,也可以选择浏览器控制台的Application页签,选中cookie,可以看到cookie的信息:
然后我们点击页面上的发送同源请求按钮,可以看到发送了一个user请求,并且已经携带上了cookie:
接下来刺激的画面来了,我们点击 发送跨域请求 按钮,出现了跨域请求的报错:

重点:接下来开始解决跨域携带cookie问题:
1. 在前端请求的时候设置request对象的属性withCredentials为true;
什么是withCredentials?
XMLHttpRequest.withCredentials 属性是一个Boolean类型,它指示了是否该使用类似cookies,authorization headers(头部授权)或者TLS客户端证书这一类资格证书来创建一个跨站点访问控制(cross-site Access-Control)请求。在同一个站点下使用withCredentials属性是无效的。
如果在发送来自其他域的XMLHttpRequest请求之前,未设置withCredentials 为true,那么就不能为它自己的域设置cookie值。而通过设置withCredentials 为true获得的第三方cookies,将会依旧享受同源策略,因此不能被通过document.cookie或者从头部相应请求的脚本等访问。
// 修改跨域请求的代码
crossButton.onclick = function () {
    axios({
      withCredentials: true, // ++ 新增
      method: "get",
      url: "http://localhost:8003/anotherService",
    }).then((res) => {
      console.log(res);
    });
};
这个时候再去发送一个跨域请求,你会发现依旧报错,但是我们仔细看下报错,意思是需要设置header的Access-Control-Allow-Origin属性:

2. 在服务端设置Access-Control-Allow-Origin
我们修改B(app2.js)服务的代码:
// 在所有路由前增加,可以拦截所有请求
app.all("*", (req, res, next) => {
  res.header("Access-Control-Allow-Origin", "http://localhost:8000");
  next();
});
修改完之后再次发送一个跨域请求,你会发现,又报错了(接近崩溃),但是跟之前报的错不一样了,意思大概就是Access-Control-Allow-Credentials这个属性应该设置为true,但是显示得到的是个'':

3. 在服务端设置Access-Control-Allow-Credentials
再次修改B服务的代码(每次修改后需要重新运行):
// 在所有路由前增加,可以拦截所有请求
app.all("*", (req, res, next) => {
  res.header("Access-Control-Allow-Origin", "http://localhost:8000");
  res.header("Access-Control-Allow-Credentials", "true"); // ++ 新增
  next();
});
再发送一个跨域请求:
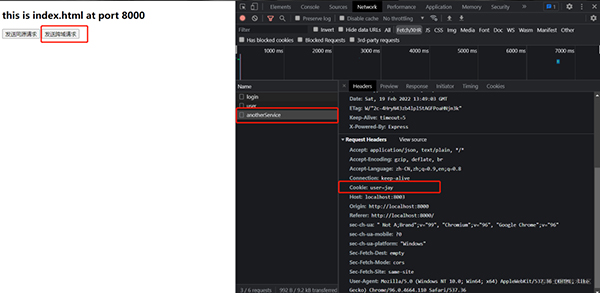

可以看到,这个跨域请求已经请求成功并且返回数据了!而且也携带了A服务的cookie,这个时候已经大功告成了。
- 前端请求时在request对象中配置"withCredentials": true;
- 服务端在response的header中配置"Access-Control-Allow-Origin", "http://xxx:${port}";
- 服务端在response的header中配置"Access-Control-Allow-Credentials", "true"
如果看完这篇文章能够帮助到你,请给个赞哦!
Recommend
About Joyk
Aggregate valuable and interesting links.
Joyk means Joy of geeK