

开源深度学习计算平台ImJoy解析:7 -- 构建基于Web的图像分析插件(JavaScript实现)
source link: https://qixinbo.info/2021/12/17/imjoy_7/
Go to the source link to view the article. You can view the picture content, updated content and better typesetting reading experience. If the link is broken, please click the button below to view the snapshot at that time.
Build web-based plugins for image analysis
在本文中,将制作一个基于Web网页的用于图像分析的ImJoy交互式插件。
使用 HTML/CSS/JS 制作GUI插件
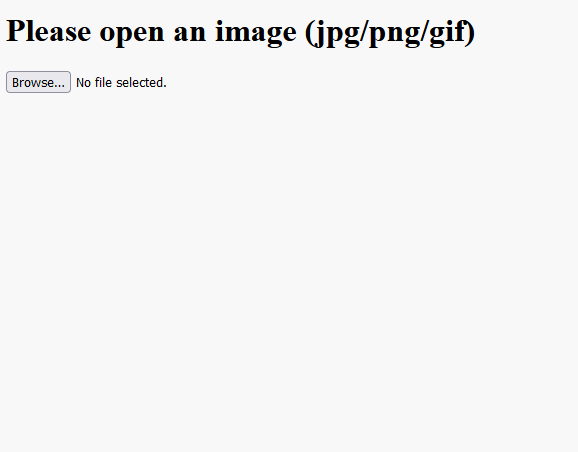
如下插件实现了一个上传并显示图像的功能,具体函数说明详见下面代码的注释:
<!-- 以Json格式定义插件属性 -->
<!-- 名称为Image Viewer,类型为window插件 -->
<config lang="json">
{
    "name": "Image Viewer",
    "type": "window",
    "tags": [],
    "ui": "",
    "version": "0.1.0",
    "cover": "",
    "description": "This is a demo plugin for displaying image",
    "icon": "extension",
    "inputs": null,
    "outputs": null,
    "api_version": "0.1.8",
    "env": "",
    "permissions": [],
    "requirements": [],
    "dependencies": []
}
</config>
<!-- 使用HTML编写窗口的显示内容 -->
<window>
    <div>
        <!-- 显示文本 -->
        <h1>Please open an image (jpg/png/gif)</h1>
        <!-- 使用<input>标签定义用户可输入的字段,其中:
        type属性定义元素类型,这里为file,即上传文件
        accept属性则限制可用文件类型,这里限制文件为图片类型
        capture属性则定义在移动设备上可以不上传文件,而是调用系统的相机来拍照
        这些属性的用法可以参见如下教程:
        https://cloud.tencent.com/developer/article/1537891 -->
        <input  id="file-input" accept="image/*" capture="camera" type="file"/>
        <!-- 使用<canvas>标签来定义一个画布,用于承载图像的显示
        canvas元素本身只是一个图像容器,没有绘图能力,需要使用JS脚本进行绘制 -->
        <canvas id="input-canvas" style="width: 100%; object-fit: cover;"></canvas>
    </div>
</window>
<!-- 使用CSS代码来编写窗口显示内容的样式
这里没有定义特殊样式 -->
<style>
</style>
<!-- 实际插件代码 -->
<script lang="javascript">
// 将base64格式图片传到画布上
// 用法见:https://blog.csdn.net/qq_39765048/article/details/118021098
const drawImage = (canvas, base64Image)=>{
    return new Promise((resolve, reject)=>{
        const img = new Image()
        img.crossOrigin = "anonymous"
        img.onload = function(){
            const ctx = canvas.getContext("2d");
            canvas.width = Math.min(this.width, 512);
            canvas.height= Math.min(this.height, parseInt(512*this.height/this.width), 1024);
            // draw the img into canvas
            ctx.drawImage(this, 0, 0, canvas.width, canvas.height);
            resolve(canvas);
        }
        img.onerror = reject;
        img.src = base64Image;
    })
}
// 读取文件内容
// 注意这里的形参file,它对应的实参是File对象(由下面的fileInput.files[0]可知)
const readImageFile = (file)=>{
    return new Promise((resolve, reject)=>{
        const U = window.URL || window.webkitURL;
        // 该流程用于safari浏览器
        // File对象继承自Blob
        if(U.createObjectURL){
            // 以下用法就是将Blob用作URL,这样就可以直接访问它
            // 用法见:https://zh.javascript.info/blob
            resolve(U.createObjectURL(file))
        }
        // 第二种就是将blob转为了base64编码
        // 用法见:https://zh.javascript.info/file
        // https://segmentfault.com/a/1190000022208272
        else{
            const fr = new FileReader();
            // when image is loaded, set the src of the image where you want to display it
            fr.onload = function(e) {
                resolve(e.target.result)
            };
            fr.onerror = reject
            // 转换为 base64 的 data url
            fr.readAsDataURL(file);
        }
    })
}
// 编写插件函数
// 一个最小的插件需要实现两个函数:setup() 和 run()
class ImJoyPlugin{
    // setup() 函数:在插件第一次加载和初始化时执行它。
    async setup(){
        // 通过ID获得页面中的input元素
        const fileInput = document.getElementById("file-input");
        // 通过ID获得页面中的canvas元素
        const canvas = document.getElementById("input-canvas");
        // 为input元素添加点击事件,其中涉及了如下语法点:
        // (1)addEventListener语法:https://www.runoob.com/jsref/met-document-addeventlistener.html
        // (2)箭头函数:https://www.helloworld.net/p/0020086208
        // https://gauliang.github.io/blog/2020/javascript-arrow-function-best-practices/
        // (3)async/await异步编程:https://www.ruanyifeng.com/blog/2015/05/async.html
        // https://developer.mozilla.org/zh-CN/docs/Learn/JavaScript/Asynchronous/Async_await
        fileInput.addEventListener("change", async ()=>{
            // 执行上面的readImageFile函数
            // 输入参数就是input元素获取的文件,具体用法如下:
            // https://developer.mozilla.org/en-US/docs/Web/API/FileList
            const img = await readImageFile(fileInput.files[0]);
            // 执行上面的drawImage函数
            await drawImage(canvas, img);
        }, true);
        await api.log("plugin initialized")
    }
    // run() 函数:每次执行插件时都会调用。
    // 执行时,一个带有上下文(名为“ctx”)的对象object(Javascript插件)或字典dictionary(Python插件)将被传递到函数中。
    // 返回的结果将显示为一个新窗口或传递给工作流中的下一个 op。
    async run(ctx){
    }
}
// 导出插件函数,或称注册插件函数,
// 这是为了使得插件可以被ImJoy主程序或其他插件所调用
api.export(new ImJoyPlugin())
</script>
插件的运行结果如下图:
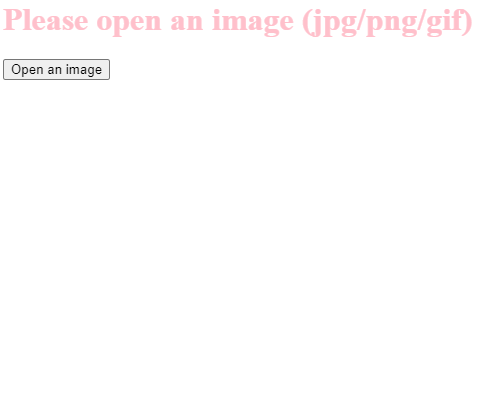
对上述插件做一点更改,来加深对它的理解。具体地,增加一个上传按钮<button>,它将触发打开文件对话框,以便可以使用该按钮来选择文件。 (这样做原因是为了后面可以轻松自定义按钮的外观。)
(1)在<input>标签下方,添加一行:<button id="select-button">Open an image</button>
(2)在setup函数中,添加:
// 当按钮点击时触发文件上传框
const selectButton = document.getElementById("select-button");
selectButton.addEventListener("click", async ()=>{
    // 模拟对<input>标签的点击
    fileInput.click()
}, true);
(3)在
<style>块中添加一个css样式来隐藏<input>元素:#file-input{
display: none;
}
(4)另外,可以通过添加更多css来更改标题文本的样式:
h1{
   color: pink;
}
现在插件变成了如下模样:
使用css库
手工制作CSS样式非常耗时,需要深入了解UI设计原理和CSS本身。
幸运的是,已经有很多UI库(Bootstrap, https://materializecss.com/ 等)可以利用。还有更强大的js库和框架可以构建更专业的UI,例如:React、Vuejs和Angular。在本教程中,将选择一个名为 Bulma 的小型CSS进行说明。
通过查看Bulma的文档这里,可以看出,只需要加载一个CSS文件。
在ImJoy插件中,加载第三方CSS或Javascript库的方式是将url添加到<config>块中的requirements字段。
因此增加如下代码:
{
    "requirements": ["https://cdn.jsdelivr.net/npm/[email protected]/css/bulma.min.css"],
}
Bulma支持大量不同的元素和布局,可以在此处阅读有关按钮的信息。
基本上,只需要向按钮标签添加一个类(例如
class="button is-primary"),它就会改变它的外观。同样,也可以在 <h1> 标题中添加 class="title"。即修改如下代码:
<h1 class="title">Please Open an image (jpg/png/gif)</h1>
<button id="select-button" class="button is-primary">Open an image</button>
现在插件变成了如下模样:
进一步地,可以尝试使用panel将 button 和 <canvas> 分组。
要在Bulma中使用图标,需要添加 https://use.fontawesome.com/releases/v5.14.0/js/all.js 和 requirements。然后从这里搜索图标。例如,如果找到一个名为 eye 的图标,可以使用将该图标作为 <i class="fas fa-eye"></i> 添加到html中。
在相应的地方修改代码如下:
"requirements": ["https://cdn.jsdelivr.net/npm/[email protected]/css/bulma.min.css", "https://use.fontawesome.com/releases/v5.14.0/js/all.js"]

<window>
    <div>
        <input  id="file-input" accept="image/*" capture="camera" type="file"/>
        <nav class="panel">
        <p class="panel-heading">
            <i class="fas fa-eye" aria-hidden="true"></i> My Image Viewer
        </p>
        <div class="panel-block">
            <button id="select-button" class="button is-link is-outlined is-fullwidth">
            Open an image
            </button>
        </div>
        <div class="panel-block">
            <canvas id="input-canvas" style="width: 100%; object-fit: cover;"></canvas>
        </div>
    </div>
</window>
现在插件变成了如下模样:
使用图像处理库OpenCV.js
OpenCV是一个常用的计算机视觉库,用C++编写,现在它已经用WebAssembly编译,可以在浏览器中运行。
opencv.js有很多功能介绍文档,但对于本教程,以下两部分就足够了:
(1)了解如何使用opencv.js加载和保存图片,阅读这里
(2)从此列表 中选择一个图像处理教程并将其集成到图像查看器插件中。例如,图像阈值、平滑图像、canny 边缘检测或分水岭分割。
基本上,需要经过三个步骤来实现:
(1)在<config>下的"requirements"中添加opencv.js库"https://docs.opencv.org/master/opencv.js"
(2)从教程中取出图像处理部分,并将其包装为一个函数(例如processImage)
(3)添加点击时调用函数的button。
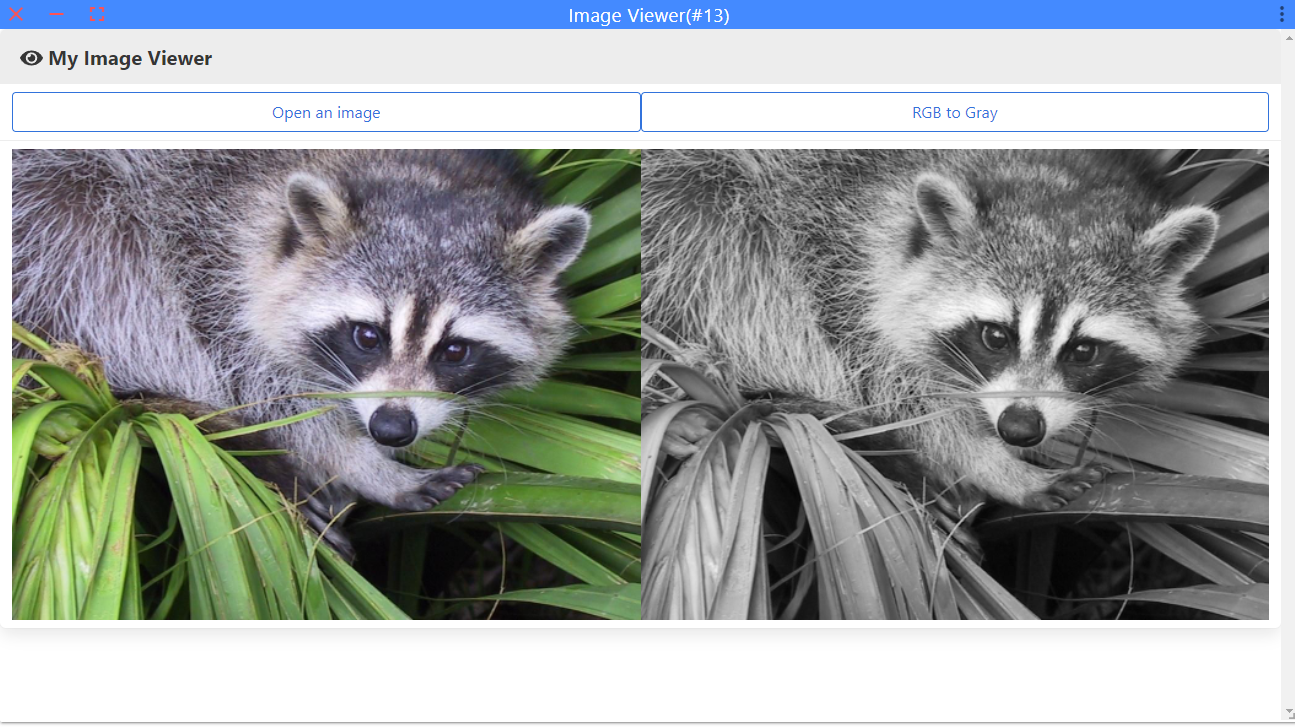
接下来以“彩色转灰度”这一功能作为例子:
(1)添加opencv.js库:
"requirements": ["https://cdn.jsdelivr.net/npm/[email protected]/css/bulma.min.css", "https://use.fontawesome.com/releases/v5.14.0/js/all.js", "https://docs.opencv.org/master/opencv.js"]
(2)编写图像处理函数:
<div class="panel-block">
    <canvas id="input-canvas" style="width: 100%; object-fit: cover;"></canvas>
    // 新增一个画布,用于显示处理后的图像
    <canvas id="output-canvas" style="width: 100%; object-fit: cover;"></canvas>
</div>

// opencv图像处理函数
function processImage(inputCanvasId, outputCanvasId){
    let src = cv.imread(inputCanvasId);
    let dst = new cv.Mat();
    cv.cvtColor(src, dst, cv.COLOR_RGBA2GRAY);
    cv.imshow(outputCanvasId, dst);
    src.delete();
    dst.delete();
}
(3) 添加事件:
<div class="panel-block">
    <button id="select-button" class="button is-link is-outlined is-fullwidth">
    Open an image
    </button>
    // 新增一个按钮来触发图像处理操作
    <button id="process-button" class="button is-link is-outlined is-fullwidth">
    RGB to Gray
    </button>
</div>

// 在setup函数种新增如下事件
const processButton = document.getElementById("process-button");
processButton.addEventListener("click", async ()=>{
    processImage('input-canvas', 'output-canvas')
}, true);
整个插件的运行示例如下:
使用深度学习库tensorflow.js
Tensorflow是一个被广泛使用的深度学习库,它已经被移植到javascript在浏览器中运行,该库被称为Tensorflow.js。
这一部分会将Tensorflow.js集成到上述插件中,具体功能为使用一个预训练的MobileNet算法对图像进行分类,详见这里。
(1)首先引用必要的JS库:
"requirements": [
"https://cdn.jsdelivr.net/npm/@tensorflow/[email protected]",
"https://cdn.jsdelivr.net/npm/@tensorflow-models/[email protected]"
]
(2)增加预测按钮、结果显示、模型加载等窗口组件:
<div class="panel-block">
    <button id="predict-button" class="button is-link is-outlined is-fullwidth">
    Predict
    </button>
</div>
<!–– Header bar ––>
<div class="hero hero-sm bg-secondary">
    <div class="mx-2">
        <h3 id="hero_title"></h3>
        <p id="status"></p>
    </div>
</div>
(3)在setup函数中增加事件响应:
const predictButton = document.getElementById("predict-button");
predictButton.onclick = ()=>{
  this.predict()
}
// Load the model.
const statusElement = document.getElementById("status");
statusElement.innerHTML = 'Loading pretrained model...';
this.model = await mobilenet.load();
document.getElementById("hero_title").innerHTML = 'Model loaded'
statusElement.innerHTML = '1. Open image (.png/.jpg) or use pre-loaded image. <br> 2. Click `Predict` for image recognition!';

// Display the predict button and file selection
predictButton.style.display = "inline";
fileInput.style.display = "inline";
可以看出,分别为预测按钮绑定了点击事件响应,以及自动下载模型。
(4)编写模型预测逻辑:
在上面的预测按钮点击后,会触发如下预测函数(这个函数在setup之外,即与setup地位平齐):
async predict(){
  const canvas = document.getElementById('input-canvas');
  // Classify the image.
  const predictions = await this.model.classify(canvas)
  // Output result in console
  console.log('Predictions', predictions);

// Output results in interface
  document.getElementById("hero_title").innerHTML = 'Predictions: '
  const result_string_html = `Top-1: ${predictions[0].className} (${Math.round(predictions[0].probability*100)}%) <br> Top-2: ${predictions[1].className} (${Math.round(predictions[1].probability*100)}%)`;
  document.getElementById("status").innerHTML = result_string_html
  // Output results as ImJoy alert
  const result_string =  `Predictions: Top-1 ${predictions[0].className} (${Math.round(predictions[0].probability*100)}%); Top-2 ${predictions[1].className} (${Math.round(predictions[1].probability*100)}%);`;
  api.alert(result_string)

}
增加上述内容后,整个插件运行结果如下:
可以看出,在最下面对图像中的内容进行了分类识别。
注意:虽然基于浏览器的插件已经很有用,并且随着WebAssembly和WebGPU等新技术的使用而变得更加强大,但它无法进行大规模计算,并且由于其安全性而受到许多限制。
Recommend
About Joyk
Aggregate valuable and interesting links.
Joyk means Joy of geeK