

How do I get started?
source link: https://help.dreamhost.com/hc/en-us/articles/215251828-How-do-I-get-started-
Go to the source link to view the article. You can view the picture content, updated content and better typesetting reading experience. If the link is broken, please click the button below to view the snapshot at that time.

Overview
Basic setup
Creating a DreamHost account
If you wish to use any DreamHost services, you must create an account. View the following article for instructions on how to open an account.
Logging into the panel
Once you finish the signup process, you’ll receive a message to notify you that your account is set up. From there, you can log in to the panel at:
To log in, use the credentials within the email that was sent to you.
Registering a domain
To load any web page, the owner must first own the registration of the domain name. If you do not own the registration, you have no right to use the domain name.
To register a domain, go to the Registrations page.
On the Registrations page, you can register any domain you wish that is still available:
DreamHost allows the registration of many different Top Level Domains (TLDs). You can view a full list of these on the Registrations page by clicking the See full pricing link.
For further information, please review the Domain Registration article.
Add a hosting plan
After you purchase a registration, you must then add a hosting plan in order for it to resolve online. There are a few different hosting options you can use for your domain.
- Fully hosted — your site is hosted on a server and is visible online
- Remixer — your site is hosted on the Remixer website builder plan
- WordPress — your site is still Fully Hosted, but it's running the software for WordPress
- DreamPress — your site is Fully Hosted and running WordPress, but it's hosted on the DreamPress plan
Adding a hosting plan
To add a hosting plan to your account, go to the Manage Account page.
On the Manage Account page, you’ll see a section titled Service Plans: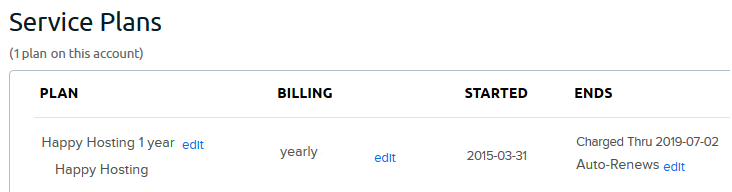
If you already added a plan, you’ll see it listed here. In this example, a 'Shared' hosting plan has been added for the entire year.
Adding hosting to a domain
View the following article for instructions on how to add hosting to your domain so it is Fully Hosted.
Even if you set a site to be FULLY HOSTED in your panel, that still does not mean it’s hosted at DreamHost. Your DNS records must also point to your DreamHost server. The company that hosts your Nameservers controls your DNS. You can check where the nameservers are pointed by looking up your public WHOIS information here:
If the nameservers are set to DreamHost already, then all you need to do is set up hosting. View the following articles for further information:
Remixer hosting
DreamHost also offers a custom website builder called 'Remixer' that requires no coding experience. Remixer is a hosting service that is separate from a Fully Hosted plan like Shared, VPS, Dedicated, or DreamPress hosting. With Remixer, you can click to build your site using its online interface. View the following link for further details:
WordPress hosting options
Adding WordPress
WordPress is the world's most popular content management system (CMS), and DreamHost is one of the very few recommended providers by WordPress.org. If you're new to hosting a website, you'll want to check out WordPress to help you build your website. Within minutes, you can build a site that incorporates all of the modern features that websites now include, with a nearly limitless capacity to add new features as you need them.
To help you get started with building a WordPress site at DreamHost, please see the following articles:
DreamPress Hosting
DreamPress is DreamHost's managed WordPress product, which provides even more powerful features such as larger memory & storage plans, faster speeds, and improved caching.
More information on DreamPress can be found here:
WordPress migration options
Free migrations using the DreamHost Automated Migration Plugin
You can now migrate your own WordPress site to DreamHost for free, using the DreamHost Automated Migration Plugin. The plugin can be used on any DreamHost account with an active hosting plan. See the following article for more details:
Paid option to migrate your site
If you are having trouble migrating your website from another host, or just don't have the time, DreamHost currently offers a service that takes care of that for you. You can find more information in the DreamHost Website migration services article.
Add an SSL certificate
Adding an SSL certificate to a domain
After you set up hosting for your domain, it's highly recommended that you also add an SSL certificate to it (either a free 'Let's Encrypt' or professionally-signed certificate). Adding a certificate is a simple process that not only secures your site for transactions and eCommerce, but also ensures that your site is rated as secure. In fact, Google will more favorably rank it since having a secure site is an important factor in search rankings.
To help you get started with adding a certificate, please see the following articles:
Additional configurations
The following are additional services or products you can add to your site, but are not mandatory in order for it to operate.
Creating an email address
Once you add hosting to a domain, you can then create an email address(es).
To create an email address:
- Go to the Manage Email page.
- Click the Create New Email Address button at the top. You’ll then be able to enter a new email and a password.
Once you save the changes, the necessary DNS records for mail are added to your site’s DNS.
More information can be found at Email Setup regarding the creation and configuration of email accounts with DreamHost.
It is also possible to host your email outside of DreamHost. To host elsewhere, you can configure custom MX records to point to your external mail host. Visit the MX record article for further instructions.
Adding site statistics
All DreamHost accounts have the ability to add site statistics to any fully-hosted website, which you can enable in the panel. There, you can track information such as number of requests, traffic by domain, traffic by file, requests by browser types/OSs/URLs, and more.
To find out more about adding site statistics to your site, please see the following articles:
Adding the DreamShield malware remover service
DreamHost also offers a paid security service in the panel. When enabled, this service allows you to scan your website for malware and alerts you if any issues are found.
To learn more about how to enable the Malware Remover service, please see the following article:
Contacting support
If there’s anything support may assist you with regarding setting up and loading your website, feel free to submit a support ticket on the Contact Support page of your panel.
See also
Recommend
About Joyk
Aggregate valuable and interesting links.
Joyk means Joy of geeK