

How to use SwiftUI Picker
source link: https://sarunw.com/posts/how-to-use-swiftui-picker/
Go to the source link to view the article. You can view the picture content, updated content and better typesetting reading experience. If the link is broken, please click the button below to view the snapshot at that time.

How to use SwiftUI Picker
A Picker is a SwiftUI equivalent of UIKit's UIPickerView. It is a control that allows you to select a value from a list of mutually exclusive values.
Creation
You create a picker by providing three things:
- A selection binding.
- A label that describes the purpose of selecting an option.
- The content for the picker to display.
We can create a picker in a variety of ways. As an example, we will create a picker for users to select their favorite colors.
Static Content
We will start with static content, where we manually create each option in a picker one by one. We need selection binding and static views with tag.
struct ContentView: View {
    @State private var selectedColorIndex = 0 // <1>
    var body: some View {
        VStack {
            Picker("Favorite Color", selection: $selectedColorIndex, content: { // <2>
                Text("Red").tag(0) // <3>
                Text("Green").tag(1) // <4>
                Text("Blue").tag(2) // <5>
            })
            Text("Selected color: \(selectedColorIndex)") // <6>
        }
    }
}
<1> Create a @State variable to bind with the picker. This will use to communicate the currently selected value.
<2> Set label to Favorite Color.
<3>, <4>, <5> We provide each option view as a text view. One important thing to note here is a .tag modifier. We append a .tag to each text view to differentiate each option. This tag value is the one reflected in our bound value (selectedColorIndex).
<6> This text view is just for debugging purposes. It will print out the current selecting value from our binding (selectedColorIndex).
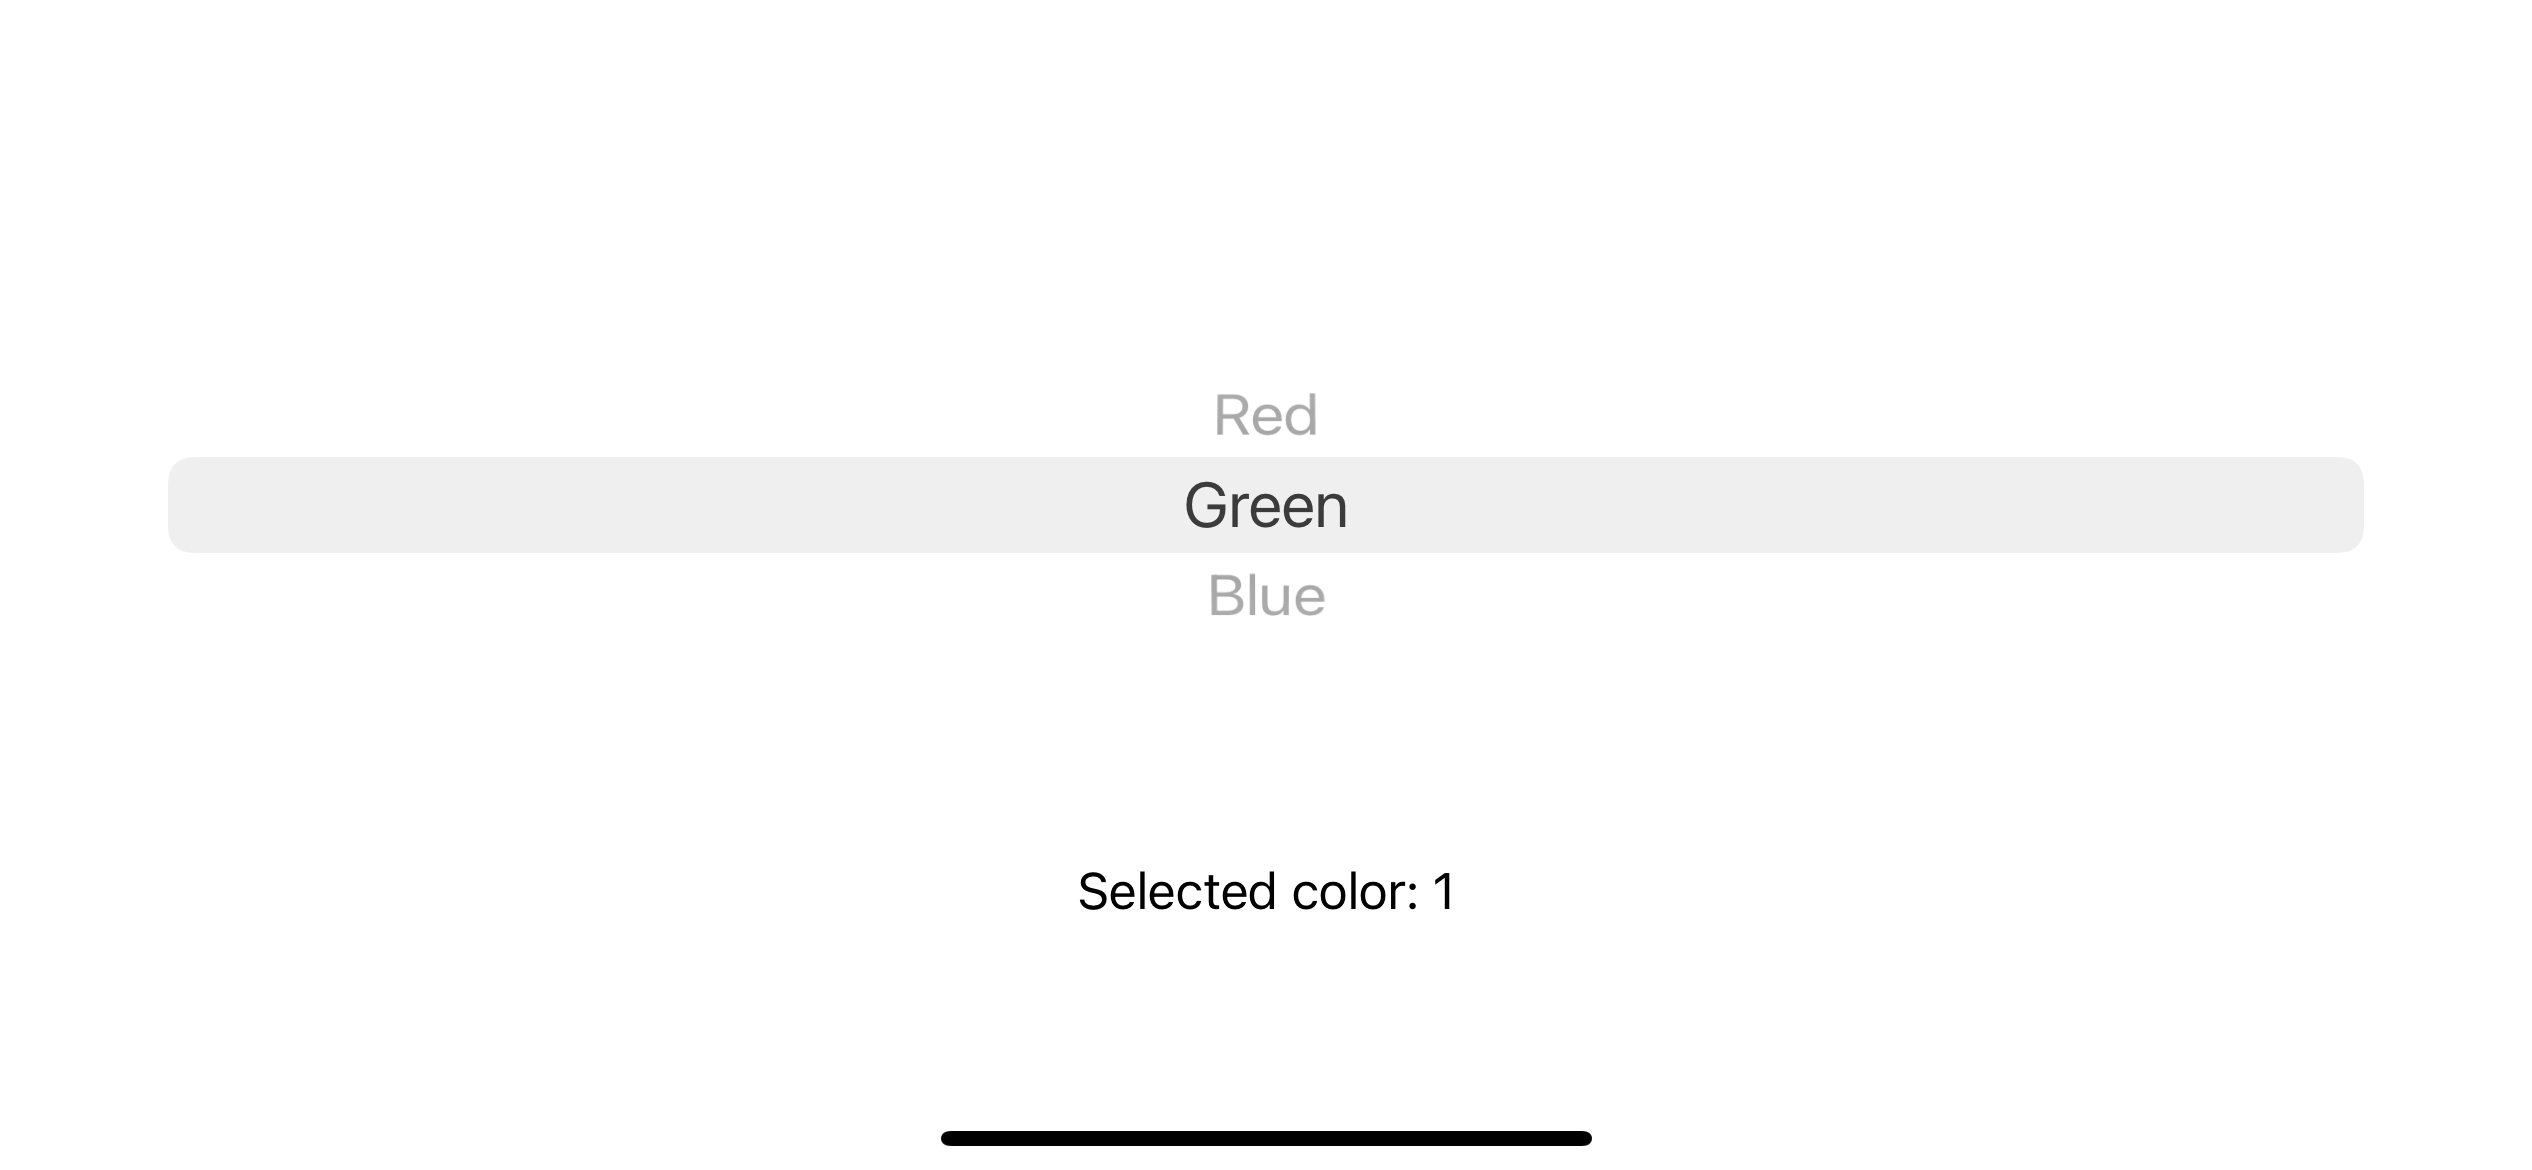 Select Green option updated our bound value to the tag value of Green, which is 1.
The type of each tag must match the type of the bound state variable. Otherwise, the selection binding won't get updated.
Forget assigning .tag or using a mismatched type between a tag and binding value would result in the binding value (selectedColorIndex in our case) not get updated.
Dynamic Content
If you have many options, you can create your content view with ForEach.
struct ContentView: View {
    private var colors = ["Red", "Green", "Blue"] // <1>
    @State private var selectedColorIndex = 0

var body: some View {
        VStack {
            Picker("Favorite Color", selection: $selectedColorIndex, content: {
                ForEach(0..<colors.count, content: { index in // <2>
                    Text(colors[index]) // <3>
                })
            })
            Text("Selected color: \(selectedColorIndex)")
        }
    }
}
<1> We create an array to hold our favorite colors.
<2> Instead of creating a text view one by one, we use ForEach here. We use ForEach, which loop over a range of index in this case.
<3> Notice that we don't put a .tag modifier here.
Run the app, and everything should work the same ways, but there is a big difference here. I don't need to put a .tag modifier in this case.
ForEach automatically assigns a tag
ForEach automatically assigns a tag to the selection views, using an ID from ForEach (You can read more about Identifier (ID) in my previous post about ForEach).
In the above example, we use ForEach which loop over a range of integer, so our id is an integer. Using integer as tag value matches our previous implementation where we tag our text view with a zero-based integer index.
Caveats
ForEach automatically assigns a tag doesn't mean we don't need to use an explicitly define tag for our view. ForEach assign tag based on the ID, so there is a chance that the id won't match our binding value.
Let's use ForEach again, but this time with another variation.
struct ContentView: View {
    private var colors = ["Red", "Green", "Blue"]
    @State private var selectedColorIndex = 0
    var body: some View {
        VStack {
            Picker("Favorite Color", selection: $selectedColorIndex, content: {
                ForEach(colors, id: \.self, content: { color in // <1>
                    Text(color)
                })
            })
            Text("Selected color: \(selectedColorIndex)")
        }
    }
}
<1> We use ForEach, which loops over an array of strings instead of a range.
We use ForEach, which loops over an array of strings using the value in an array itself (\.self) as an id (a String in this case).
Which can be translate to something like this:
Text("Red").tag("Red")
Text("Green").tag("Green")
Text("Blue").tag("Blue")
Run the app, and you will get a broken picker because the selection type (Int) doesn't match the tag (String).
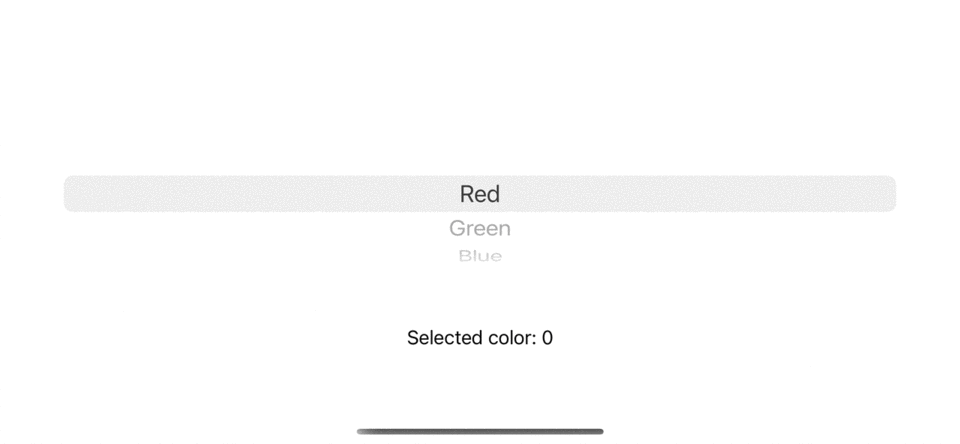 Binding value not get updated and always stay at the default value of 0.
You can fix this by add a tag explicitly or change the selection bound value to String. I will show the latter solution.
struct ContentView: View {
    private var colors = ["Red", "Green", "Blue"]
    @State private var selectedColor = "Red" // <1>
    var body: some View {
        VStack {
            Picker("Favorite Color", selection: $selectedColor, content: {
                ForEach(colors, id: \.self, content: { color in
                    Text(color)
                })
            })
            Text("Selected color: \(selectedColor)")
        }
    }
}
<1> Change the selection bound value to String.
Everything work as expected now.
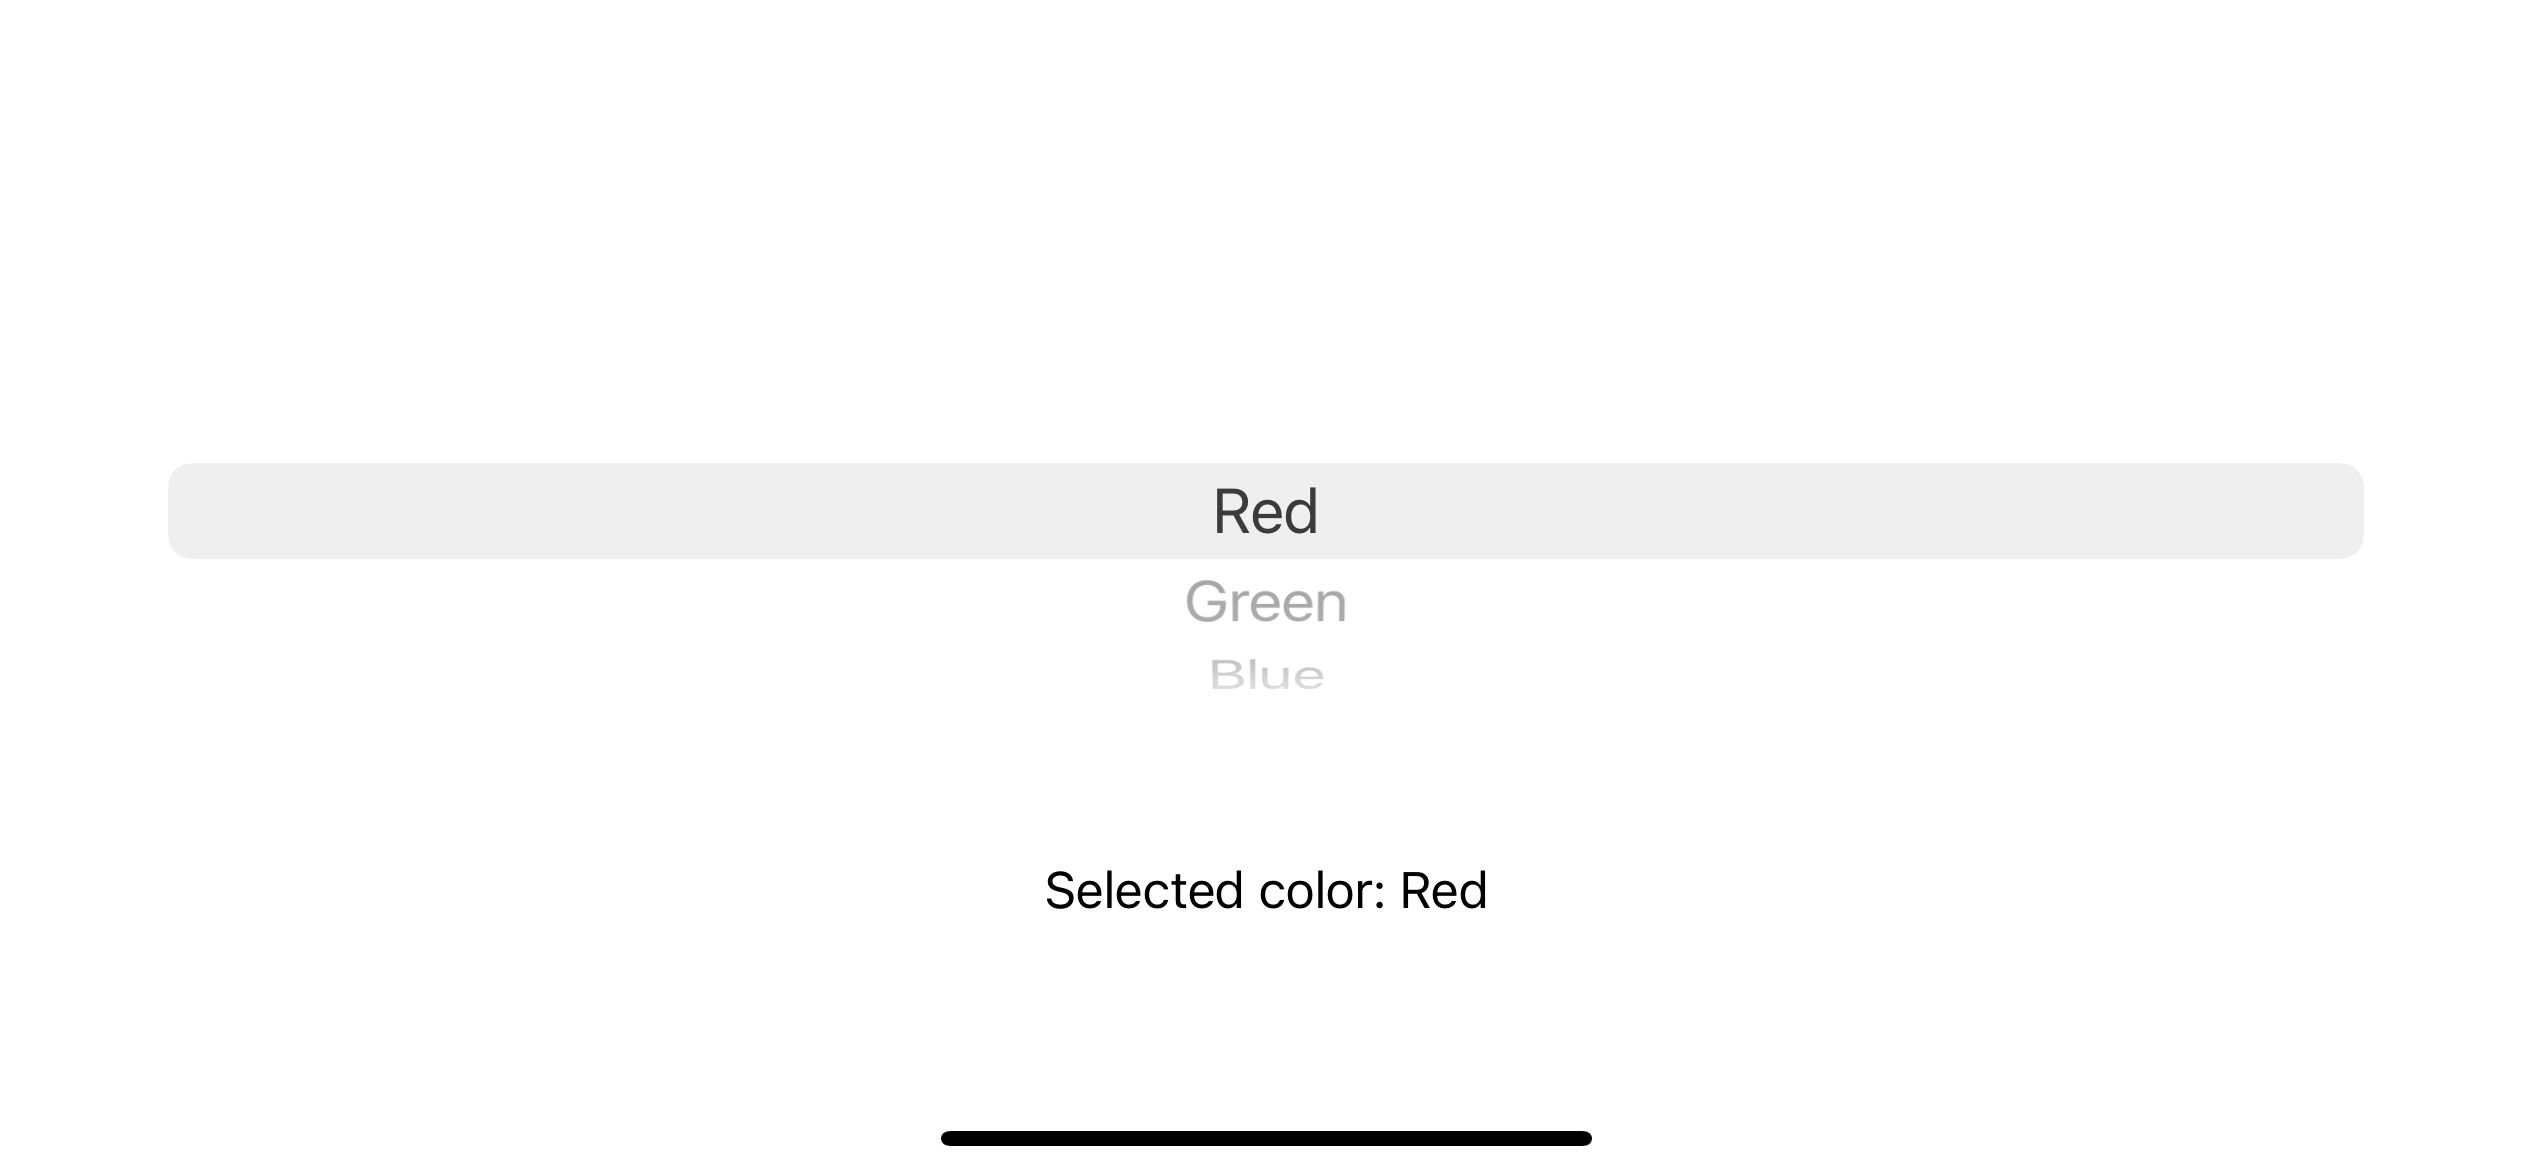 The binding type and tag type are strings, as you can see in the text view.
Using Enum as an option
Picker is a control for selecting from a set of mutually exclusive values.
From the Picker definition, one of the data structures that perfect for this is Enum. Let's create a new enum to represent our colors.
enum FavoriteColor: String, CaseIterable, Identifiable { // <1>
    case red
    case green
    case blue

var id: FavoriteColor { self }
}
<1>
- We make FavoriteColor an enum string raw value. Swift automatically makes our enum conform Equatable and Hashable by doing this.
- We conform CaseIterable because we want to loop over these values in ForEach.
- We conform Identifiable. The
idvalue will use in the tag. In this case, an enum itself. This is possible because the tag accepts Hashable value.
Then we use it with ForEach.
struct ContentView: View {
    @State private var selectedColor = FavoriteColor.red // <1>

var body: some View {
        VStack {
            Picker("Favorite Color", selection: $selectedColor, content: {
                ForEach(FavoriteColor.allCases, content: { color in
                    Text(color.rawValue.capitalized)
                })
            })
            Text("Selected color: \(selectedColor.rawValue.capitalized)")
        }
    }
}
<1> We change our selection bound value to the enum FavoriteColor, which matches the type of our id.
Run the app, and everything works as expected.
Conclusion
The only thing you need to know when using a picker is to make sure that the view's tag and selection type are matched. Otherwise, you might get an unexpected behavior since the code still compiles and running, but the selecting value won't get updated.
You may also like
Part 1 in the series "Building Lists and Navigation in SwiftUI". We visit the first building block of any list view, content, and how to create them.
SwiftUIEquatable and Hashable are two essential protocols in the Swift world. Let's learn an old Swift feature that you might forget.
Read more article about SwiftUI, Picker,
or see all available topic
Get new posts weekly
If you enjoy this article, you can subscribe to the weekly newsletter.
Every Friday, you’ll get a quick recap of all articles and tips posted on this site — entirely for free.
Feel free to follow me on Twitter and ask your questions related to this post. Thanks for reading and see you next time.
If you enjoy my writing, please check out my Patreon https://www.patreon.com/sarunw and become my supporter. Sharing the article is also greatly appreciated.
Does Swift enum retain its associated value
An easy question that you might overlook. Learn this simple fact together in this article.
How to delete UserDefaults data on macOS and Catalyst
In iOS, if you want to delete the app's UserDefaults, you can simply delete the app. But that is not the case for macOS and Catalyst app.
Recommend
About Joyk
Aggregate valuable and interesting links.
Joyk means Joy of geeK