

How I Built My Own Deep Learning PC
source link: https://jkjung-avt.github.io/deep-learning-pc/
Go to the source link to view the article. You can view the picture content, updated content and better typesetting reading experience. If the link is broken, please click the button below to view the snapshot at that time.

How I Built My Own Deep Learning PC
Aug 24, 2017
I built my own deep learning PC for DNN/CNN training about 1 year ago. Although the information is not up-to-date now. I think the experience is still worth sharing.
When I set out to build my own deep learning PC, I mainly referenced the following web pages:
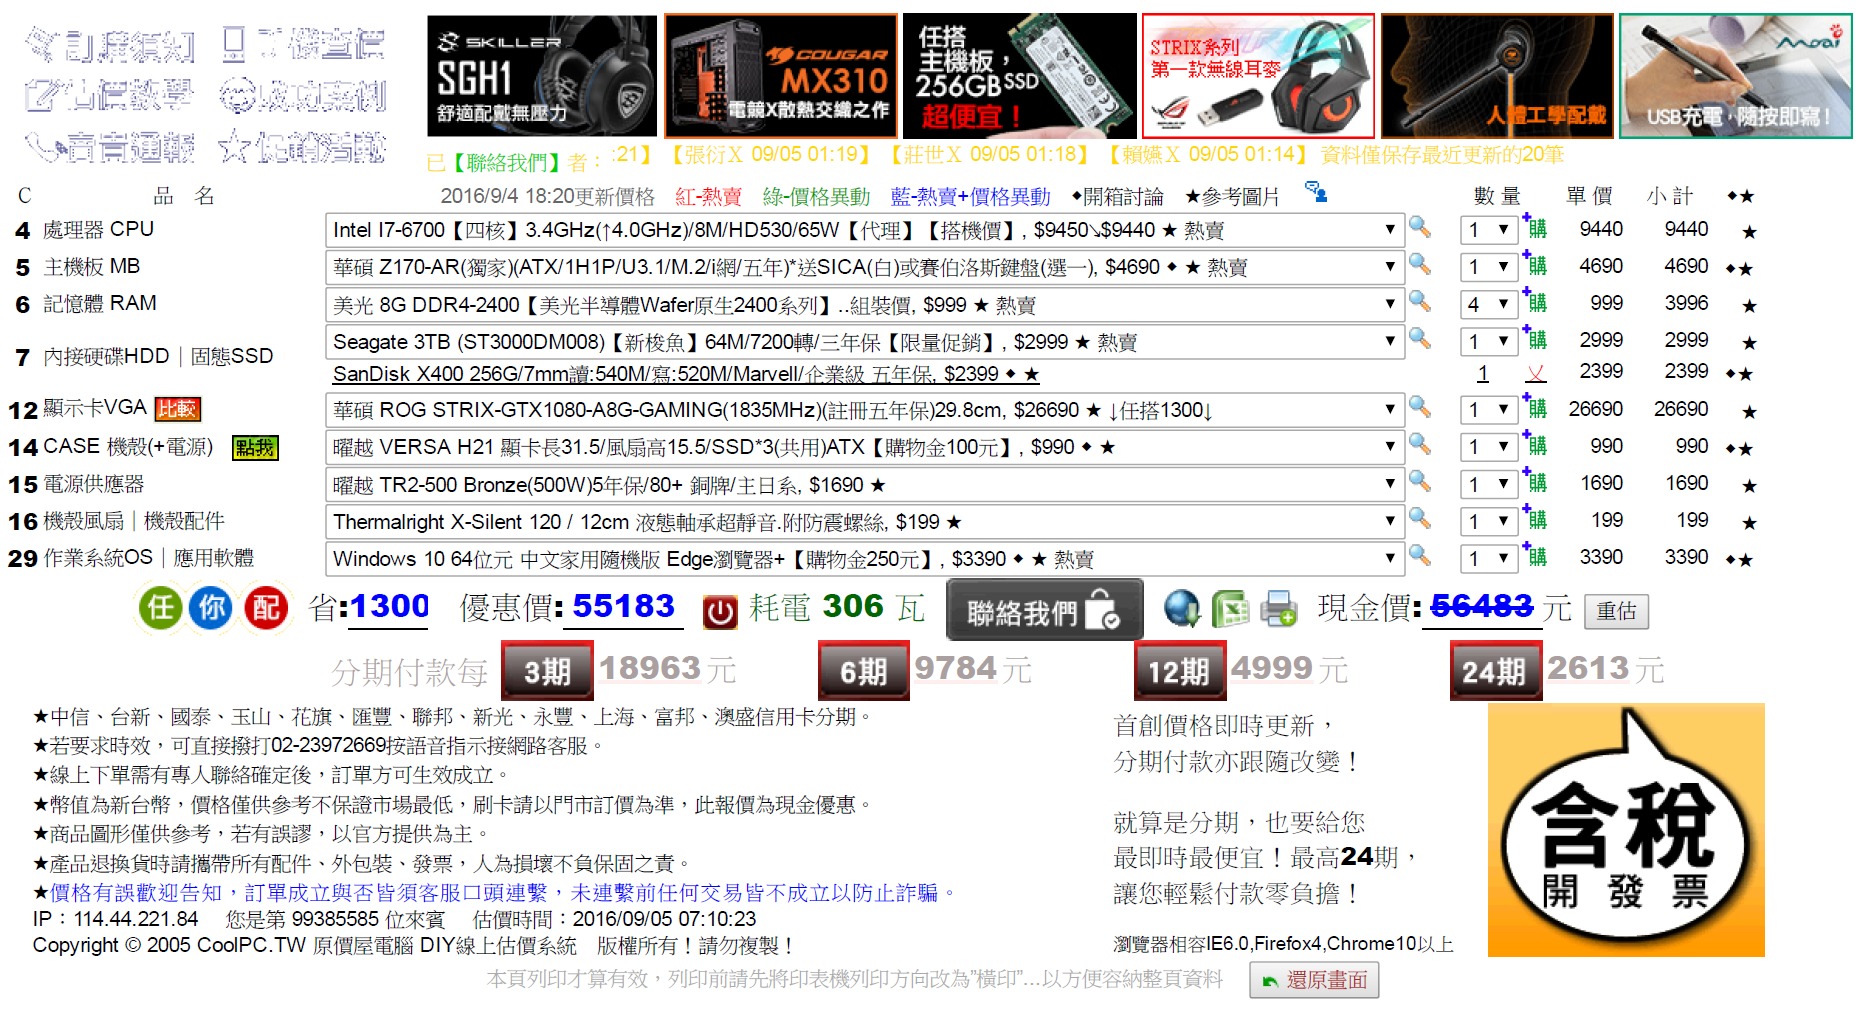
After research, I went to CoolPC (原價屋) to acquire the desktop PC. I first decided that I’d want a GeForce GTX-1080 with 8GB of GPU memory. Then I picked a decent Intel i7 CPU and motherboard to match the graphics card. I wasn’t thinking about expanding the PC with more than 1 GPU, so I picked a motherboard with only 1 PCIe x16 slot and didn’t consider much buffer on power supply and case (internal space). Finally I picked an 256GB SSD for Linux booting and another 3TB regular HDD for data storage. Note that later on I found I needed to purcahse 1 additional large SSD drive since training a DNN/CNN with a large dataset like ImageNet images (>130GB) would require constant and frequent access of the HDD/SSD, lasting 24HR for several days. The regular HDD is just not cut for that kind of task!
Here’s the exact breakdown of the desktop PC I purchased (without the additional SSD). And it cost me NT$ 55,183, or roughly USD 1,800.
As to software installation, I did the following.
- I partitioned tha 256GB SSD drive into half/half. On one of the partitions I kept the Windows 10 which came bundled with the desktop PC. And I installed Ubuntu 14.04 on the other partition.
- I partitioned the 3TB HDD into 3 parts: EFI, swap and Linux data (/home).
- I created different accounts under Linux for different purposes: jkjung, caffe, digits, etc. For each account, I was able to set it up to use different version of the libraries (CUDA, python packages, OpenCV, Caffe/NvCaffe, etc.)
- I don’t use
apt-getto install NVIDIA graphics driver. Instead I downloaded and installed the latest version from NVIDIA web site: http://www.nvidia.com/object/unix.html - I also downloaded and installed the latest version of CUDA Toolkit and cuDNN from NVIDIA web sites.
- Finally for NVIDIA DIGITS, I again did not do
apt-get installbut instead installed it from source by following its GitHub document. This way I had better control over when digits-devserver got started and where all data/configuration/files got written to. (Recently I found running DIGITS through Docker containers might be a even better solution.)
I’ve been using this PC for DNN/CNN training (and also for BitCoin mining occasionally) for 1 year now, and I’m pretty happy with the hardware as well as how I’ve set it up software-wise.
Recommend
About Joyk
Aggregate valuable and interesting links.
Joyk means Joy of geeK