

第145篇:js设计模式注册模式及相应实践 - 养肥胖虎
source link: https://www.cnblogs.com/FatTiger4399/p/18091878
Go to the source link to view the article. You can view the picture content, updated content and better typesetting reading experience. If the link is broken, please click the button below to view the snapshot at that time.

第145篇:js设计模式注册模式及相应实践
好家伙,
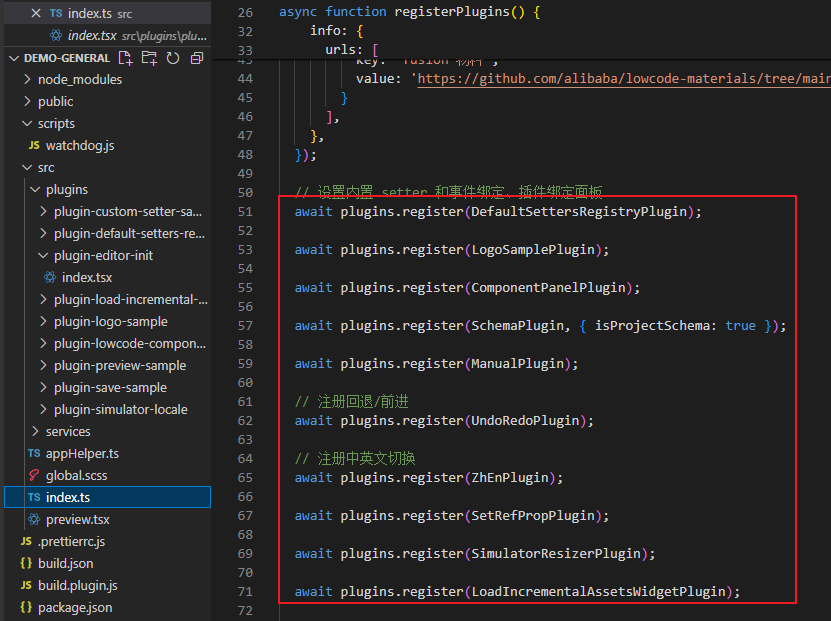
在阿里的低开项目中,使用这种形式去注册组件,我不禁好奇,这到底是个什么玩意
在 JavaScript 中,注册模式(Registry Pattern)是一种设计模式,它用于管理对象、函数或其他类型的实例,并提供一种机制来访问它们。注册模式通常用于将对象实例注册到一个中心注册表中,以便在需要时能够轻松地检索和使用这些实例。
注册模式通常包含以下几个核心组件:
-
注册表(Registry):注册表是一个存储对象实例的集合,通常以键值对的形式存储。可以将对象实例注册到注册表中,也可以从注册表中检索对象实例。
-
注册(Registration):注册是指将对象实例添加到注册表中的过程。通常会将对象实例与一个唯一的标识符(如字符串)相关联,以便在需要时能够通过该标识符检索对象实例。
-
检索(Retrieval):检索是指从注册表中获取对象实例的过程。通过提供相应的标识符,可以从注册表中检索相应的对象实例。
使用注册模式的一个常见场景是在应用程序中管理和访问多个服务、插件或组件。通过将这些服务、插件或组件注册到一个中心注册表中,可以在需要时轻松地获取它们,而无需直接引用它们的实现细节。
然后我发现我的低开物料库也能这么干,
具体怎么做呢?
1.写个注册表
2.写个注册方法
3.写出相应的检索方法
3.注册表
const componentList = [];
以数组的形式存在,可以直接push
4.注册方法
function createEditorConfig() {
  const componentList = [];
  return {
    componentList,
    componentMap,
    register: (component) => {
      componentList.push(component);
    }
  };
}
function createEditorConfig() {
  const componentList = [];
  const componentMap = {};
  console.log(componentList,componentMap)
  return {
    componentList,
    componentMap,
    register: (component) => {
      componentList.push(component);
      componentMap[component.key] = component;
    }
  };
}

export let registerConfig = createEditorConfig();
registerConfig.register({
  label: '文本',
  preview: () => '预览文本',
  render: function(h) {
    return h('div', '渲染文本');
  },
  key: 'text'
});
registerConfig.register({
  label: '按钮',
  preview: () => <ElButton>预览按钮</ElButton>,
  render: function(h) {
    return <el-button>渲染按钮</el-button>;
  },
  key: 'button'
});
registerConfig.register({
  label: '输入框',
  preview: () => <ElInput placeholder="预览输入框">预览按钮</ElInput>,
  render: function(h) {
    return <el-input placeholder="渲染输入框">预览输入框</el-input>;
  },
  key: 'input'
});
这里,我们为每个注册的组件配置配置相应的key值(比如输入框组件的key值是input)
componentMap 是一个对象,用于将组件的 key与组件对象进行映射。
当注册一个新组件时,会将组件对象以 key-value 的形式存储在 componentMap 对象中,其中 key 是组件的唯一标识符,通常用于查找特定组件。
通过维护一个组件映射,可以快速通过 key 查找到对应的组件对象。
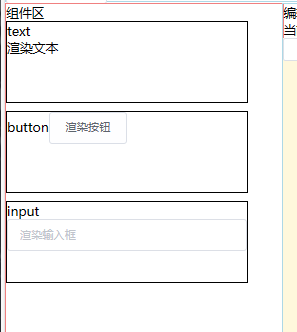
6.使用注册表
既然注册表已经做好了,那么我们去将这个注册表中的组件渲染出来
<div class="material" v-for="(component, key) in registerConfig.componentMap" :key="component.key">
                <span>{{ key }}</span>
                <component :is="component"></component>
            </div>


components: {
        lcEditor, lcRender, test, Material,
        component: {
            functional: true,
            render(h, { data }) {
                return h(registerConfig.componentMap[data.key]);
            }
        }
    },
成功渲染
7.疑问:为什么要将componentList,componentMap包在方法内部?
将 componentList 和 componentMap 包在 createEditorConfig 方法内部的主要目的是为了封装这两个变量,并且通过闭包的方式创建了一个私有作用域,避免了这两个变量被外部直接访问和修改。
具体原因如下:
-
封装数据: 将
componentList和componentMap包在方法内部,可以将它们视为createEditorConfig方法的私有属性,外部无法直接访问或修改这两个变量,只能通过register方法来操作它们,从而保证了数据的封装性。 -
避免全局污染: 将变量包在方法内部可以避免将这些变量暴露在全局作用域中,减少了全局变量的数量,避免了可能出现的命名冲突和全局污染。
-
提供了私有作用域: 通过闭包的方式,
register方法可以访问到componentList和componentMap变量,但外部无法直接访问这两个变量,确保了数据的私有性。 -
简化调用方式: 将
componentList和componentMap封装在方法内部,使得创建配置对象和注册组件的操作更加简洁明了,只需调用createEditorConfig()方法即可获得一个包含componentList和componentMap的配置对象,然后通过register方法注册组件。
总的来说,将 componentList 和 componentMap 包在方法内部是一种良好的编程实践,有利于提高代码的可维护性、可读性,并且能够更好地控制数据的访问权限和作用域。
Recommend
About Joyk
Aggregate valuable and interesting links.
Joyk means Joy of geeK