

一键整合,万用万灵,Python3.10项目嵌入式一键整合包的制作(Embed)
source link: https://v3u.cn/a_id_328
Go to the source link to view the article. You can view the picture content, updated content and better typesetting reading experience. If the link is broken, please click the button below to view the snapshot at that time.


我们知道Python是一门解释型语言,项目运行时需要依赖Python解释器,并且有时候需要安装项目中对应的三方依赖库。对于专业的Python开发者来说,可以直接通过pip命令进行安装即可。但是如果是分发给其他的Windows用户,特别是不熟悉Python的人来说,这样过于繁琐。因此最好的办法是连同Python解释器和Python项目打包在一起,通过嵌入式一键整合包解决项目的分发问题。
本次我们以一键扒谱的项目为例子,演示如何将项目直接打包为一键整合包,方便其他用户运行使用。
嵌入式Python处理
首先克隆我们自己的项目:
git clone https://github.com/v3ucn/YiJianBaPu.git正常流程是通过pip安装项目的依赖。
但现在我们不直接通过pip安装依赖,而是通过嵌入式的安装包。
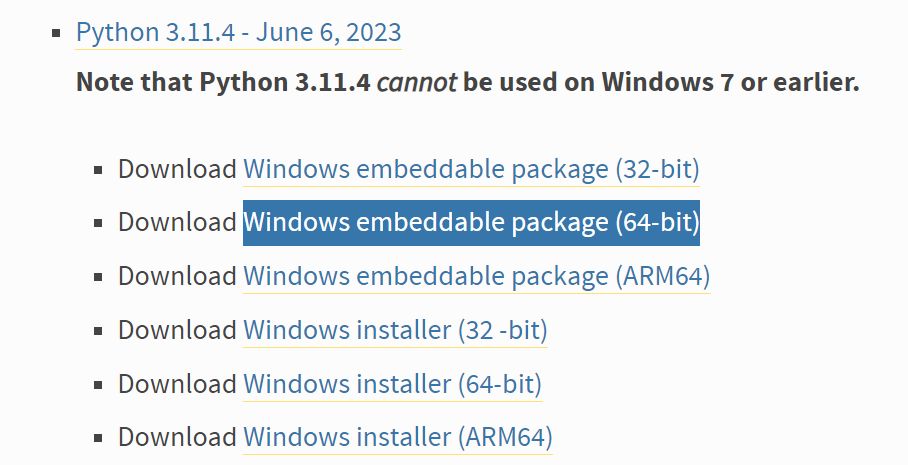
进入Python官方的下载页面:
https://www.python.org/downloads/windows/下载Windows embeddable package (64-bit)安装包,注意是embeddable版本的,并不是传统安装包,同时版本也需要和开发项目的Python版本吻合:
随后将其解压到项目的根目录,并且下载get-pip.py文件,放入到刚刚解压的安装包内,下载地址:
https://bootstrap.pypa.io/get-pip.py放入之后的目录结构如下:
D:\work\YiJianBaPu\python310>tree /f
Folder PATH listing for volume 新加卷
Volume serial number is 9824-5798
D:.
    get-pip.py
    libcrypto-1_1.dll
    libffi-7.dll
    libssl-1_1.dll
    LICENSE.txt
    pyexpat.pyd
    python.cat
    python.exe
    python3.dll
    python310.dll
    python310.zip
    python310._pth
    pythonw.exe
    select.pyd
    sqlite3.dll
    unicodedata.pyd
    vcruntime140.dll
    vcruntime140_1.dll
    winsound.pyd
    _asyncio.pyd
    _bz2.pyd
    _ctypes.pyd
    _decimal.pyd
    _elementtree.pyd
    _hashlib.pyd
    _lzma.pyd
    _msi.pyd
    _multiprocessing.pyd
    _overlapped.pyd
    _queue.pyd
    _socket.pyd
    _sqlite3.pyd
    _ssl.pyd
    _uuid.pyd
    _zoneinfo.pyd
随后在项目的根目录执行命令:
.\python310\get-pip.py
注意这里的python.exe并不是本地开发环境的Python,而是嵌入式解释器的Python。
此时我们的目录中多出两个文件夹Lib和Scripts:
D:\work\YiJianBaPu\python310>tree
Folder PATH listing for volume 新加卷
Volume serial number is 9824-5798
D:.
├───Lib
│   └───site-packages
│       ├───pip
│       │   ├───_internal
│       │   │   ├───cli
│       │   │   │   └───__pycache__
│       │   │   ├───commands
│       │   │   │   └───__pycache__
│       │   │   ├───distributions
│       │   │   │   └───__pycache__
│       │   │   ├───index
│       │   │   │   └───__pycache__
│       │   │   ├───locations
│       │   │   │   └───__pycache__
│       │   │   ├───metadata
│       │   │   │   ├───importlib
│       │   │   │   │   └───__pycache__
│       │   │   │   └───__pycache__
│       │   │   ├───models
│       │   │   │   └───__pycache__
│       │   │   ├───network
│       │   │   │   └───__pycache__
│       │   │   ├───operations
│       │   │   │   ├───build
│       │   │   │   │   └───__pycache__
│       │   │   │   ├───install
│       │   │   │   │   └───__pycache__
│       │   │   │   └───__pycache__
│       │   │   ├───req
│       │   │   │   └───__pycache__
│       │   │   ├───resolution
│       │   │   │   ├───legacy
│       │   │   │   │   └───__pycache__
│       │   │   │   ├───resolvelib
│       │   │   │   │   └───__pycache__
│       │   │   │   └───__pycache__
│       │   │   ├───utils
│       │   │   │   └───__pycache__
│       │   │   ├───vcs
│       │   │   │   └───__pycache__
│       │   │   └───__pycache__
│       │   ├───_vendor
│       │   │   ├───cachecontrol
│       │   │   │   ├───caches
│       │   │   │   │   └───__pycache__
│       │   │   │   └───__pycache__
│       │   │   ├───certifi
│       │   │   │   └───__pycache__
│       │   │   ├───chardet
│       │   │   │   ├───cli
│       │   │   │   │   └───__pycache__
│       │   │   │   ├───metadata
│       │   │   │   │   └───__pycache__
│       │   │   │   └───__pycache__
│       │   │   ├───colorama
│       │   │   │   ├───tests
│       │   │   │   │   └───__pycache__
│       │   │   │   └───__pycache__
│       │   │   ├───distlib
│       │   │   │   └───__pycache__
│       │   │   ├───distro
│       │   │   │   └───__pycache__
│       │   │   ├───idna
│       │   │   │   └───__pycache__
│       │   │   ├───msgpack
│       │   │   │   └───__pycache__
│       │   │   ├───packaging
│       │   │   │   └───__pycache__
│       │   │   ├───pkg_resources
│       │   │   │   └───__pycache__
│       │   │   ├───platformdirs
│       │   │   │   └───__pycache__
│       │   │   ├───pygments
│       │   │   │   ├───filters
│       │   │   │   │   └───__pycache__
│       │   │   │   ├───formatters
│       │   │   │   │   └───__pycache__
│       │   │   │   ├───lexers
│       │   │   │   │   └───__pycache__
│       │   │   │   ├───styles
│       │   │   │   │   └───__pycache__
│       │   │   │   └───__pycache__
│       │   │   ├───pyparsing
│       │   │   │   ├───diagram
│       │   │   │   │   └───__pycache__
│       │   │   │   └───__pycache__
│       │   │   ├───pyproject_hooks
│       │   │   │   ├───_in_process
│       │   │   │   │   └───__pycache__
│       │   │   │   └───__pycache__
│       │   │   ├───requests
│       │   │   │   └───__pycache__
│       │   │   ├───resolvelib
│       │   │   │   ├───compat
│       │   │   │   │   └───__pycache__
│       │   │   │   └───__pycache__
│       │   │   ├───rich
│       │   │   │   └───__pycache__
│       │   │   ├───tenacity
│       │   │   │   └───__pycache__
│       │   │   ├───tomli
│       │   │   │   └───__pycache__
│       │   │   ├───truststore
│       │   │   │   └───__pycache__
│       │   │   ├───urllib3
│       │   │   │   ├───contrib
│       │   │   │   │   ├───_securetransport
│       │   │   │   │   │   └───__pycache__
│       │   │   │   │   └───__pycache__
│       │   │   │   ├───packages
│       │   │   │   │   ├───backports
│       │   │   │   │   │   └───__pycache__
│       │   │   │   │   └───__pycache__
│       │   │   │   ├───util
│       │   │   │   │   └───__pycache__
│       │   │   │   └───__pycache__
│       │   │   ├───webencodings
│       │   │   │   └───__pycache__
│       │   │   └───__pycache__
│       │   └───__pycache__
│       ├───pip-23.3.1.dist-info
│       ├───pkg_resources
│       │   ├───extern
│       │   │   └───__pycache__
│       │   ├───_vendor
│       │   │   ├───importlib_resources
│       │   │   │   └───__pycache__
│       │   │   ├───jaraco
│       │   │   │   ├───text
│       │   │   │   │   └───__pycache__
│       │   │   │   └───__pycache__
│       │   │   ├───more_itertools
│       │   │   │   └───__pycache__
│       │   │   ├───packaging
│       │   │   │   └───__pycache__
│       │   │   ├───platformdirs
│       │   │   │   └───__pycache__
│       │   │   └───__pycache__
│       │   └───__pycache__
│       ├───setuptools
│       │   ├───command
│       │   │   └───__pycache__
│       │   ├───config
│       │   │   ├───_validate_pyproject
│       │   │   │   └───__pycache__
│       │   │   └───__pycache__
│       │   ├───extern
│       │   │   └───__pycache__
│       │   ├───_distutils
│       │   │   ├───command
│       │   │   │   └───__pycache__
│       │   │   └───__pycache__
│       │   ├───_vendor
│       │   │   ├───importlib_metadata
│       │   │   │   └───__pycache__
│       │   │   ├───importlib_resources
│       │   │   │   └───__pycache__
│       │   │   ├───jaraco
│       │   │   │   ├───text
│       │   │   │   │   └───__pycache__
│       │   │   │   └───__pycache__
│       │   │   ├───more_itertools
│       │   │   │   └───__pycache__
│       │   │   ├───packaging
│       │   │   │   └───__pycache__
│       │   │   ├───tomli
│       │   │   │   └───__pycache__
│       │   │   └───__pycache__
│       │   └───__pycache__
│       ├───setuptools-68.2.2.dist-info
│       └───_distutils_hack
│           └───__pycache__
└───Scripts
随后修改python310._pth文件,将内容改成下面这样:
python310.zip
.

# Uncomment to run site.main() automatically
import site
至此,嵌入式解释器就配置好了。
嵌入式安装依赖
此后,当我们需要安装依赖时,必须用嵌入式的解释器进行安装:
.\python310\python.exe -m pip install noisereduce -t E:\work\YiJianBaPu\python310\Lib\site-packages上面的命令展示如何嵌入式安装依赖库noisereduce。
这里需要注意的时,解释器必须是嵌入式解释器.\python310\python.exe,同时通过-t参数来指定三方库的位置,也就是说,必须安装到项目的目录中,而不是系统的默认开发环境目录。
安装成功后,我们必须可以在项目的目录下可以找到这个库:
D:\work\YiJianBaPu\python310\Lib\site-packages>tree
Folder PATH listing for volume 新加卷
Volume serial number is 9824-5798
D:.
├───noisereduce
│   ├───spectralgate
│   │   └───__pycache__
│   ├───torchgate
│   │   └───__pycache__
│   └───__pycache__
如此,依赖和解释器就紧密结合在一起了,换台机器,并不需要安装也可以直接启动。
现在,我们来编写一键启动脚本,launch.bat文件:
@echo off
chcp 65001
@echo 开始运行
call .\python310\python.exe -m spleeter separate -p spleeter:2stems -o ./output ./test.mp3
call .\python310\python.exe ./infer.py --model ./ckpt/model_ckpt_steps_104000_simplified.ckpt --wav ./output/test/vocals.wav
@echo 处理完毕,请按任意键
call pause
这里chcp命令用来声明编码,防止中文提示乱码。
call用来执行脚本,注意解释器必须使用项目内置的嵌入式解释器.\python310\python.exe
随后双击执行脚本launch.bat,程序返回:
Active code page: 65001
开始运行
INFO:spleeter:File ./output\test/vocals.wav written succesfully
INFO:spleeter:File ./output\test/accompaniment.wav written succesfully
accumulate_grad_batches: 1, audio_sample_rate: 44100, binarization_args: {'num_workers': 0, 'shuffle': True}, binarizer_cls: preprocessing.MIDIExtractionBinarizer, binary_data_dir: data/some_ds_fixmel_spk3_aug8/binary,
clip_grad_norm: 1, dataloader_prefetch_factor: 2, ddp_backend: nccl, ds_workers: 4, finetune_ckpt_path: None,
finetune_enabled: False, finetune_ignored_params: [], finetune_strict_shapes: True, fmax: 8000, fmin: 40,
freezing_enabled: False, frozen_params: [], hop_size: 512, log_interval: 100, lr_scheduler_args: {'min_lr': 1e-05, 'scheduler_cls': 'lr_scheduler.scheduler.WarmupLR', 'warmup_steps': 5000},
max_batch_frames: 80000, max_batch_size: 8, max_updates: 10000000, max_val_batch_frames: 10000, max_val_batch_size: 1,
midi_extractor_args: {'attention_drop': 0.1, 'attention_heads': 8, 'attention_heads_dim': 64, 'conv_drop': 0.1, 'dim': 512, 'ffn_latent_drop': 0.1, 'ffn_out_drop': 0.1, 'kernel_size': 31, 'lay': 8, 'use_lay_skip': True}, midi_max: 127, midi_min: 0, midi_num_bins: 128, midi_prob_deviation: 1.0,
midi_shift_proportion: 0.0, midi_shift_range: [-6, 6], model_cls: modules.model.Gmidi_conform.midi_conforms, num_ckpt_keep: 5, num_sanity_val_steps: 1,
num_valid_plots: 300, optimizer_args: {'beta1': 0.9, 'beta2': 0.98, 'lr': 0.0001, 'optimizer_cls': 'torch.optim.AdamW', 'weight_decay': 0}, pe: rmvpe, pe_ckpt: pretrained/rmvpe/model.pt, permanent_ckpt_interval: 40000,
permanent_ckpt_start: 200000, pl_trainer_accelerator: auto, pl_trainer_devices: auto, pl_trainer_num_nodes: 1, pl_trainer_precision: 32-true,
pl_trainer_strategy: auto, raw_data_dir: [], rest_threshold: 0.1, sampler_frame_count_grid: 6, seed: 114514,
sort_by_len: True, task_cls: training.MIDIExtractionTask, test_prefixes: None, train_set_name: train, units_dim: 80,
units_encoder: mel, units_encoder_ckpt: pretrained/contentvec/checkpoint_best_legacy_500.pt, use_buond_loss: True, use_midi_loss: True, val_check_interval: 4000,
valid_set_name: valid, win_size: 2048
| load 'model' from 'ckpt\model_ckpt_steps_104000_simplified.ckpt'.
100%|████████████████████████████████████████████████████████████████████████████████████| 2/2 [00:01<00:00,  1.88it/s]
处理完毕,请按任意键
Press any key to continue . . .
可以看到,执行结果和传统终端执行的结果是一致的。
区别是使用者并不需要本地配置Python环境,只需要下载项目的整合包即可。
通过嵌入式打包,可以把Python程序和解释器、依赖库一并打包分发给非专业用户,由此就提高了这部分用户群体的使用体验,最后奉上打包后的整合包,以飨众乡亲:
链接:https://pan.baidu.com/s/1HN3LAusdtofwqtb4gnSwvQ?pwd=72yqRecommend
About Joyk
Aggregate valuable and interesting links.
Joyk means Joy of geeK