

如何快速部署本地训练的 Bert-VITS2 语音模型到 Hugging Face - 刘悦的技术博客
source link: https://www.cnblogs.com/v3ucn/p/17964666
Go to the source link to view the article. You can view the picture content, updated content and better typesetting reading experience. If the link is broken, please click the button below to view the snapshot at that time.


Hugging Face是一个机器学习(ML)和数据科学平台和社区,帮助用户构建、部署和训练机器学习模型。它提供基础设施,用于在实时应用中演示、运行和部署人工智能(AI)。用户还可以浏览其他用户上传的模型和数据集。Hugging Face通常被称为机器学习界的GitHub,因为它让开发人员公开分享和测试他们所训练的模型。
本次分享如何快速部署本地训练的 Bert-VITS2 语音模型到 Hugging Face。
本地配置HuggingFace
首先注册HuggingFace平台:
https://huggingface.co/join
随后在用户的设置界面新建token,也就是令牌:

这里令牌有两种权限类型,一种是写权限,另外一种是读权限。
随后本地安装Huggingface客户端:
pip install huggingface_hub
随后运行命令登录Huggingface账号:
huggingface-cli login
此时需要用到刚刚创建的token,复制写token,粘贴到命令行中:
E:\work>huggingface-cli login

    _|    _|  _|    _|    _|_|_|    _|_|_|  _|_|_|  _|      _|    _|_|_|      _|_|_|_|    _|_|      _|_|_|  _|_|_|_|
    _|    _|  _|    _|  _|        _|          _|    _|_|    _|  _|            _|        _|    _|  _|        _|
    _|_|_|_|  _|    _|  _|  _|_|  _|  _|_|    _|    _|  _|  _|  _|  _|_|      _|_|_|    _|_|_|_|  _|        _|_|_|
    _|    _|  _|    _|  _|    _|  _|    _|    _|    _|    _|_|  _|    _|      _|        _|    _|  _|        _|
    _|    _|    _|_|      _|_|_|    _|_|_|  _|_|_|  _|      _|    _|_|_|      _|        _|    _|    _|_|_|  _|_|_|_|

    A token is already saved on your machine. Run `huggingface-cli whoami` to get more information or `huggingface-cli logout` if you want to log out.
    Setting a new token will erase the existing one.
    To login, `huggingface_hub` requires a token generated from https://huggingface.co/settings/tokens .
Token can be pasted using 'Right-Click'.
Token:
Add token as git credential? (Y/n) y
Token is valid (permission: write).
Cannot authenticate through git-credential as no helper is defined on your machine.
You might have to re-authenticate when pushing to the Hugging Face Hub.
Run the following command in your terminal in case you want to set the 'store' credential helper as default.

git config --global credential.helper store

Read https://git-scm.com/book/en/v2/Git-Tools-Credential-Storage for more details.
Token has not been saved to git credential helper.
Your token has been saved to C:\Users\zcxey\.cache\huggingface\token
Login successful
显示Login successful即代表登录成功。
随后,可以使用命令来创建模型的repo项目:
huggingface-cli repo create wizard3
这里创建巫师3系列角色模型。
程序返回:
E:\work>huggingface-cli repo create wizard3
git version 2.31.0.windows.1
git-lfs/2.13.2 (GitHub; windows amd64; go 1.14.13; git fc664697)

You are about to create v3ucn/wizard3
Proceed? [Y/n] y

Your repo now lives at:
  https://huggingface.co/v3ucn/wizard3

You can clone it locally with the command below, and commit/push as usual.

  git clone https://huggingface.co/v3ucn/wizard3
说明已经创建好模型项目了。
当然,过程中可能会报443的错误,如果您身在国内,这是十分合理的现象。
此时,可以通过给git配置代理来解决:
配置socks5

git config --global http.proxy socks5 127.0.0.1:7890
git config --global https.proxy socks5 127.0.0.1:7890

配置http

git config --global http.proxy 127.0.0.1:7890
git config --global https.proxy 127.0.0.1:7890
其中7890为您在国内学术上网用的端口号,啥叫学术上网?很抱歉这里无法多做解释。
同时也可以通过命令取消git学术上网:
git config --global --unset http.proxy
git config --global --unset https.proxy
接着本地克隆项目:
git clone https://huggingface.co/v3ucn/wizard3
随后将模型本体和配置文件config.json放入wizard3目录。
提交后,推送即可:
E:\work>cd wizard3

E:\work\wizard3>git add -A

E:\work\wizard3>git commit -m "commit from liuyue "
[main cd327b9] commit from liuyue
 2 files changed, 114 insertions(+)
 create mode 100644 G_200.pth
 create mode 100644 config.json

E:\work\wizard3>git push
Uploading LFS objects:   0% (0/1), 925 MB | 2.4 MB/s
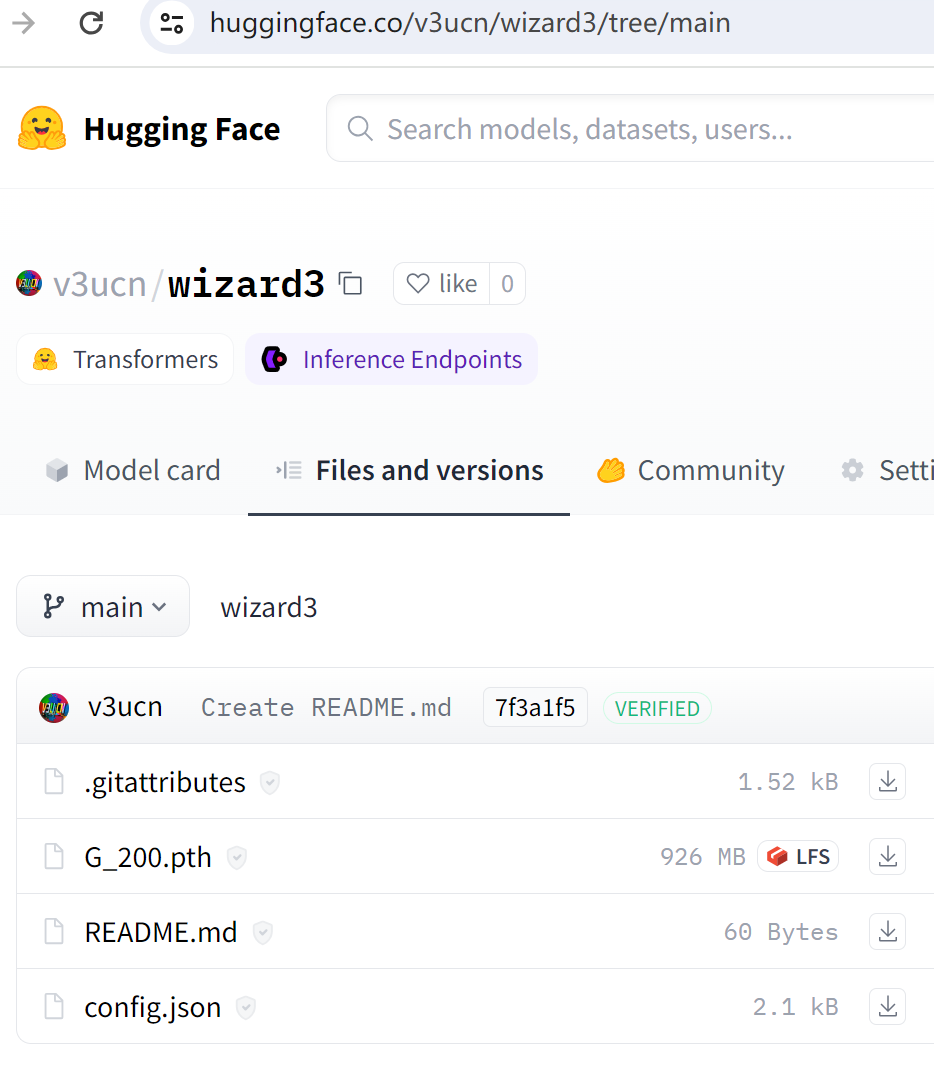
此时,git就会把模型推送到Huggingface云端。
推送完毕后,访问线上地址,即可查看模型:
https://huggingface.co/v3ucn/wizard3/tree/main
Hugging Face的优势包括可访问性、集成性、快速原型设计和部署、社区和成本效益,是不可多得的机器学习交流平台。
Recommend
About Joyk
Aggregate valuable and interesting links.
Joyk means Joy of geeK