
🕵️♀️ Detect And Blur Human Faces with Ai in NextJS ✨
source link: https://dev.to/random_ti/detect-and-blur-human-faces-with-ai-in-nextjs-hg6
Go to the source link to view the article. You can view the picture content, updated content and better typesetting reading experience. If the link is broken, please click the button below to view the snapshot at that time.

Hellooo Developers 👋 Welcome to my another blog post.
Have you ever uploaded a photo with other people's faces online and wondered how to keep their privacy? Face detection and blurring is an important privacy feature that all applications should have.
Implementing face detection and blurring isn't very difficult thanks to services like PixLab that provide ready-made AI APIs.
In this blog post, I will show you a live demo and how you can implement this in your Nextjs/React app using PixLab's powerful computer vision APIs.
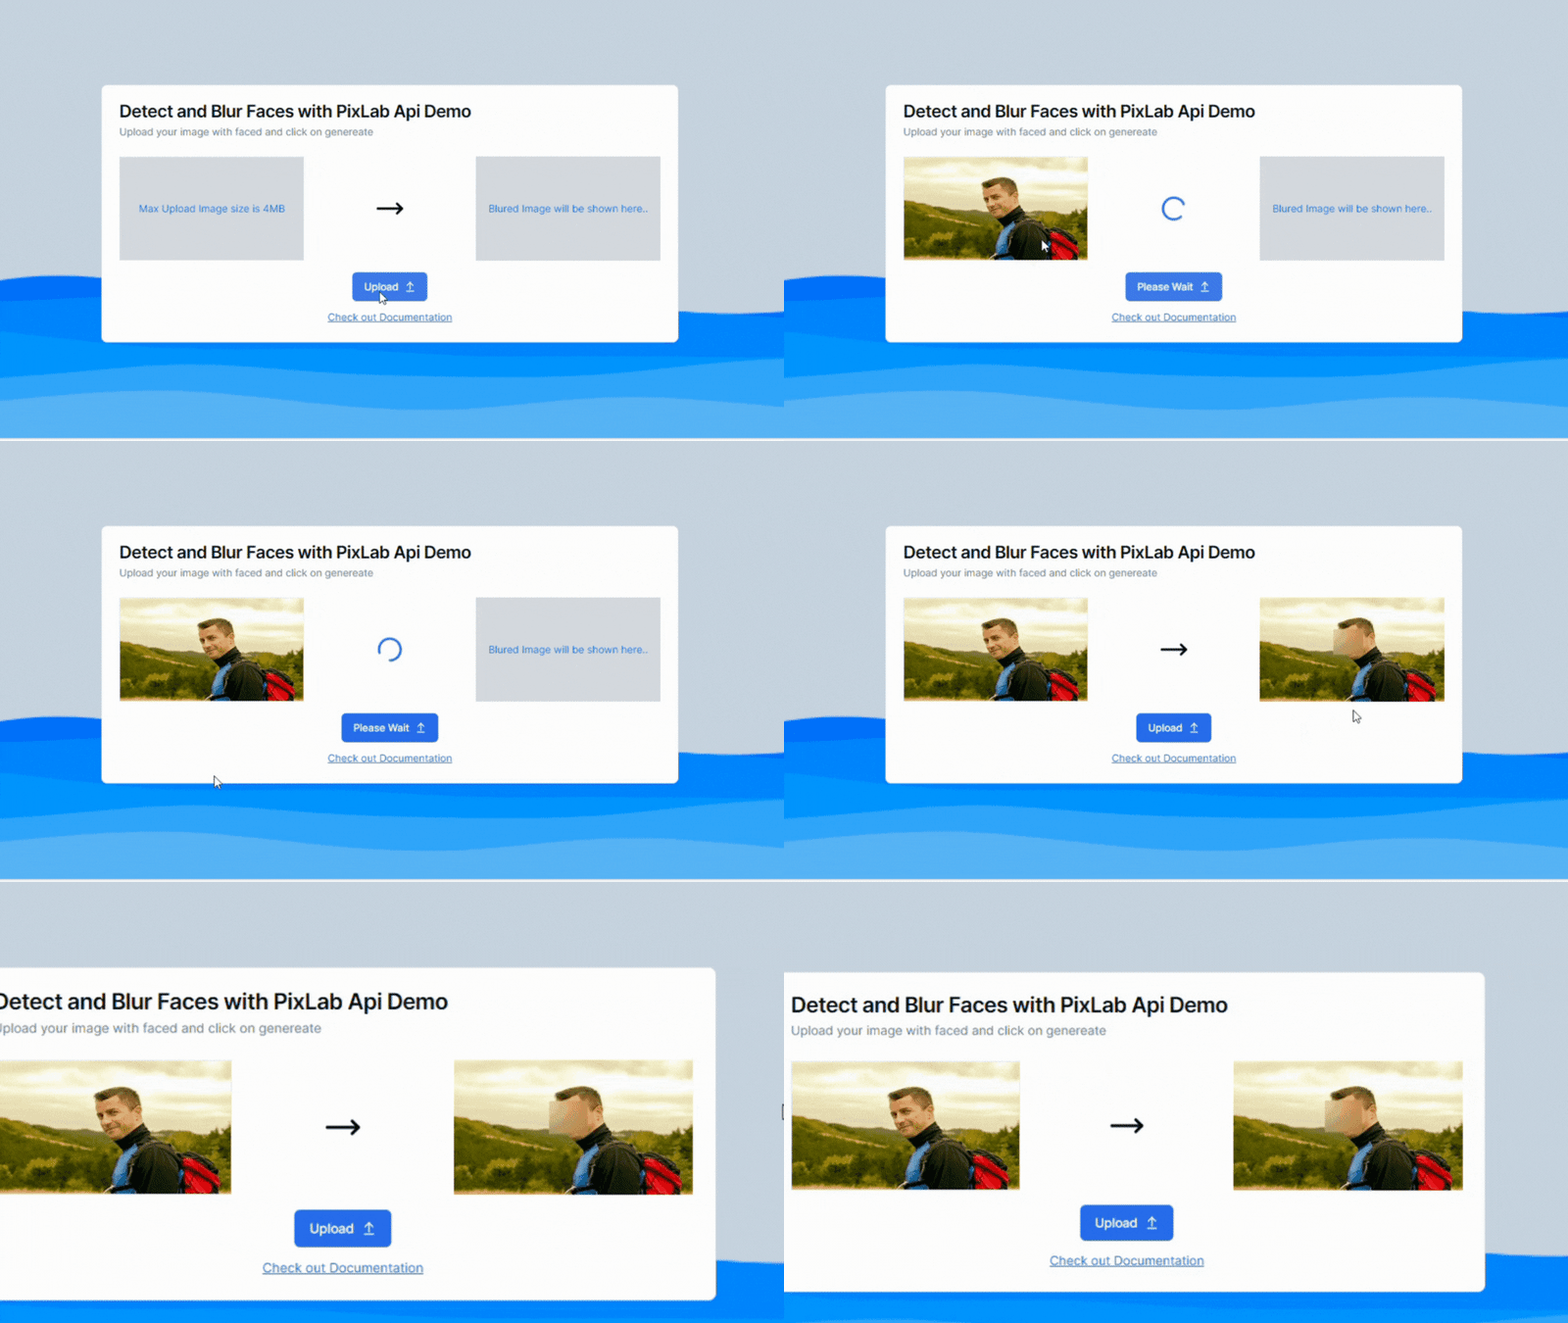
Click here to see Demo 🟢

uploaded image 👇
How can Pixlab help implement face detection and blurring?? 🤔
PixLab is a platform, which give a user-friendly application programming interface (API) to their state-of-the-art AI models.
PixLab has a FACEDETECT API that can accurately find all human faces in an image.
It returns the coordinates of each detected face. We can then use these coordinates with PixLab's MOGRIFY API to apply a blur filter only on the face regions, leaving the rest of the image intact.
Let's see how to impleament in Nextjs ✌
Before diving into the tutorial i want to tell you that i had not used any 3rd party library here i used only Pixlab Api here.
1. First get the image from user with <input/>
 <input
     type="file"
     accept=".jpeg, .jpg, .png"
     onChange={handleImageUpload}
 />
2. Now let's define a handleImageUpload function for onChange input.
const handleImageUpload = async (e: React.ChangeEvent<HTMLInputElement>) => {
    try {
      const file = e.target?.files?.[0];
    if (file) {
        const fileSizeMB = file.size / (1024 * 1024); // Here i am Converting bytes to megabytes
        if (fileSizeMB > 4{
          toast.error(`File size exceeds the limit of 4MB`);
          return;
        }
        const imgFile = new File([file], file.name, { type: "image/png" || "image/jpeg" });
    const formData = new FormData();
        formData.append("file", imgFile);
    const upload = await fetch("/api/blurface", {
          method: "POST",
          body: formData,
        });
        const response = await upload.json();
        if (upload.status === 200) {
          setBluredImage(response.blurImgUrl.link);
        } else {
           toast.error(response.message);
        }
      }
    } catch (error) {
      console.log("Something Went Wrong :" + error);
    }
  };
3. Now finally let's Create a /api/faceblur Api 🚀
Before creating /api/faceblur get the PixLab Api Key and set it to .env.local file with variable name NEXT_PUBLIC_BLUR_IMAGE_KEY.
// src/api/blurface

import axios from "axios";
import { NextRequest, NextResponse } from "next/server";

export async function POST(req: NextRequest) {
  try {
    const data = await req.formData();
    const file: File | null = data.get("file") as unknown as File;
    if (!file) {
      return NextResponse.json(
        { message: "No image Provided!" },
        { status: 400 }
      );
    }
    // CONVETING TO BUFFER AND THEN BUFFER TO BLOB
    const bytes = await file.arrayBuffer();
    const buffer = Buffer.from(bytes);
    const toBlob = new Blob([buffer], { type: file.type });

    // Api 1 =>  UPLOADING TO PIXLAB AWS
    const formData = new FormData();
    formData.append("file", toBlob, file.name);
    formData.append("key", process.env.NEXT_PUBLIC_BLUR_IMAGE_KEY || "");
    const uploadImg = await fetch(`https://api.pixlab.io/store`, {
      method: "POST",

      body: formData,
    });

    const finalRes = await uploadImg.json();

    if (finalRes.status !== 200) {
      return NextResponse.json(
        { message: "Uploading Failed to pixlab" },
        { status: 400 }
      );
    }

    // Api 2 => GETTING COORDIANATES OF THE FACES IN IMAGE

    const getCordinate = await axios.get("https://api.pixlab.io/facedetect", {
      params: {
        img: finalRes.link,
        key: process.env.NEXT_PUBLIC_BLUR_IMAGE_KEY,
      },
    });
    //   console.log(getCordinate.data);
    if (getCordinate.data.faces.length === 0) {
      return NextResponse.json(
        { message: "No faces Found! Try another" },
        { status: 400 }
      );
    }

    // Api 3 =>  FINALLY GENERATING IMAGE FACES BLURED

    const blurFaces = await axios.post("https://api.pixlab.io/mogrify", {
      img: finalRes.link,
      key: process.env.NEXT_PUBLIC_BLUR_IMAGE_KEY,
      cord: getCordinate.data.faces,
    });

    const blurImgUrl = await blurFaces.data;

    if (blurImgUrl.status !== 200) {
      return NextResponse.json(
        { message: "Falied to Blur Faces! Try again" },
        { status: 400 }
      );
    }

    return NextResponse.json({ blurImgUrl }, { status: 200 });
  } catch (error) {
    console.log(error);
    return NextResponse.json({ message: "Error server" }, { status: 500 });
  }
}
And if you face any problem then checkout my Github repositories how i had impleamented it.
That's it 🙏
Automatic face detection and blurring is an important privacy and compliance feature. With PixLab, NextJS/ReactJS developers can add this functionality to their apps effortlessly.
Give their APIs a try to discover other ways you can enhance your projects with computer vision.
Thank you for reading till here.
Happy Coding 👋
Recommend
About Joyk
Aggregate valuable and interesting links.
Joyk means Joy of geeK


