

3 Ways to Get Started with a React App in 2024
source link: https://blog.bitsrc.io/3-ways-to-create-a-react-app-in-2024-e50e67f36a62
Go to the source link to view the article. You can view the picture content, updated content and better typesetting reading experience. If the link is broken, please click the button below to view the snapshot at that time.

3 Ways to Get Started with a React App in 2024
Leverage tools like Bit, Vite and Refine to create better React apps in 2024

As we step into 2024, React remains a web development powerhouse, outstanding in seamlessly crafting dynamic and responsive user interfaces. Since its creation by Facebook, this open-source JavaScript library has gained significant popularity.
Since React.js is more popular among developers, it is critical to stay updated with React.js development in 2024 to get the spotlight among the other React.js developers.
Therefore, let’s take a look at three different ways in which you can create a React app in 2024, while focusing on improving developer experience!
Technique 01: Bit
Bit is a tool for component-driven development, enabling design, build, test, and versioning independently. Also, it can be introduced as a platform for creating and sharing components.
Bit components can be UI components, a backend service, or a CLI script.
Why Bit should be used with React?
Think about a simple react application that allows users to add inputs, and list them. So, according to this, there are two main components, Input and List.
But, we can use the “create react app” method easily for this situation. But, if the application begins to grow into a large monolith application, there can be some issues.
- Slower deployment time.
- Require full codebase access even for minor changes.
- There can be versioning issues with global updates for single component changes.
Therefore, Bit comes into play in these kinds of situations. With Bit, you can design everything in independent components.
Bit helps to create apps like building Legos.
Building React Components using Bit
Let’s build the same components we discuss above.
Step 1: Pre-Requirements
First, install the Bit on your local development environment by using the below command.
npx @teambit/bvm install
Next, create the below items on Bit.
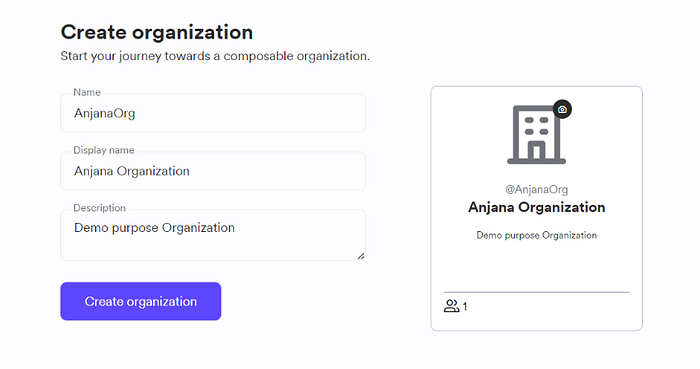
Bit Organization: It is a shared space for developers’ groups for projects.
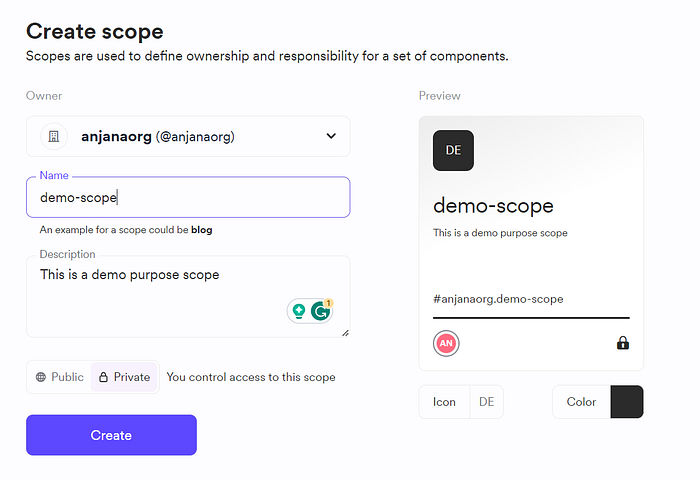
Bit scope: A Bit Scope serves as a remote server, allowing you to export components for universal access and sharing
Step 2: Workspace creation
Now, we can create a Bit workspace using the below command.
bit new react my-workspace --env teambit.react/react-env --default-scope anjanaOrg.demo
You can replace “yourOrgnizationName.your-scope” with your relevant Bit Organization name and the scope name.
Also, you can change the workspace name by replacing “my-workspace”
What’s a Bit workspace? Well, a Bit workspace is a disposable environment you’ll use to work on your Bit components.
Each Bit component contains its environment that contains all the details that need to be run independently. Therefore, Bit Workspace is only for development, not project configuration.
Now you can launch the app using the below command.
bit start
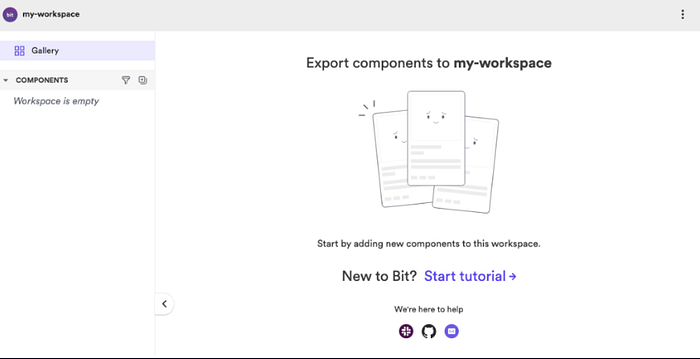
Go to http://localhost:3000 in your browser. Currently, your workspace is empty as no component is being tracked.
Step 3: Creating Bit component
You can create a bit component by using the below command.
bit create react components/Input
Like that, you can create another component for the List.
And folder structure will look like this.
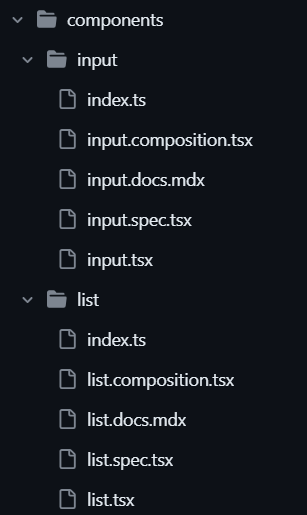
As you can see there are main 5 files in each component.
- Index file: Act as the component root file.
- Component file: Used to add core business logic of the component
- Composition: Used to define component variants.
- Spec file: Component testing file
- Documentation file: Used to explain the component’s usage with live examples.
Step 4: Creating Component and Composition files
List.ts: The list component will display a list of tasks with dynamic rendering using React.
import React from 'react';

export type ListProps = {
  tasks: string[];
};
export const List = ({ tasks }: ListProps) => {
  return (
    <ul>
      {tasks.map((task, index) => (
        <li key={index}>
          {task}
        </li>
      ))}
    </ul>
  );
};
list.composition.tsx: This renders the List component with an empty task array, initializing state.
import React, { useState } from 'react';
import {List} from './list';

const ListComposition = () => {
  const [tasks] = useState<string[]>([]);
  return (
    <div>
      <List tasks={tasks} />
    </div>
  );
};
export default ListComposition;
Input.tsx: This will allow users to add task to the list by clicking a button.
import React, { useState } from 'react';

export type InputProps = {
  onAddTask: (task: string) => void;
};

export const Input = ({ onAddTask }: InputProps) => {
  const [task, setTask] = useState<string>('');
  const handleInputChange = (e: React.ChangeEvent<HTMLInputElement>) => {
    setTask(e.target.value);
  };
  const handleAddTask = () => {
    if (task.trim() !== '') {
      onAddTask(task);
      setTask('');
    }
  };
  return (
    <div>
      <input type="text" value={task} onChange={handleInputChange} placeholder="Type in here..."/>
      <button type="button" onClick={handleAddTask}>Add to the List</button>
    </div>
  );
};
Input.compostion.tsx: This code segment manages tasks with the Input component, updating state and handling task addition through onAddTask.
import React, {useState} from 'react';
import { Input } from './input';

export const InputComposition = () => {
  const [tasks, setTasks] = useState<string[]>([]);

const handleAddTask = (task: string) => {
    setTasks([...tasks, task]);
  };
  return (
  <Input onAddTask={handleAddTask} />);
};
Now after you have created those files successfully, you can create new versions for components and export components to the bit cloud using the below commands.
bit tag
bit export
Building React App using created component
Currently, we are done with creating multiple reusable components that can be used in any project. So, let’s build a simple React app using those components.
With bit, you can create a React app using the below command.
bit create react-app apps/demo
You can use any name for the app by replacing “demo”. This command generates a React app that works seamlessly integrating your components. Then open your component file(demo.tsx) and include below code segment into it.
import {useState} from 'react';
import { Input } from '@anjanaorg/demo.components.input';
import { List } from '@anjanaorg/demo.components.list';

export function DemoApp() {
  const [tasks, setTasks] = useState<string[]>([]);
  const parentContainerStyle: React.CSSProperties = {
    display: 'flex',
    flexDirection: 'column',
    alignItems: 'center',
    justifyContent: 'center',
    height: '100vh',
  };
  const handleAddTask = (task: string) => {
    setTasks([...tasks, task]);
  };
  return (
    <div style={parentContainerStyle}>
      <h1>This is a Bit Demo</h1>
      <Input onAddTask={handleAddTask} />
      <h2>List</h2>
      {tasks.length === 0 ? ('Your List is empty'):<List tasks={tasks} />}
    </div>
  )
}
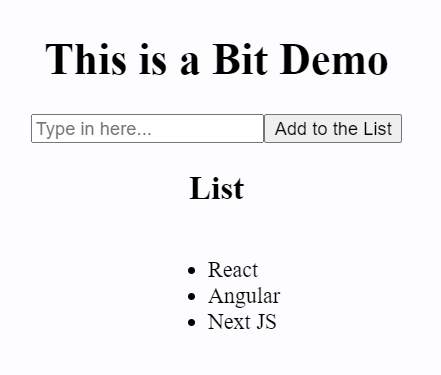
As you can see, I have imported and reused the components we’ve built before.
Next, launch the app by running the following command:
bit run demo
After executing this command, you’ll have the opportunity to observe your application on its live server(http://localhost:3000/).
Now, you can create more components such as headers or footers, and re-use them in other projects like this.
Technique 02: Vite
Vite is a build tool that gives faster and learner development experience for modern web development. It consists of two major parts.
- Dev server — This provides rich feature enhancement such as hot module replacement, pre-bundling, and support for typescript and JSX, over the native modules.
- Build command — Vite takes all your code and bundles it up using a tool called Rollup that results in a set of static files that you can easily put on a web server for others to access.
Why Should You Use Vite?
This can be discussed under 3 main topics.
- Performance — Since pre-bundling helps improve page speed and convert common/UMD modules to ESM, pre-bundling with Vite’s es-build is way faster than the other JS bundlers.
- Configuration options — allow you to have more control over your project configurations by customizing vite-config.ts or vite-config.js on your root file.
- Hot module replacement — Vite enables this option to allow seamless updates to your app without refreshing the entire page. It is also integrated by default. Because of this feature, your app’s performance will increase while the app becomes lighter and faster regardless of the size of your app.
How To Build a React app using Vite?
First, you have to run the below command in the terminal. You can use either “npm”, “pnpm”, “yarn”, or “Bun”. I continued this using npm.
npm create vite@latest
This command will set up initial configurations by asking the below questions.

Figure: project set-up configurations
Then, they will ask for the project name. Give any name you like as the project name. Then, go ahead and select “React” as for the framework. I selected “TypeScript” as the variant. You can choose any other if you want.
So after you successfully configured these steps, you will see this message.
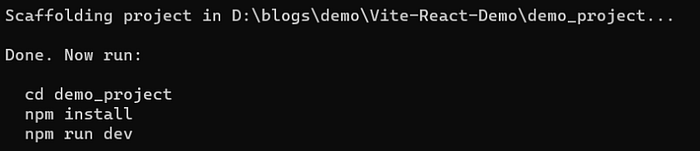
Figure: Project set-up success message
Then, as per the instructions, go to your project directory and use “npm install” and “npm run dev”.
This will start a vite server on port 5173 in localhost, And it will look like this.
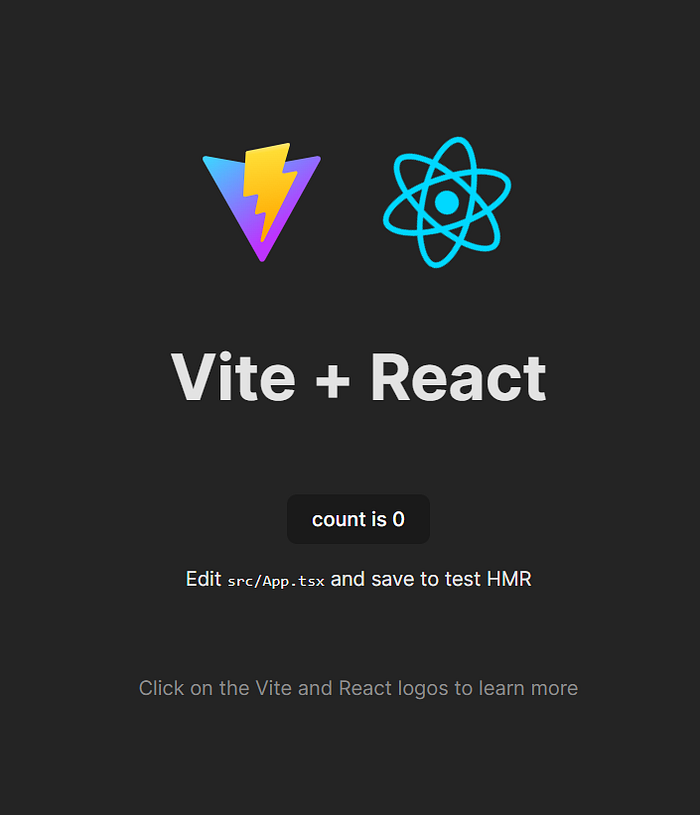
Figure: Project welcome page
Also, you can change the port by adding this code after the plugins in the vite.config.ts file.
server: {
    port: 5000,
},
If you pay attention, maybe you have noted the speed of Vite already. When you run the “npm run dev” command, the server starts fast compared to the CRA method.
Not only that Vite will give you the initial folder structure like below.
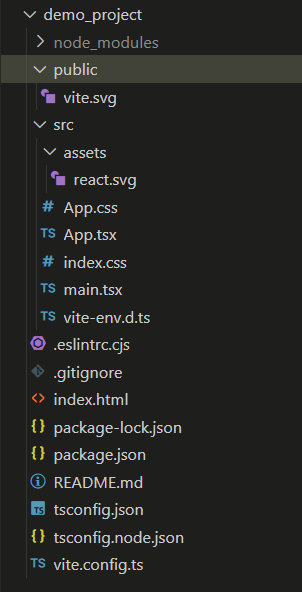
Figure: Vite folder strucure
As you can see all the files, other than the two SVG files, there aren’t any unnecessary files.
Also, if you open the package.json file you can see, that they have already configured the scripts and installed the initial necessary dependencies such as “typescript”, “react-dom”, and the Eslint.
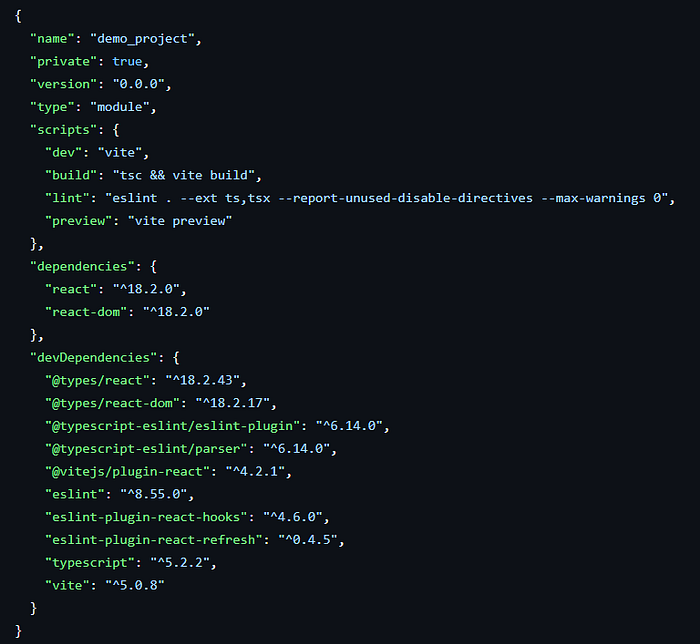
Figure: Package.json file
So now you can jump to the development process directly. Additionally for the demo, I have created a simple auto-counting app.
I created a folder named “components” in the src, created the file named demo.tsx, and added the below code.
import { useState, useEffect } from 'react';

const Demo: React.FC = () => {
 const [value, setValue] = useState(0);
 useEffect(() => {
  const timeoutId = setTimeout(() => {
   setValue((prevValue) => prevValue + 1);
  }, 2000);
  return () => clearTimeout(timeoutId);
 }, [value])
 return (
   <>
     <div>Count : {value}</div>
     <p>Increased by one for every second</p>
    </>
 )
}
export default Demo;
Then I navigated to the app.tsx, removed the existing code, and added the code below.
import Demo from './components/demo';
import './App.css';

function App() {
 return (
  <>
   <h1>Vite + React</h1>
   <Demo />
  </>
 )
}
export default App
And it resulted like this.
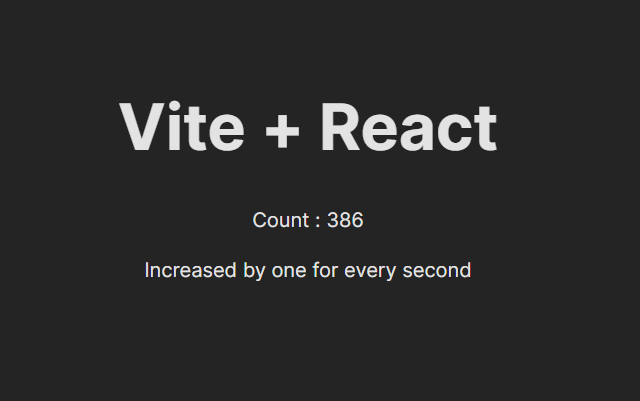
Figure: Counting app demo
Technique 03: Refine
Refine is a meta React-based framework for web development. It’s an open-source solution designed for web applications, including internal tools, admin panels, B2B apps, and dashboards. It stands out in constructing CRUD applications easily and efficiently.
Important Concepts of Refine Framework
There are three main concepts in handling data with Refine.
Concept 01: Data providers
In Refine, data providers simplify communication with APIs in data-intensive React applications. It acts as a data layer for your app. It handles HTTP requests by abstracting complexities.
Also, you can create custom providers, following a defined structure with methods like create, update, delete, getList, etc.
It is important to note that all interactions occur through data hooks in your Refine application, triggering the corresponding data provider methods.
Concept 02: Data hooks
These made integration with web applications much easier for web developers. Using these hooks you can trigger any of the methods in the data provider. Each method in the data provider has its corresponding data hook.
As an example, you can use the createMany method using the useCreateMany hooks, the useCreate hook can trigger the create data provider.
Also, hooks are specialized for some tasks, such as data handling, authentication, routing, and more.
Concept 03: The Inferencer
This is about creating CRUD pages automatically by analyzing data modal based on the resource schema.
There are 3 main benefits of using this.
- Reduce the amount of time spent in creating views.
- Instead of starting from scratch, the code generated by the Inferencer is good starting point.
- Avoid common mistakes that can occur when manually creating crud operations.
Building a React app using Refine
First, give the below command in the terminal. You can use npm, yarn, or pnpm as the package manager.
npm create refine-app@latest
This command will set up initial configurations by asking these questions.
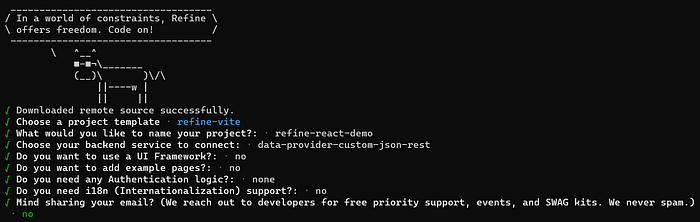
Figure: Project set-up configurations
As you can see, I have used react-vite as the project template, and RESTfull backend integration and nothing was selected as the UI framework.

Figure: Project set up success page
Then you can give the “npm run dev” command to the terminal and it will launch the development server on port 5173 in localhost. Initially, the web page looks like this.

Figure: Initial web page
To create a crud operation, first run the below command in the terminal. These packages are used by the Inferencer to generate forms and tables.
npm i @pankod/refine-react-table @pankod/refine-react-hook-form
Then, you can remove the existing code of the App.tsx and, add the code below. Also, you can get in-depth details regarding the code using documentation.
import { Refine } from "@refinedev/core";
import routerBindings, { NavigateToResource, UnsavedChangesNotifier } from "@refinedev/react-router-v6";
import dataProvider from "@refinedev/simple-rest";
import { BrowserRouter, Route, Routes, Outlet } from "react-router-dom";
import { HeadlessInferencer } from "@refinedev/inferencer/headless";

import { Layout } from "./components/layout";
import "./App.css";
const App = () => {
  return (
    <BrowserRouter>
      <Refine
        routerProvider={routerBindings}
        dataProvider={dataProvider("https://api.fake-rest.refine.dev")}
        resources={[
          {
            name: "posts",
            list: "/posts",
            show: "/posts/show/:id",
            create: "/posts/create",
            edit: "/posts/edit/:id",
          },
        ]}
        options={{
          syncWithLocation: true,
          warnWhenUnsavedChanges: true,
        }}
        <Routes>
          <Route
            element={
              <Layout>
                <Outlet />
              </Layout>
            }
<Route index element={<NavigateToResource resource="posts" />} />
            <Route path="posts">
              <Route index element={<HeadlessInferencer />} />
              <Route path="show/:id" element={<HeadlessInferencer />} />
              <Route path="edit/:id" element={<HeadlessInferencer />} />
              <Route path="create" element={<HeadlessInferencer />} />
            </Route>
          </Route>
        </Routes>
        <UnsavedChangesNotifier />
      </Refine>
    </BrowserRouter>
  );
};
export default App;
For this, I have used fake REST APIs generated by the JSON server. You can read more about it using its documentation.
Here, Refine will generate crud operations and its pages automatically for the “posts” resource based on the API response using the the Inferencer feature.
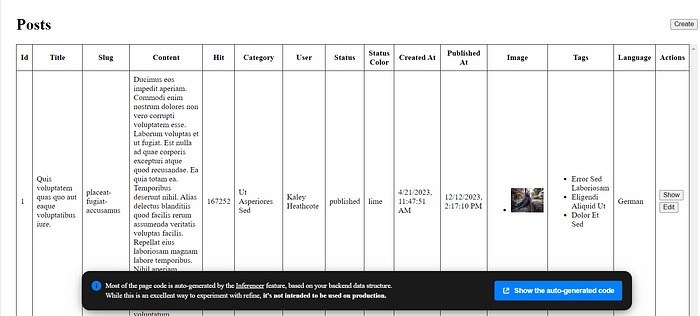
Figure: Posts page
If you follow the steps, you will see the initial web page as this. You can navigate to the post creation page, show one post details page, and edit post details for each post.
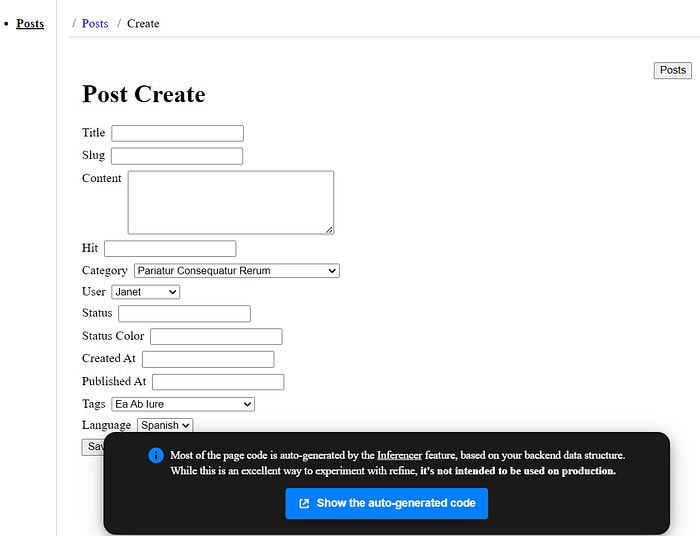
Figure: Post creation page
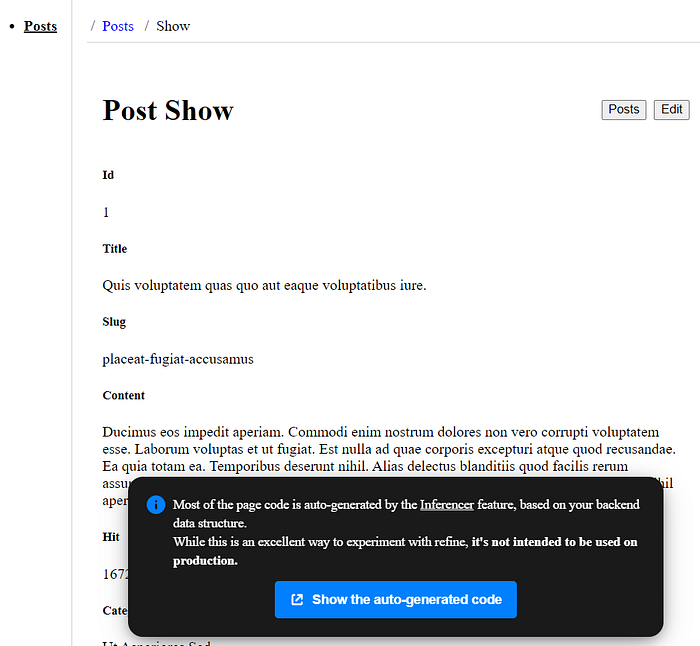
Figure: Post-show page
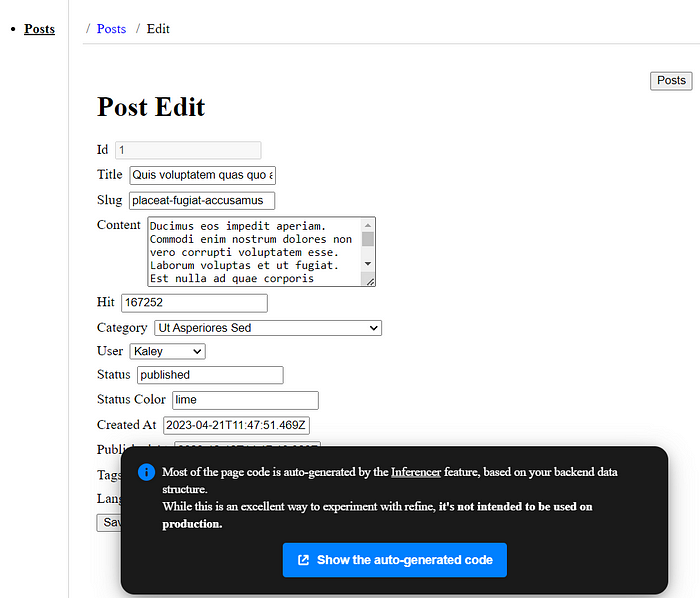
Figure: Post edit page
You can get all the auto-generated codes for the cruds from each page.
You can learn how to create crud operations manually by using auto-generated code from the documentation.
In the code, you can change the resource types into others mentioned in the documentation and check according to the data model how the pages are changing automatically.
Conclusion
As we step into 2024! we can replace our traditional methods of working with React using external tools, and new frameworks. Bit lets you break down your app into manageable components, avoiding those messy monolith issues. Vite offers a speedy development experience with advanced features. , Refine emerges as a meta-framework simplifying CRUD applications.
Staying updated with these tools ensures a React developer’s spot in the dynamic landscape of web development.
If you want you can what we’ve built in the above demos, check out my GitHub repos.
Thank you for reading.
Recommend
About Joyk
Aggregate valuable and interesting links.
Joyk means Joy of geeK