

The Fundamentals of Bit Component Lifecycle
source link: https://blog.bitsrc.io/bit-component-lifecycle-99a8462469e2
Go to the source link to view the article. You can view the picture content, updated content and better typesetting reading experience. If the link is broken, please click the button below to view the snapshot at that time.

The Fundamentals of Bit Component Lifecycle
Learn the basics of Bit component development lifecycle with tips and tricks
As a developer, you may have encountered a situation where you need to reuse multiple blocks of code from your Git repository across the organization or between projects. You have also decided to maintain them within the repository and use Bit to publish packages to facilitate reuse across projects.
A great example would be sharing a frontend design system across the organization or a modular framework between projects.
You may also have configured CI/CD and development workflows for your application lifecycle.
So, how can you introduce Bit into your ecosystem with least friction to facilitate code reuse? Let’s find out.
First, it’s worth investigating how we work with Bit components and their lifecycle. This can be understood by answering the following three questions.
- How do you create and modify Bit components in your local development environment?
- How are these components tested and built in your local development environment and on CI?
- How are these components released on CD?
Bit development environment (local)
As you are already familiar, we start by creating a Bit workspace by running bit new basic my-workspace (for a new project) or bit init (inside of an existing project). These commands create the .bitmap and workspace.json files. You can also use a Bit workspace starter (pre-configured workspace template) to create a workspace with its default configuration and components.
Note: Looking at the complexity of the existing project, you can decide whether to create a separate directory for Bit components or initialize the workspace at the root.
After creating the workspace, you can create new Bit components and track them in your Git repository.
Do we need track .bitmap and workspace.json files as well in Git?
Yes!. You need to track both .bitmap and workspace.json files in Git. In this option, your Bit components will be source-controlled by Git and Bit, but the source of truth will only be Git. That means you will use Git for collaboration, reusing most of your existing CI/CD infrastructure and development workflows.
After creating the workspace and tracking it in Git, you must modify your existing CI pipelines to build, test, and publish Bit components. This is made easy with Bit’s built-in support for popular CI platforms, GitHub Actions, GitLab Pipelines, Jenkins, Azure DevOps and custom scripts.
Note: For more information on configuring CI, check out my article on Integrating Bit with your existing CI.
Now, you can track directories as components that will be published into bit.cloud. Bit takes care of their dependencies and provides insight into your project’s dependency graph. After that, you can access them from any project in multiple ways.
- Install them as NPM packages directly from bit.cloud, using its package registry features.
- Import them into a Bit workspace in a different project.
- Fork (clone) them into a Bit workspace in a different project.
Compiling, testing, and building components
You can compile, test, and build components in your workspace locally using bit compile , bit test and bit build commands.
Bit uses capsules to isolate your components from potential referencing and dependency issues to ensure that they are truly independent of one another when building them.
So, does this mean Bit comes with an internal build pipeline for components with a default set of configurations? Yes. Bit components use a pipeline configured by default in its dev environment. Since everything is a component in Bit, you can even fork the dev environment component and customize your build pipeline. The build pipeline configuration looks as follows.
export class MyEnv {
...
/**
* the compiler for components maintained by this env.
* used for compilation during development ('bit compile', 'bit watch', 'bit start').
*/
compiler(): EnvHandler<Compiler> {
return MyCompiler.from(myCompilerConfig);
}
/**
* the tester for components maintained by this env.
* used for testing during development ('bit test').
*/
tester(): EnvHandler<Tester> {
return MyTester.from(myTesterConfig);
}
/**
* the build pipeline for components maintained by this env
* this pipeline includes compilation, tests, and linting tasks
* ('bit build', 'bit snap', 'bit tag')
*/
build() {
return Pipeline.from([
MyCompilerTask.from(myCompilerConfig),
MyLinterTask.from(myLinterConfig),
MyTesterTask.from(myTesterConfig),
]);
}
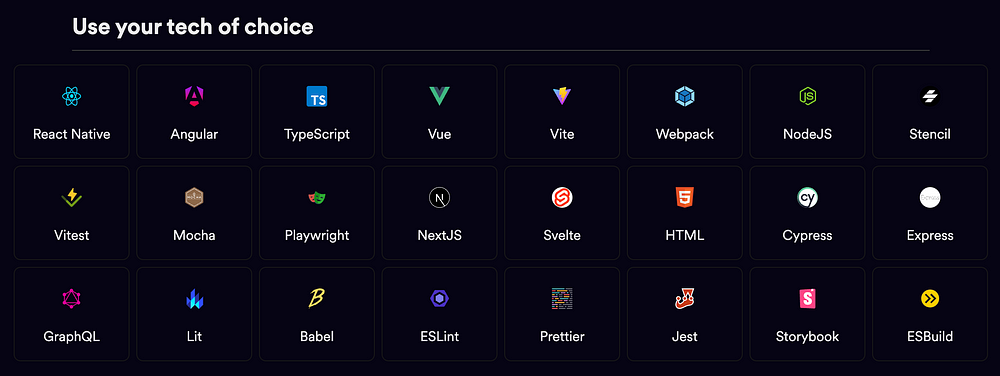
...Bit provides dev environments for popular frameworks, libraries, and platforms like React, Angular, Vue, NodeJS, TypeScript, Docker, etc.
In addition to these build steps, Bit also provides support for linting, formatting, and previewing (useful for UI components) as a part of its pipeline for code consistency.
Use Ripple
Bit recently introduced its native CI named Ripple, which does much more. The main difference is that instead of running the build locally or in your existing CI agent, it will parallel execute the component builds inside the Ripple CI in distributed containers.
Releasing components
So far, we have looked into creating, modifying, and tracking component changes in Git.
Once the component is ready, how do we release the component?
Bit supports tagging and exporting new component versions to bit.cloud. In your CI, you can run bit tag -m <message>" and and bit export commands to export components.
So, you might wonder how the CI/CD pipeline knows which version to bump each modified component.
Since Bit components support semantic versioning (x-major.x-minor.x-patch), you must decide which version to bump depending on the changes you made to the components. And, if multiple components are modified in your workspace, you may need to provide versions on a granular level, which complicates things.
To solve this, there are two options at hand. The first option is to use soft tagging components. The other one is extending your CI/CD pipelines to explicitly provide the version bump parameters.
Note: All the Bit integrations for popular CI platforms support this (e.g., GitHub labels, Git commit message, Pull Request title).
The bit tag command has a rich set of flags to support different ways to increment versions.

Soft tagging
The motive here is to bump the version of your components in your local development environment but defer releasing it permanently. To do that, you can use the flag --soft while tagging the components locally by running bit tag --soft --minor -m "my first soft tag" . When doing the soft tag, you have complete control over defining the subsequent versions of your components eventually stored in the .bitmap file. Once you commit and push it to Git, your team members can review it and execute the tag command with the --persist flag from your CI/CD pipeline. This persists the version and then releases it by exporting it to bit.cloud.
Note: After that, your .bitmap file gets modified. Therefore, you must commit the .bitmap file back to your repository from your CI. Bit integrations for popular CI platforms have tasks to handle this.
Using CI/CD parameters to increment
For this approach, you need to extend your CI/CD configuration to pass flags like --patch , --minor , --major , --increment-by with relevant values for the bit tag command. The main challenge of this approach is that you need to think in bulk.
Note: The main advantage of this approach is that you can decide the versions of the components at a granular level, deciding the version of each component you modify.
But, in most cases, this approach is convenient since we can continue to bump the version.
Bonus — Bit also source control your components
Remember we talked about “Bit components will be source-controlled by Git and Bit, but the source of truth will only be Git.”
You can choose another option for source control if you are starting a new project following the composable architecture pattern. You can start thinking in Bit by building the entire project, which is composed of components.
So, what’s the other option for component source control?
You can use Bit itself to source control your components. Think of your workspace as the playground where you develop your components. You can always create a new workspace, import the component you modify (or create a new one), and export it to bit.cloud. You can repeat the same process each time, only importing the components you need to modify.
To make it work, Bit provides an entire ecosystem of commands synonymous with Git. For example, when you modify a component, you can create a Bit lane (similar to a branch in Git) by running bit lane create "lanename" command. Then, you can modify the components inside your workspace and use Bit snap (similar to Git commit) by running bit snap -m "message" to track the component changes locally.
In addition, you can use the Bit development server to preview and test Bit components (especially UI components like React, Angular, etc.) in real-time while developing them and running the app locally.
Note: In the world of Bit, everything is a component, including UI, apps, dev configuration, etc.
You can switch to the main lane and run bit tag -m "my tag message" to tag the components. Then, you need to run bit export to release them to bit.cloud with newer versions.
Note: One of the main differences between Git branching and Bit lanes is that main lane always keeps track of component versions, while other lanes (lane with any other name) keep track of snaps.
Tagging can be run from the local development environment. However, it’s recommended to run from your CI/CD pipeline.
If you use Ripple, it’s automatically configured to tag what is exported to the main lane. Otherwise, you can switch to the main lane and execute tag and export commands from your CI/CD platform. You can also create change requests from other lanes to main lane in bit.cloud.
In addition to this, you can also create a Bit workspace starter component and start tracking it in bit.cloud. So, next time one of your developers wants to start fresh, they can use the starter to create the workspace with the default configuration.
And there we have it. I hope you have found this helpful. Thank you for reading!
Recommend
-
32
Not long agoAnkit Kumar wrotean excellent article about React's component lifecycle. One of the things about technology is that IT changes, and changes quickly. React's current stable version is
-
28
Understanding React v16.4+ New Component Lifecycle Methods A hands-on guide to React’s new component lifecycle methods; build a simple music player!
-
57
README.md hook-flow
-
9
Component-Driven Development with BitComponent-Driven Development with BitUsing Bit to solve all major challenges presented by the CDD development strategy.In the world of web dev, component-driven deve...
-
5
Component Level Localization with React and BitBest practices implementing localization for React Components that are sharable across projectsDISCLAIMER: This article reflects my o...
-
4
✏️ Edit Show NotesIn this episode of Syntax, Scott and Wes continue their discussion of TypeScript Fundamentals with a deeper diver into m...
-
4
Tomcat将组件的声明周期抽象为了不同的状态,同时定义了组件状态转移的状态机,并将其定义为Lifecycle接口,通过这个接口来管理所有组件。 Lifecycle 接口Lifecycle 接口主要定义三个功能: tomcat组件生命周期对...
-
5
Manufacturing, Packaging & Materials Shortages Spark Novel Component Lifecycle Soluti...
-
3
Building A React Datepicker Component With Bit
-
4
About Joyk
Aggregate valuable and interesting links.
Joyk means Joy of geeK