

PetaLinux配置运行笔记 – 2023.1
source link: https://www.taterli.com/9484/
Go to the source link to view the article. You can view the picture content, updated content and better typesetting reading experience. If the link is broken, please click the button below to view the snapshot at that time.

PetaLinux配置运行笔记 – 2023.1
PetaLinux配置运行笔记 – 2023.1
很久前就配置过环境,但是用的2018.3,那时候还不是Vitis,现在都什么版本了,早该重新来试试,就按着已有的记忆,赶紧整理,配置环境,安装各种软件,以及简单的驱动开发笔记,算是温故而知新了.
安装Ubuntu就不用多说了,这个还不会就有点离谱了,我选择的是Ubuntu 22.04,因为要匹配Vivado版本,所以这个其实是不能乱选的哦,内存至少分配16G,硬盘分500G勉强够用了.
Ubuntu安装配置nfs服务器.
sudo apt install nfs-kernel-server
mkdir ~/nfs
添加NFS目录配置到/etc/exports来配置nfs共享目录.
/home/taterli/nfs *(rw,sync,no_root_squash)接着重启nfs服务器.
sudo systemctl start nfs-kernel-server安装PYNQ相关环境包,链接 => https://support.xilinx.com/s/article/73296
其中pylint3改成pylint,因为后面这个软件包改名了,另外还要安装libtinfo5,因为Vivado依赖他.
直接运行他就是,最后还要修改成bash提供shell环境.
sudo dpkg-reconfigure dash # 选择No接着直接安装PetaLinux和Vivado,配置License就行.
total 3.2G

drwxr-x---  3 taterli taterli 4.0K Sep 29 20:02 .

drwxr-x--- 18 taterli taterli 4.0K Sep 30 06:29 ..

-rwxr-x---  1 taterli taterli 3.2G Sep 29 11:13 petalinux-v2023.1-05012318-installer.run

drwxr-xr-x  8 taterli taterli 4.0K May 10 18:15 Xilinx_Unified_2023.1_0507_1903
./petalinux-v2023.1-05012318-installer.run -d ~/petalinux
cd Xilinx_Unified_2023.1_0507_1903
./xsetup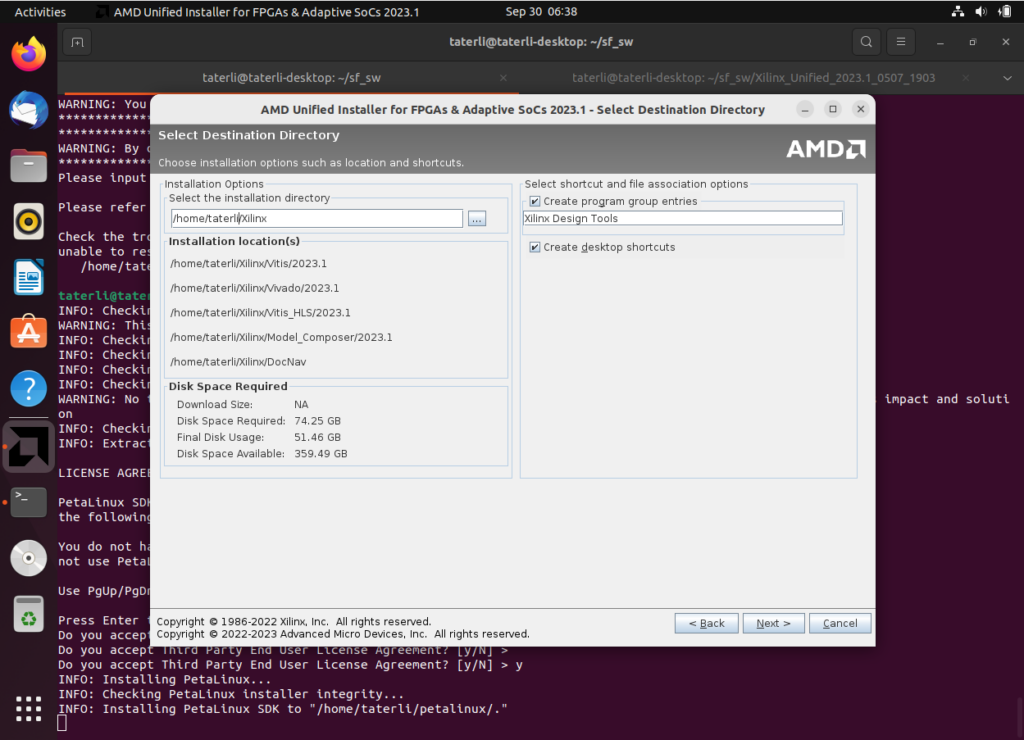
为了让PetaLinux方便运行,还要安装tftp服务器.
sudo apt install tftp-hpa tftpd-hpa -y
sudo mkdir -p /tftpboot
sudo chmod 777 /tftpboot
修改配置文件/etc/default/tftpd-hpa
# /etc/default/tftpd-hpa
TFTP_USERNAME="tftp"
TFTP_DIRECTORY="/tftpboot"
TFTP_ADDRESS=":69"
TFTP_OPTIONS="-l -c -s"
最后重启tftpd.
sudo systemctl restart tftpd-hpa下次执行这一句就进入PetaLinux环境了.
/home/taterli/petalinux/settings.sh安装驱动要手动进行,因为需要root权限嘛,安装时候是普通权限.
cd /home/taterli/Xilinx/Vivado/2023.1/data/xicom/cable_drivers/lin64/install_script
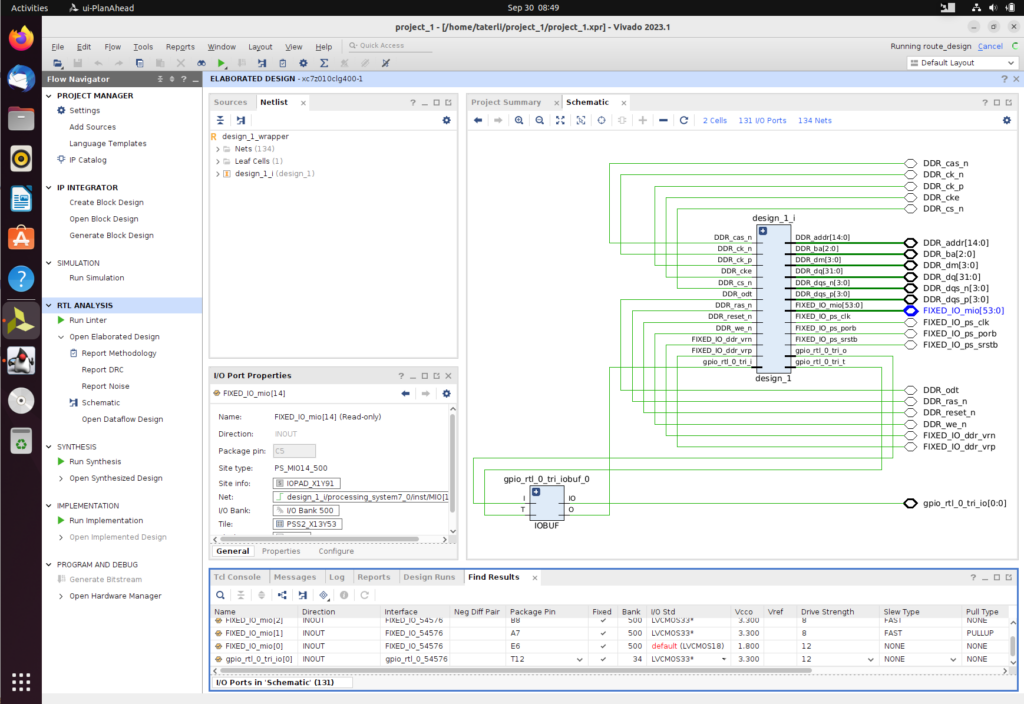
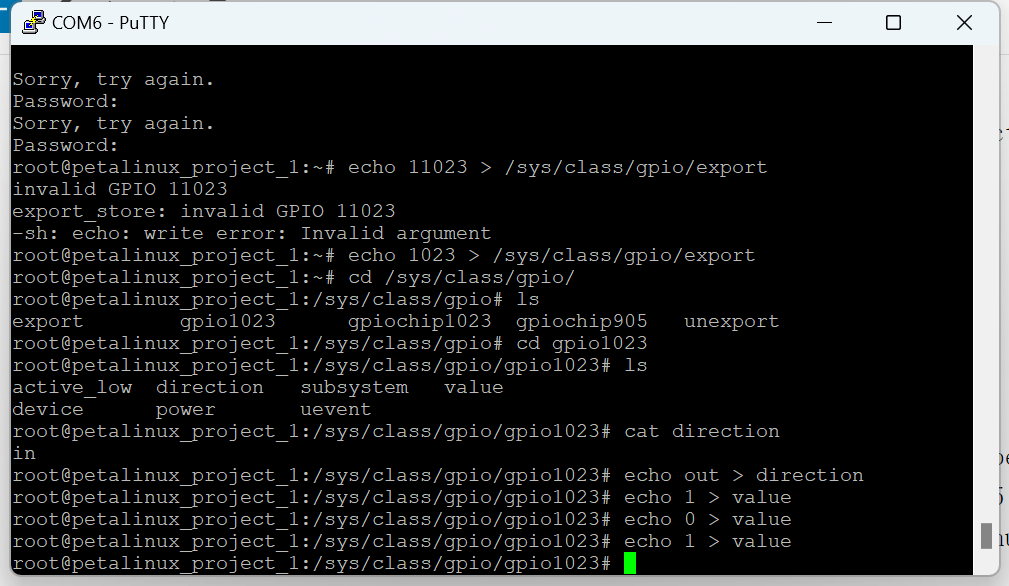
sudo ./install_drivers/install_drivers 安装配置到是很容易,最后创建工程试一试,简单来说就是DDR配置后,PL随便插个AXI GPIO测试一下就行.
创建配置构建PetaLinux工程.
taterli@taterli-desktop:~$ source /home/taterli/petalinux/settings.sh
PetaLinux environment set to '/home/taterli/petalinux'
WARNING: This is not a supported OS
INFO: Checking free disk space
INFO: Checking installed tools
INFO: Checking installed development libraries
INFO: Checking network and other services
taterli@taterli-desktop:~$ petalinux-create -t project --template zynq -n petalinux_project_1
INFO: Create project: petalinux_project_1
INFO: New project successfully created in /home/taterli/petalinux_project_1
taterli@taterli-desktop:~$ cd petalinux_project_1/
taterli@taterli-desktop:~/petalinux_project_1$ petalinux-config --get-hw-description ../project_1/
[INFO] Sourcing buildtools
[INFO] Getting hardware description...
INFO: Renaming design_1_wrapper.xsa to system.xsa
[INFO] Extracting yocto SDK to components/yocto. This may take time!
[INFO] Generating Kconfig for project
[INFO] Menuconfig project
[INFO] Generating kconfig for rootfs
[INFO] Silentconfig rootfs
[INFO] Adding user layers
[INFO] Generating machine conf file
[INFO] Generating plnxtool conf file
[INFO] Generating workspace directory
[INFO] Successfully configured project
taterli@taterli-desktop:~/petalinux_project_1$
下次还需要修改配置还可以用petalinux-config重新进入.
petalinux-config
petalinux-config -c rootfs
petalinux-config -c kernel
配置设备树文件
vim project-spec/meta-user/recipes-bsp/device-tree/files/system-user.dtsi简单配置一下AXI GPIO.
/include/ "system-conf.dtsi"

#include <dt-bindings/gpio/gpio.h>

/ {
    model = "Zynq ECO Development Board";
    compatible = "xlnx,zynq-zc702","xlnx,zynq-7000";

    leds {
        compatible ="gpio-leds";

        act-led {
            label = "act";
            gpios = <&gpio0 54 GPIO_ACTIVE_HIGH>;
            linux,default-trigger ="heartbeat";
        };
    };
};
最后构建.
petalinux-build构建需要比较久,耐心等待.
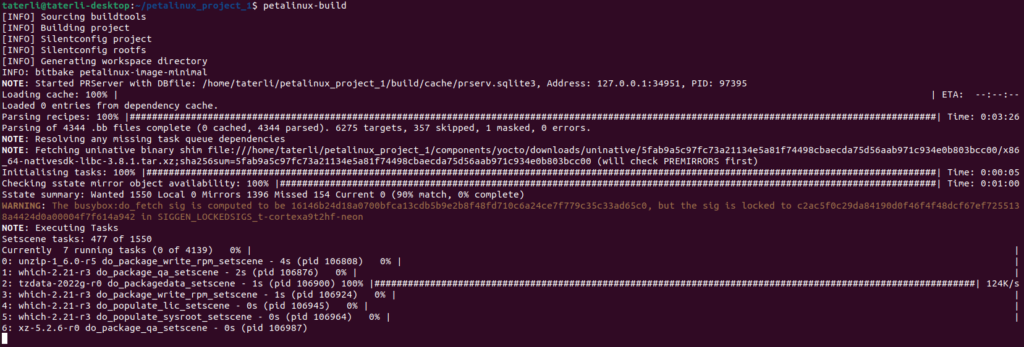
然后就可以打包启动了.
[INFO] Successfully built project
taterli@taterli-desktop:~/petalinux_project_1$ petalinux-package --boot --fsbl --fpga --u-boot --force
[INFO] Sourcing buildtools
INFO: File in BOOT BIN: "/home/taterli/petalinux_project_1/images/linux/zynq_fsbl.elf"
INFO: File in BOOT BIN: "/home/taterli/petalinux_project_1/project-spec/hw-description/design_1_wrapper.bit"
INFO: File in BOOT BIN: "/home/taterli/petalinux_project_1/images/linux/u-boot.elf"
INFO: File in BOOT BIN: "/home/taterli/petalinux_project_1/images/linux/system.dtb"
INFO: Generating zynq binary package BOOT.BIN...


****** Bootgen v2023.1
  **** Build date : Apr  7 2023-10:18:04
    ** Copyright 1986-2022 Xilinx, Inc. All Rights Reserved.
    ** Copyright 2022-2023 Advanced Micro Devices, Inc. All Rights Reserved.

[WARNING]: Partition zynq_fsbl.elf.0 range is overlapped with partition design_1_wrapper.bit.0 memory range
[WARNING]: Partition design_1_wrapper.bit.0 range is overlapped with partition system.dtb.0 memory range

[INFO]   : Bootimage generated successfully

INFO: Binary is ready.
taterli@taterli-desktop:~/petalinux_project_1$
之后制作TF卡镜像,就可以启动了,通常,他会提供image.ub,但是这样确实不放在再开发,开发期间还是希望他是ext4或者tftp boot比较好.但是目前先行启动吧.至于TF卡分区,可以参照这样来配置.
Disk /dev/sdb: 15 GiB, 16106127360 bytes, 31457280 sectors
Disk model: SD Card Reader
Units: sectors of 1 * 512 = 512 bytes
Sector size (logical/physical): 512 bytes / 512 bytes
I/O size (minimum/optimal): 512 bytes / 512 bytes
Disklabel type: dos
Disk identifier: 0x8e8cbf9d

Device     Boot   Start      End  Sectors  Size Id Type
/dev/sdb1  *       2048  1026047  1024000  500M  c W95 FAT32 (LBA)
/dev/sdb2       1026048 31457279 30431232 14.5G 83 Linux
复制启动必须的文件.
taterli@taterli-desktop:~/petalinux_project_1/images/linux$ cp BOOT.BIN boot.scr image.ub /media/taterli/boot/
启动成功,总体来说感觉从2018.3过来也没什么不适,当然这还是比较简单的操作.
Recommend
About Joyk
Aggregate valuable and interesting links.
Joyk means Joy of geeK