

How to Install VNC Server on Debian 12
source link: https://www.howtoforge.com/how-to-install-vnc-server-on-debian-12/
Go to the source link to view the article. You can view the picture content, updated content and better typesetting reading experience. If the link is broken, please click the button below to view the snapshot at that time.

How to Install VNC Server on Debian 12
Virtual Network Computing (VNC) is a desktop-sharing protocol that allows you to control a computer remotely using the VNC client software. VNC is working on GUI (Graphical User Interface) environments, it transmits movements of your mouse and keyboard input over the network using the Remote Frame Buffer (RFB) protocol.
Commonly, VNC is used for technicians to control client desktops or used by someone who needs to access their Desktop in the office from their home. VNC can be used securely through the VPN network or using the SSH tunneling connection.
In this guide, I'll show you step-by-step how to install VNC Server on the Debian 12 server.
Prerequisites
To proceed with this guide, you'll need the following:
- A Debian 12 server.
- A non-root user with administrator privileges.
Installing Desktop Environment
To start the tutorial, you will be installing the Desktop Environment to your Debian server. This can be done manually via APT or using a helper tool such as tasksel. Tasksel is a command line tool that helps you install a group of packages such as Desktop Environments and Web Server via interactive shell.
First, update your Debian repository before installing packages using the command below.
sudo apt update
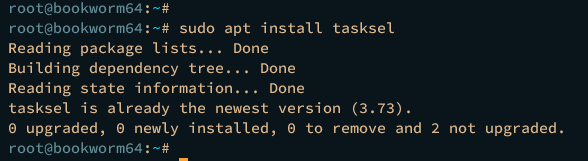
Now run the following command to install tasksel.
sudo apt install tasksel
Type y to confirm with the installation.
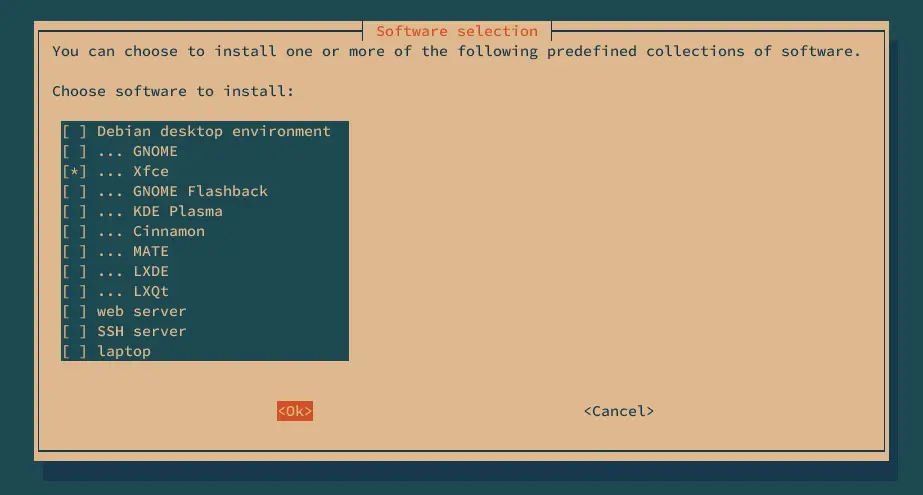
After you've installed tasksel, execute the tasksel command below to install a Desktop Environment for your VNC Server.
sudo tasksel
Select your preferred Desktop Environment, move to OK to confirm, and press ENTER to start the installation. The following example will be using XFCE as the default DE for the VNC Server.
The installation of the Desktop Environment should be started.
Installing TigerVNC Server
After you've installed the Desktop Environment, you're ready to install the VNC Server packages. On Debian, you can use TigerVNC to create a VNC Server.
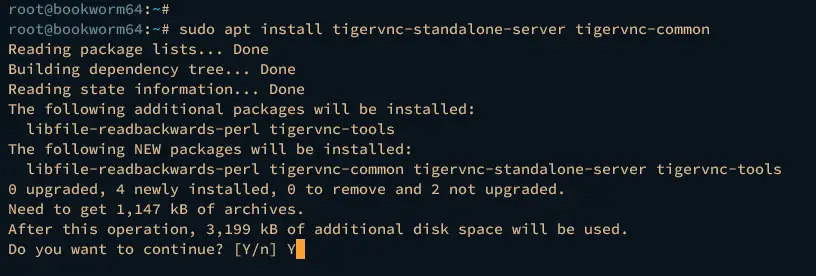
Execute the command below to install the tigervnc-standalone-server package to your Debian system.
sudo apt install tigervnc-standalone-server tigervnc-common
Input y and press ENTER to proceed with the installation.
Once the TigerVNC Server installation is finished, take a look at some important TigerVNC configurations:
- A directory /etc/tigervnc/: The main configuration directory for TigerVNC Server. In this directory, you should see the file vncserver.users for storing users, and the vncserver-config-mandatory file as the main TigerVNC configuration that will be loaded automatically.
- Service file [email protected]: The TigerVNC Server provides a systemd service file that allows you to run VNC Server desktops with ease.
Initializing VNC server
Now that you've installed TigerVNC, it's time to create your first VNC Server with TigerVNC. Before you begin, ensure that you have your non-root user ready.
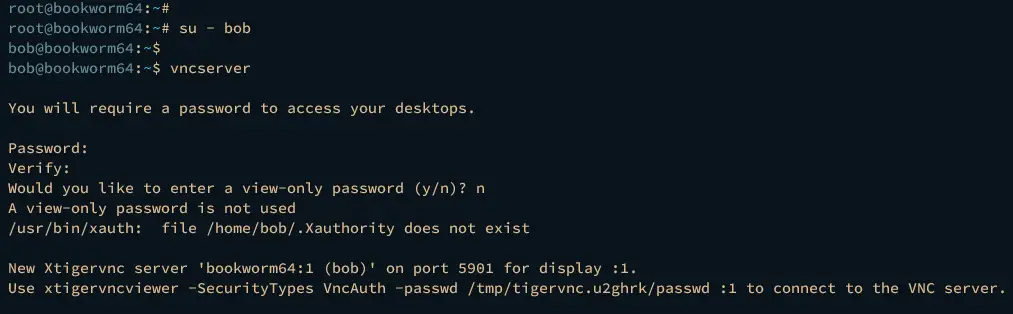
Execute the command below to log in to your user.
su - username
Initialize the VNC Server by executing the following command. Through this, you will set up the VNC Server password and the view-only password (optional).
vncserver
Input the new password for your VNC Server and repeat when asked. Then, type n to disable the view-only password, or y to enable the view-only password.
Now that you've initialized VNC Server, the VNC Server should be running on 'hostname:x'. The hostname is a system hostname, and x is the desktop number. In this example, the VNC Server is running on bookworm64:1.
Configuring VNC Server and Desktop Environment
At this point, you've configured the VNC Server and its password. Moving on, you will configure VNC Server and set up the default Desktop Environment.
Before configuring VNC Server, stop the current VNC Server process by executing the command below. In the following example, we'll stop the VNC Server bookworm64:1.
vncserver -kill bookworm64:1
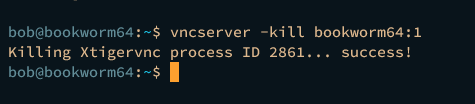
Now, run the following command to check the available Desktop Environment on your system.
ls /usr/share/xsessions/
In the following output, the xfce.desktop confirms that XFCE is available.
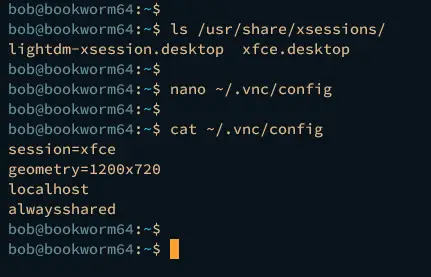
Next, create a new VNC Server configuration ~/.vnc/config using the following nano editor command. This is a per-user configuration, which means each user can have different configurations.
nano ~/.vnc/config
Input the following configuration to the file.
session=xfce
geometry=1200x720
localhost
alwaysshared
Save and close the file when you're done.
In this example, you'll configure VNC Server with the following:
- session=xfce: Configure the default session to XFCE.
- geometry=1200x720: Configure the display to 1200x720.
- localhost: Running VNC Server only in localhost.
- alwaysshared: Always treat incoming connections as shared.
Adding User for TigerVNC Server
Now that you've configured the default Desktop Environment and VNC Server, the next task is to add your user to the VNC Server.
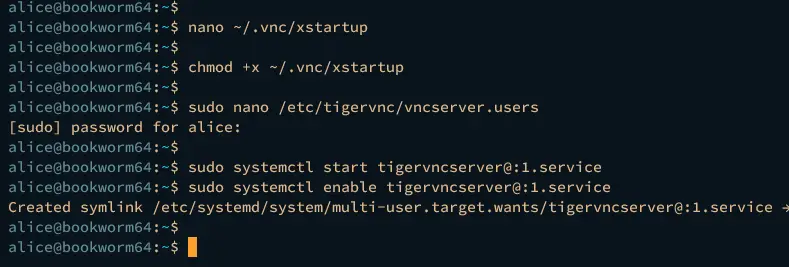
Run the following nano editor command to open file /etc/tigervnc/vncserver.users for TigerVNC.
sudo nano /etc/tigervnc/vncserver.users
Add the following line to the file. Using this, you will configure the VNC Server :1 to the user username. This list can go on, depending on the available VNC users and desktops that you will be creating.
:1=username
Save and close the file when finished.
Next, run the systemctl command below to start and enable tigervncserver@:1.service. The service file tigervncserver@:1.service means that you will start VNC Server desktop :1.
sudo systemctl start tigervncserver@:1.service
sudo systemctl enable tigervncserver@:1.service
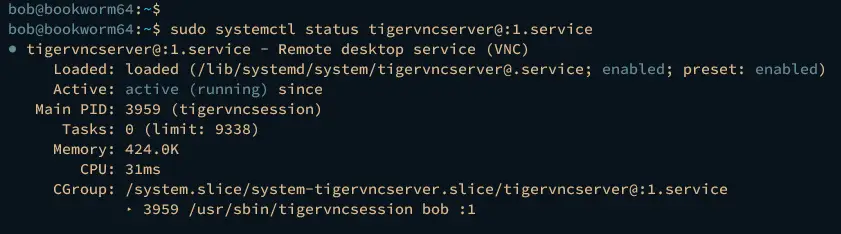
Lastly, ensure the tigervncserver@:1.service is running by executing the command below.
sudo systemctl status tigervncserver@:1.service
In the following example, you can see the tigervncserver@:1.service is running.
At this point, you've finished the VNC Server installation using TigerVNC and XFCE as the default Desktop Environment. Moving forward, you will connect to VNC Server securely via SSH tunneling.
Connecting to VNC Server via SSH Tunneling
Before you connect to VNC Server, ensure the SSH client and VNC Viewer are installed on your local machine.
For Windows users: You can use PowerShell with SSH client installed and UltraVNC for VNC client.
For Linux users: Use terminal and Remmina remote desktop application.
Open your terminal and execute the ssh command below to create SSH tunneling to the VNC Server. Input your password when asked. In this example, we'll create SSH tunneling to the VNC Server 192.168.5.15 with port 5901 and user bob.
ssh -L 5901:127.0.0.1:5901 -N -f -l bob 192.168.5.15
Now open the VNC Viewer application and connect to localhost or 127.0.0.1 with port 5901. In this example, we'll be using UltraVNC, click Connect to continue.
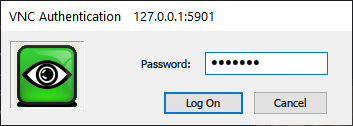
Input the VNC Server password when asked and click Log On.
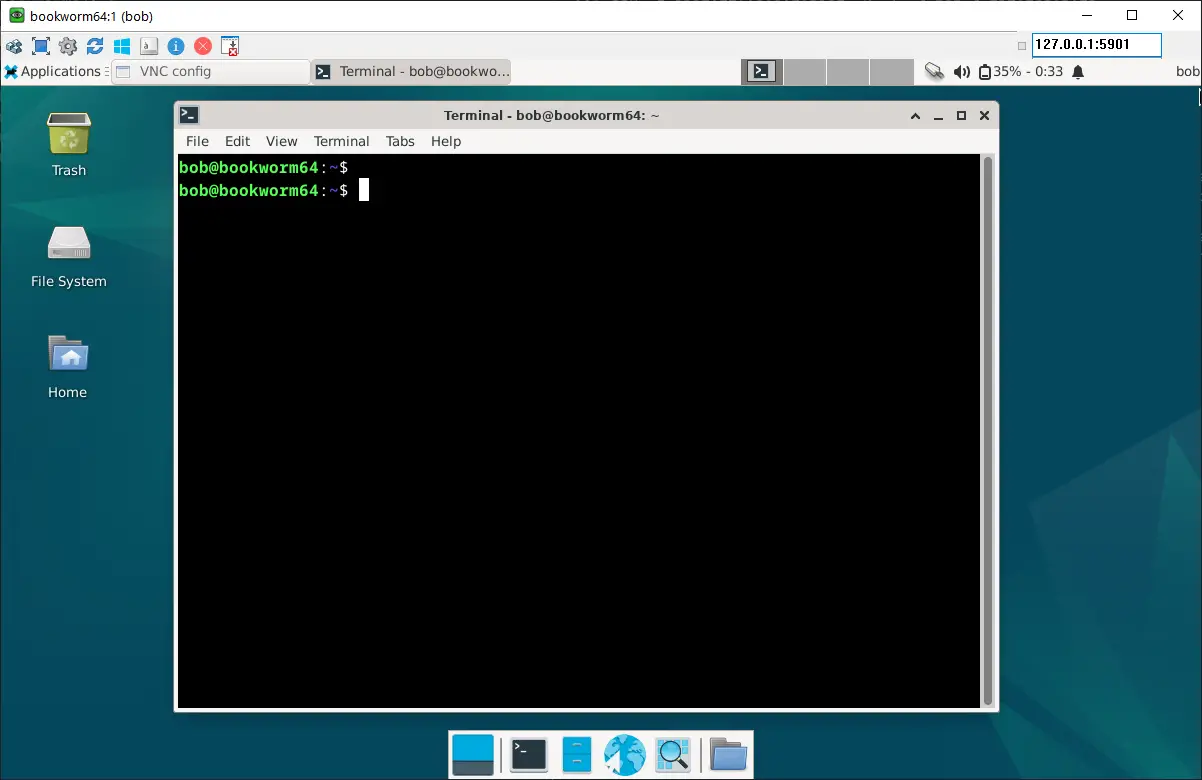
If you have the correct password, you should be able to log in to VNC Server with XFCE Desktop like the following.
Installing Graphical Application to VNC Server
Now that you've connected to the VNC Server, you can install a Desktop application to your VNC Server.
Click on the Applications menu and select Terminal Emulator.
Now run the following command to get the root privileges and update your Debian package repository.
sudo su
sudo apt update
For this example, you can install Firefox ESR to your VNC Server using the apt command below.
sudo apt install firefox-esr -y
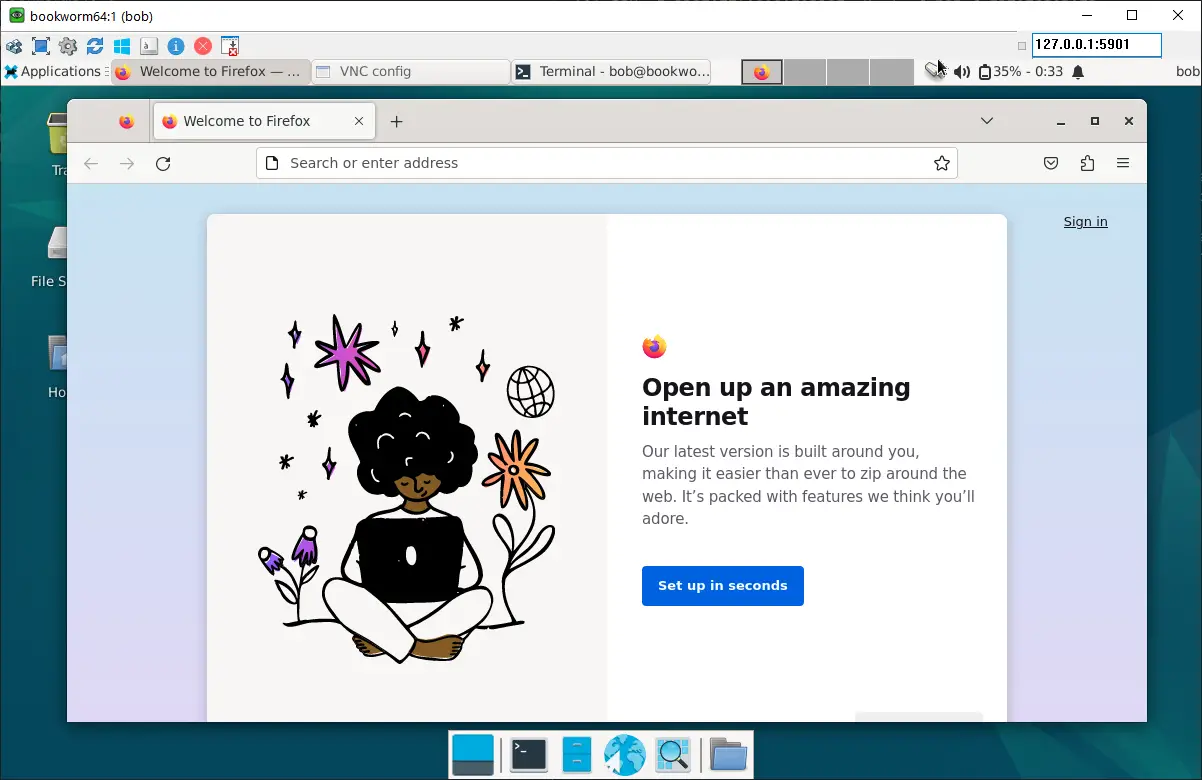
Once the installation is finished, open the Firefox ESR from the application menu. If everything goes well, you should see the Firefox ESR running on VNC Server like the following.
Conclusion
To wrap up, you have finished the installation of the VNC Server on the Debian 12 server with TigerVNC Server and XFCE Desktop environment. You've also learned how to connect to the VNC Server securely via SSH Tunneling and installed graphical application Firefox ESR to your Debian server.
From now on, you can use and manage your server with GUI (Graphical User Interface). Further reading, you may want to adopt security on TigerVNC with TLS certificates.
Recommend
About Joyk
Aggregate valuable and interesting links.
Joyk means Joy of geeK