

How To Update Multiple NPM Packages Effectively?
source link: https://blog.bitsrc.io/update-multiple-npm-packages-a1d49636ffca
Go to the source link to view the article. You can view the picture content, updated content and better typesetting reading experience. If the link is broken, please click the button below to view the snapshot at that time.

How To Update Multiple NPM Packages Effectively?
Use Bit to ensure that your NPM packages are always up-to-date

If you’re building NPM packages, you never include everything inside one package, right? For example, let’s say that you’re building a package which has the following features:
- A logger module that is capable of printing a detailed log message. If you pass in a message, it logs the time, message, and a few system metrics for better analysis.
- A helper module that provides a DynamoDB Wrapper. You might want to include reusable code to simplify CRUD operations in DynamoDB.
Now, if you bundle both of these two modules in a single library, you can’t ever use this Logger module without installing the DynamoDB helper. If you had a requirement where you wanted to build a UI library but use the same logging library for logs, you can’t do it!

Figure: Installing the Single Library to the UI Library
Therefore, as a rule of thumb, you’re always encouraged to publish these as two NPM libraries — A Logger and a DynamoDB Helper. By doing so, you have successfully allowed each library to be used independently of each other.
But this is where things get problematic.
Let’s say that in the future, you release a new version of the Logger — v0.0.3 that optimizes how the logs are printed. So, to get this new release onto the other libraries, you’d have to manually bump the dependency of both the DynamoDB Helper and the UI Library.

Figure: Manually bumping library versions
This will get things done for the moment. But imagine you have thousands of libraries depending on this Logger. It’s physically impossible to go and update the versions one by one.
But what can we do to fix this problem?
The Need For Modern Build Systems
Well, the answer is simple. You need a build system capable of keeping track of a particular library’s usages and propagating an update to all its consumers.
Lucky for you, I know just the tool.
Meet Bit — A Modern Build System for Composable Software
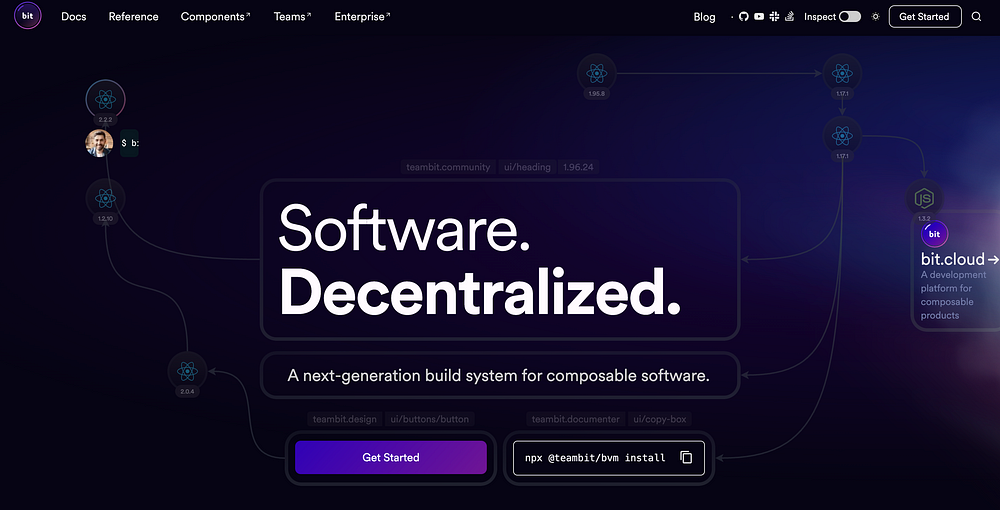
Figure: Bit.dev
Bit is a next-generation build system for composable software. It’s a tool that lets you independently design, develop, and build components (Frontend, Backend, Utility Libraries — literally anything). It takes this one step further by keeping track of each component’s usages, and then leveraging modern CI servers to propagate the changes up the tree.
Updating Multiple NPM Packages with Bit
Bit lets you directly ship components to the NPM registry. By default, Bit ships your components to its component registry — Bit Cloud. But, Bit let’s you extend this behavior and publish to other registries like NPM after syncing with the Bit Cloud.
So, let’s look at how we can accomplish this. For our demo, let’s build two libraries:
- A Logger library: This library will be capable of accepting a log message and displaying a well-structured and formatted log.
- A “isEven” library: This library will be capable of accepting a number and determining if it’s even or not. Additionally, it’ll use our “logger” library to log the result before returning it to the consumer.
We’ll be using Bit to build these two libraries in isolation and ship them off to the NPM registry.
Step 01: Pre-requisites
First, you’ll need to install the Bit CLI using the command:
npx @teambit/bvm install
Next, you’ll need to verify that the CLI has been installed successfully by running the command:
bit --version
If you’ve installed Bit correctly, you should see the screenshot below.

Figure: Sucessfully installing Bit
Additionally, you must setup an NPM Organization along, install NPM Locally and login to your NPM account using npm login. To confirm the authentication, run npm whoami. If you're authenticated, it'll display your username.
Step 02 — Initializing a Development Environment
Next, you’ll have to create a Bit workspace to help build composable components we can reuse across applications!
To do so, run the command:
bit init
Afterward, you’ll see a file being created — workspace.jsonc. This file will be help us customize our workspace. Next, we'll need to tell our workspace that all components we're working on will be published to NPM. Therefore, open your workspace.jsonc file and add the config:
"teambit.workspace/variants": {
    "*": {
      "teambit.pkg/pkg": {
        "packageJson": {
          "packageManagerPublishArgs": [
            "--access=public"
          ],
          "private": false,
          "name": "@{scope}/{name}",
          "publishConfig": {
            "scope": "@{scope}",
            "registry": "https://registry.npmjs.org/",
            "access": "public"
          }
        }
      }
    }
  },
Next, you’ll need to create an account on Bit Cloud. Afterward, create an organization in Bit. Inside the organization, create a Bit Scope using your NPM organization name, like I’ve done below:

Figure: Creating a Scope on Bit inside the organization
As shown above, the name of my NPM organization is lakinduhewawasam. But you're free to replace this with your NPM Organization name.
Step 03: Configuring Ripple CI to publish to NPM
Next, let’s configure the Ripple CI on our Bit Cloud organization so that it has permission to publish to NPM. To do so, you’ll first need to create an NPM Access Token that lets users write to your organization. After this, visit your organization settings in Bit Cloud.
For simple access, paste this URL in your browser and include your organization name in the placeholder:
https://bit.cloud/<<ORG-NAME>>/~settings/ripple
Afterward, you should see the output:

Next, click “Create New” and create a new token with the name: NPM_TOKEN and the value as the token you created through NPM:
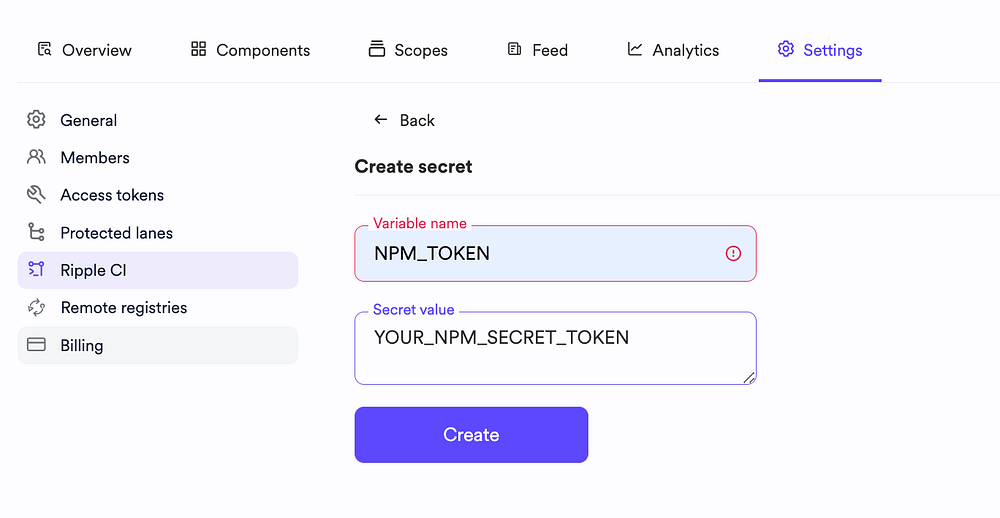
Figure: Creating the NPM Token
Afterward, you’re ready to start building your components!
What’ll happen is that when you publish a component to your Bit Cloud Scope, it’ll trigger a build on its Ripple CI. After a successful build, it will publish the components to NPM
Step 03: Building the Libraries
Next, let’s build the two libraries:
- Logger
- IsEven
To do so, we’ll need to create a dev environment. Since Bit isn’t language-dependent, you can develop anything as long as you provide a dev environment.
Simply put, think of a dev environment as the being that gives life to your component! It defines how your component is tested, built, linted and the dependencies included in each component.
So, let’s build our library using Node.js. Let’s create a Node.js env:
bit create node-env envs/node --aspect teambit.node/node
After you run the command, you should see the output:

Figure: Creating a dev environment
Next, let’s create the two functions bundled as two NPM packages. To do so, we have to create two Bit components, and Bit automatically packages it up in its own independent environment. Run the command:
bit create node is-even --env envs/node && bit create node logger --env envs/node
Once you do so, you’ll see an output like this:

Figure: Creating the components
Next, you should be able to see the following folder structure:

Figure: Viewing created folder structure
You’ll see five files:
index.ts: This file serves as the entry point to your package.composition.ts: This file lets you independently view all the variations of your component. For example, look at this - https://bit.cloud/dummyorg/lakinduhewawasam/is-even/~compositionsdocs.mdx: This file will let you define documentation for your component.spec.ts: This file lets you define test cases for your component. When Ripple CI builds your components across the tree, it'll execute tests and ensure the components work as expected.<<module-name>>.ts: This file lets you define your implementation.
So, let’s go ahead and implement our components. I adopted test-driven development when I designed my packages as I wanted to ensure that the code I write passes possible outcomes:
So, here’s my test case for the logger package:
import { logger } from './logger';

it('should log', () => {
  expect(logger('hello world')).toBe(`
  **********INSERTING LOG**********
  **********HELLO WORLD**********
  `);
});
Afterward, I implemented the Logger based on the test case to make sure it passes:
export function logger(message: string) {
  const log = `
  **********INSERTING LOG**********
  **********${message.toUpperCase()}**********
  `
  console.warn(log)
  return log;
}
Next, I followed the same process for the is-even package. I started off with two test cases:
import { isEven } from './is-even';

it('should return 2 as an even number', () => {
  expect(isEven(2)).toBe(true);
});

it('should return 10001 as an odd number', () => {
  expect(isEven(10001)).toBe(false);
});
Hereafter, I implemented the package to fit to these test cases:
import { logger } from "@lakinduhewawasam/logger";

export function isEven(toCheck: number): boolean {
  const resp = toCheck % 2 === 0;
  logger(`is even - ${resp}`)
  return resp;
}
As you can see, we’re using the logger inside the isEven function:

Figure: The dependency tree
Next, after implementing the two packages, it’s essential to verify that your components pass the test cases. To do so, run the command:
bit test --all
This will test your components locally and will denote the test results. Luckily for me, everything passed on the first go ;)

Figure: The Test Results
Step 04: Publishing to NPM
After you’ve tested and verified the functionality, it’s time to ship it to the public. To do so, run the command:
bit tag && bit export
This will generate an output similar to the one I’ve attached below:
Figure: The Exported URL
After you visit your URL, you’ll see your components being built:

Figure: Viewing the Ripple Build
After your components get built, they’ll automatically get published to the NPM repository. After the build succeeds, head over to your NPM Organization, and you should see the libraries published:

Figure: Viewing the published libraries
You can check my libraries on NPM, too:
@lakinduhewawasam/envs.node
Latest version: 0.0.5, last published: an hour ago. Start using @lakinduhewawasam/envs.node in your project by running…
@lakinduhewawasam/logger
Latest version: 0.0.5, last published: 13 minutes ago. Start using @lakinduhewawasam/logger in your project by running…
@lakinduhewawasam/is-even
Latest version: 0.0.5, last published: 12 minutes ago. Start using @lakinduhewawasam/is-even in your project by running…
That was easy.
But this isn’t the best part of this!
With this approach, you can seamlessly change one component and update the entire tree. By doing so, you can ensure that your packages always use the latest versions of the children. To experiment with this, let’s update the logger:
// logger.ts
export function logger(message: string) {
  const log = `
  **********NEW LOG INSERTED**********
  **********${message.toUpperCase()}**********
  `
  console.warn(log)
  return log;
}

// logger.spec.ts

import { logger } from './logger';

it('should log', () => {
  expect(logger('hello world')).toBe(`
  **********NEW LOG INSERTED**********
  **********HELLO WORLD**********
  `);
});
Now, theoretically, the isEven function should also be updated. To test this out, let's re-export the components to Bit Cloud using
bit tag && bit export
Afterward, you should see Ripple CI building both the isEven and Logger:

Figure: Viewing the build diff
This will automatically publish packages to NPM:

Figure: Viewing the published packages
Wrapping Up
And just like that, we ensured that all of our NPM packages use dependent packages that are always up to date! This ensures that components always get the latest optimizations, making code maintenance a breeze!
If you like what you see, check out the full code in my Bit Scope.
Thank you for reading.
Recommend
-
33
In the meantime of WWDC 2019 event, looking back to the web development area, NPM - the largest package registry on planet Earth - has passed the 1M mark, in terms of packages
-
8
5 Best Practices to Choosing Third-Party NPM PackagesWhat you should consider when choosing a third-party NPM library for your project.Installing an NPM package is a pretty straightforward tas...
-
7
Keep your npm and Yarn packages up to date117 viewsJan 27, 20225DislikeShareSave ...
-
8
Private NPM modules with GitHub packages Apr 4, 2022 • Tim VelettaTags: typescript
-
19
These aren’t the npm packages you’re looking forDeveloperSteveMay 4, 2022
-
6
Alternatives to installing npm packages globallyThere are two ways in which npm packages can be installed: Locally, into a node_modules directory that npm searches for (or creates) in the current directory an...
-
8
npm: What you are doing wrong when installing packages
-
6
Top 6 npm Packages for Component-Driven Prototyping with UXPin Merge
-
5
1 NPM_TOKEN Add an NPM_TOKEN secret on GitHub. Get your secret key from the NPM dashboard. 2 Add a step to your action - name: Authenticate with private NPM package run: echo "//registry.npm...
-
5
of 230k versions seen84.7%Removed75.2%Pre-releasesVulnerableDelayedInstall Scripts
About Joyk
Aggregate valuable and interesting links.
Joyk means Joy of geeK