
0

按鈕版 Gnuk 實體金鑰燒錄筆記
source link: https://blog.darkthread.net/blog/flash-gnuk-notes/
Go to the source link to view the article. You can view the picture content, updated content and better typesetting reading experience. If the link is broken, please click the button below to view the snapshot at that time.

按鈕版 Gnuk 實體金鑰燒錄筆記
| 2023-12-02 11:57 PM | 0 | 272 |
前陣子買到一批便宜的 ST-LINK 偵錯器(55 元有找,比珍奶還便宜),又燒錄了兩支土砲版 USB 實體金鑰:
過程有個小插曲。這批外型看似與先前買的一致,但腳位居然不同! 上一批按鈕焊接的 CLK 跟 5V 接點在電路板兩端,滑鼠拆下來的歐姆龍微動開關焊上去尺寸剛剛好。而這次買的版本 5V 跟 CLK 腳位間隔減半,不適用歐姆龍微動開關。山不轉路轉,我找到另一款廢棄滑鼠的方型微動開關,小紅點版本問市!
之前沒將燒錄細節寫成文章,這回搞了好久才恢復記憶,這篇補上筆記以備未來所需。
- Gnuk 專案加入按鈕支援
Gnuk 專案原始碼在 salsa.debian.org,但 master 分支我編譯不過也缺少現成的按鈕版改法,故要用 STABLE-BRANCH-1-2 分支,再套用網友提供的0001-add-pa5-as-switch-pin-for-st-dongle.patch(使用 CLK PIN 腳當按鈕輸入) 編譯出 gnuk-btn.bin。
編譯程序有點複雜,我是參考這兩篇: - openocd 設定修改
我買的偵錯器採用 Geehy APM32 晶片,參考极海国产芯|VScode开发APM32F1过程分享建立\share\openocd\scripts\target\apm32f1x.cfg,並修改 openocd.cfg 如下:telnet_port 4444 source [find interface/stlink-v2.cfg] source [find target/apm32f1x.cfg] set WORKAREASIZE 0x10000 - 接線
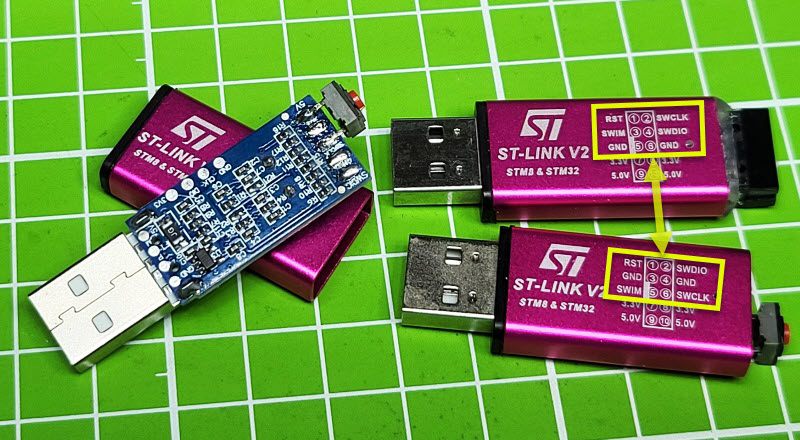
ST-LINK 偵錯器的 3.3V、GND、SWDIO、SWCLK 接到燒錄對象的 3V3、GND、D0、CLK: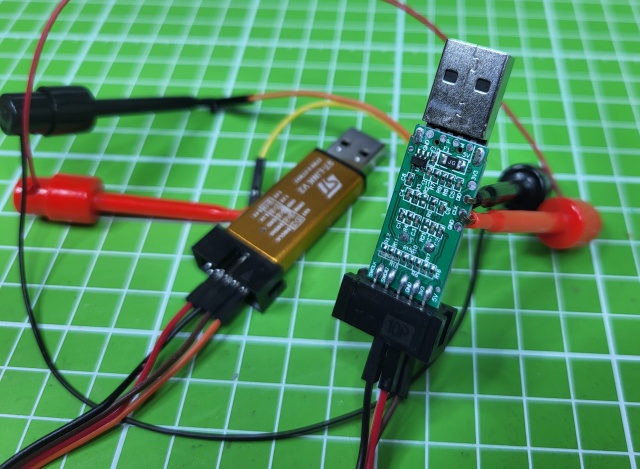
- 執行 openocd
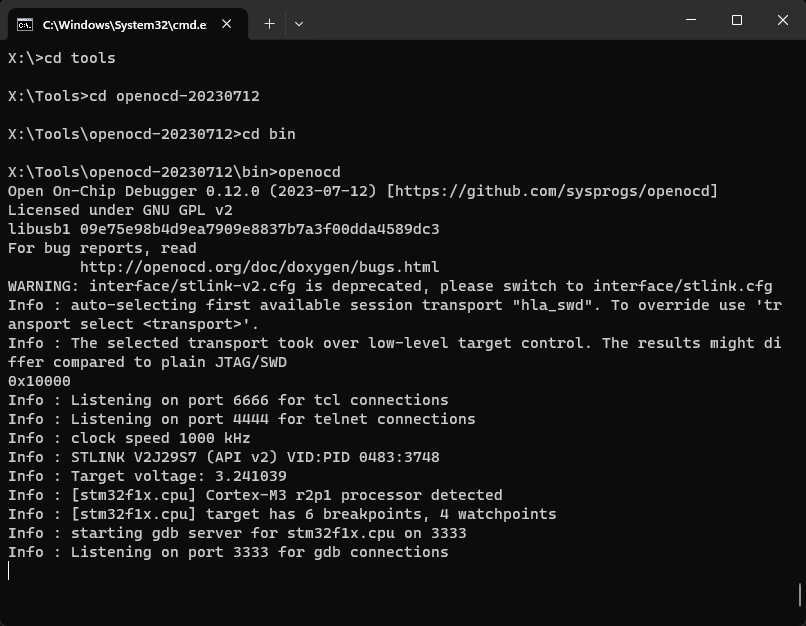
- telnet localhost 4444
先下指令stm32f1x unlock 0、reset halt、exit,拔出 USB 斷電重啟以完成解除寫入保護: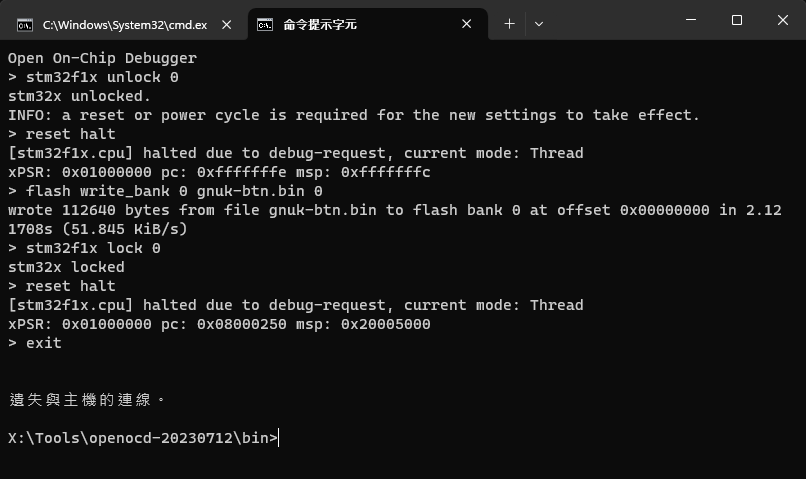
- 再次 telnet localhost 4444,寫入 Gnuk
stm32f1x unlock 0 reset halt flash write_bank 0 gnuk-btn.bin 0 stm32f1x lock 0 reset halt - 後續操作接回 GPG 整合實體金鑰筆記
Recommend
About Joyk
Aggregate valuable and interesting links.
Joyk means Joy of geeK