

Create Web, Offline & Enterprise MSI within the same Advanced Installer proj...
source link: https://www.advancedinstaller.com/create-web-offline-enterprise-msi-advanced-installer.html
Go to the source link to view the article. You can view the picture content, updated content and better typesetting reading experience. If the link is broken, please click the button below to view the snapshot at that time.

Create Web, Offline & Enterprise MSI within the same Advanced Installer project
Written by Danut Ghiorghita · December 4th, 2023
In the dynamic world of software installation, one often faces the challenge of creating both offline and web installers, not to mention the MSI version for Enterprise customers.
This is where MSI packages shine in the enterprise setting, offering a standardized, reliable format for software deployments.
In contrast, EXE files show a wider range of installation methods and behaviors, making them less suitable for meeting the strict standards and requirements of enterprise-level deployments.
Package Output Explained
- Full Installer: The installer contains all the files and required runtime for the application to be installed on machines that are not connected to the internet.
- Web Installer: The user downloads a small EXE file from the webpage and all the required files are downloaded during installation. Note that the setup requires an active internet connection.
- Enterprise MSI Setup: Think of it as the Full Installer but bundled neatly into a single MSI file, ideal for offline use.
Specifications
Our goal is to craft all these installers within a single project, waving goodbye to the hassle of multiple projects.
Let’s keep things simple and assume that the setup installs some files and also requires the C++ runtime.
It doesn’t really matter if the installer also configures a service, a scheduled task or executes any custom action during the installation. All the setups will behave the same and have the same functionality.
Configure the installer
1. Add files to the project
In the Files and Folders section you can add the application files.
For more details, our Creating an MSI Package article has got you covered.
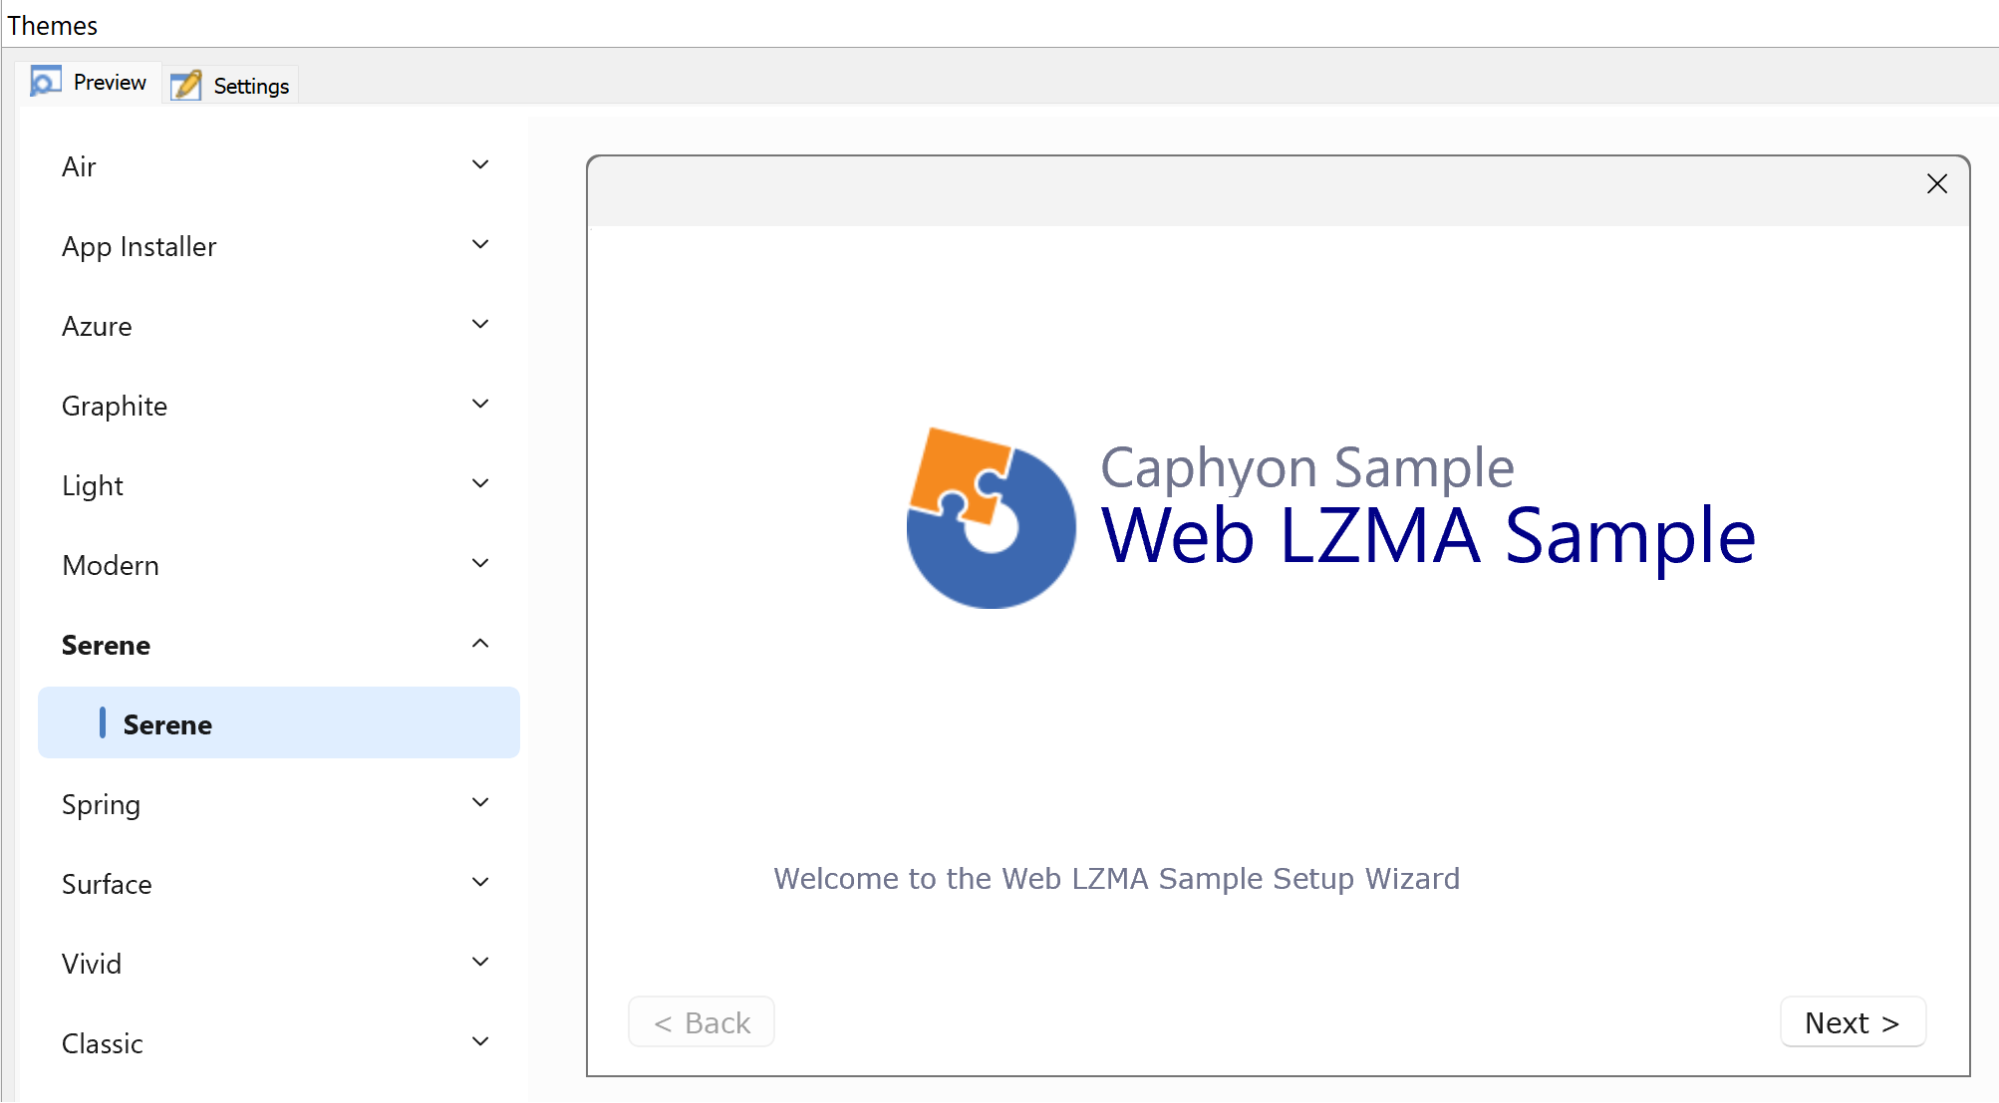
2. Define the theme for the installer
In the Themes view you can select from the predefined list of gorgeous themes that are available and ready to use.
We’ll go with the Serene:
3. Define the builds
In the Builds view, duplicate and rename the existing build accordingly:

We’ll come back later to this view and configure the setup packages.
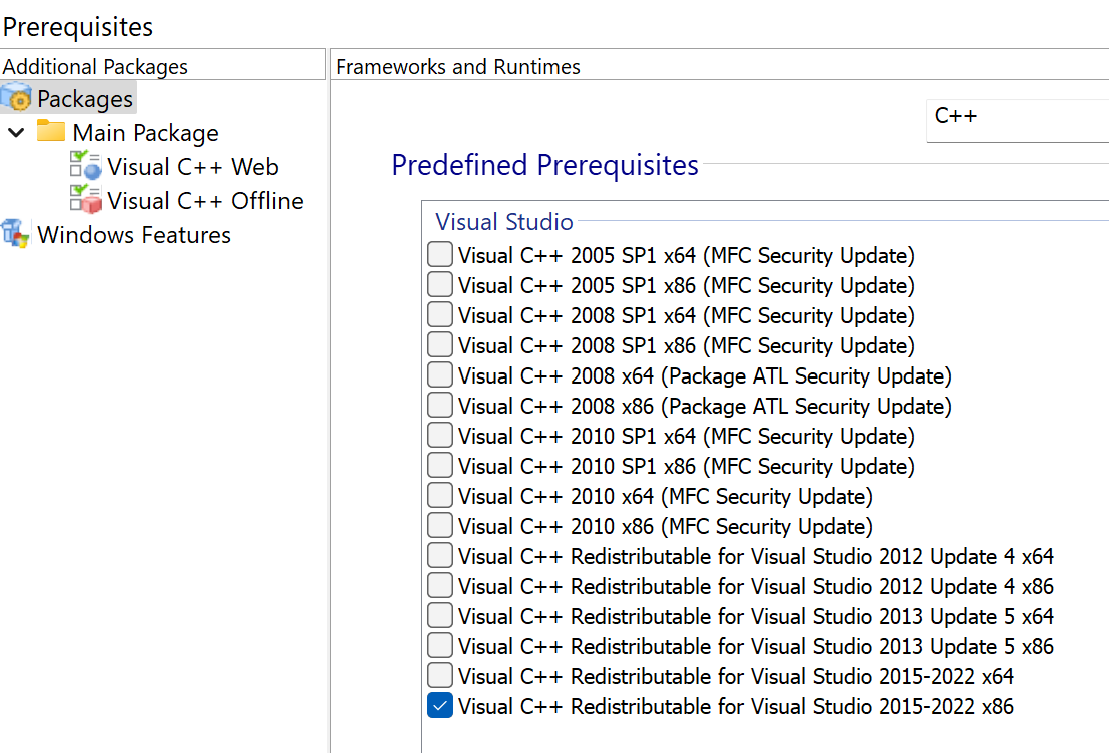
4. Add the runtime as a prerequisite
A common case is when we need to add a runtime to the installer. In our case, we need to add the C++ runtime: Visual C++ Redistributable for Visual Studio 2015-2022
In the Prerequisites section you can add the required runtimes for the setup:
When prompted, select to be downloaded on the disk so that it can be included in the offline:
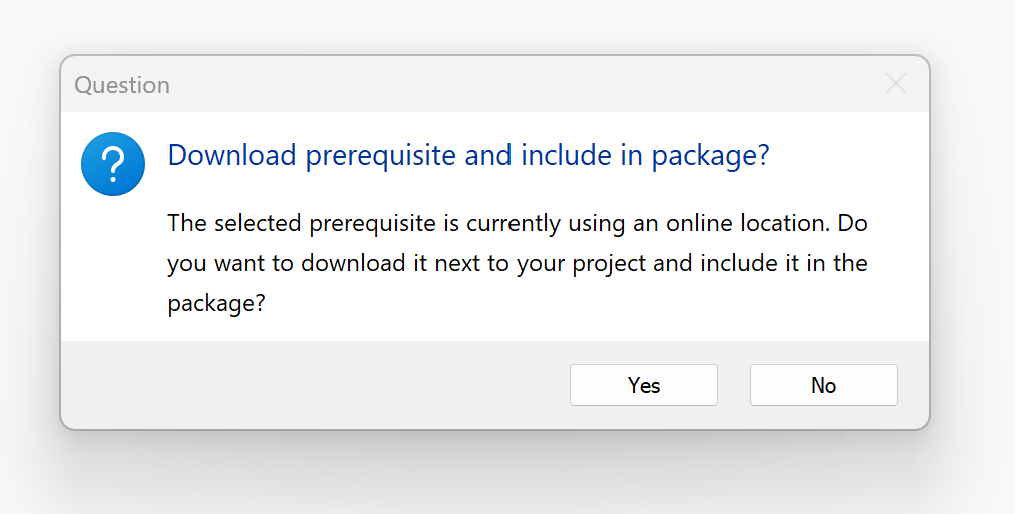
After it was downloaded, you can remove it from the project. After this, add it again and make sure that you don’t include it again in the project (select No option when asked).
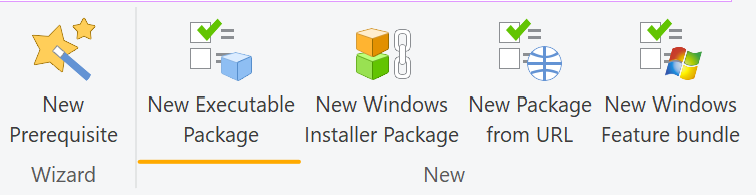
What we have so far, we have the runtime added from its online location. We need to add it in the installer, so it can be used by the offline setup.
For this, use the New Executable Package toolbar option:
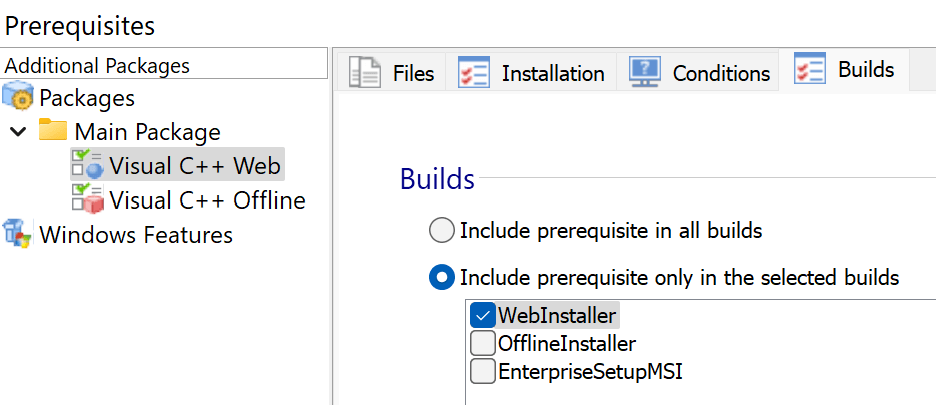
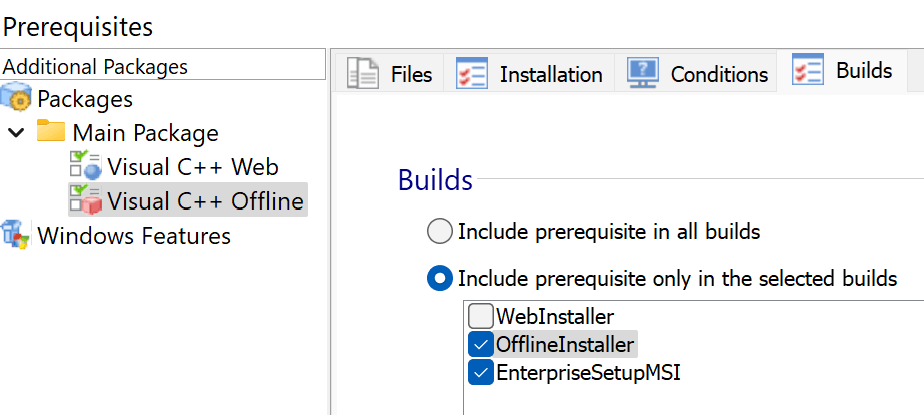
5. Add each prerequisite in corresponding build
In the Builds tab from the Prerequisites view, make sure each runtime is added in its corresponding build.
The runtime with the online location will only be included in the Web Installer setup, while the runtime with the source from disk will be included in the Full Installer and the Enterprise MSI package.
Web-installer prerequisite:
Full installer & Enterprise MSI:
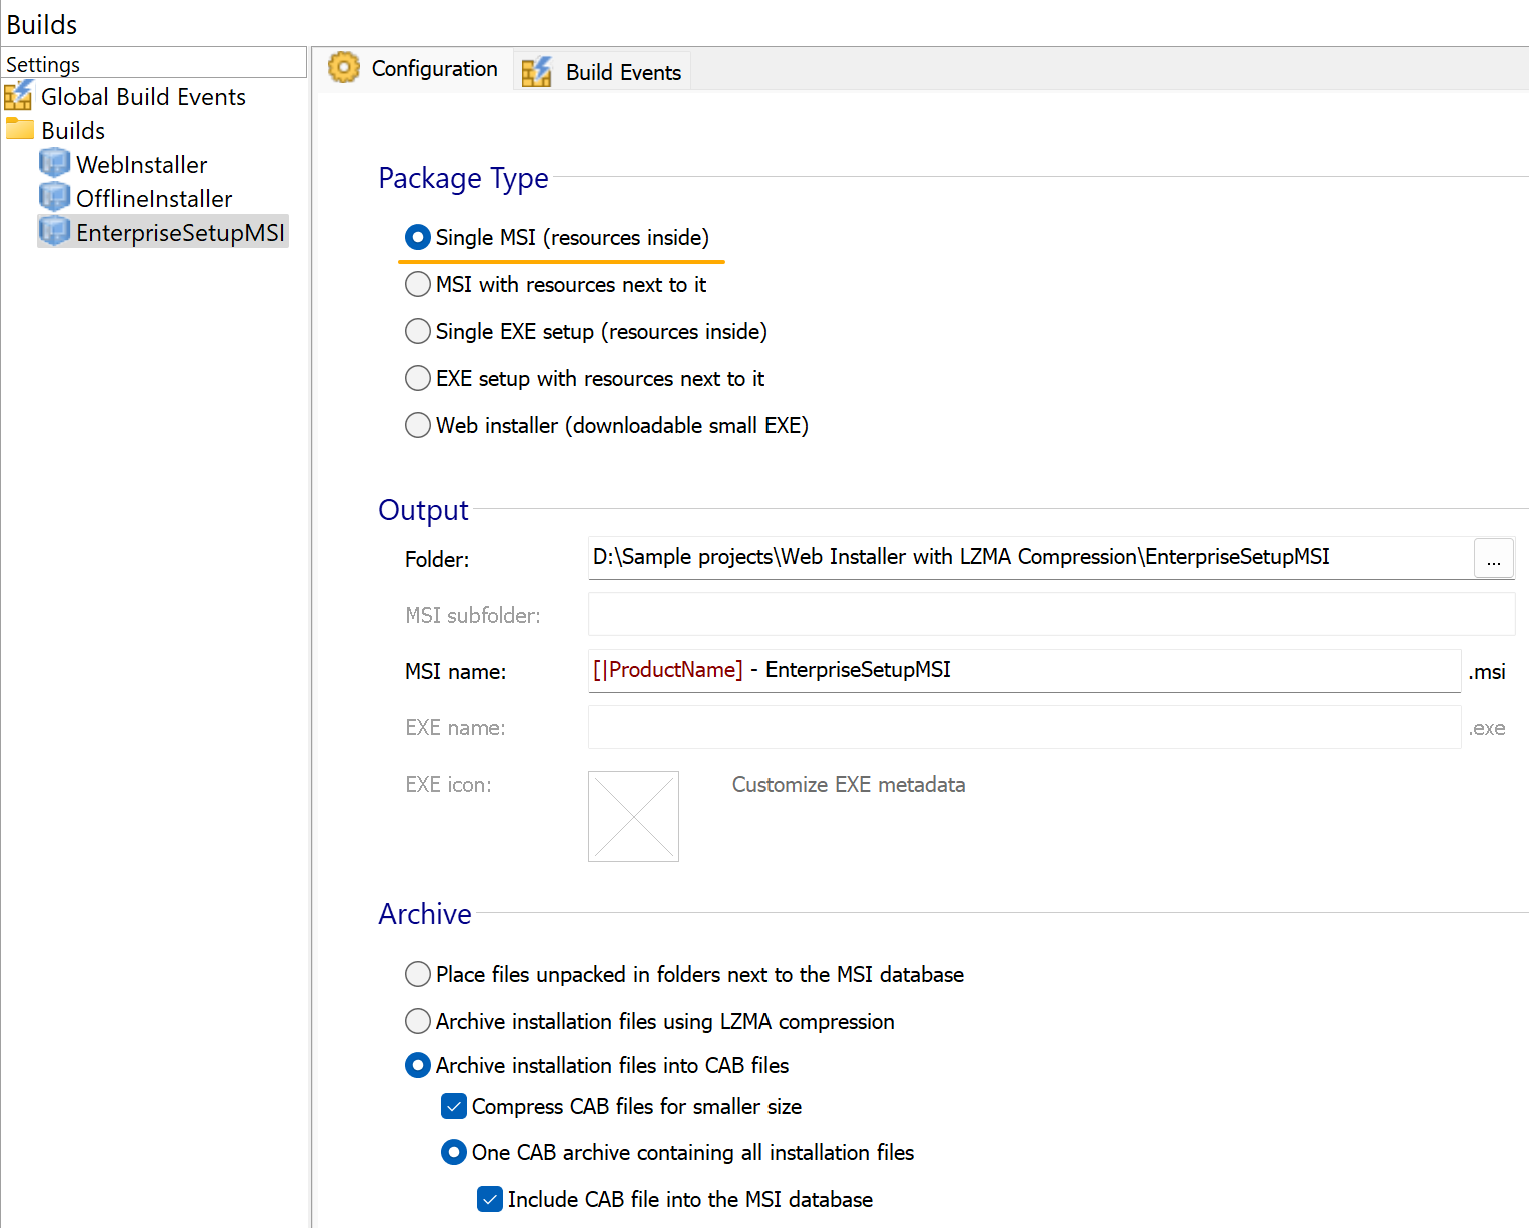
6. Configure the Builds view
- Web Installer configuration:

- After building the project, make sure to upload the .lzma file on your server and update the LZMA’s URL field.
- Offline build configuration:

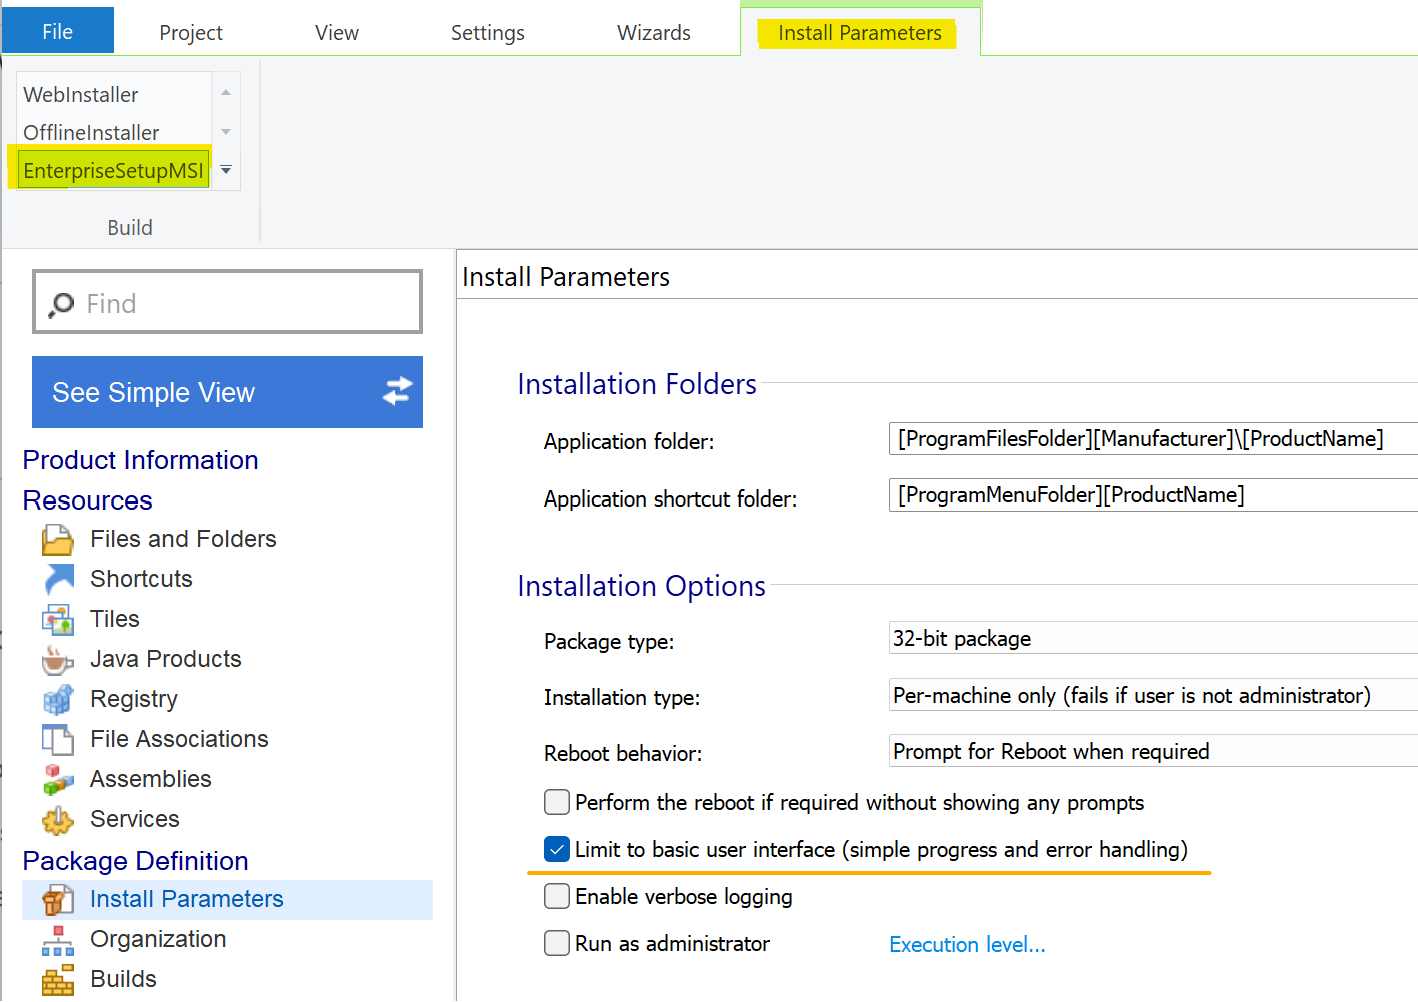
- Enterprise MSI build configuration:
As the MSI cannot handle the custom theme that we might select, just enable the Basic UI level option from the Install Parameters view.
MSI packages are deployed silently in enterprises, so the installer UI theme is irrelevant as it will never be used.
Conclusion
With Advanced Installer, you're not just creating installers; you're crafting a seamless experience for users across various environments, from web-savvy to enterprise-level. Dive in and discover the ease and efficiency of multi-faceted installer creation!
Written by
Danut Ghiorghita
Dan has been part of the Advanced Installer's team for over seven years as a Solution Engineer. If you visit the Advanced Installer's forum , you will likely find him helping clients with product explanations and technical difficulties that they may be experiencing. In addition, he is the person to go to for demos and technical presentations to our current and prospective clients. And we are grateful for his contributions to our blog, which he does whenever he has the occasion.
Comments:

Recommend
About Joyk
Aggregate valuable and interesting links.
Joyk means Joy of geeK