

基于开源模型搭建实时人脸识别系统(四):人脸质量 - CoderInCV
source link: https://www.cnblogs.com/haoliuhust/p/17770881.html
Go to the source link to view the article. You can view the picture content, updated content and better typesetting reading experience. If the link is broken, please click the button below to view the snapshot at that time.

续人脸识别实战之基于开源模型搭建实时人脸识别系统(三):人脸关键点、对齐模型概览与模型选型_CodingInCV的博客-CSDN博客
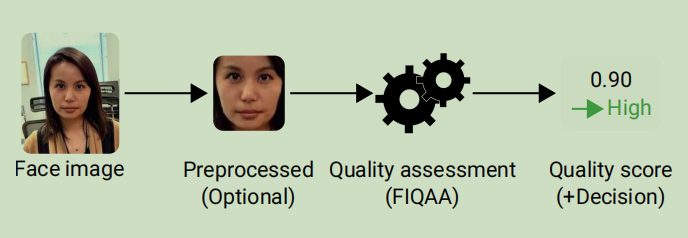
不论对于静态的人脸识别还是动态的人脸识别,我们都会面临一个问题,就是输入的人脸图像的质量可能会很差,比如人脸角度很大,人脸很模糊,人脸亮度很亮或很暗。这些质量低的图像不仅造成识别失败,还可能引起误识别。因此,对输入人脸识别进行一定的质量过滤是很必要的。这个领域的英文为Face Image Quality Assessment。
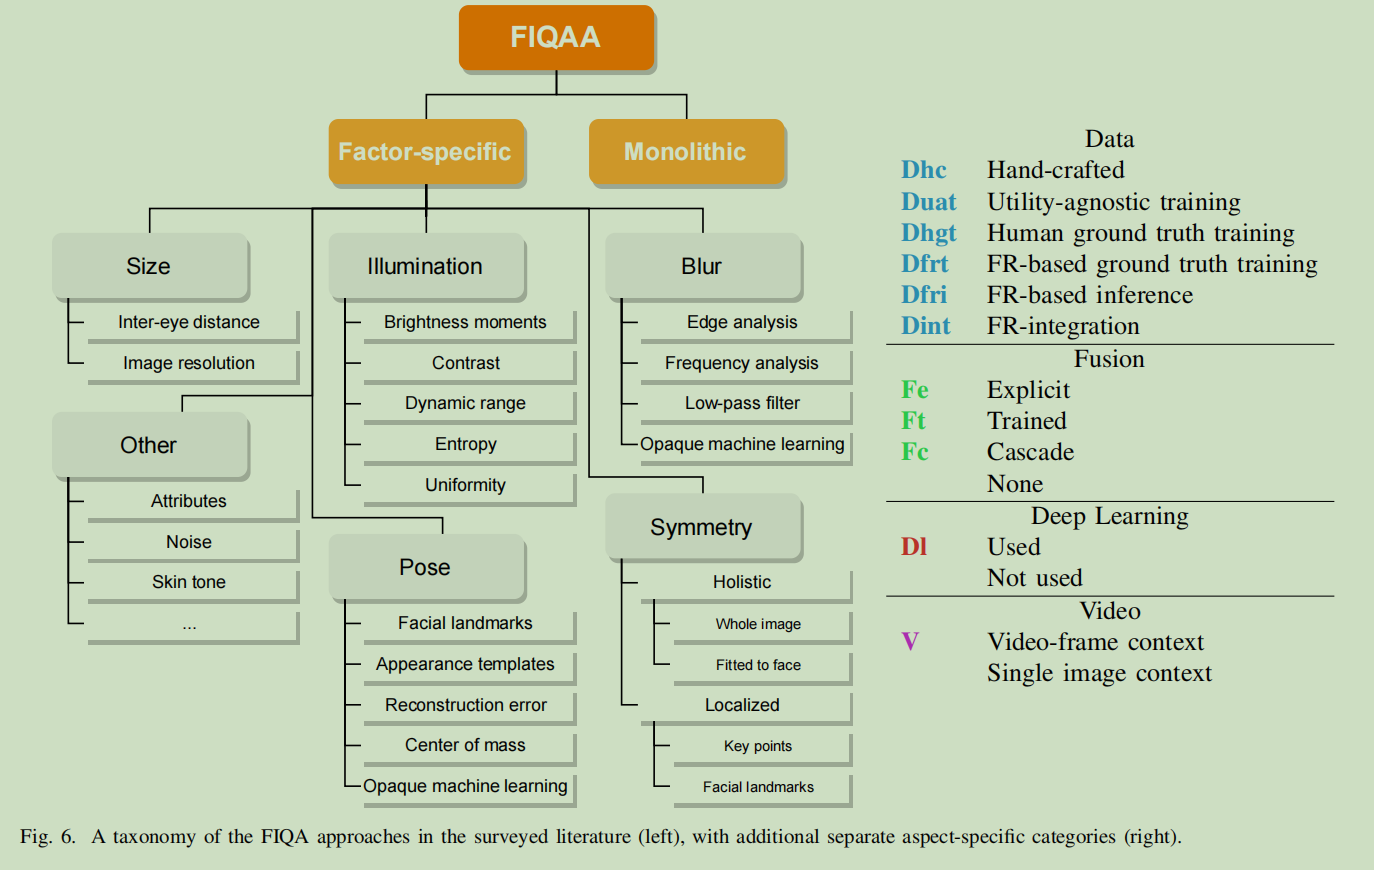
传统的方法一般是将图像质量领域(Image Quality Assessment)的方法应用到人脸图像上,比如使用边缘检测来评测模糊、统计平均像素值来评测亮度。这些方法没有特别考虑人脸图像的特点,效果一般。
深度学习方法
普通深度学习方法
这类方法将人脸图像质量作为一个普通的深度学习问题,通过人工或预设算法对数据打标,然后设计一个网络,回归质量分数。这个方法的学习目标主要还是人眼感知上的质量,因为标签来源于人工打标,而并不是对于识别效果更好的质量。
这类方法的主要难题在于数据标签难获得,网络结构上只是简单的回归网络。
面向人脸识别的人脸质量评估
人脸质量的筛选目标是提高人脸识别的效果,因此越来越多的方法开始将人脸质量和人脸识别任务结合起来,结合的方式主要有2种:
一种是直接训一个特征能够用来衡量人脸质量的模型,代表是MagFace, 基本思想是用特征的模长来表征人脸质量。个人觉得这种方式实用起来存在一个问题就是要获得人脸质量就得进行人脸特征提取,开销太大。
另一种方式是通过人脸识别模型的特征关系来生成质量标签,代表方法:
SER-FIQ: 同一个人脸多次推理(开启dropout),统计多次推理特征的距离,对于质量好的图片,特征平均距离小,反之越大
SDD-FIQ: 统计计算人脸与同一ID和不同ID人脸的距离
FaceQnet, PCNet等
理论上,面向人脸识别的人脸质量评估效果更好,不过这些方法与识别模型存在较大的耦合关系,根据笔者在私有数据上的实际测试,训练比较困难,开源出来的预训练模型也较大。KaenChan/lightqnet: Deployment of the Lightweight Face Image Quality Assessment (github.com) 这个比较轻量,但实测对于人脸区域比较敏感,没有区分度。
综合速度要求,选择 KS‐FQA: Keyframe selection based on face quality assessment for efficient face recognition in video - Bahroun - 2021 - IET Image Processing - Wiley Online Library
这个方法考虑了人脸角度、亮度、大小、模糊。速度较快,也有一定区分度,不过也还是有些缺陷,对于大侧脸的过滤效果一般。
import numpy as np
import cv2


class FaceQualityOverall:
    def __init__(self, **kwargs) -> None:
        pass

    def pose_score(self, face_box: np.ndarray, landmarks: np.ndarray):
        center_x, center_y = (face_box[0] + face_box[2]) / 2, (face_box[1] + face_box[3]) / 2
        nose_x, nose_y = landmarks[2][0], landmarks[2][1]
        distance = np.sqrt((center_x - nose_x) ** 2 + (center_y - nose_y) ** 2)
        face_size = np.sqrt((face_box[2] - face_box[0]) ** 2 + (face_box[3] - face_box[1]) ** 2)
        pose_score = max(0, 1 - distance / face_size)
        return pose_score

    def sharpness_and_brightness_score(self, image: np.ndarray, face_box: np.ndarray):
        box = face_box[:]
        box = box.astype(np.int32)
        face_image = image[box[1] : box[3], box[0] : box[2], :]
        face_image_gray = cv2.cvtColor(face_image, cv2.COLOR_BGR2GRAY)
        # blur the face image with a 5x5 guassian kernel
        blur_face_image = cv2.GaussianBlur(face_image_gray, (5, 5), sigmaX=1, sigmaY=1)
        # calculate the sharpness score
        sharpness_score = np.sum(np.abs(face_image_gray - blur_face_image)) / np.prod(face_image_gray.shape)
        sharpness_score = sharpness_score / 255.0
        sharpness_score = min(1, sharpness_score * 2)
        brightness_score = np.mean(face_image_gray)

        # normalize the brightness score
        if brightness_score < 20 or brightness_score > 230:
            brightness_score = 0
        else:
            brightness_score = 1 - abs(brightness_score - 127.5) / 127.5

        return sharpness_score, brightness_score

    def resolution_score(self, face_box: np.ndarray):
        face_width = face_box[2] - face_box[0]
        face_height = face_box[3] - face_box[1]
        resolution_score = min(1, min(face_width, face_height) / 224)
        if face_height/face_width > 2.5:
            resolution_score = 0

        if min(face_width, face_height) < 48:
            resolution_score = 0

        return resolution_score

    def run(self, image: np.ndarray, face_box: np.ndarray, landmarks: np.ndarray):
        pose_score = self.pose_score(face_box, landmarks)
        if pose_score < 0.3:
            return 0
        sharpness_score, brightness_score = self.sharpness_and_brightness_score(image, face_box)
        if sharpness_score<0.1:
            return 0
        resolution_score = self.resolution_score(face_box)
        if resolution_score < 48/224:
            return 0

        output = np.array([pose_score, sharpness_score, brightness_score, resolution_score])
        weight = np.array([0.3, 0.4, 0.1, 0.2])
        return np.sum(output * weight)


if __name__ == "__main__":
    from face_recognition_modules.face_alignment.face_landmarks import FaceLandmarks
    from face_recognition_modules.face_detection.yolov8_face import Yolov8Face
    import cv2

    yolo8face = Yolov8Face(model_path="models/yolov8-lite-t.onnx", device="gpu")
    landmarks_det = FaceLandmarks(model_path="models/student_128.onnx", device="gpu")
    image = cv2.imread("test_images/1.jpg")
    if image is None:
        raise Exception("read image failed")
    face_box, _ = yolo8face.run(image)
    landmarks = landmarks_det.run(image, face_box[0])
    face_quality = FaceQualityOverall()
    quality = face_quality.run(image, face_box[0], landmarks)
    print(quality)
这篇我们简要介绍了一下人脸质量评估,不过笔者在这方面涉猎也不深,只是做个简单的总结,需要深入做还是有不少工作。

Recommend
About Joyk
Aggregate valuable and interesting links.
Joyk means Joy of geeK