

Kubernetes Bare Metal Deployment Part 2: Setting Up the Kubernetes Management Cl...
source link: https://cloudbase.it/bare-metal-kubernetes-on-mixed-x64-and-arm64-part-2/
Go to the source link to view the article. You can view the picture content, updated content and better typesetting reading experience. If the link is broken, please click the button below to view the snapshot at that time.

Kubernetes Bare Metal Deployment Part 2: Setting Up the Kubernetes Management Cluster
Hello again! Welcome back to our continuing journey on Kubernetes bare metal deployment. Today, we’ll delve deeper into establishing the Kubernetes Management Cluster.
Understanding the Role of the K8S Management Cluster
Before we dive deep into the Kubernetes bare metal deployment intricacies, it’s essential to understand the heart of our operations: the K8S Management Cluster. Think of this cluster as the control tower in an airport. Just as the tower oversees and manages every plane taking off, landing, or merely taxiing around, the K8S Management Cluster orchestrates the creation, maintenance, and monitoring of other Kubernetes clusters.
Now, why do we need it? There are a few pivotal reasons:
- Centralized Control: With a management cluster, you can create, update, or delete multiple Kubernetes workload clusters from a single point of command.
- Isolation: It keeps the administrative tasks separate from the applications and workloads. This separation ensures that any issues in the workload clusters don’t affect the management functionalities.
- Scalability: As your infrastructure grows, managing each cluster individually can become a daunting task. A management cluster simplifies this by scaling operations across numerous clusters seamlessly.
- Uniformity: Ensuring every cluster is set up and maintained using consistent configurations and policies becomes a breeze with a central management cluster.
Hardware
Let’s talk about hardware. Here’s what we suggest as minimum requirements:
- Storage: At least 50GB for k3d.
- RAM: 16GB or more (Primarily for services like Prometheus).
- CPU Cores: 4-8 should suffice.
The foundation? Ubuntu 22.04 Server ARM64, get it here.
Preparation: Gathering the Essentials
Before diving into Kubernetes deployment, let’s stock up on the needed binaries. We’re looking at k3d, helm, argocd, and clusterctl.
Here’s the command line magic to get these:
# Determining the architecture ARCH=$(dpkg-architecture -q DEB_BUILD_ARCH) # Grabbing k3d wget https://github.com/k3d-io/k3d/releases/download/v5.5.1/k3d-linux-${ARCH} -O k3d chmod a+x k3d mv k3d /usr/local/bin/ # Helm, the package manager for K8s curl -fsSL -o get_helm.sh https://raw.githubusercontent.com/helm/helm/main/scripts/get-helm-3 chmod 700 get_helm.sh ./get_helm.sh # ArgoCD for Continuous Delivery wget https://github.com/argoproj/argo-cd/releases/download/v2.6.8/argocd-linux-${ARCH} -O argocd chmod a+x argocd mv argocd /usr/local/bin/ # Clusterctl for Cluster API wget https://github.com/kubernetes-sigs/cluster-api/releases/download/v1.4.2/clusterctl-linux-${ARCH} -O clusterctl chmod a+x clusterctl mv clusterctl /usr/local/bin/ |
Unfolding the Kubernetes Magic with k3d
With k3d, we’ll set up our K8S Management Cluster. A few pointers:
- Tinkerbell’s Boots needs the load balancer off.
- We’ll need host networking (again, credit to Boots) and host pid mode.
k3d cluster create --network host --no-lb --k3s-arg "--disable=traefik,servicelb" \ --k3s-arg "--kube-apiserver-arg=feature-gates=MixedProtocolLBService=true" \ --host-pid-mode mkdir -p ~/.kube/ k3d kubeconfig get -a >~/.kube/config until kubectl wait --for=condition=Ready nodes --all --timeout=600s; do sleep 1; done |
Automation with ArgoCD
ArgoCD, our preferred automation tool, comes next. For this, an unused IP from our static range will be used for ArgoCD services. We’ve chosen 10.8.10.133 and our NIC named “enp1s0f0np0”.
All necessary configurations are available in the cloudbase/k8sbm repository.
# Getting the repository git clone https://github.com/cloudbase/k8sbm cd k8sbm |
Friendly Reminder: Ensure every repository code change gets pushed since ArgoCD relies on the remote repository, not the local one.
We’ll also utilize existing helm repositories and charts for automation:
# Helm charts for various services helm repo add ingress-nginx https://kubernetes.github.io/ingress-nginx helm repo add argo-cd https://argoproj.github.io/argo-helm helm repo add kube-vip https://kube-vip.github.io/helm-charts/ helm repo update # Additional helm commands for setting up services helm upgrade --install ingress-nginx ingress-nginx/ingress-nginx \ --version 4.5.2 --namespace ingress-nginx \ --create-namespace \ -f config/management/ingress-nginx/values.yaml -v 6 until kubectl wait deployment -n ingress-nginx ingress-nginx-controller --for condition=Available=True --timeout=90s; do sleep 1; done helm upgrade --install kube-vip kube-vip/kube-vip \ --namespace kube-vip --create-namespace \ -f config/management/ingress-nginx/kube-vip-values.yaml -v 6 helm upgrade --install argo-cd \ --create-namespace --namespace argo-cd \ -f config/management/argocd/values.yaml argo-cd/argo-cd until kubectl wait deployment -n argo-cd argo-cd-argocd-server --for condition=Available=True --timeout=90s; do sleep 1; done until kubectl wait deployment -n argo-cd argo-cd-argocd-applicationset-controller --for condition=Available=True --timeout=90s; do sleep 1; done until kubectl wait deployment -n argo-cd argo-cd-argocd-repo-server --for condition=Available=True --timeout=90s; do sleep 1; done |
Post-deployment, ArgoCD’s dashboard is accessible by updating host mappings. Here’s how:
echo "10.8.10.133 argo-cd.mgmt.kub-poc.local" | sudo tee -a /etc/hosts |
For ArgoCD access, the default username is admin. Retrieve the password via CLI:
pass=$(kubectl -n argo-cd get secret argocd-initial-admin-secret -o jsonpath="{.data.password}" | base64 -d) echo $pass |
To wrap up, configure ArgoCD with our GitHub repository and introduce the management applications for our K8S Management Cluster.
argocd login argo-cd.mgmt.kub-poc.local --username admin --password $pass --insecure argocd repo add [email protected]:cloudbase/k8sbm.git \ --ssh-private-key-path ~/.ssh/id_rsa argocd app create management-apps \ --repo [email protected]:cloudbase/k8sbm.git \ --path applications/management --dest-namespace argo-cd \ --dest-server https://kubernetes.default.svc \ --revision "main" --sync-policy automated argocd app sync management-apps argocd app get management-apps --hard-refresh |
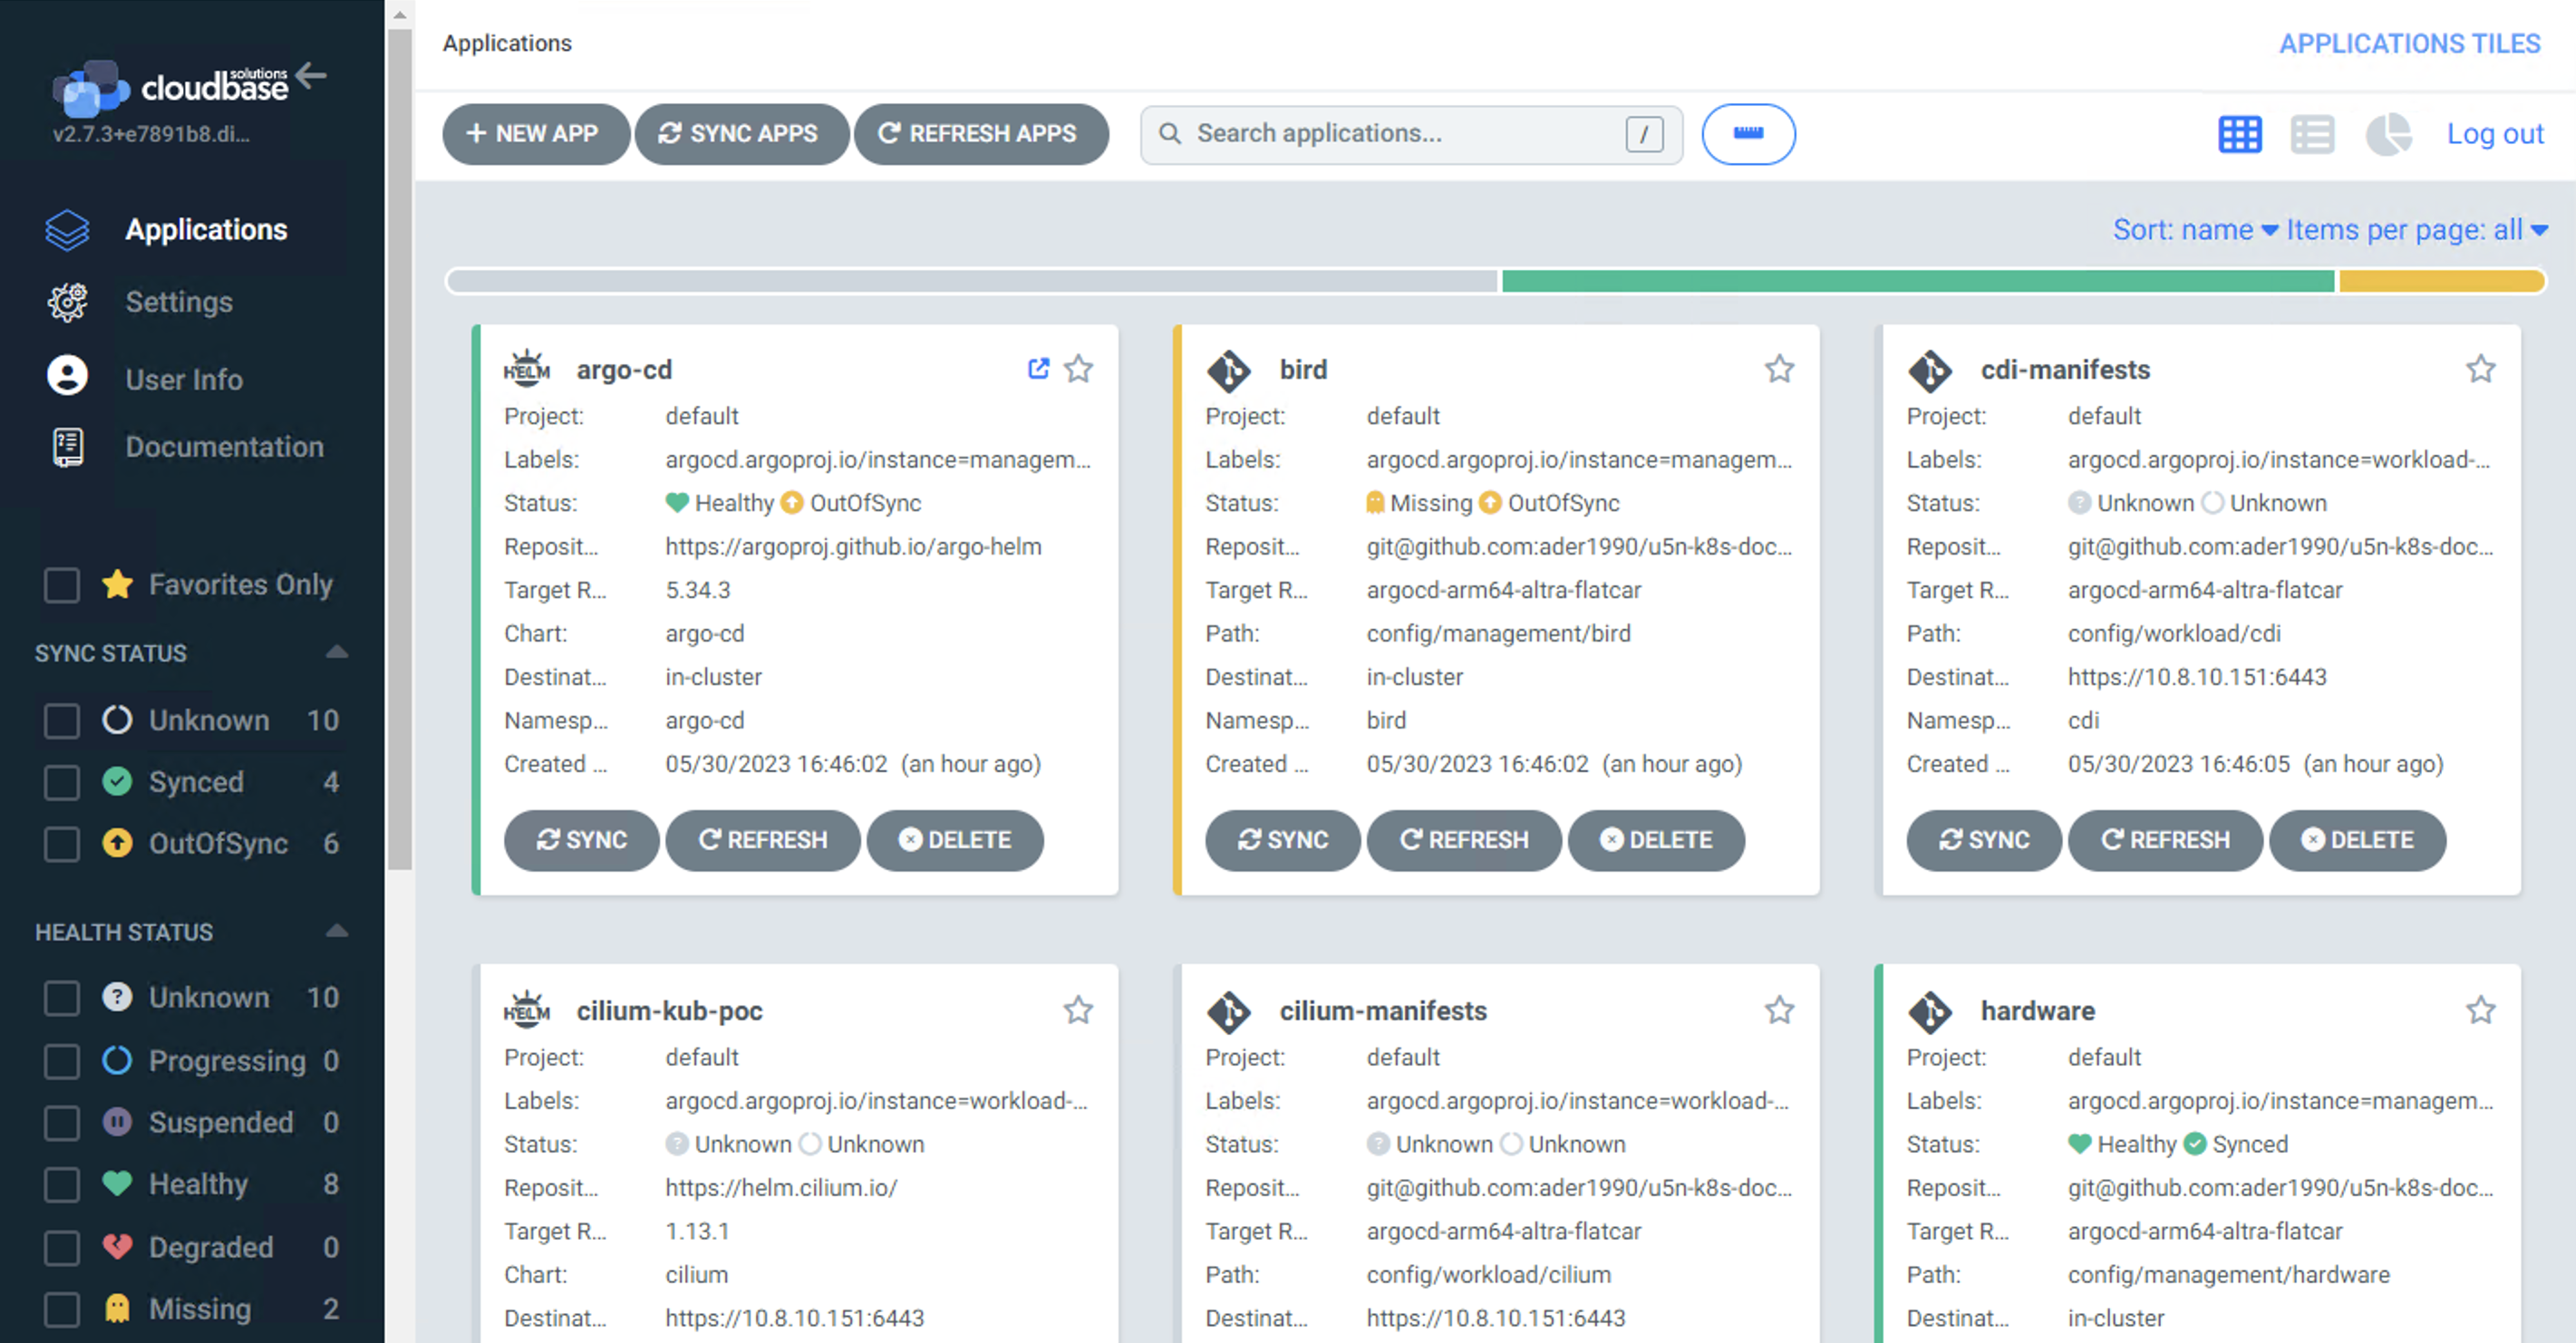
Let’s check the status of ArgoCD from the WEB UI, it should look similar to this


Taking our journey to the next level, we’ll be diving into the installation of the Tinkerbell stack. This stack consist of an array of services: from the Tink server and controller to Boots, Hegel, and Rufio. The cherry on top? We’ll leverage ArgoCD for the deployment, ensuring a streamlined process. Giving a nod to Tinkerbell’s HTTP services, we’ve earmarked the IP 10.8.10.130 from our stash, diligently setting it in applications/management/values.yaml.
Pop open the terminal and roll with:
argocd app sync tink-stack until kubectl wait deployment -n tink-system tink-stack --for condition=Available=True --timeout=90s; do sleep 1; done |
With that wrapped up, it’s a go-ahead for the installation of Cluster API services. Finally, we’re prepping for the rollout of the K8S Workload Cluster. Key in:
export TINKERBELL_IP="10.8.10.130" mkdir -p ~/.cluster-api cat > ~/.cluster-api/clusterctl.yaml <<EOF providers: - name: "tinkerbell" url: "https://github.com/tinkerbell/cluster-api-provider-tinkerbell/releases/v0.4.0/infrastructure-components.yaml" type: "InfrastructureProvider" export EXP_KUBEADM_BOOTSTRAP_FORMAT_IGNITION="true" clusterctl init --infrastructure tinkerbell -v 5 until kubectl wait deployment -n capt-system capt-controller-manager --for condition=Available=True --timeout=90s; do sleep 1; done |
A quick aside: given our affinity with Flatcar in the K8S Workload Cluster nodes, there was a need to activate a novel feature in the Cluster API: Ignition userdata format support. So, we set EXP_KUBEADM_BOOTSTRAP_FORMAT_IGNITION=true.
Here we go! Check your K8S Management Cluster. It’s ready and set to bring in our K8S Workload Cluster!

The Grand Result
By now, you should have a fully equipped K8S Management Cluster, ready to manage workloads!
Stay tuned, as in Part 3, we’ll launch the K8S Workload Cluster!
Recommend
About Joyk
Aggregate valuable and interesting links.
Joyk means Joy of geeK