

How to Install Etherpad on Debian 12
source link: https://www.howtoforge.com/how-to-install-etherpad-on-debian-12/
Go to the source link to view the article. You can view the picture content, updated content and better typesetting reading experience. If the link is broken, please click the button below to view the snapshot at that time.

How to Install Etherpad on Debian 12
Etherpad is a free and open-source alternative to services like Google Docs and Zoho Writer. Etherpad is a collaborative and real-time text editor for your team, it's accessible from anywhere at any time because Etherpad is a web-based text editor.
Any changes on Etherpad are happening in real-time, and also, Etherpad supports versioning and built-in formatting for teams. Etherpad is a highly customizable editor with the support of various plugins. And also supports modern document formats such as doc, pdf, odt, markdown, etc.
This guide'll show you how to install Etherpad collaborative editor on Debian 12 server. We'll show you the installation of Etherpad with MariaDB database server and Nginx web server, also securing Etherpad with UFW (Uncomplicated Firewall) and SSL via Certbot and Letsencrypt.
Prerequisites
To complete this guide, ensure you have the following:
- A Debian 12 server.
- A non-root user with administrator privileges.
- A domain name pointed to your server IP address.
Installing Dependencies
Etherpad is an open-source software for collaborative editors written in JavaScript. To install Etherpad, you must install the JavaScript runtime on your Debian server.
In the first step, you will install the following dependencies for Etherpad:
- Node.js 18: a JavaScript runtime for running Etherpad, which is written in JavaScript.
- Npm: The Node.js package manager.
- MariaDB Server: as the database for Etherpad.
- Nginx web server: as a reverse proxy for Etherpad.
Let's move on.
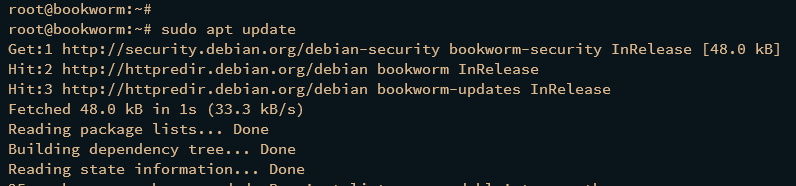
Run the apt update command below to update and refresh your Debian package index.
sudo apt update
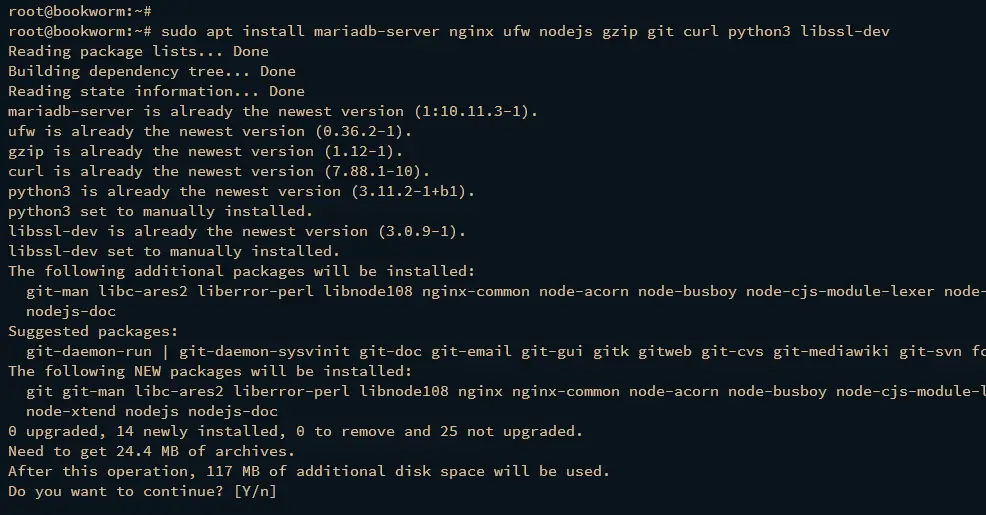
Then, install package dependencies via the apt install command below. Input y to confirm and press ENTER to proceed to the installation.
sudo apt install mariadb-server nginx ufw nodejs npm gzip git curl python3 libssl-dev
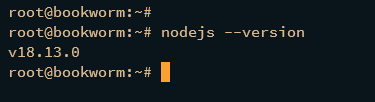
After dependencies are installed, verify the Node.js version via the nodejs command below. You should get the Node.18 is installed.
nodejs --version
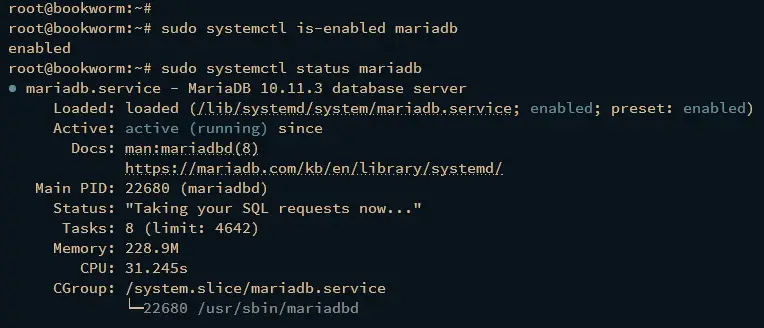
Then, check the mariadb service status using the systemctl commands below. You should get the mariadb service enabled and will be run automatically upon the system boot, and the status of the mariadb service is running.
sudo systemctl is-enabled mariadb
sudo systemctl status mariadb
Lastly, check the nginx service using the following command. Ensure that the nginx service is running and enabled. When enabled, the service will start automatically at the system boot.
sudo systemctl is-enabled nginx
sudo systemctl status nginx
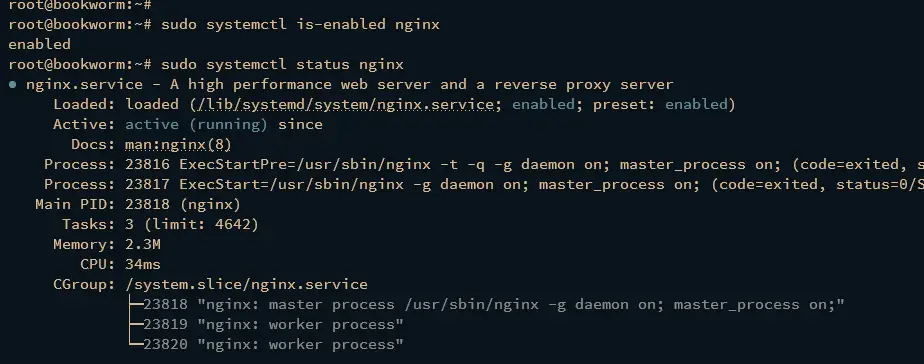
Configuring UFW (Uncomplicated Firewall)
After installing dependencies, now you will be setting up UFW (Uncomplicated Firewall) to secure your Etherpad installation. You've installed UFE before this, continue to configure UFW.
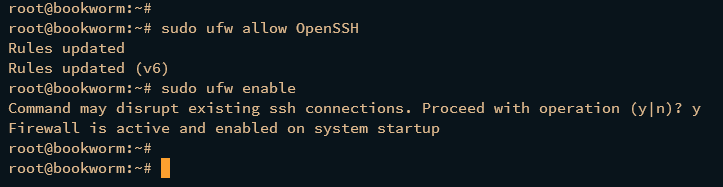
First, run the command below to enable the OpenSSH profile and allow SSH connection. Then, start and enable UFW (Uncomplicated Firewall).
sudo ufw allow OpenSSH
sudo ufw enable
When prompted, input y to start and enable UFW. When successful, you should get an output like this:
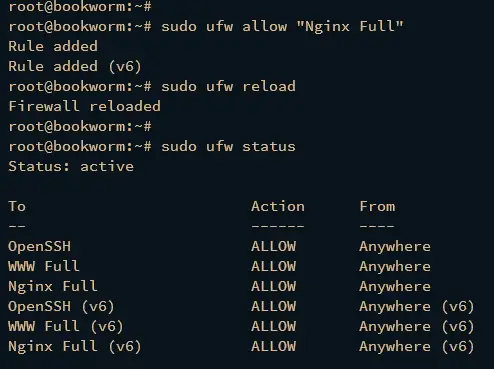
Next, run the ufw command below to get available firewall profiles and enable the "Nginx Full" profile to open both HTTP and HTTPS ports.
sudo ufw app list
sudo ufw allow "Nginx Full"
Lastly, reload UFW to apply the changes and verify enabled rules and profiles on UFW.
sudo ufw reload
sudo ufw status
You should see the UFW is active with the OpenSSH and Nginx Full profiles enabled.
Configuring MariaDB Database Server
In the following section, you will be securing your MariaDB server via the mariadb-secure-installation utility and creating a new database and user for Etherpad.
Run the mariadb-secure-installation command below to secure the MariaDB server. The mariadb-secure-installation allows you to set up the root password for MariaDB and apply some basic security settings to your MariaDB server.
sudo mariadb-secure-installation
During the process, you will be asked for some changes on MariaDB configuration. Input Y to apply the configuration or n for no.
- Press ENTER when asked for the MariaDB root password.
Input n when asked about the unix_socket authentication method.
Input Y to set up a new password for the MariaDB root user. Then, input the new password and repeat.
Input Y to remove the default anonymous user from MariaDB.
Then, input Y again to disable remote login for the MariaDB root user.
Input Y to remove the default database test from MariaDB.
Lastly, input Y again to reload table privileges and apply the changes.
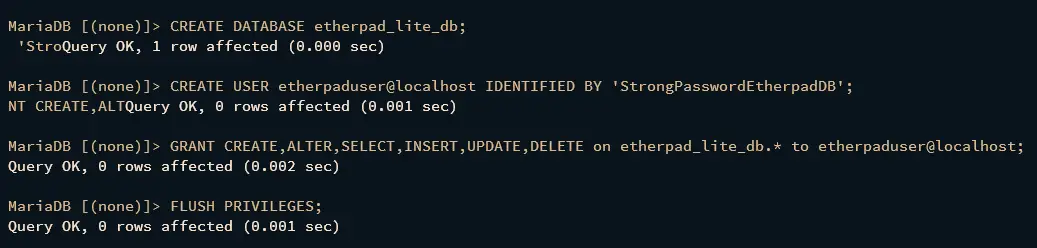
After the MariaDB server is secured, you will create a new database and user that Etherpad will use.
Execute the mariadb client command below to log in to the MariaDB server. Input the password for your MariaDB root user.
sudo mariadb -u root -p
After logging in, run the following queries to create a new database etherpad_lite_db and user etherpaduser. be sure to change the password StrongPasswordEtherpadDB with your new database password.
CREATE DATABASE etherpad_lite_db;
CREATE USER etherpaduser@localhost IDENTIFIED BY 'StrongPasswordEtherpadDB';
GRANT CREATE,ALTER,SELECT,INSERT,UPDATE,DELETE on etherpad_lite_db.* to etherpaduser@localhost;
FLUSH PRIVILEGES;
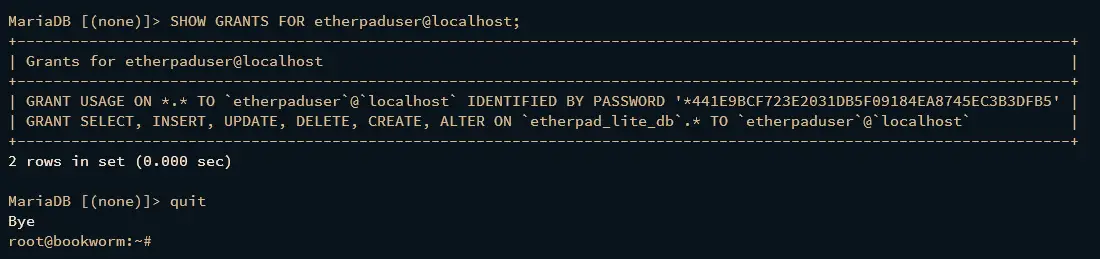
Now verify the MariaDB user etherpaduser via the following query to ensure that the user etherpaduser can access the database etherpad_lite_db.
SHOW GRANTS FOR etherpaduser@localhost;
Ensure you have an output like the following, which confirms that user etherpaduser can access the database etherpad_lite_db.
Type quit to exit from the MariaDB server and finished the step.
Downloading and Configuring Etherpad
In this section, you will download the Etherpad source code and install its dependencies. Then, you will also configure Etherpad to run in localhost only and configure Etherpad with MariaDB server.
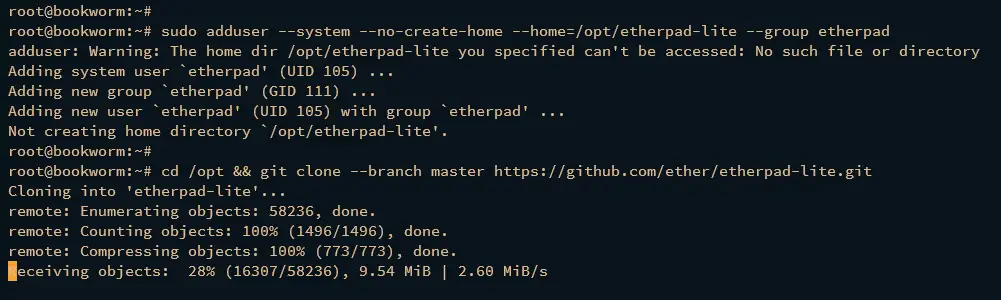
Execute the following command to add a new system user etherpad with the default home directory /opt/etherpad-lite.
sudo adduser --system --no-create-home --home=/opt/etherpad-lite --group etherpad
Now download the Etherpad source code via git to the /opt/etherpad-lite directory and change the ownership of the /opt/etherpad-lite directory to the etherpad user and group. This allows the etherpad user to access the source code.
cd /opt && git clone --branch master https://github.com/ether/etherpad-lite.git
sudo chown -R etherpad:etherpad /opt/etherpad-lite
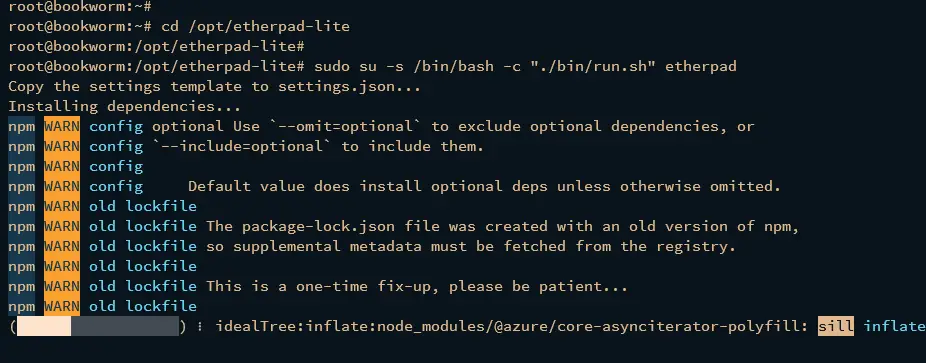
Next, move to the /opt/etherpad-lite directory and run the script ./bin/run.sh to prepare the system environment for Etherpad installation. This will install the required dependencies for Etherpad and run Etherpad with the default configuration.
cd /opt/etherpad-lite
sudo su -s /bin/bash -c "./bin/run.sh" etherpad
Installation of Node.js dependencies.
After dependencies are installed, the Etherpad should be running with the default configuration, and below is the output you should get.
Press Ctrl+c to terminate the Etherpad process. You will modify the Etherpad configuration settings.json to configure your installation.
Open the settings.json file using the following nano editor command.
nano settings.json
Change the default title of your Etherpad installation.
"title": "Etherpad Debian 12",
Change the ip to localhost or 127.0.0.1 to run Etherpad on localhost only.
  "ip": "127.0.0.1",
  "port": 9001,
Comment on the dbType section to disable the default database configuration. You can also delete the following lines.
  /*
  *"dbType": "dirty",
  *"dbSettings": {
  *  "filename": "var/dirty.db"
  *},
  */
Add a new dbType configuration with mysql as the default database for your Etherpad installation. Be sure to change the details of the database name, user, and password in the following configuration.
  "dbType" : "mysql",
  "dbSettings" : {
    "user":     "etherpaduser",
    "host":     "127.0.0.1",
    "port":     3306,
    "password": "StrongPasswordEtherpadDB",
    "database": "etherpad_lite_db",
    "charset":  "utf8mb4"
  },
Save the changes and close the editor when finished.
Running Etherpad as Systemd Service
After installing and configuring Etherpad, you will create a new systemd service file for Etherpad. This allows you to run Etherpad in the background and manage Etherpad easily via the systemctl utility.
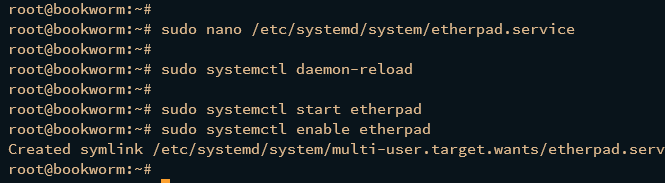
Create a new systemd service file /etc/systemd/system/etherpad.service using the nano editor.
sudo nano /etc/systemd/system/etherpad.service
Insert the following configuration to run Etherpad in the background as a systemd service.
[Unit]
Description=Etherpad-lite, the collaborative editor.
After=syslog.target network.target mariadb.service

[Service]
Type=simple
User=etherpad
Group=etherpad
WorkingDirectory=/opt/etherpad-lite
Environment=NODE_ENV=production
ExecStart=/usr/bin/node --experimental-worker /opt/etherpad-lite/node_modules/ep_etherpad-lite/node/server.js
# use mysql plus a complete settings.json to avoid Service hold-off time over, scheduling restart.
Restart=always

[Install]
WantedBy=multi-user.target
Once you're finished, save the file and exit the editor.
Next, run the following systemctl command to reload the systemd manager and apply new systemd services.
sudo systemctl daemon-reload
Now start and enable the etherpad service via the systemctl command below. The Etherpad should be running in the background as a systemd service and will start automatically upon the system boot.
sudo systemctl start etherpad
sudo systemctl enable etherpad
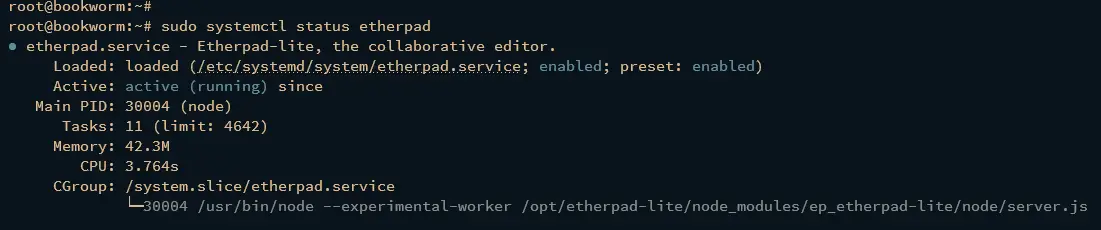
Lastly, verify the etherpad service by running the following command to ensure that the etherpad is running.
sudo systemctl status etherpad
The output below confirms that the etherpad service is running, and it's running on localhost with port 9001.
Enter the ss command below to ensure that port 9001 is used by the Node.js application, which is Etherpad.
ss -tulpn | grep 9001
At this point, the Etherpad is installed, but to get most of it you'll be setting up Nginx as a reverse proxy and secure Etherpad via SSL/TLS certificates.
Configuring Nginx as a Reverse Proxy
In this section, you will create a new Nginx server block that will be used as the reverse proxy for Etherpad. So, ensure you have the domain name pointed to your Debian server IP address before you begin.
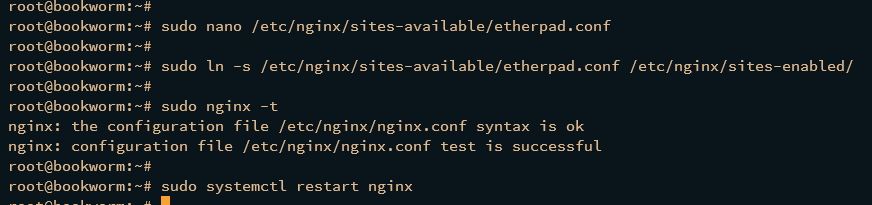
Create a new Nginx server block configuration /etc/nginx/sites-available/etherpad.conf using the nano command.
sudo nano /etc/nginx/sites-available/etherpad.conf
Insert the following configuration and be sure to change the domain name with your etherpad domain.
server {
    listen       80;
    server_name  etherpad.hwdomain.io;

access_log  /var/log/nginx/eplite.access.log;
    error_log   /var/log/nginx/eplite.error.log;

location / {
        proxy_pass         http://127.0.0.1:9001;
        proxy_buffering    off; # be careful, this line doesn't override any proxy_buffering on set in a conf.d/file.conf
        proxy_set_header   Host $host;
        proxy_pass_header  Server;

# Note you might want to pass these headers etc too.
        proxy_set_header    X-Real-IP $remote_addr; # https://nginx.org/en/docs/http/ngx_http_proxy_module.html
        proxy_set_header    X-Forwarded-For $remote_addr; # EP logs to show the actual remote IP
        proxy_set_header    X-Forwarded-Proto $scheme; # for EP to set secure cookie flag when https is used
        proxy_http_version  1.1; # recommended with keepalive connections

# WebSocket proxying - from https://nginx.org/en/docs/http/websocket.html
        proxy_set_header  Upgrade $http_upgrade;
        proxy_set_header  Connection $connection_upgrade;
    }
}
Save the file and exit the editor when finished.
Next, run the following command to activate the server block file etherpad.conf and verify overall Nginx configurations.
sudo ln -s /etc/nginx/sites-available/etherpad.conf /etc/nginx/sites-enabled/
sudo nginx -t
If you have the correct and proper Nginx configuration, you should get an output such as syntax is ok - test is successful.
Now run the following systemctl command to restart the Nginx and apply the changes.
sudo systemctl restart nginx
Lastly, to ensure that your Nginx configuration is successful, visit your Etherpad domain name (i.e: http://etherpad.hwdomain.io/) using your preferred web browser. If successful, you should get the Etherpad screen.
Securing Etherpad with SSL/TLS Certificates
After configuring Nginx as a reverse proxy, now you will secure Etherpad with SSL/TLS certificates that will be generated via Certbot and Letsencrypt. You will also configure auto-redirect for HTTP to HTTPS within the Etherpad via the Certbot Nginx plugin.
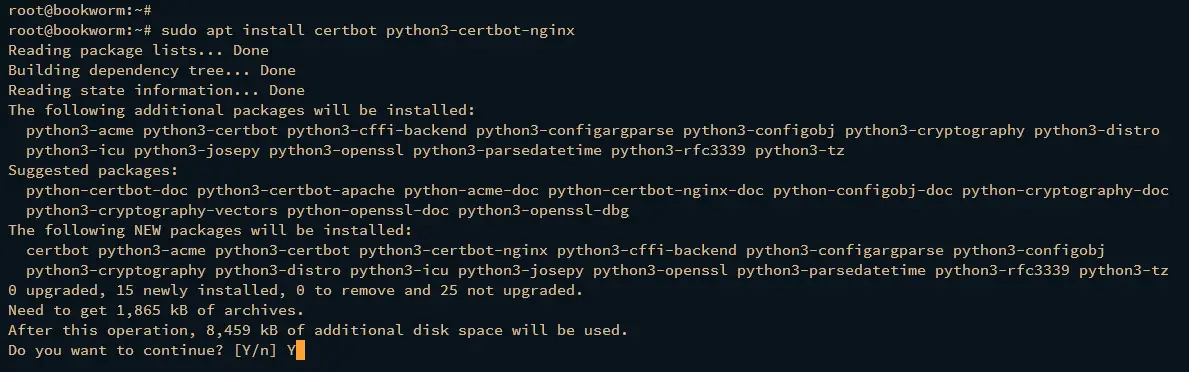
Run the apt install command below to install Cetbot and the Cetbot Nginx plugin. Input y to confirm and press ENTER to proceed with the installation.
sudo apt install certbot python3-certbot-nginx
Once Certbot is installed, run the certbot command below to generate the SSL/TLS Letsencrypt for your Etherpad domain name. Be sure to change the domain name and the email address in the following command.
sudo certbot --nginx --agree-tos --redirect --hsts --staple-ocsp --email [email protected] -d etherpad.hwdomain.io
Once the process is finished, the new SSL certificates are available in the /etc/letsencrypt/live/domain.com directory. And the Nginx server block configuration for Etherpad will automatically be configured with HTTPS.
Launch your web browser and visit your Etherpad domain name (i.e: http://etherpad.hwdomain.io/). You will automatically be redirected to the secure HTTPS connection, which is configured via the Certbot Nginx plugin.
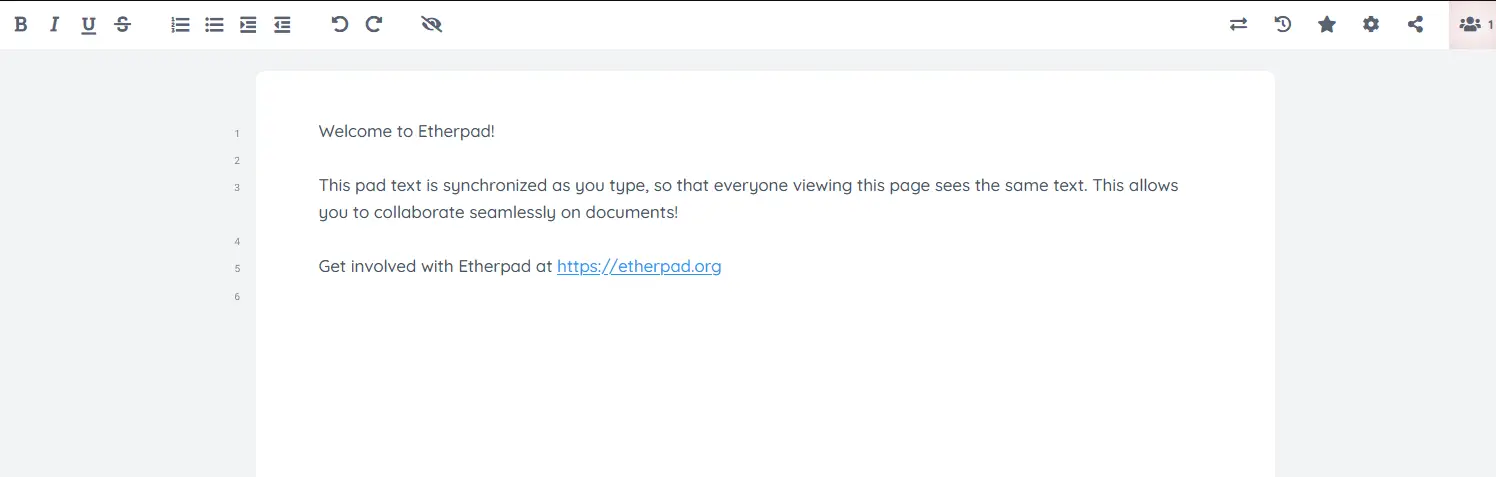
Now input the new pad name to ensure that you can create a new pad or document. Click OK to confirm.
Once the pad is created, enjoy the self-hosted Document collaboration via Etherpad.
Conclusion
That's it! You've completed the installation of Etherpad on your Debian 12 machine. You've installed Etherpad with the MariaDB database server and Nginx web server. You've also secured your Etherpad with SSL/TLS certificates from Letsencrypt and UFW (Uncomplicated Firewall.
From here, you can now use Etherpad as a collaborative editor with your friend. Or you can also install Etherpad plugins/addons to leverage the functionality that suits your needs.
Recommend
About Joyk
Aggregate valuable and interesting links.
Joyk means Joy of geeK